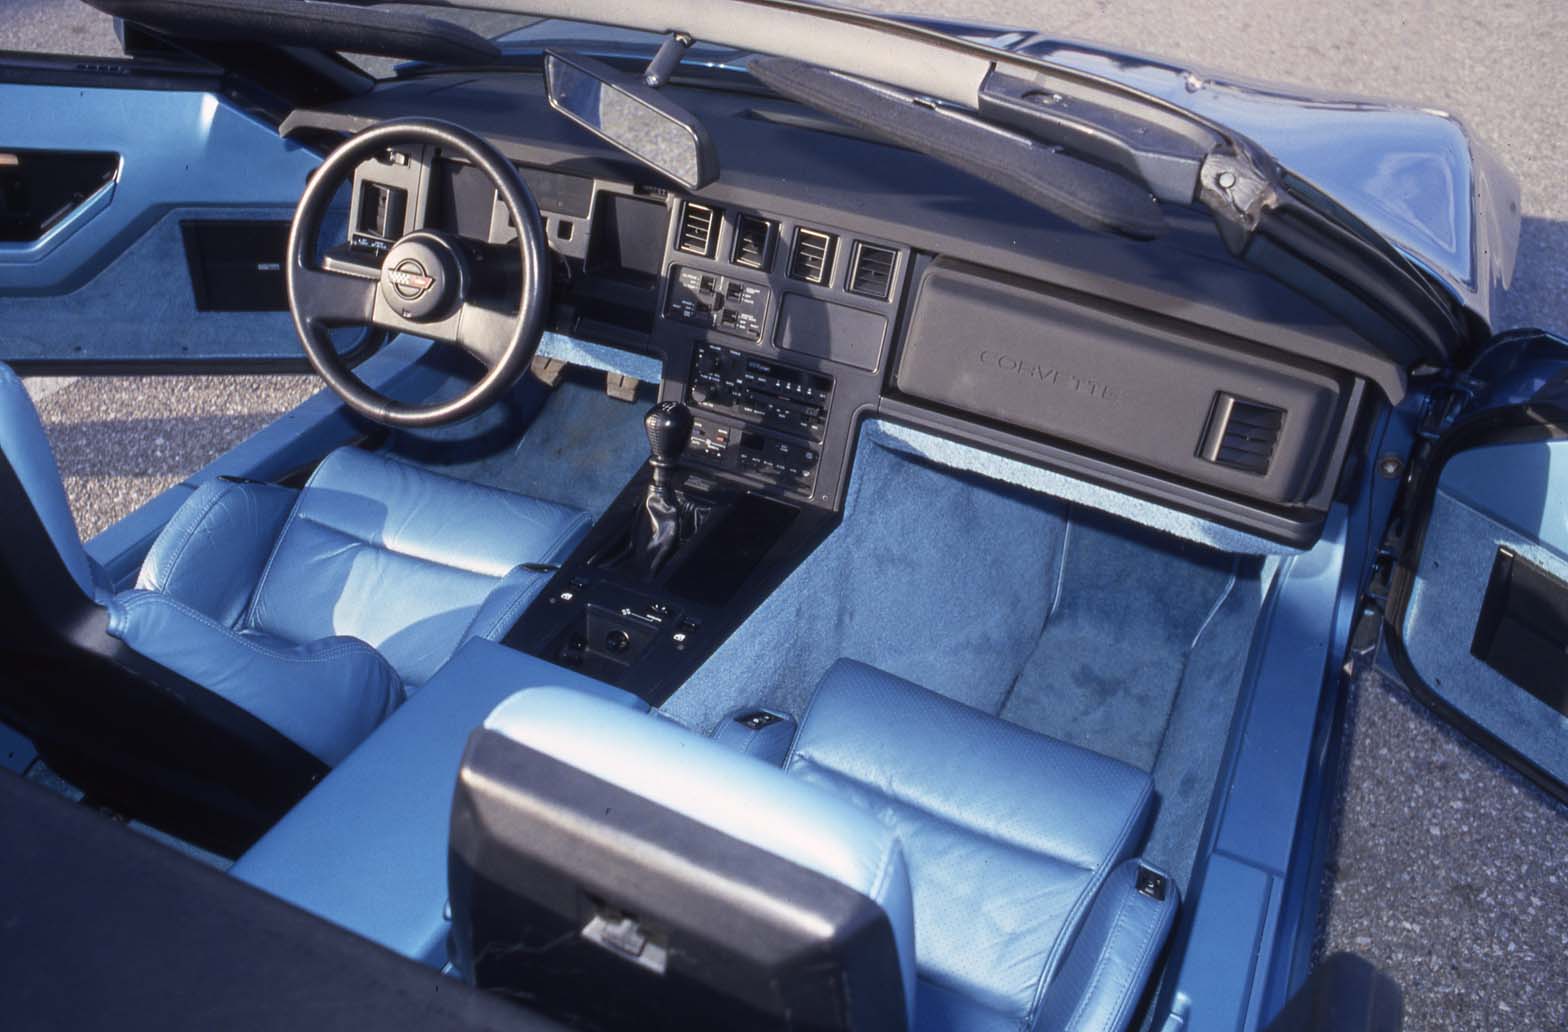
While plastic certainly has its merits in our modern society, it can be problematic when it is used extensively in automotive interiors. Temperature extremes, excessively bumpy roads, and improper removal/reinstallation are the biggest factors that can cause annoying interior component squeaks. 1984-1989 Corvettes are arguably the worst affected, with later C4s, C5s, and C6s being less susceptible to squeaks and rattles barring improper removal and/or reinstallation techniques.
As far as the first two culprits go, there isn’t much you can do other than try to keep your Corvette cool and shaded as much as possible in extreme heat and inside the garage when the temperature dips too low. Road conditions are also beyond your control, so the most you can do is avoid potholes and poorly maintained roads as much as possible.
Improper removal and reinstallation causes a great number of people to scoff, but it should not be taken lightly. Plenty of Corvettes plagued by squeaks have been cured by simply replacing a screw that was intentionally or inadvertently left out, or fixing a plastic tab that was destroyed during a hasty dash removal.
After many years of dealing with noises coming from some very difficult to pinpoint areas, I came up with a very simple tool to aid in finding those aggravating squeaks and rattles. Before we discuss that, I want to share how this technique and rather simple tool came about. While I was managing a Corvette Service Center, a customer came in complaining of a loud noise in the interior. It “sounds like a door is open,” was the complaint.
The customer explained that the C4 Corvette had been in a rear-end collision and had just been picked up from a local body shop. They notified the body shop manager of their concern, but after numerous attempts at quelling the incessant road noise, the shop had enough and the customer accepted the “open door” C4. On the initial road test it was apparent that there was considerable road noise that elevated as speed increased.
I went over to the coolant hose shelf and cut off about five feet of 5/8” heater hose. I enlisted a driver so I could use the crude stethoscope to locate the noise as we rode along. Within a few minutes it was apparent the noise was coming from the rear of the C4, as I placed the end of the heater hose near the driver side rear corner the noise got louder. The noise was really pronounced once I directed the impromptu stethoscope towards the rear corner.
As difficult as this may be to believe, after the rear body repairs had been completed, someone had left out the antenna cable and wire pass-through grommet, causing the excessive road noise. I simply pushed the large plug into place and the interior noise decreased considerably. Sure, you may look a bit daft holding a piece of hose to your ear while someone is driving you around, but it works. The first step in the fix is finding the origin of the noise.
Here are some tips and tricks for remedying troublesome squeaks:
- Enlist the help of a partner to locate squeaks if necessary. You obviously have to recreate the conditions that bring about the squeak, and although you can safely check the driver’s side yourself, no one should attempt to isolate squeaks on the passenger’s side while driving. The isolation technique is rather basic- just apply moderate pressure to items in the car until you isolate the issue. Remember that even though you placed pressure in that particular area, the source may be a good distance away.
- Another lesser-known strategy for finding squeaks is to look for shiny spots, which typically appear at rub points.
- If you have never had the dash or console apart before, patience, an organizational plan, factory service manuals, and a camera are invaluable tools to have on hand. Patience and the factory service manual will allow you to remove everything properly and eliminate or lessen the likelihood of damaging a part. Having a set of trays or dishes nearby to place fasteners in is a good way to make sure that everything will be reassembled properly. Lastly, dutifully taking photos can be a great insurance policy if the project takes longer than anticipated and you have now forgotten where each screw should be reinstalled. It is important to note that if your Corvette belonged to someone else in the past or you had it serviced somewhere and the dash had to be removed, it is quite likely that one or more fasteners may be missing or installed in the incorrect location. This is a great reason to have the service manual at your disposal.
- It is far too easy to accidentally damage a plastic component, especially one that is aged. Line up panels carefully and use a pick if necessary, then insert screws. Start each screw before tightening any of them. The only place for a cordless drill in this process is for removal. It is highly recommended that you tighten screws manually with a screwdriver. It is just too easy for the drill to overzealously tighten a screw and damage the plastic. Manually reinstalling the screws also adds the benefit of being able to feel when the screws are properly seated.
- Plastex, available from Corvette Central, comes in three different colors of plastic power material: item #102713 black, item #104948 clear, and item #103854 white. These plastic repair kits can be used to repair cracked and damaged parts. The black plastic powder material is high strength and heat resistant and the clear is transparent for general repairs. See the photos and captions below for more information regarding Plastex.
- If for any reason you are unable to replace a plastic part, there are a few options to repair them. Two options that generally work best are fabricating reinforcement plates or plastic welding. Neither option is desirable for components that are visible. Manila file folders are great for creating templates, and .020 gauge aluminum makes an excellent patch. The aluminum can be adhered using epoxy, but be sure to clean both surfaces with isopropyl alcohol or brake cleaner first. Rivets can be used to ensure a permanent bond.
- A heat gun may sometimes be helpful to reshape a panel to prevent it from making noise, but be aware that it is easy to overheat the plastic and harm its appearance or even melt it.
- If you are unable to lift or remove a panel with relative ease it is imperative that you stop and take a moment to check once again that every screw has been removed and that every item that attaches to that particular panel has been accounted for and dealt with accordingly. It is far better to spend a bit more time removing things carefully then it is to spend time locating a replacement part or have to make repairs once something breaks.
- Although this seems so basic, just one missing screw can cause agony when it comes to a persistent squeak. If you find a screw (or worse, screws) left over, instead of tossing them in a leftover parts bin, figure out where they are meant to be. Small details like that can make the difference between a Corvette that is a pleasure to drive and one that nobody is eager to drive a long distance.
- Almost as bad as missing screws would be screws that are installed in the incorrect location. It’s easy to assume that one screw looks a lot like another, and therefore it should be fine. It’s not. There is a reason a particular fastener was chosen when your car was first designed and it is wise to put them back where they were meant to go.
- Fascia plate alignment tabs can be damaged when they are out of place for an extended period of time. Since reproduction fascia plates are available at a reasonable cost, it makes more sense to purchase one rather than to attempt a repair. Repairs to fascia plates are generally visible and unsightly.
- The “soft side” of Velcro is a great insulator that is easy to handle and already has an adhesive backing in place. Felt and foam is also useful.
- Every few years it is wise to check all visible screws for tightness to prevent future problems.
- A thin coat of silicone grease is recommended for any squeaks related to weatherstrip pieces. If you replace any weatherstrip be sure to get high quality pieces; the extra cost is worth it over the long run. Not only will they fit better and last longer, they are far less likely to squeak.
Some C5 Corvettes may have a squeak that originates from the rear of the convertible top, and the solution is to remove the old seal, clean the surface, and install a new lid protector.
C6 Corvettes do not suffer from as many interior squeaks as the C4 Corvettes do, but common sources of squeaks include the roof panel guide pin balls, door strikers, front speaker retainer clips on some years.
The beginning of this past article explains the roof panel situation and solution in detail: https://tech.corvettecentral.com/2011/05/c6-factory-service-bulletins/ In summary, you will need to apply GM Super Lube around the entire guide pin ball to stop the squeak. Door striker replacement will solve door rattle woes, and felt or foam applied to the trim retainers on the door trim will quell squeaks that typically occur with bass music.
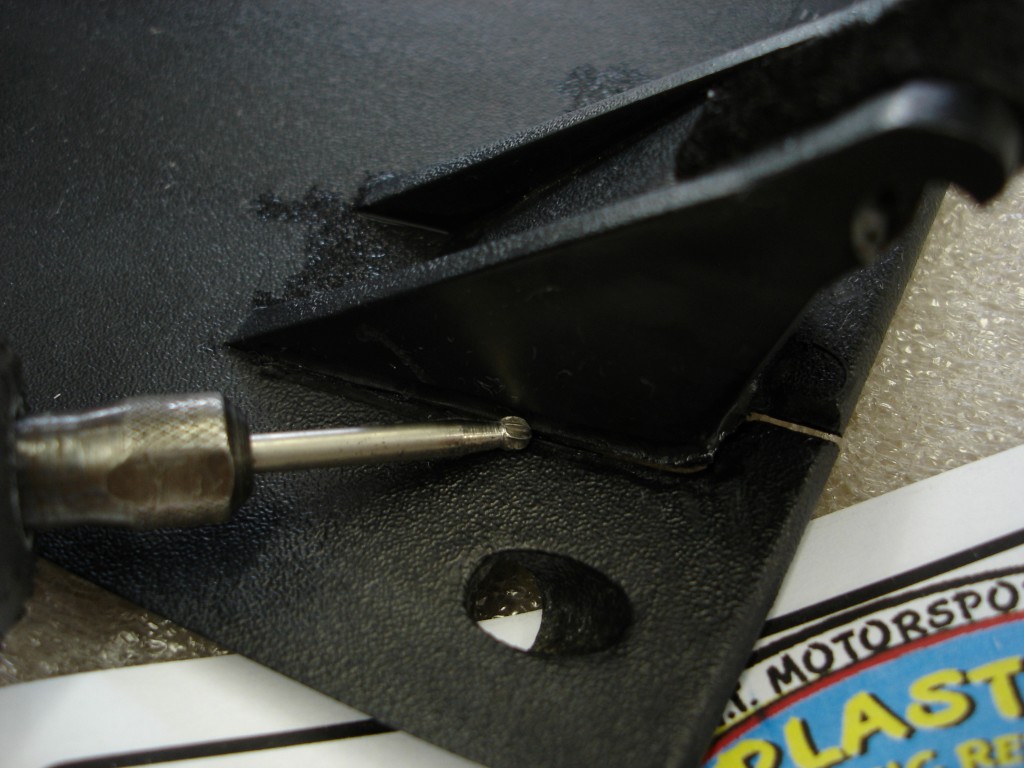
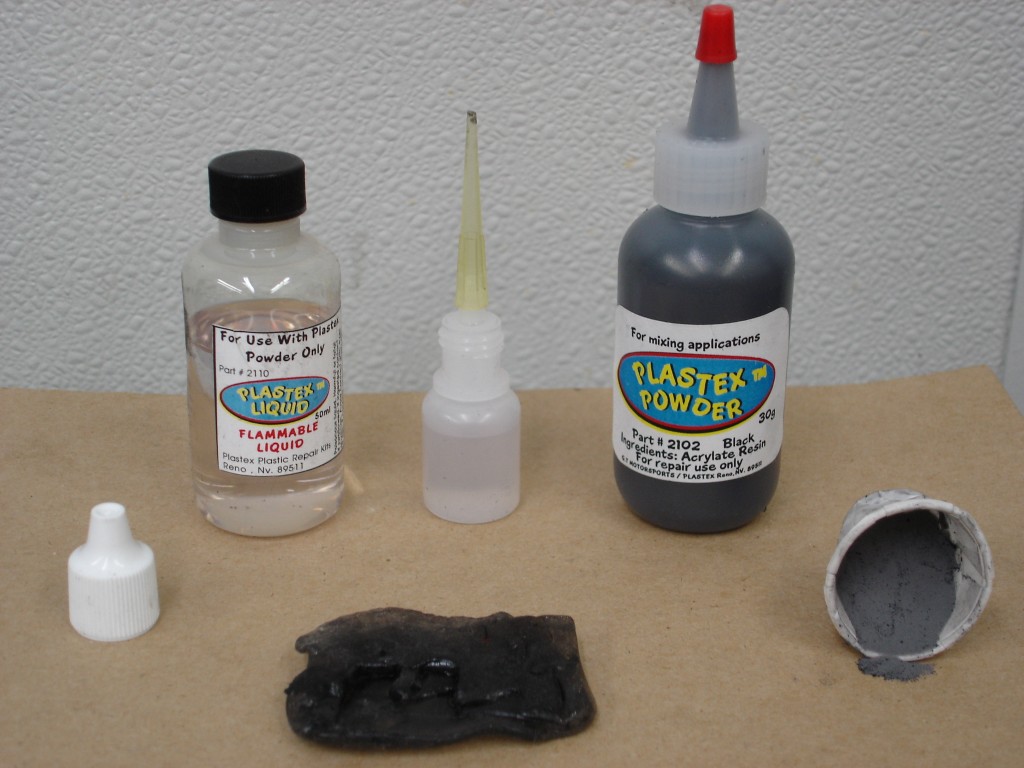 These are the contents of the typical Plastex plastic repair kit. These materials are not an epoxy; they manufacture plastic when combined. The black piece of modeling compound allows you to duplicate a broken tab or section of plastic. The modeling compound is placed in water at approximately 150 degrees to allow easy shaping.
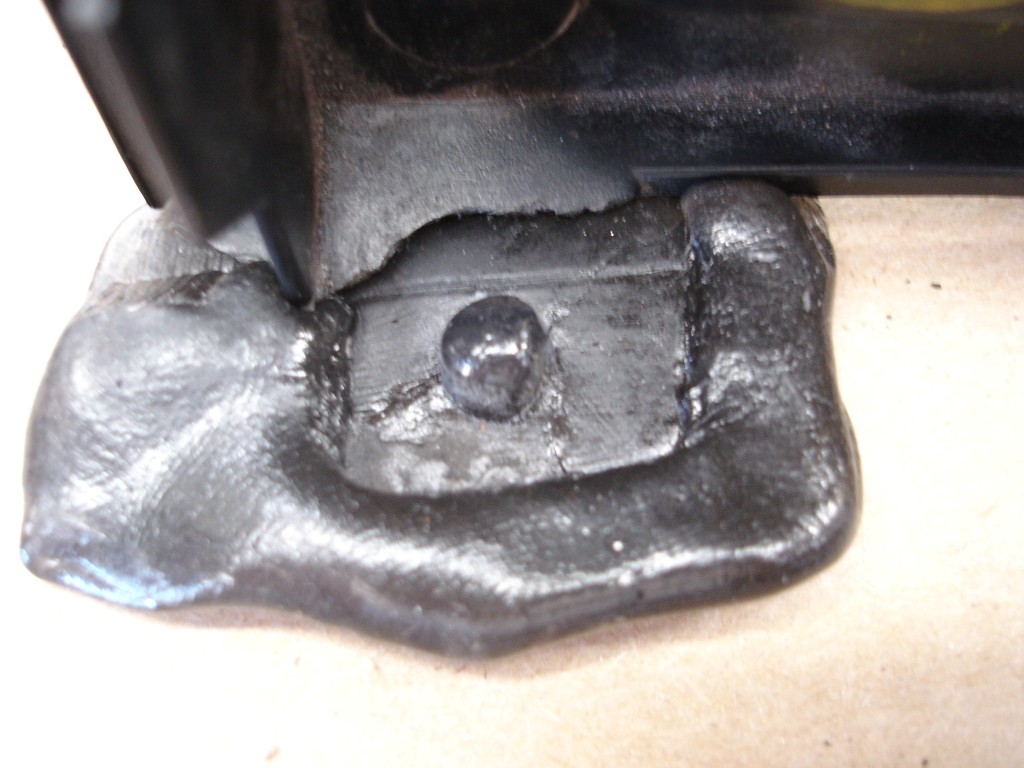 Here the modeling compound is used to duplicate a broken tab. The compound is affixed to the broken component and the plastic build-up begins.
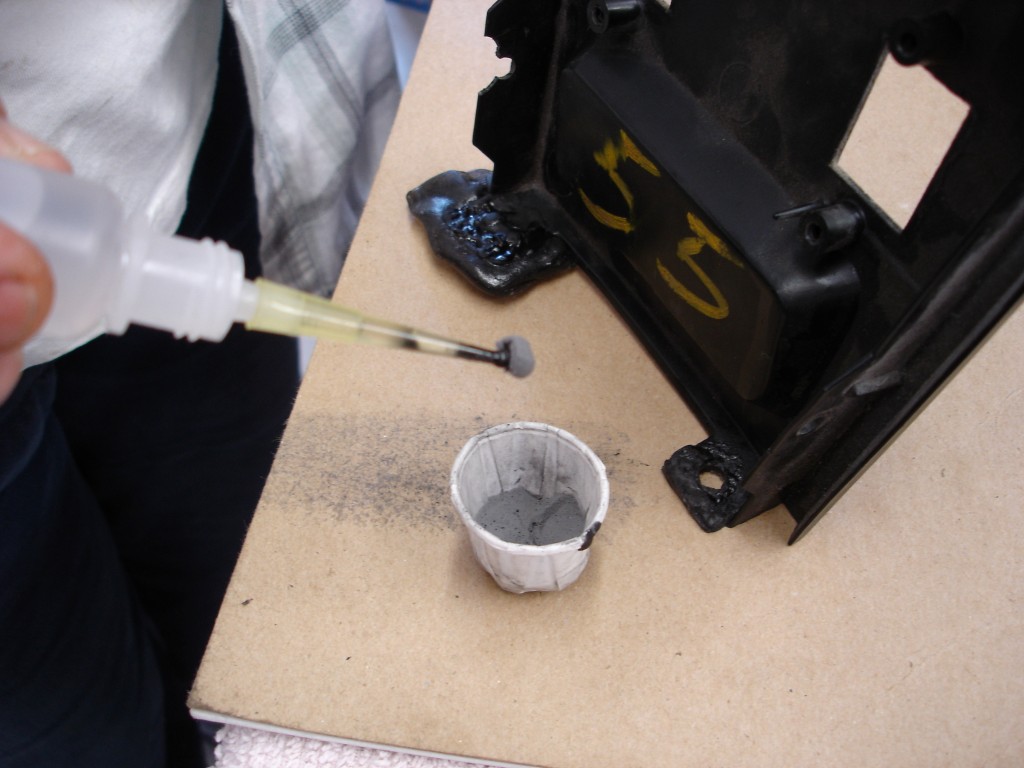 The tricky part here begins with drawing the clear Plastex liquid from the container into the supplied squeeze bulb. The squeeze bulb is then used to grab a ball of the Plastex powder from the cup. The squeeze bulb is depressed just enough to allow a drop of the Plastex liquid out of the end of the tube without dropping it, in turn grabbing the powder. This takes some practice to avoid dropping the liquid into the powder’s pick-up cup which turns the powder into instant plastic and must be discarded.
 Cracked areas can be repaired also. Grinding an area out for the Plastex material to “bite” onto both surfaces works best. This is not a glue; plastic will be made and the area will be as strong as the original piece.
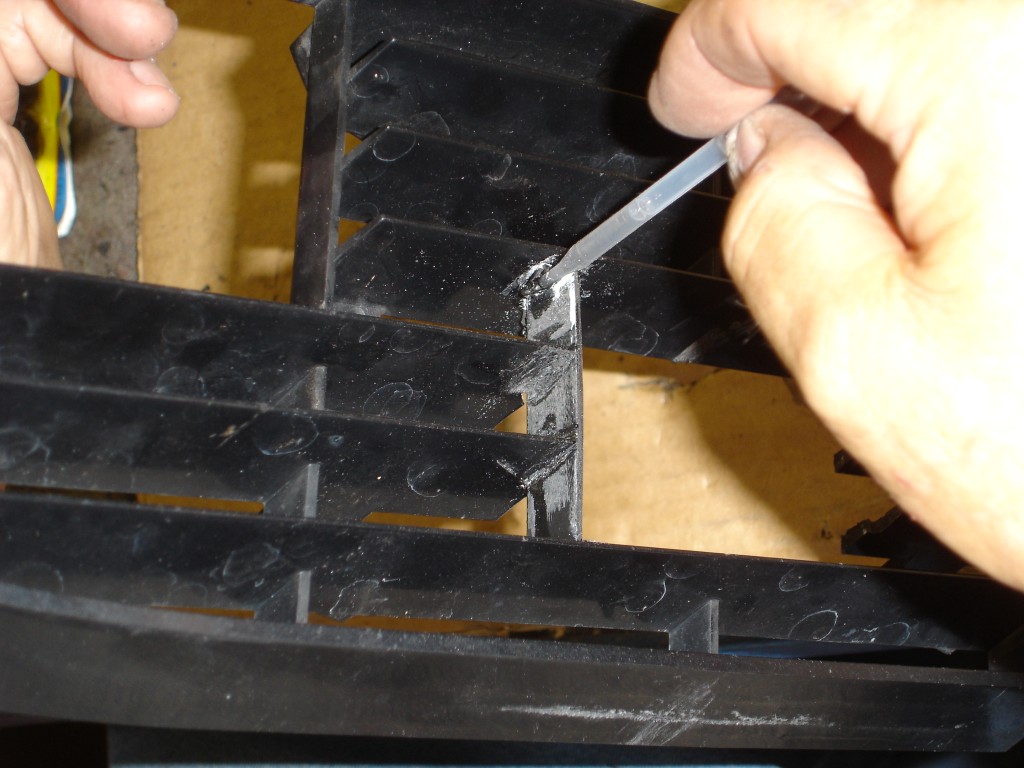 Another application here affixing a plastic rib to an existing grille. The squeeze bulb is now depressed causing the mixture to drop onto the two areas becoming one.
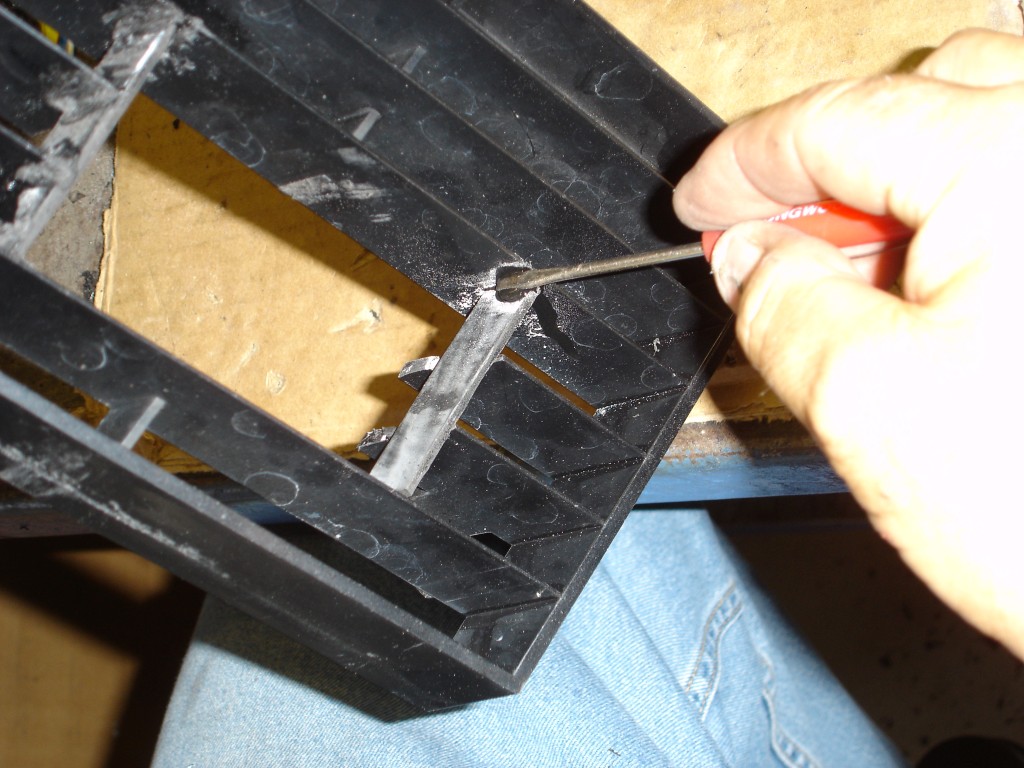 Smoothing the Plastex material out before it sets up helps avoid extra sanding. Once the material dries it can be sanded and smoothed to look like the original plastic finish. Be sure to give the Plastex material time to harden fully before applying any pressure on it. It usually takes about 15-20 minutes to be dry enough to work.
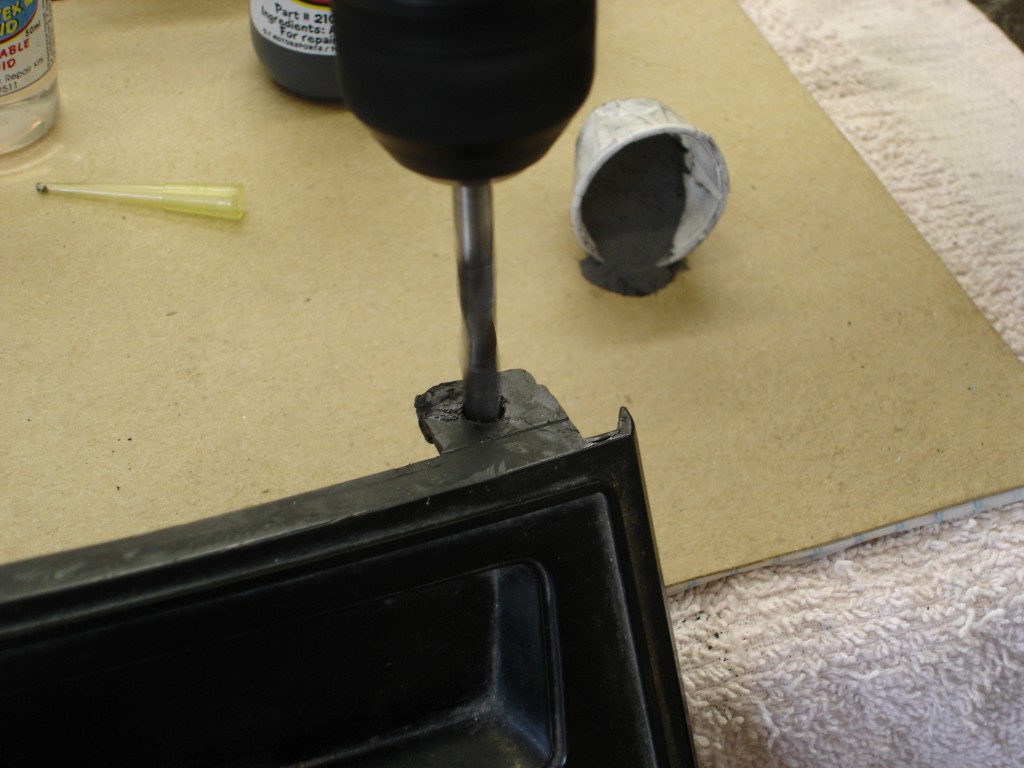 This is some tough stuff! Once hardened it can withstand drilling and if anything the tab will break away from the repair if stressed too much.
Story and photos courtesy Chris Petris