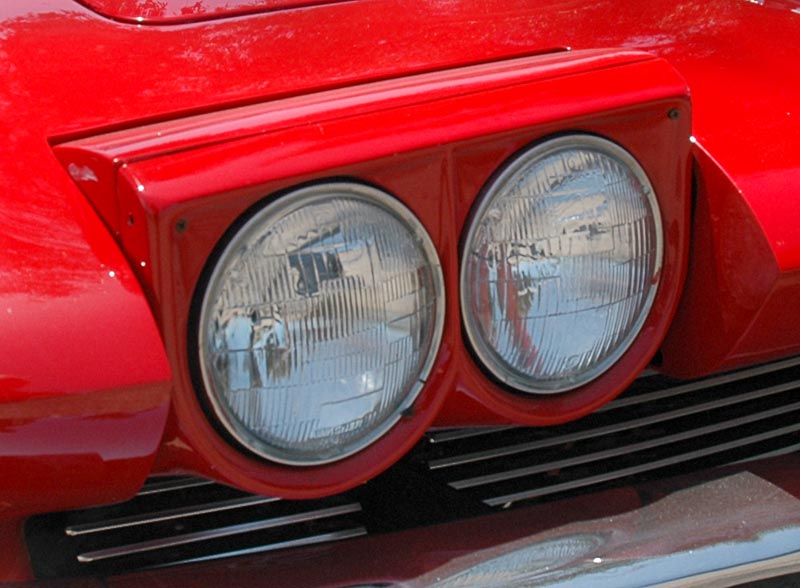
Headlight buckets on 1963-1967 Corvettes can be rather difficult to install properly. Ill-fitting assemblies and incorrect installations are common finds . We’ll provide some tips and tricks to do the job properly.
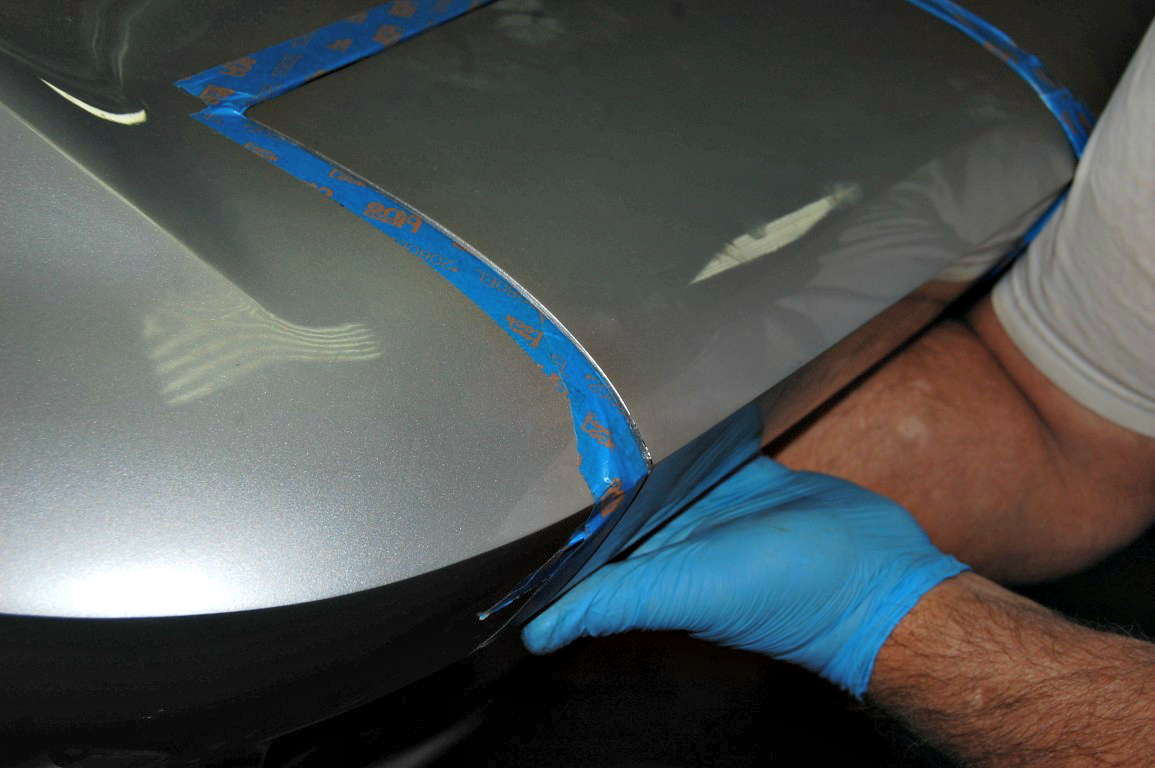
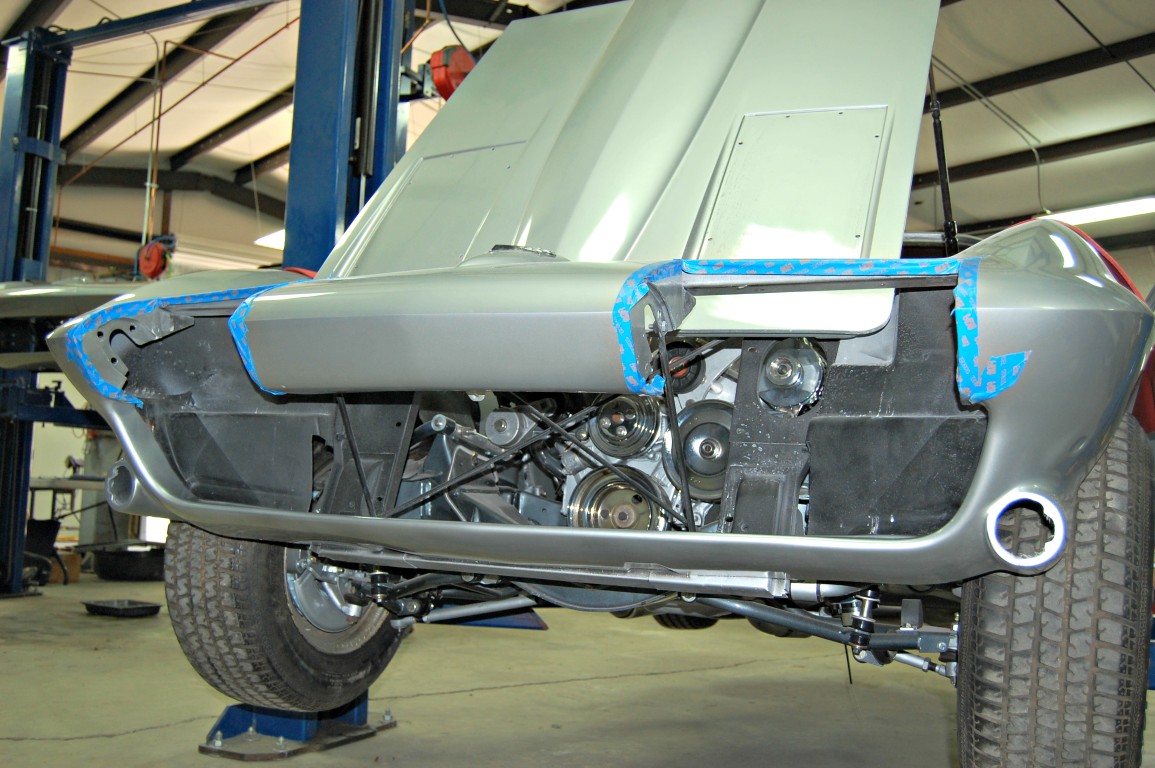 First and foremost, we cover the headlight openings with painter’s tape. It is far too easy to scratch the headlight bucket and/or the car as you work in this tight area.
We prefer to install the buckets on the car first and then install the internal components. Whether you opt to do the same is your choice, but keep in mind that space is limited and a juggling act will most likely occur as you attempt to hold the bucket in place and secure it to the body of the car.
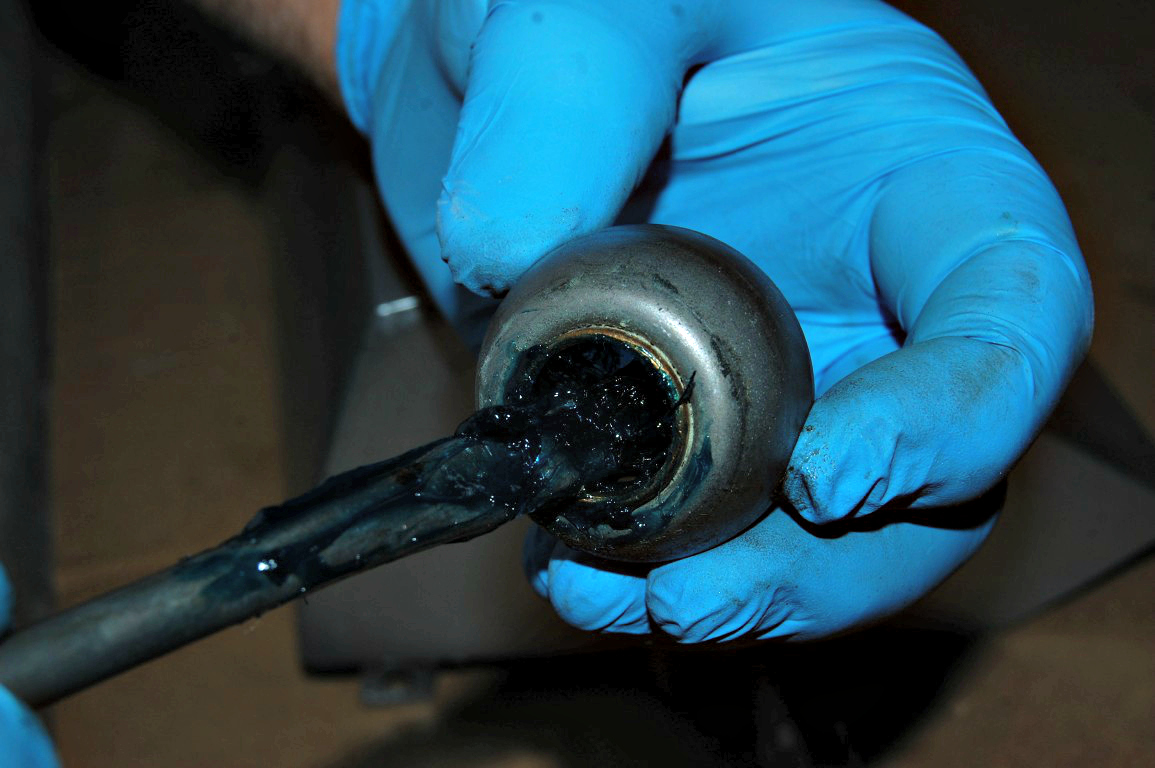
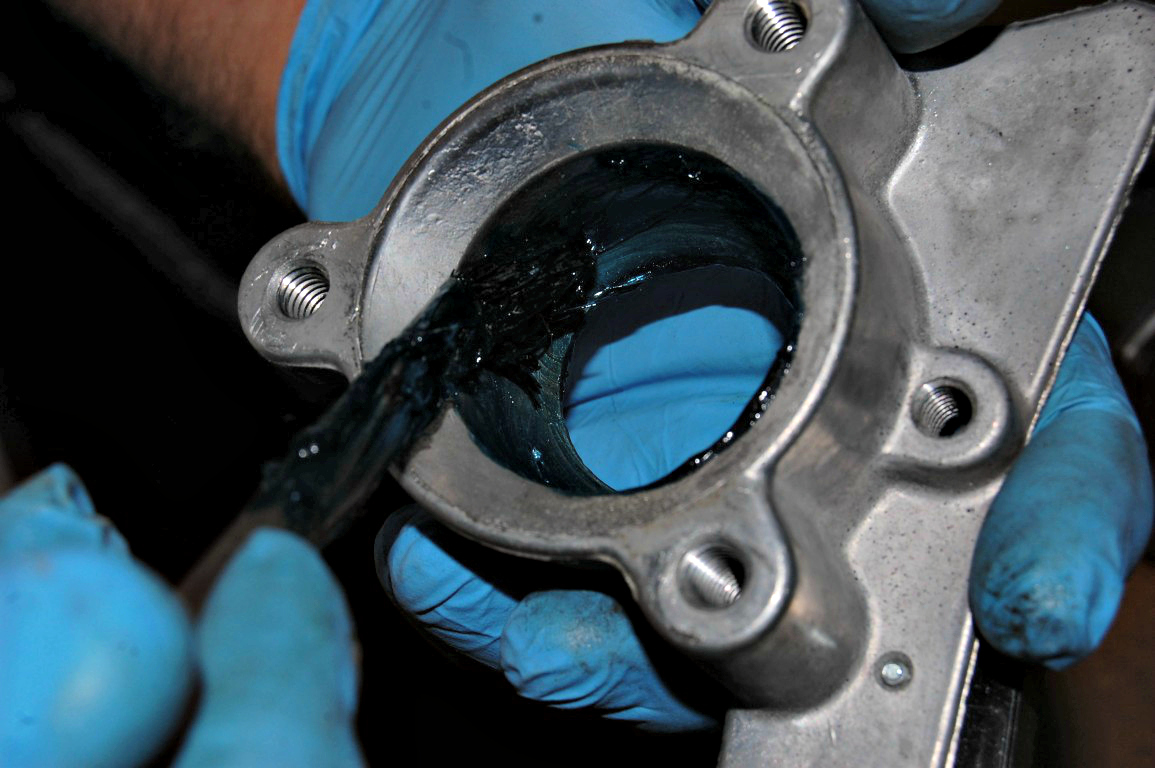 Some prep work is involved before we bring the buckets over for installation. Chassis grease is applied to the pivot support balls and pivot supports in order to prevent corrosion. It also provides a bit of “sticking power” to keep things in place while everything is installed.
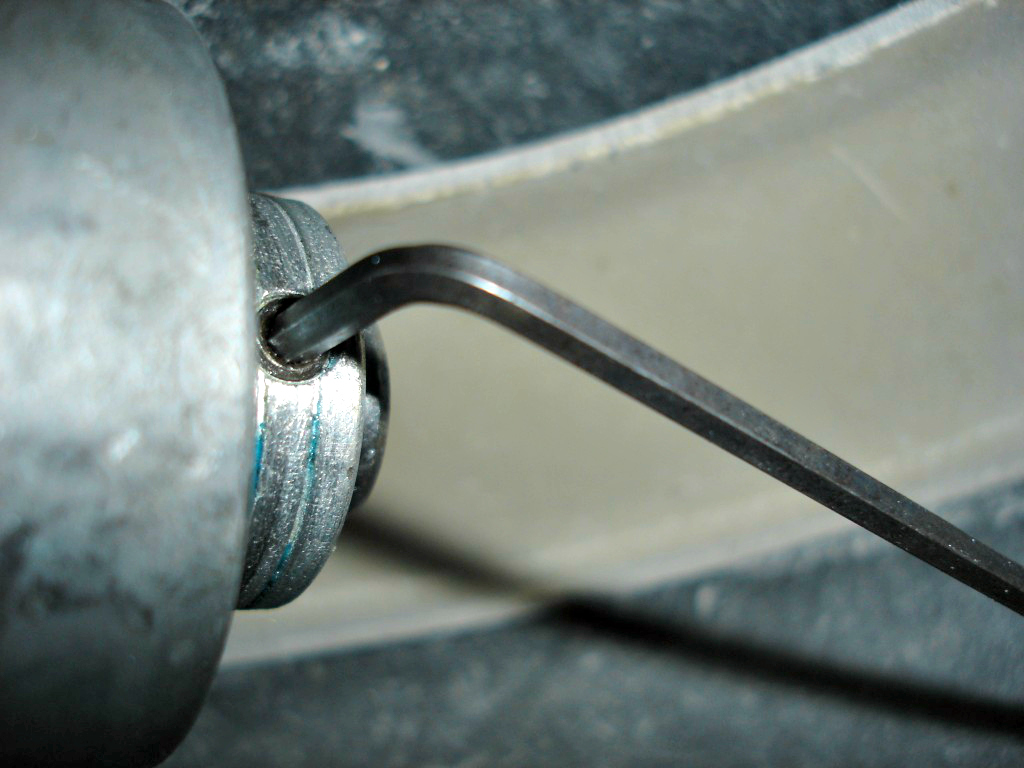
 One thing to note: we install the pivot balls with the larger outer section outward for a tight fit in the housings.
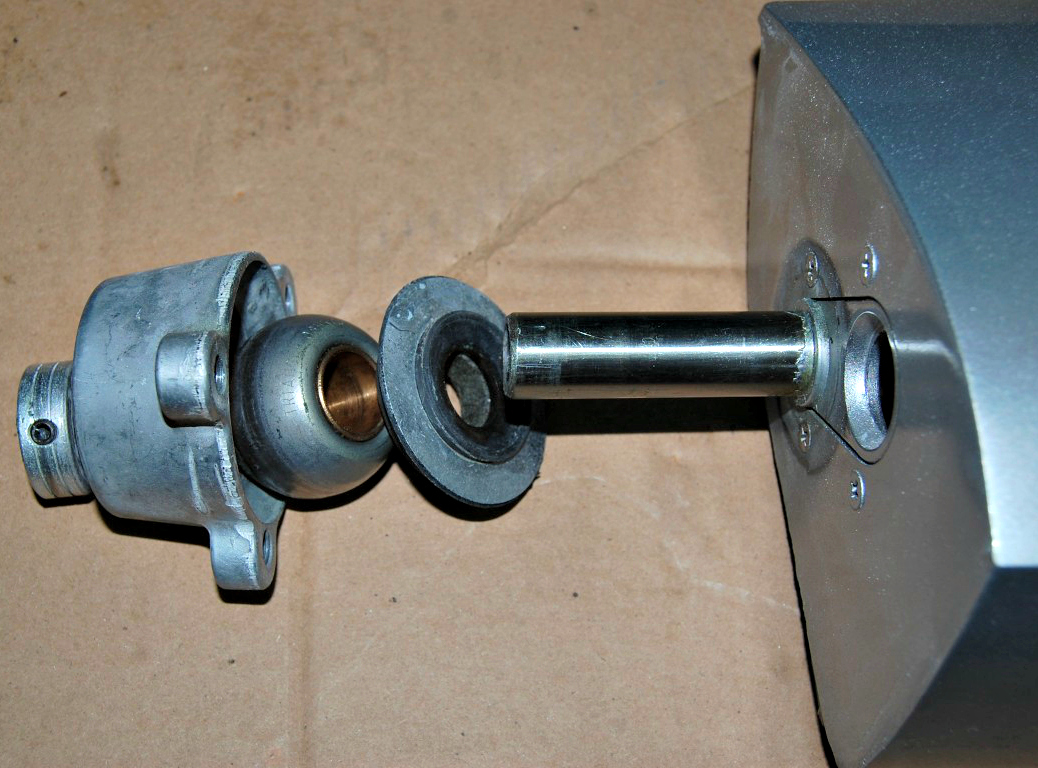
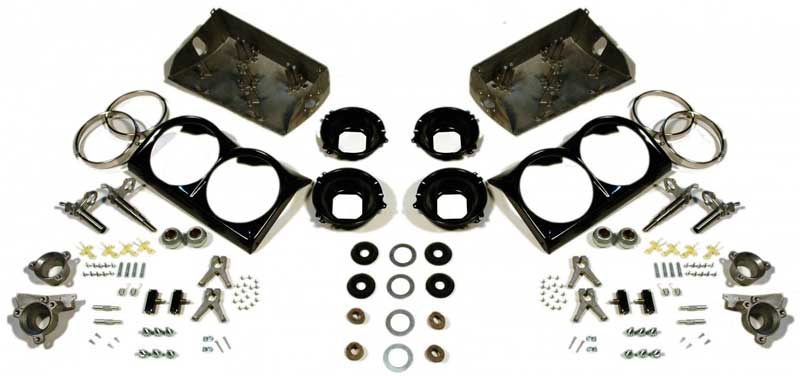
 These photos show the items that need to be installed and their correct order. On the left side of the bucket (the side that is next to the outer edge of the car) the headlight ball seal washer (#442029) is installed on the pivot ball rubber seal (#442028) then the felt seal (#442027) is installed into the rubber seal, the assembled rubber seal, washer and felt seal are installed on the shaft first, followed by the pivot support ball (#442025), the outer pivot support (#442035), and the headlight end collar spacer (#442036). On the right side, which will face the center of the car, put the washer with rubber seal on first, then the felt seal, pivot support ball, and inner pivot support (#442024L / #442024R).
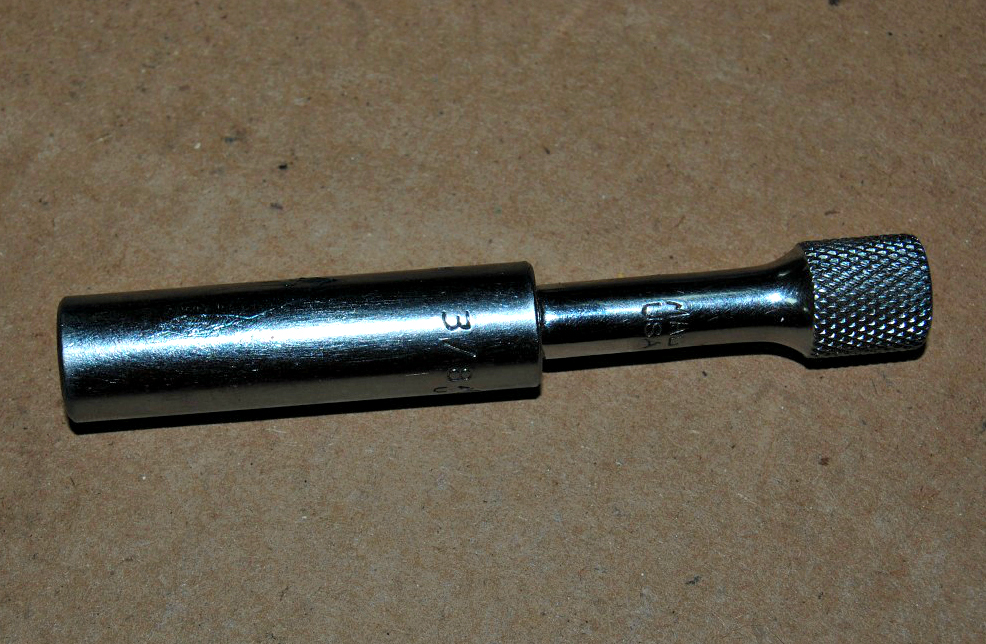 Have a 3/8” socket ready to install the buckets on the car. A long socket with extension is recommended because it prevents the socket and screw from falling between the headlamp assembly and frame when you pull the socket from the screw head.
 Carefully slide the bucket into place.
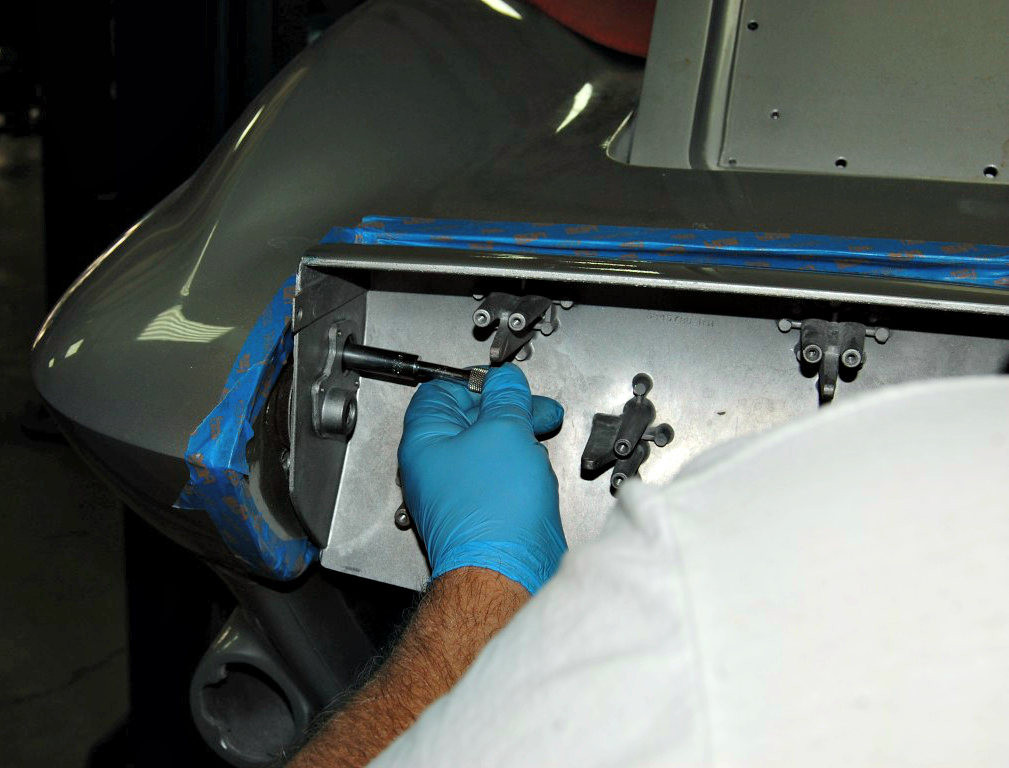 The bucket will need to be rotated several times as you work to align the screws with the screw holes.
 This can likely occur with the use of a short socket. Applying masking tape to the inside of the socket helps to prevent getaway hardware.
 Having an assistant hold the bucket in place is highly recommended so that you can focus solely on aligning and installing the screws. The problem isn’t so much that you have to hold something with one hand and tighten screws with the other, it’s that the assembly will rotate in the process. If an assistant is not available, you can install them solo without an issue, but you will need to get creative in order to hold the buckets firmly in place while you secure them. Supporting them with your forearm is one way to accomplish this.

 Systematically install and tighten screws, rotating the assembly as necessary. Install a screw on one side, and then install one on the opposite side, continuing until they are all in place. Do not tighten them completely at this time. If you do, you will have difficulty aligning the pivot supports and you will have to loosen them all in order to adjust the headlight bucket’s position.
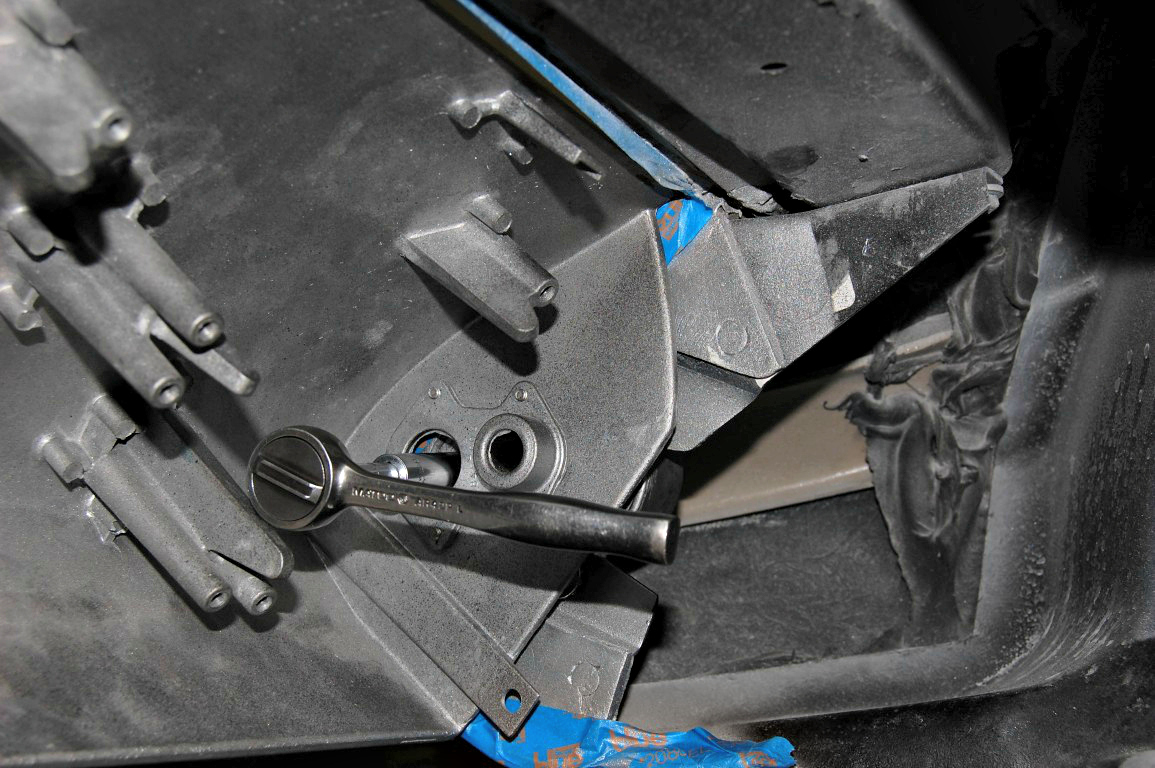 This is definitely one of the toughest aspects of this particular job. You will need to access the bucket’s pivot support from the underside of the bucket. Luckily, the grill was not yet in place, but if it had been we would have removed it to make the process a lot easier.
 All of the screws are installed, but a fitment check is in order before we move on.
 Now that we are comfortable with the alignment of the headlight bucket in relation to the body, it is time to completely tighten all of the screws.
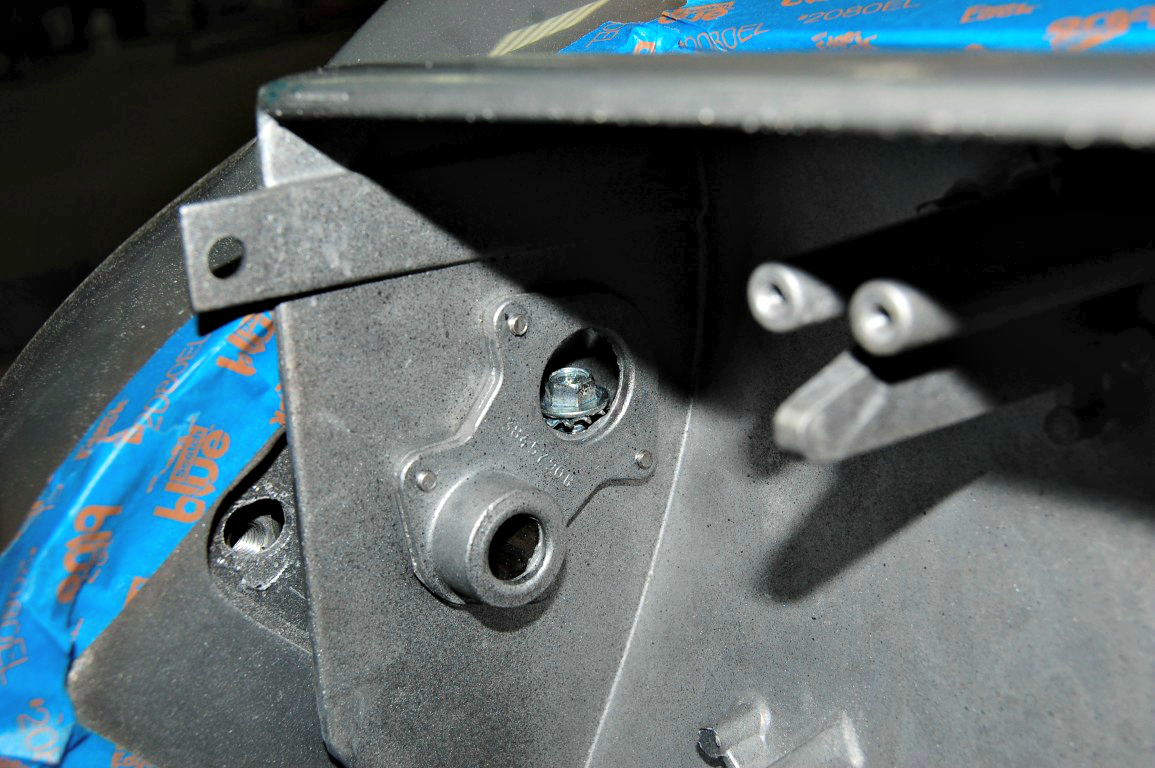
 The Allen head set screw on the headlight end collar spacer keeps everything in place on the left side of the bucket.
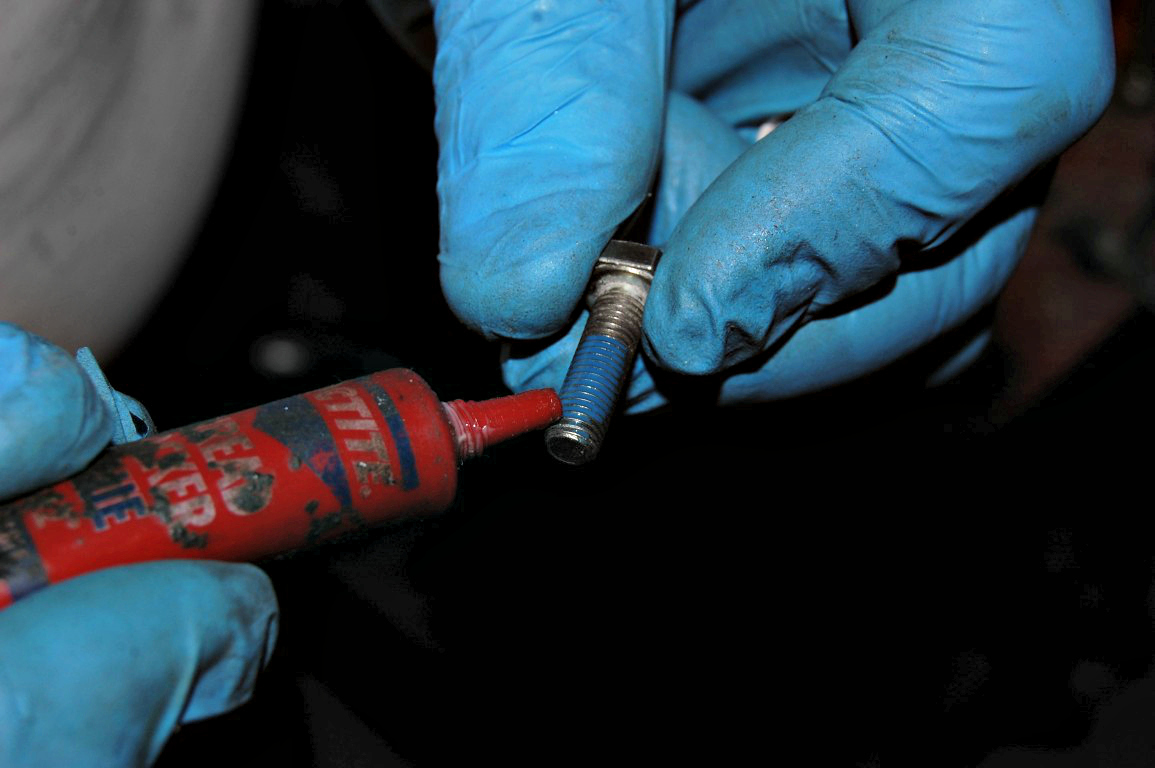 Loctite is placed on the threads of the Y-stop screws to prevent them from loosening on their own. The headlight opening stop part number is 442020.
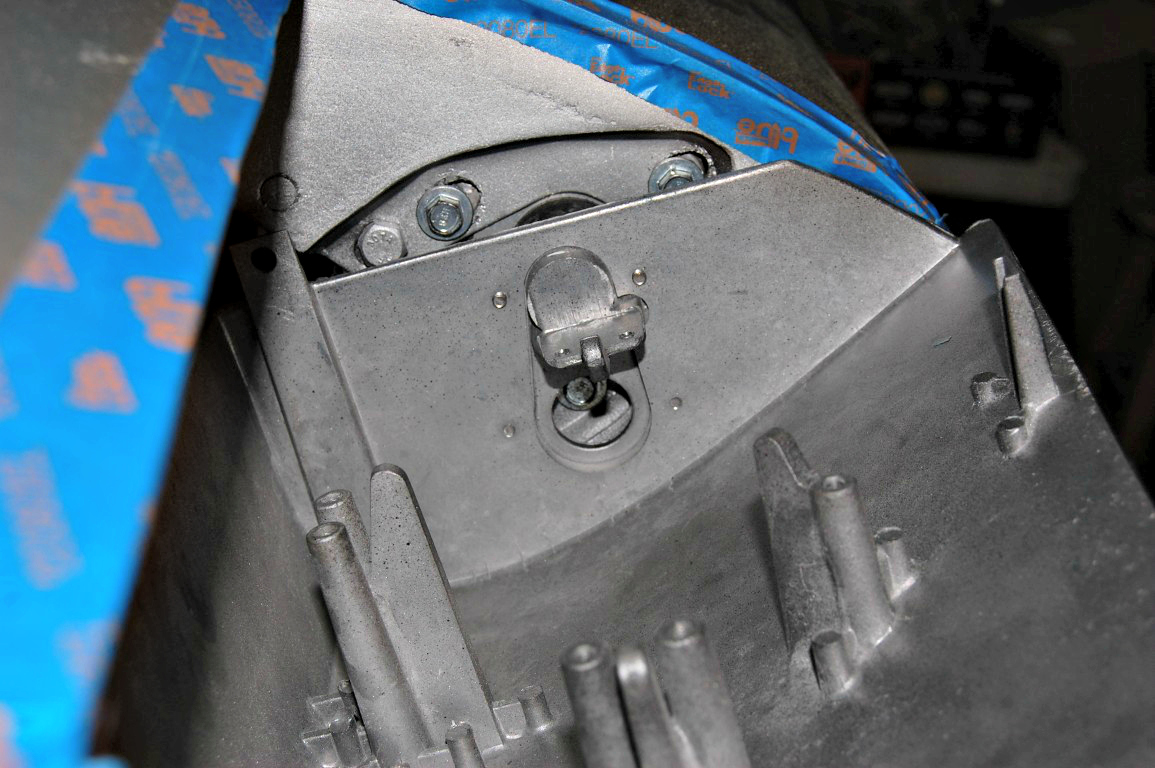
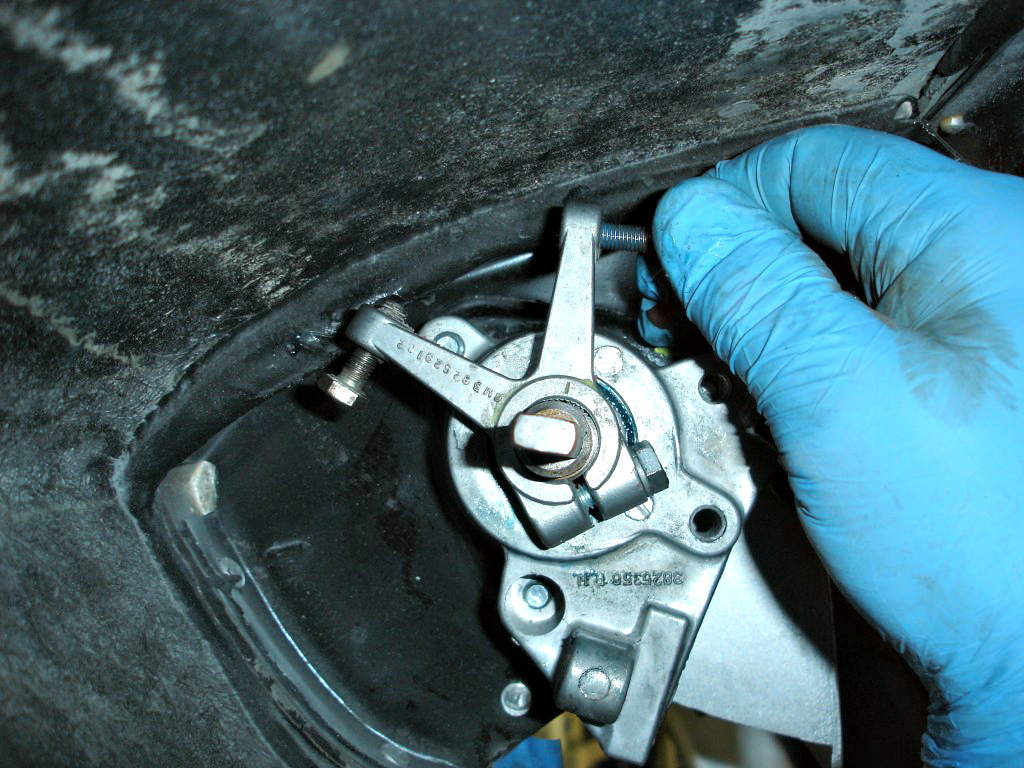 The Y-stop controls headlight rotation and lateral movement against the outside collar that was adjusted earlier. Line up the Y-stop serrations with the serrations on the shaft and tighten down the 7/16 inch hex screw while holding the stop against the pivot ball. Be careful the 7/16 screw does not require a lot of torque to hold the Y-stops position and can easily break the aluminum Y-stop if over-tightened. Install the Y-stop screws with Loctite applied, you have about an hour to adjust the stop screws so the door is closed in the position you like.
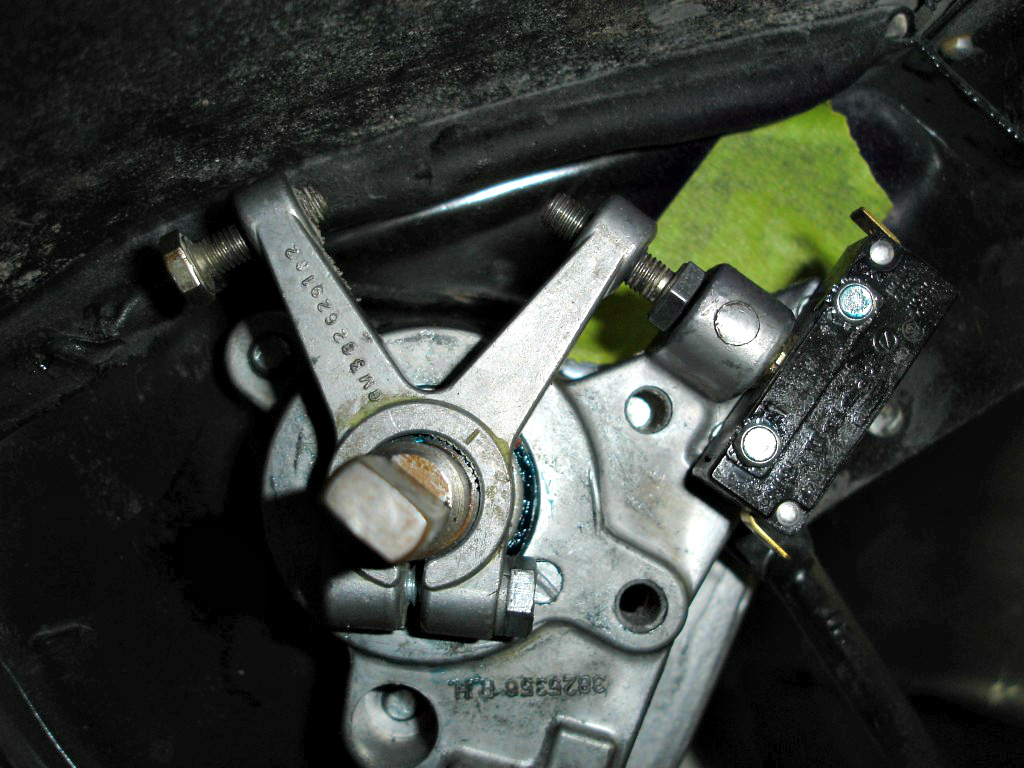 The headlight motor limit switch (#592027) is currently closed, therefore the headlights would be on.
 The fully open position of the headlamp bucket affects headlight aiming, as a rule of thumb we align the back edge of the headlamp housing with the headlamp opening in this area. If the headlamp opening is adjusted too low or high the headlamp aiming screws will not have enough travel.
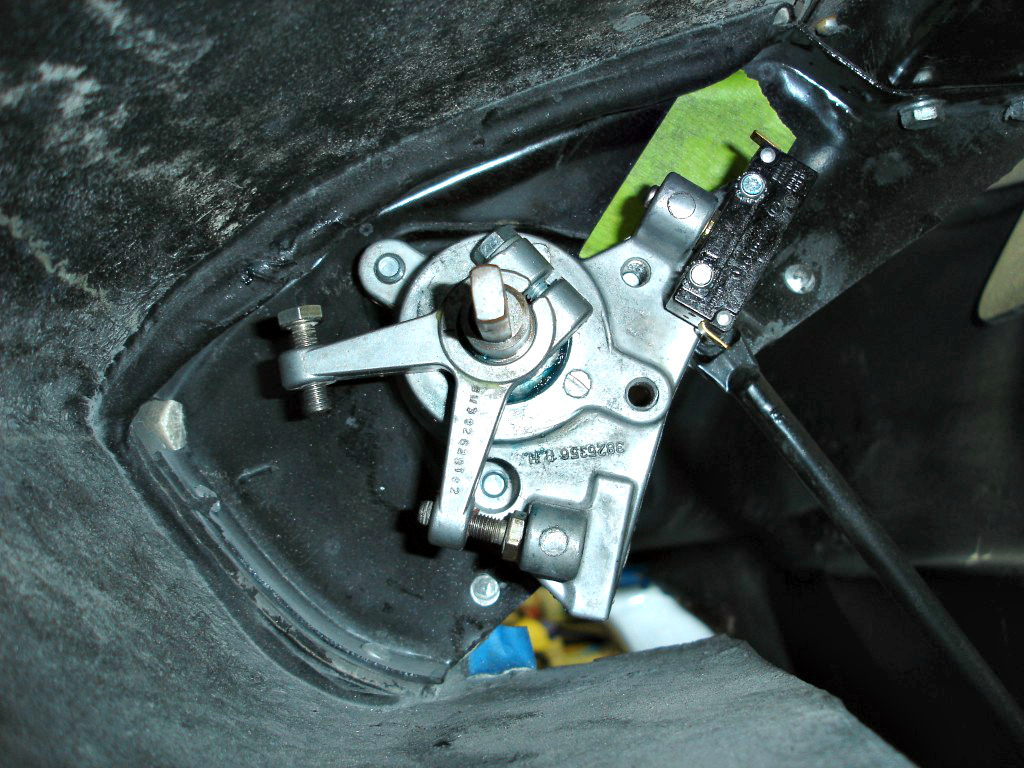 When the headlights are rotated to their fully closed position, the Y-stop screw rests at the bottom of the pivot support.
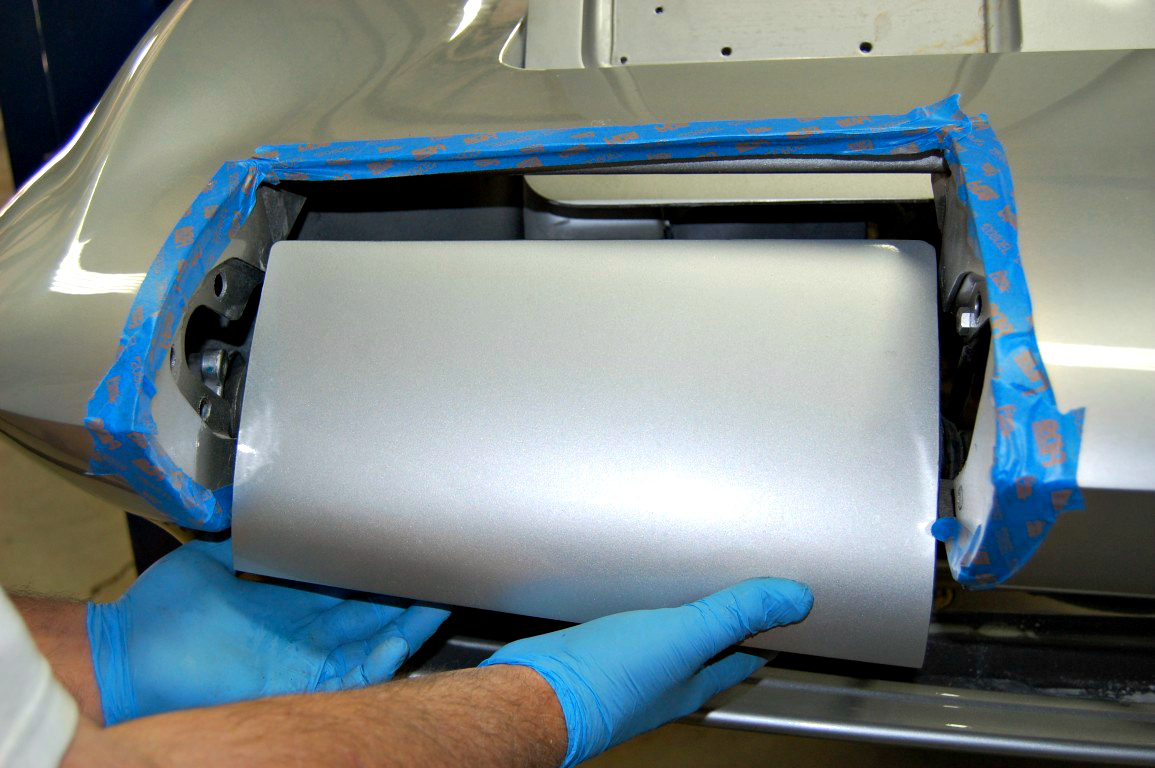
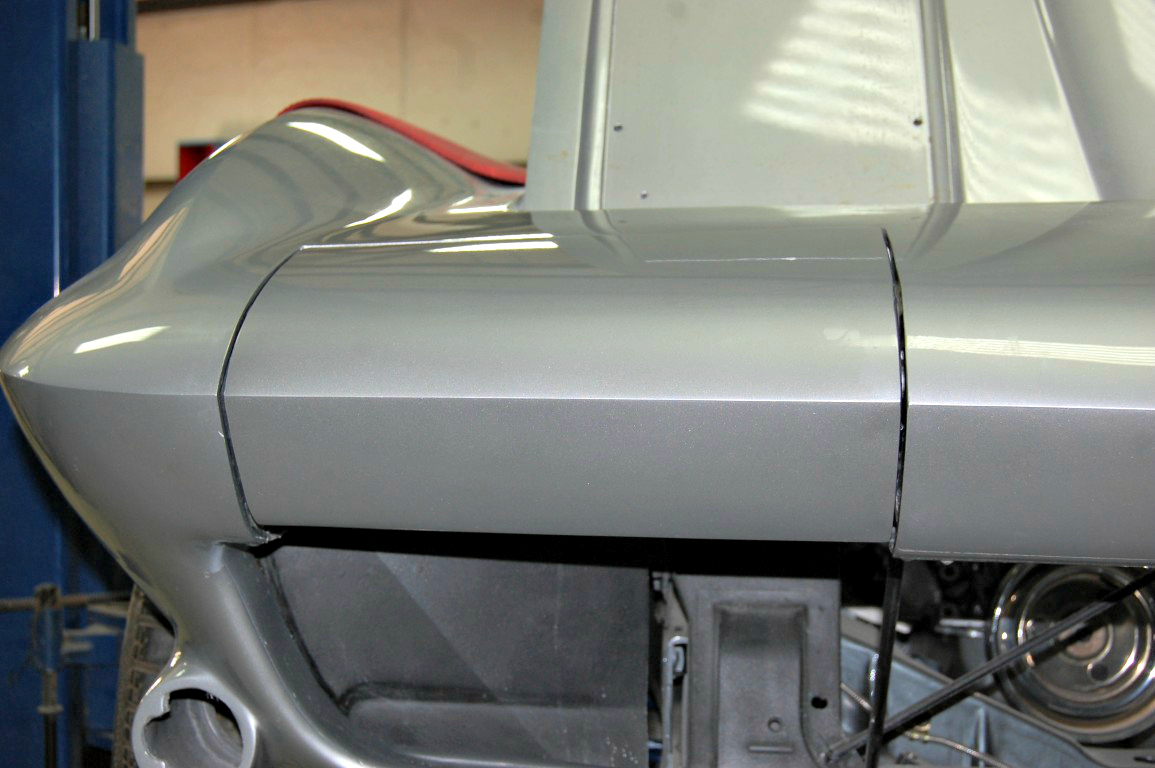 Manually check the operation of the headlight bucket, ensuring that adequate clearance is maintained during the entire length of travel. Once you are happy with the results you can remove the masking tape and admire the renewed headlight buckets.
Stay tuned because our next installment will cover headlamp aiming.
Related post: How to assemble and install C2 Corvette Headlights
Story and photos courtesy Chris Petris
Someone drove their car into the driver’s side bumper, bending the supporting brackets and pushing the bumper up so it stopped the driver’s side bucket from opening all the way. The shop removed the bumper and repaired the brackets so the bucket can open all the way. The problem is the impact moved the bucket more toward the drivers side so it rubs on the opening, preventing it from opening all the way sometimes. The clearance between the bucket and the body is visibly smaller on the outside edge. How do we shift the bucket back toward the passenger side so the bucket does not rub and stick?
Thanks for info, one thing I am not sure of, Does the washer go between the bucket and the frame OR does it go on the OUTSIDE of the frame on a 1965 Corvette
Check out part number 442036 on our website corvettecentral.com/442036. There is an exploded view of the headlight parts taken from the GM Assembly Instruction Manual.
Thank You,
Product Assistance
Corvette Central
66 c2 trying to remove pivot support ball from the shaft. Any suggestions? It has been soaked with several types of penetrating solutions but still won’t come off. I can’t find a puller that works and don’t want to cut it off just to replace the washers.
Apply some heat. Use a heat gun (or a propane torch) which should make the brass pivot expand a bit. Grab it with pliers and gently try to twist it back and forth. If you can get even a small amount of movement, give it more PB Blaster and continue loosening. Eventually, it should become free enough to remove.
Just finished this job today. Started with a squirt of Superzilla. Don’t know if that really helped, but found a piece of 1/4 inch steel in my scrap which had a U shaped slot already cut in it.
The I.D. of the U was just wide enough to slip over the shaft and settle on the bronze bushing, but not the ball part. For the motor side, clamp the flat of the shaft in the vise with the whole piece vertical, and hammer down on that scrap steel. For the outside, position the piece vertical over a socket of smaller diameter than the shaft, so the bushing has a place to go when you hammer down that side. I tried this first, rather than spending a whole day welding up a special puller. Hope this approach works for you!
I just read your post and thanks for putting it up. My question concerns body alignment with the top edge of the head light housing. My 66 housings have a very slight radius on the alignment edge and the metal bezels are straight edges. The body has a slighter radius. I’m thinking the edge of the housing should be flat but being cast aluminum I’m not sure how to straighten the castings. Can you advise?
Can you get me a front clip and back clip i want to take my 63 back to crome bummers
Robbie,
We can supply a complete, Pre-assembled front clip, part number142003, $5639.00.
This will be all the original press-molded panels properly glued together with the factory bonding strips. Including the inner fenders.
Or
142005, one-piece molded front end, $1749.00. No inner fenders.
Truck freight charges will apply on either of these.
As for the rear end, if you require a complete clip, you are looking for good used parts.
Please check with the various salvage yards that I have attached Or All the individual pieces are available but will have to be bonded to the inner tub.
Gus Gustafson
Product Assistance
Should all the dimensions of the right and left housings be identical?
The 442055L and R that we offer are mirror images of each other. They should be identical in dimensions. The exception could be early 1963 cars, as GM used some unique housings on these cars and there may be variance for the early vs. the late version.
Thanks for posting the C2 HBA it’s been just what I am looking for. I just bought my 1st Corvette a ’63. Now I have the confidence that I have the best resources here to refurbish my assemblies.
thx for the support