If you haven’t already replaced the oil pressure sender (CC part # 305254) on your C5 Corvette, it will become a necessity when the gauge stops functioning properly. One telltale sign is the oil pressure gauge needle leaning past the high mark at all times or not moving from the lowest point. Another sign is an oil leak near the rear of the oil pan. Many times, the presence of oil is mistaken for a leaking rear main seal; always look at the top of the bellhousing for the source of a leak. If there is a trail of fresh oil cascading over the bellhousing, chances are the sending unit is leaking. Sending units have an immediately noticeable leak, whereas rear main seals usually experience a slow leak that increases over time.
This job will require you to remove your air cleaner, intake, and fuel rail, so if you have been considering an upgrade to any of these items now is the time.
You may or may not remove the fuel rail for this job, but if you decide to remove it before you tear into the engine, make sure to first remove the fuel pump fuse. Attempt to start the engine until all of the fuel is drawn out of the system. At first, the engine will start then die during cranking. Try this a few times until the engine does not start at all. This will decrease the amount of fuel in the rail. Then disconnect the battery.
When disconnecting the weather-pack connectors for the engine wire harness, be aware of the silicone seal used to prevent water, dirt, and debris from corroding the sensor connections. Many times, the seals fall off and are missed during reassembly, leaving a connection vulnerable to corrosion. Unfortunately, the seals are not available separately; they are considered part of the connector. In the shop, we always salvage the seals when we replace broken connectors, so it is feasible that a local repair shop may have a seal if need be.
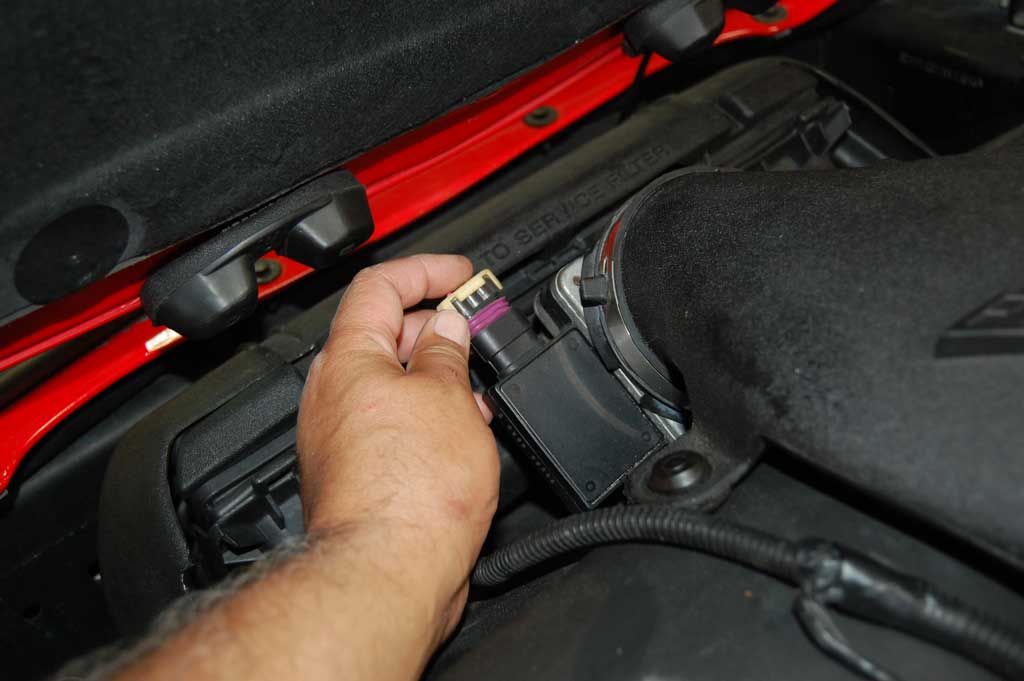
01- Disconnect the mass air flow sensor connector from the air intake.
02- Disconnect the intake air temperature sensor from the air duct assembly.
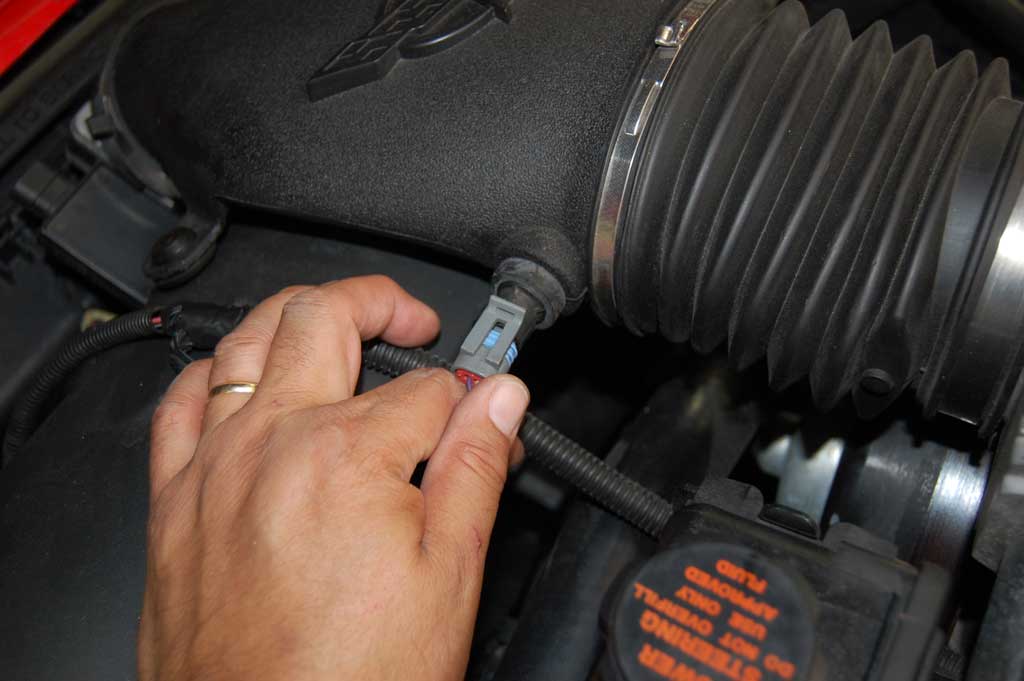
03- Disconnect the throttle actuator connector.
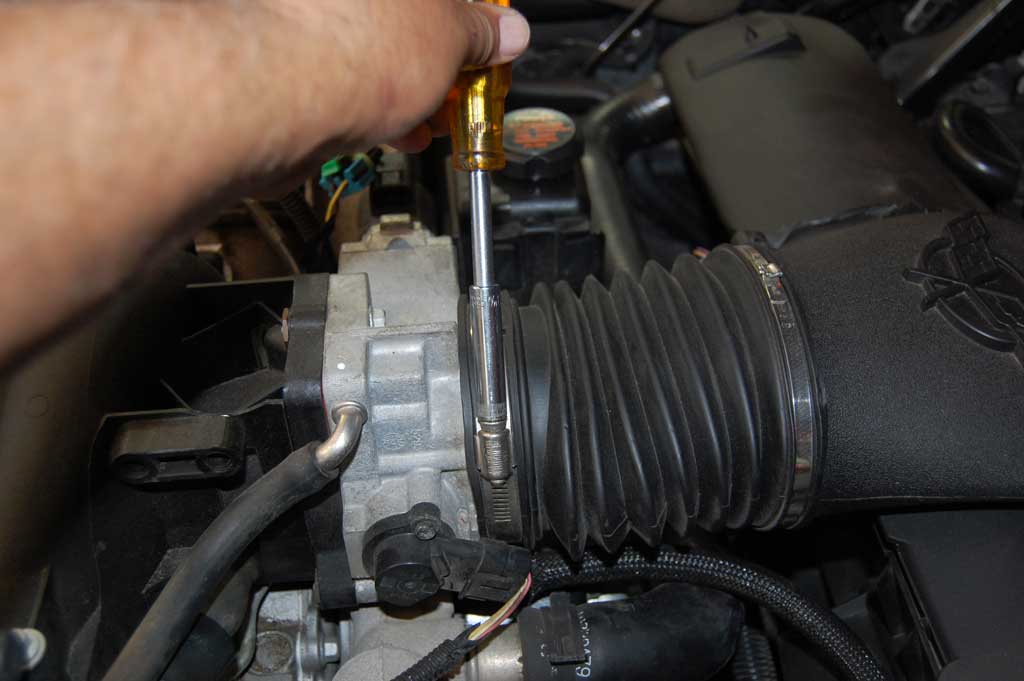
04- Loosen the clamp that secures the intake bellows to the throttle body.
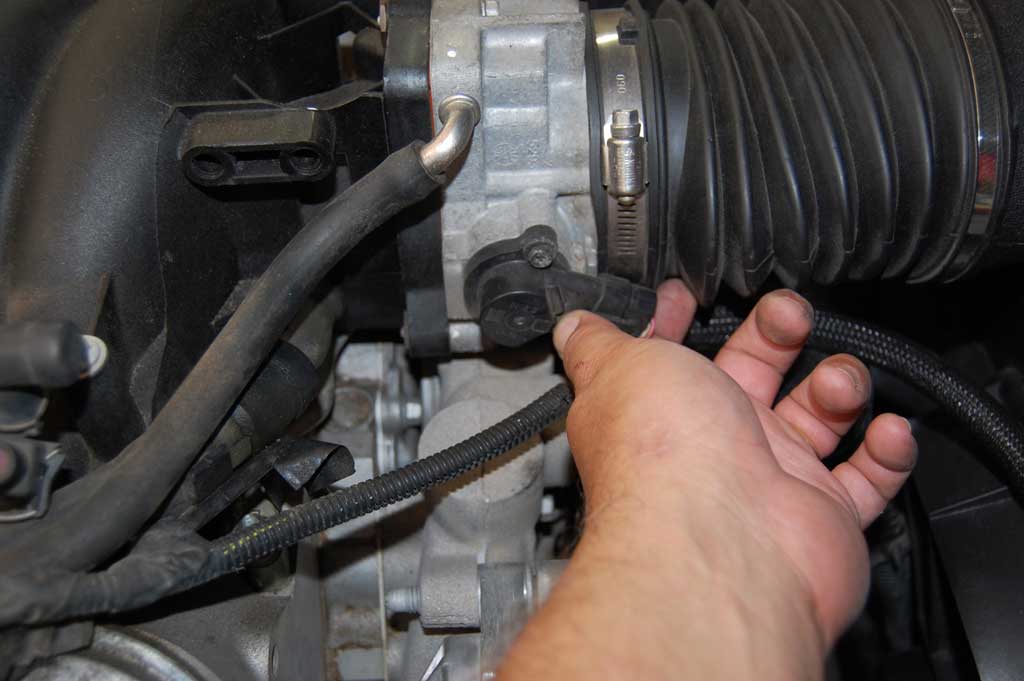
05- Disconnect the throttle position sensor.
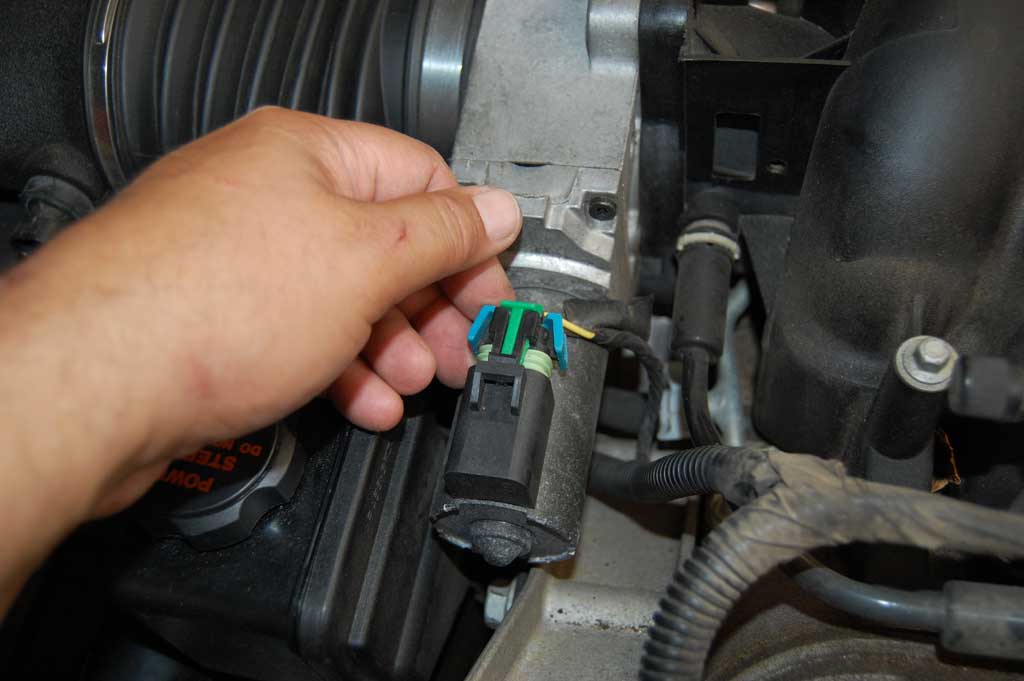
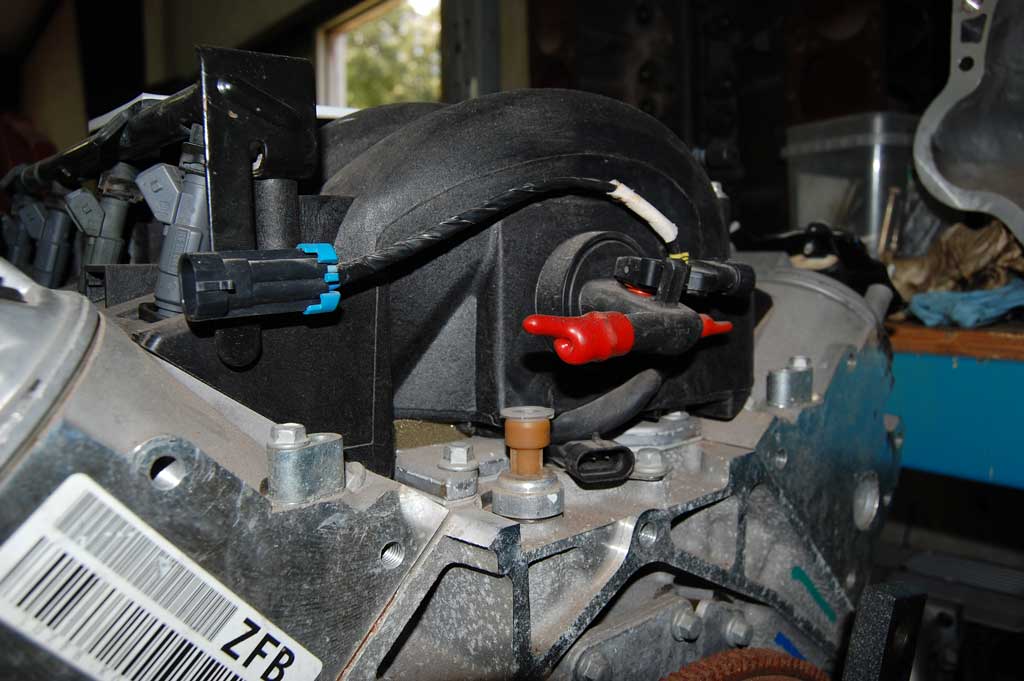
05a- Disconnect the MAP and knock sensor connectors at the rear of the engine.
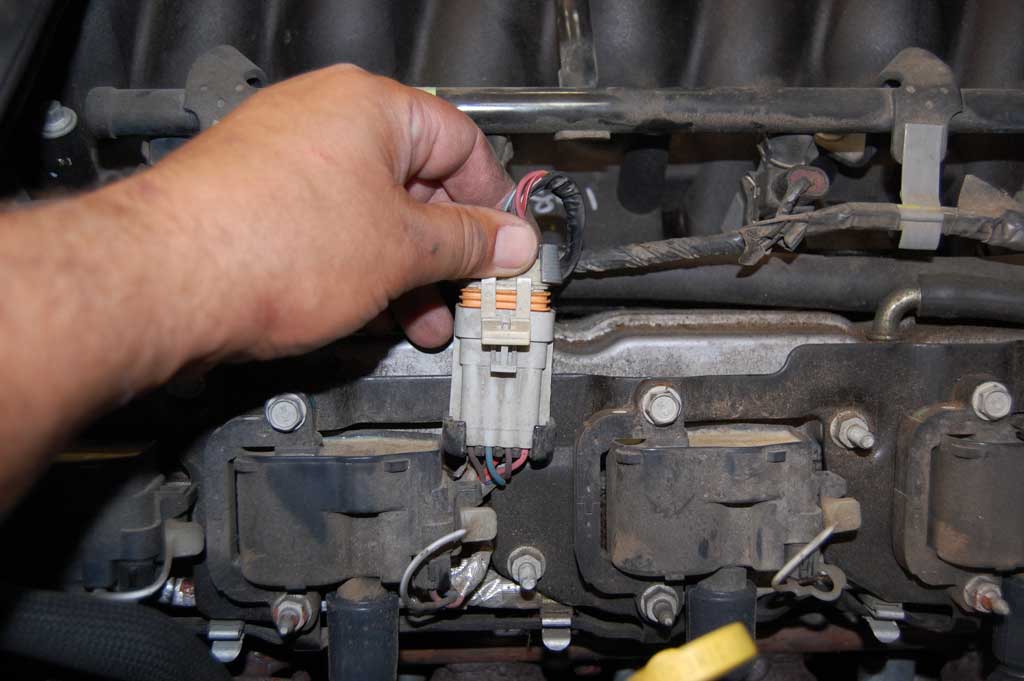
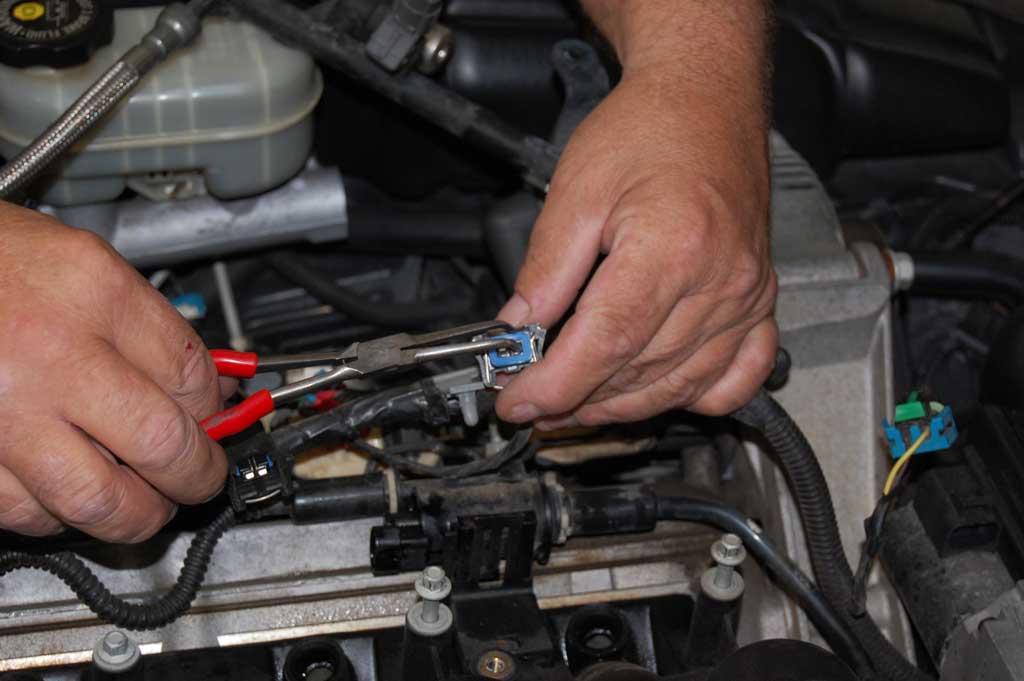
06- Disconnect the coil pack connectors on both rails. The fuel injector harness connectors and gray plastic wire supports are also removed. The gray plastic wire supports use a winged post to hold them in the fuel rail and a pair of needle nose pliers works well to collapse the wings on the post to release them.
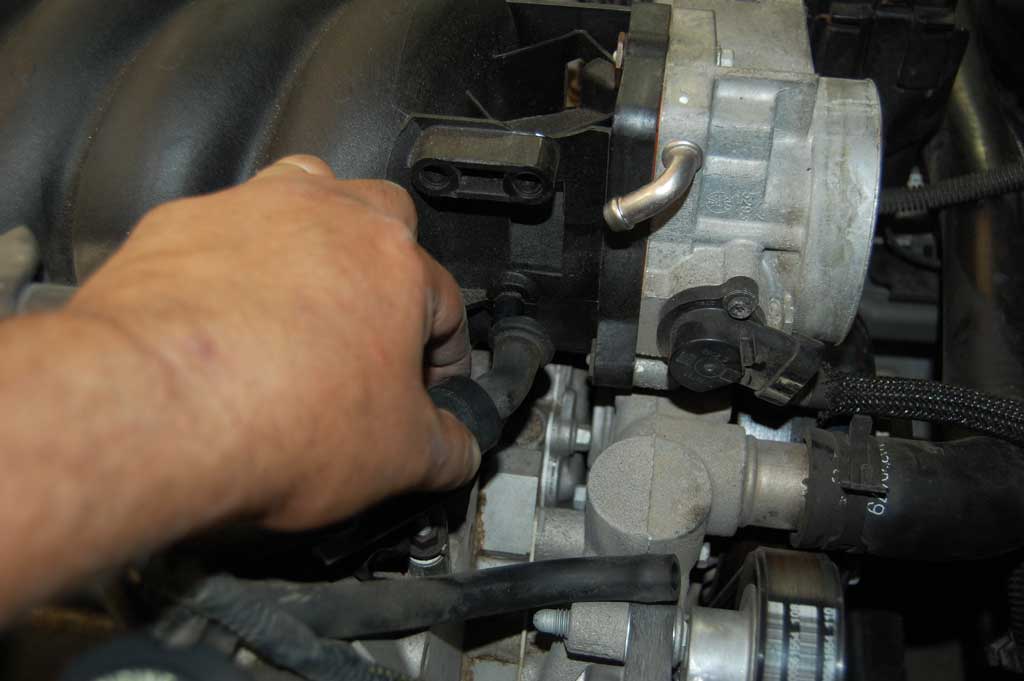
07- Disconnect the PCV valve supply hose at the intake manifold.
08- Remove the (4) 10mm bolts and one 8mm bolt that secure the fuel rails. The 8mm bolt is an intake manifold retaining bolt that is used to ground the fuel rail to the engine via the stainless steel strap.
09- At this point, it is a good idea to use compressed air to remove any debris from the top of the engine prior to removing the fuel rails and intake manifold.
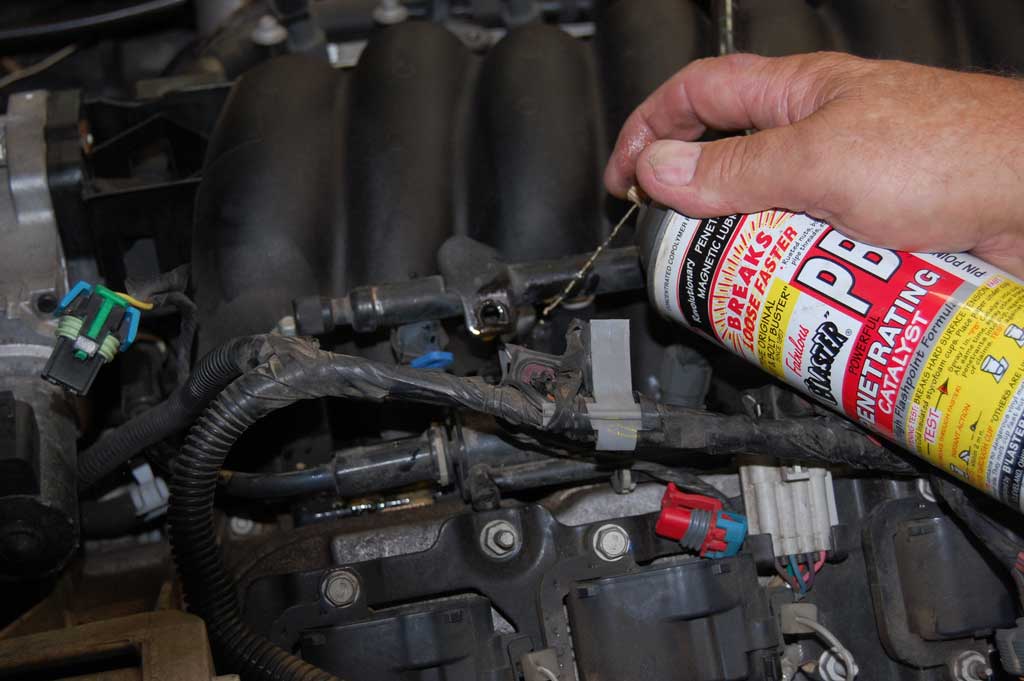
10- PB’laster or an equivalent lubricant (WD40-CRC) is sprayed into the bowls where the fuel injectors are inserted into the intake manifold, to help loosen the seals during removal. Rotate the injectors back and forth to let the lube work its way between the seal and intake.
11- Disconnect all injector connectors. Push the metal fastener wire inward while pulling up on the connector. The weather-pack seal is placed back inside the injector connector and pushed back into position with bent needle nose pliers.
12- Carefully remove the fuel rail and disconnect the fuel line. Lay it to the side, out of the way, until the task is completed.

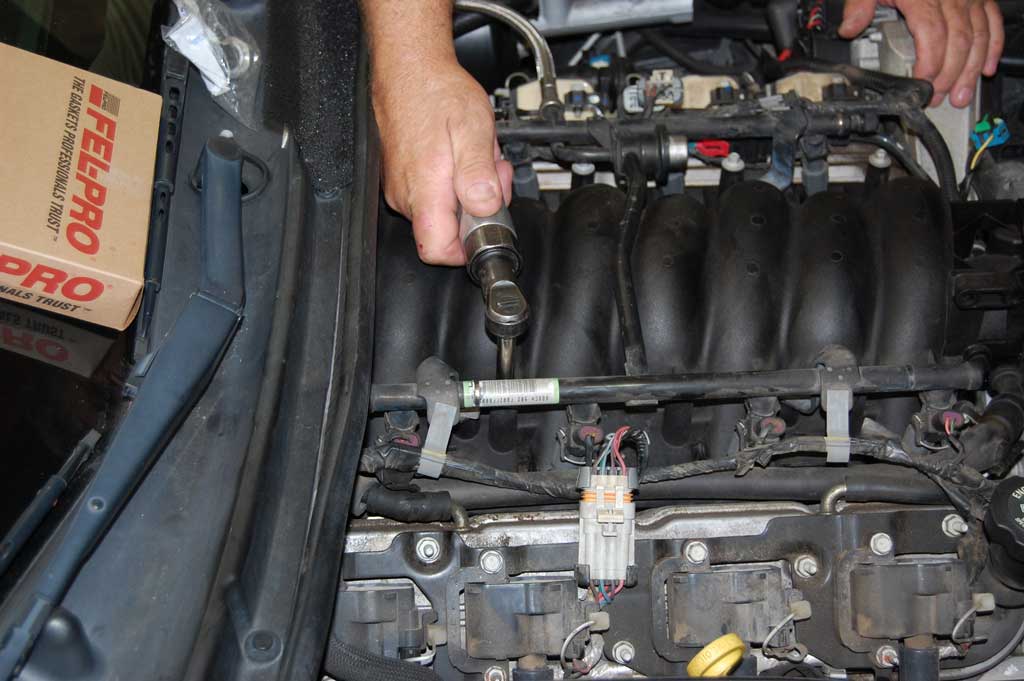
13- Remove the (10) 8mm intake manifold bolts. The rear two bolts on the intake will not come out of the intake after loosening them. Make sure they are unthreaded fully and be sure to pull them upward, away from the cylinder heads, as the intake manifold is lifted off the engine.
14- Disconnect the brake booster vacuum hose from the booster as opposed to rear of the intake. It may be easier to remove the intake manifold with the hose still attached to the intake manifold, rather than trying to remove it from the rear of the engine. With the brake booster hose disconnected, remove the intake manifold and hose.

15- As you can see, the top side of this engine could use some TLC. Carefully insert clean rags into each port and use a vacuum to clean up the large debris. Next, use mineral spirits to remove any remaining debris.

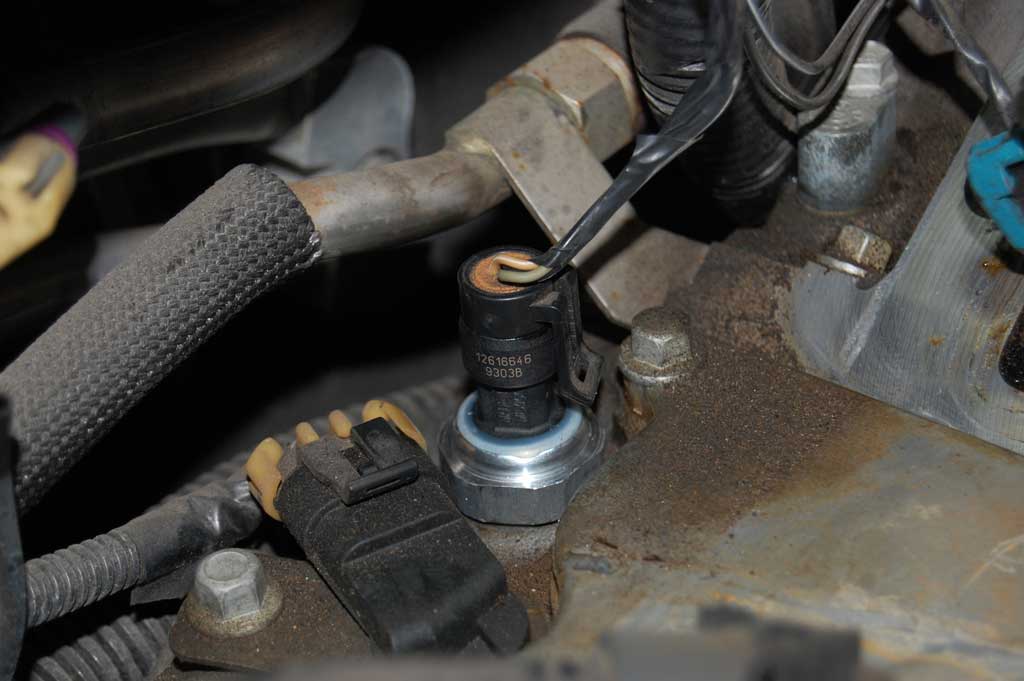
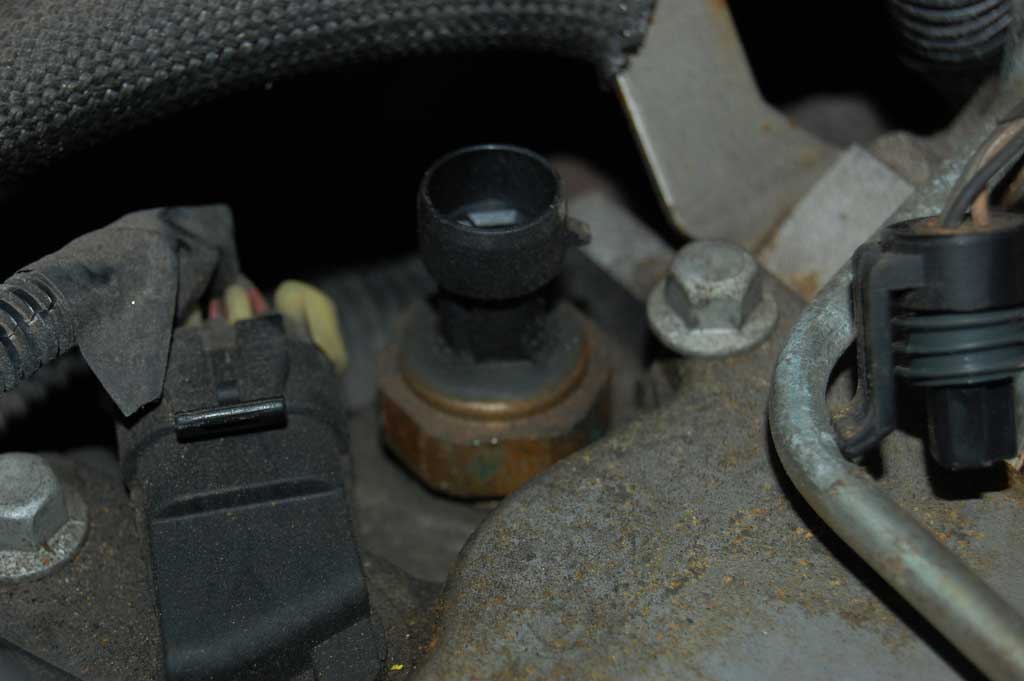
16- Here is the culprit situated close to the firewall.
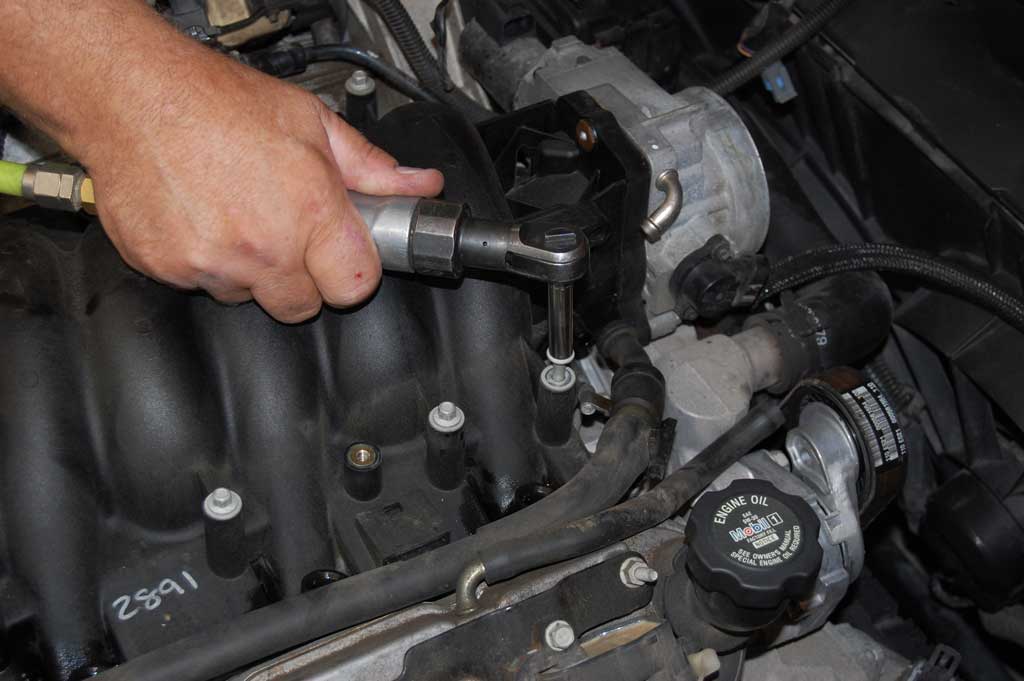
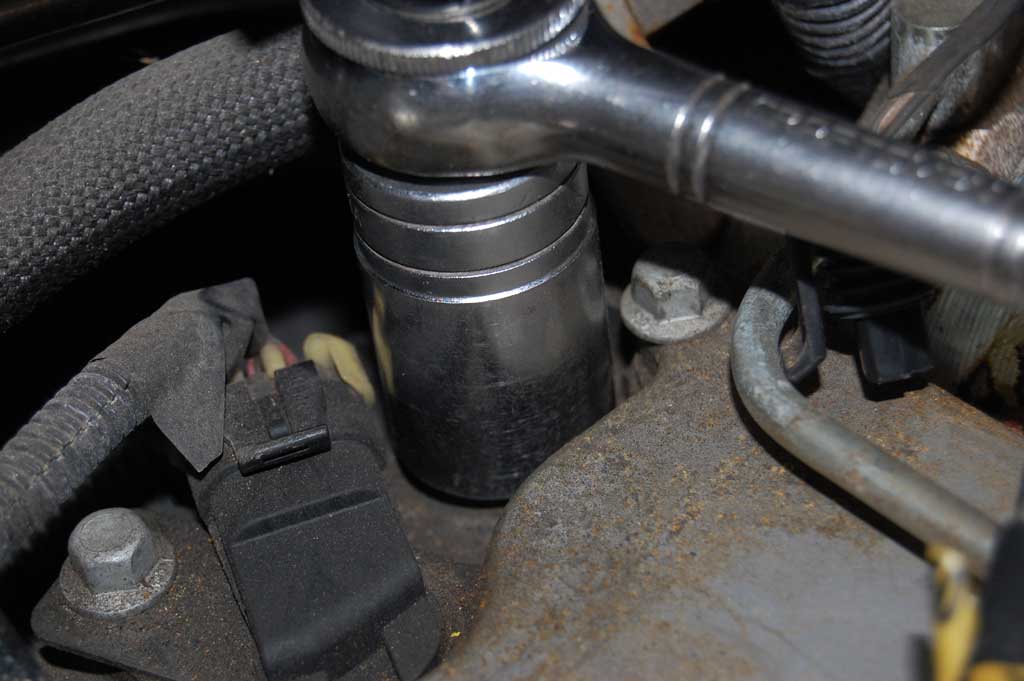
17- Use a deep 1-1/16” socket to remove the oil pressure sensor and replace it with a new sensor. This sensor is not the typical tapered pipe thread that was used for all the other GM engines past. A metric straight thread is used with an aluminum sealing ring for proper sensor sealing to the engine. 110 inch pounds of torque is all that is required for proper sealing.
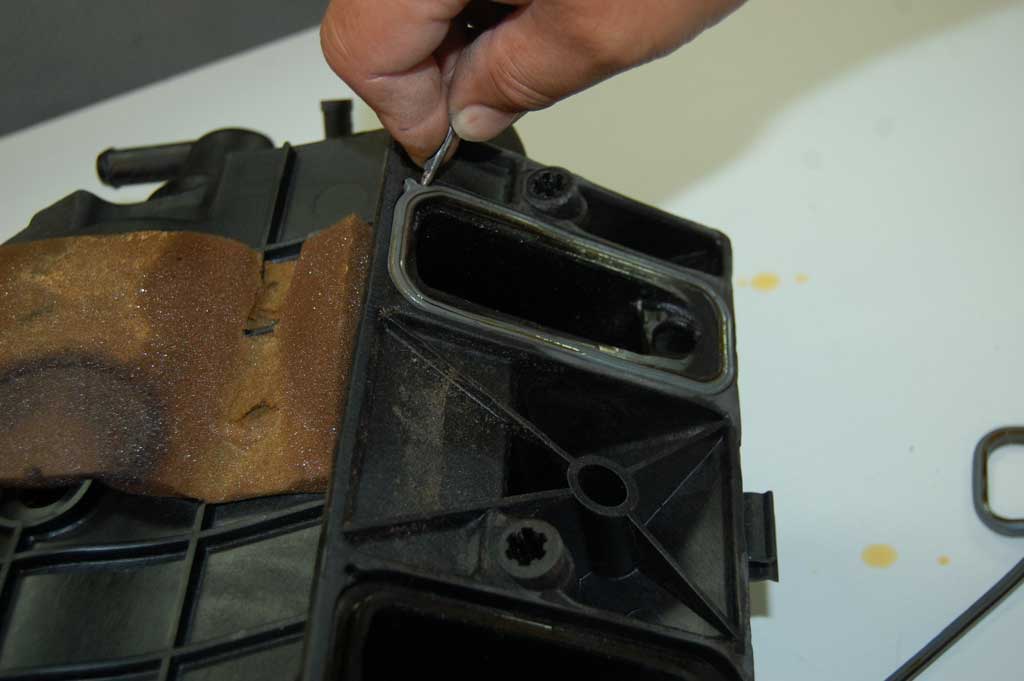
18- Be sure to replace all intake manifold gaskets prior to reinstalling the manifold. Use the aid of a pick to remove them from their machined retaining groove. Remove all residual oil in the sealing grooves with brake cleaner or mineral spirits before installing the new seals.
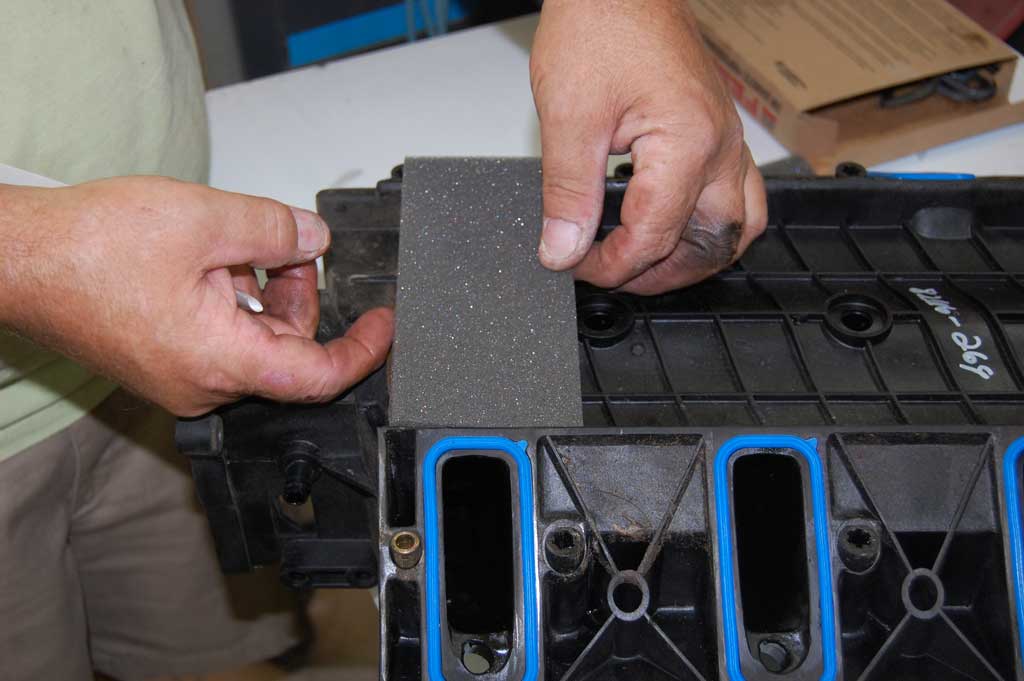
19- The foam seal is used to limit the amount of debris that builds up under the intake manifold; most intake manifold gasket sets include them as part of the kit.
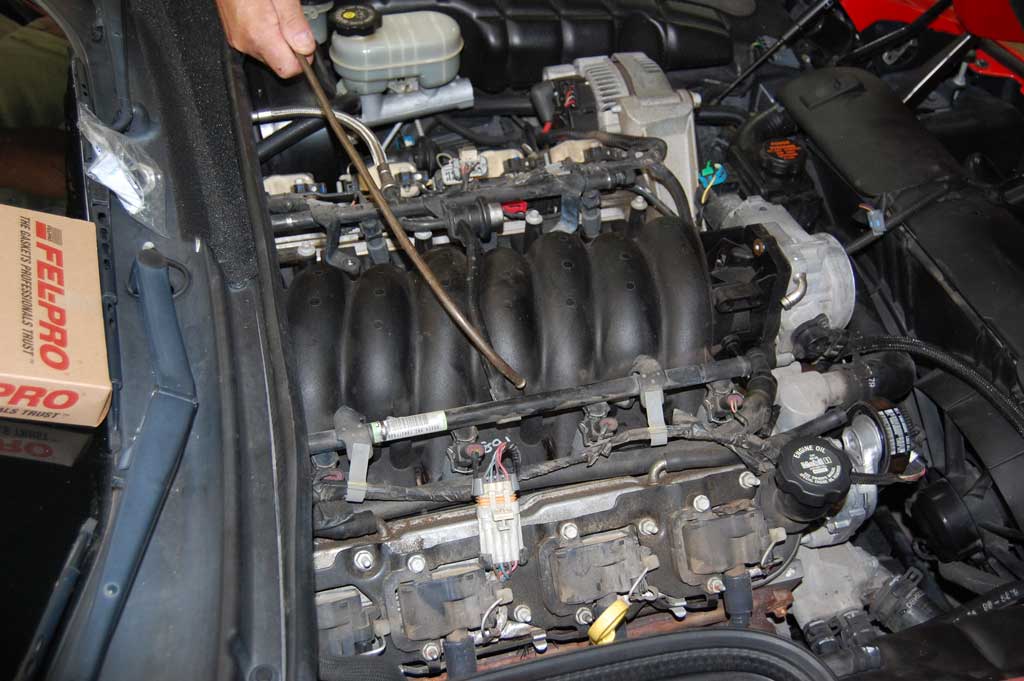
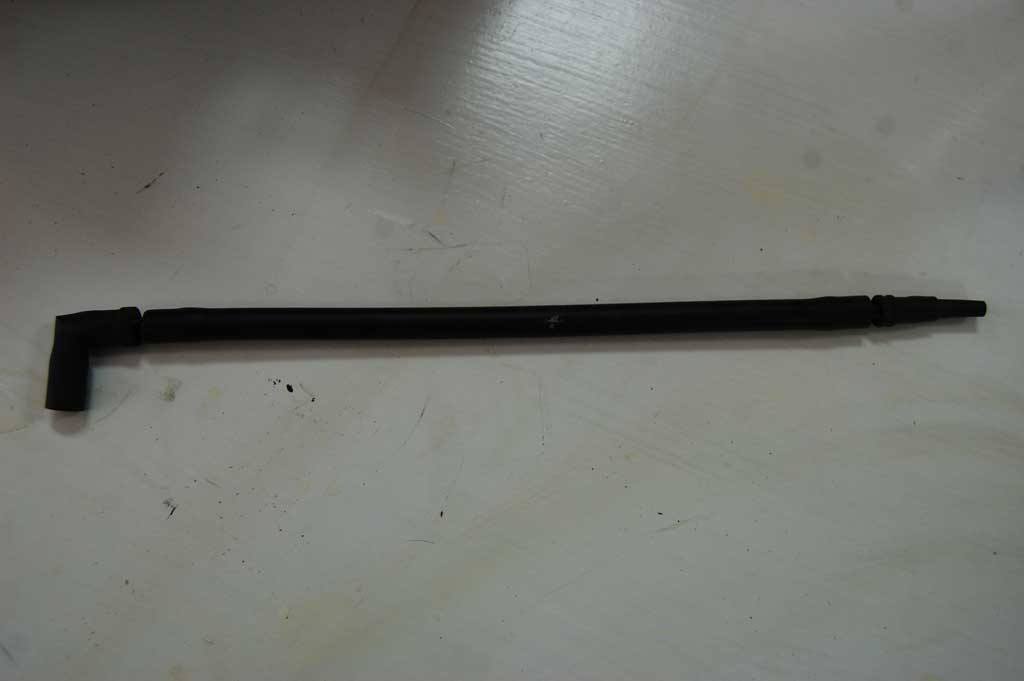
20- When it comes time to install the manifold, the most aggravating part is dealing with the plastic vacuum line that connects to the rear of the intake manifold. If GM had made the tube 4-6 inches longer, the task would be much easier. I make this tube assembly from 5/32 vacuum hose, two hard plastic vacuum connectors, and two soft rubber vacuum connectors to lengthen the tube assembly, for a much easier intake manifold installation. The straight end connects to the existing vacuum tube and the 90 degree end connects to the intake manifold.
Story and photos courtesy Chris Petris
Will an faulty oil sending sensor cause my check engine light to stay on?
On photo #6
What is the red material/size/type (any info) used to plug the ports on the MAP sensor?
It is just a piece of silicone plug that was made to fit.
Hi oil sensor on my 98 C5 wire plug when bad previous owner try to change it pull the wires off the plug got new plug from the Chevy dealer same plug but all the wires are white there is 3 wire grey, black, & white/tan which wire goes to the 3 wires on the plug does any body knows
I sure appreciate the help Thank you
Thank you for de-mystifying the procedure to do this the right way. I do believe I would be pretty angry if someone cut a hole in my cowl box to get to this sender…
After watching a Utube video about doing this job without taking the intake manifold off I gave it a try. Had to use a 1 1/16″ old spark plug socket to get it done but not too hard. Now my oil pressure gauge is working just fine.
If you don’t miss me asking, what procedure specifically did you request to discover this procedure “without” taking the manifold off please?
bonjour moi j ai mis 1heure pour changer le contact pression d huile
sans rien demonter
ilsufit d enlever les essuis glasse la plage en plastique sous le pare brise faire un trou de 8centimetre
et voila le contact a portee de main
cordialement
—————————-
hello me I put 1 hour to change the contact oil pressure
without dismounting
it is necessary to remove the wipes glasse the plastic beach under the windshield to make a hole of 8centimetre
and here is the contact at hand
cordially
Enjoyed and appreciated your guide on the oil pressure sending unit. Unfortunately, after watching numerous YouTube videos attempted to take a short cut in removing the sending unit… I pulled the wires out of the sending unit plug and have now removed the intake manifold to correctly replace the sending unit. Can the plug be purchased separately and then spliced to the little wire I have left to work with?
Unfortunately, this is not a pigtail/connector that we are offering yet. It looks like it may be the AC Delco PT1825, but I don’t have a way to confirm that currently.
This seems pretty straight forward. I’ve watched several videos and many say drain the coolant. Is this necessary?
Thanks
No, to there is no need to drain coolant.
This is for oil pressure – if there is coolant inside where this sensor is attached you have bigger issues than a leaking sensor.
Regards,
Gus
Corvette Central Product Assistance
Yes, all this information is great as I have watched my dad work on cars my entire life. My mom passed away and left me her C5 and my dad is thoroughly enjoying watching me work on it as he is not expected to help me since there is so much valuable information on the web. I truly appreciate your step by step instructions!!
Thank you for your help.