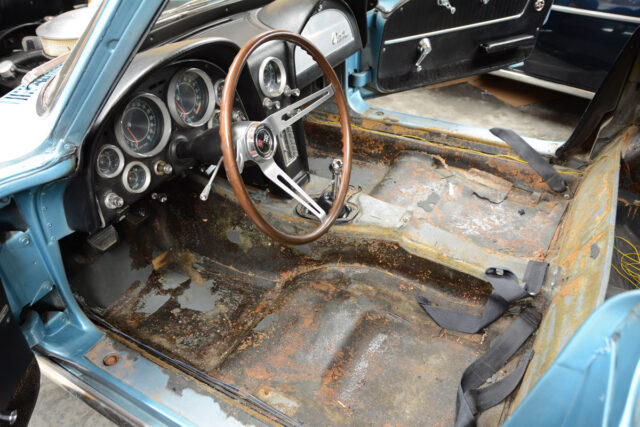
If you own a 1963 or 1964 Corvette, you know that early C2 carpet doesn’t age well, thanks to the overlapping design that eventually changed to a more seamless construction in 1965. In the case of our 1964 Corvette coupe project car, the sun had faded the black carpet, and the adhesive started turning loose. It was really hurting the appearance of the car, and we finally decided to overhaul the interior, starting with new carpet.
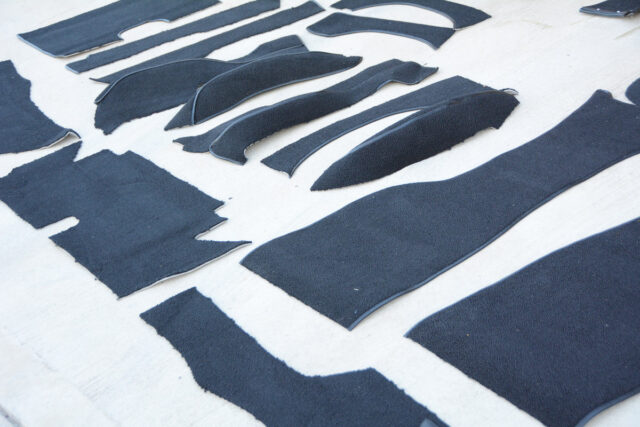
The Corvette Central carpet kit is sourced from Auto Custom Carpets, Inc. (ACC) and it’s a complete kit for 1963 and 1964 Corvette coupes. This kit fits coupes with or without the rear blower motor. Our project car happens to be a late 1964 coupe, which has the blower motor. Along with the carpet kit, it’s a good idea to replace the quarter panel trim pieces, as well as the plastic rear window garnish molding and rear deck vinyl. You can also go a step further with new insulation or even additional insulation like HushMat. You’ll also need some heavy-duty scissors, a carpet knife and at least two cans of 3M General Trim Adhesive, or a quart of Al Knoch carpet adhesive.
Most importantly, you’ll need patience for this project, as it is tedious and time consuming. Keep in mind that you’re installing 19 pieces of carpet in a very small interior, and they all require a special order of installation. Most pieces require trimming for proper fitment, but the custom-tailored appearance is worth the hours you’ll spend test-fitting and trimming. The end result is a beautifully restored interior that looks better than new. See how we tackled this project, and take note of some of the tips and tricks to make your C2 coupe carpet installation quicker and easier.
How to Install Early C2 Corvette Carpet
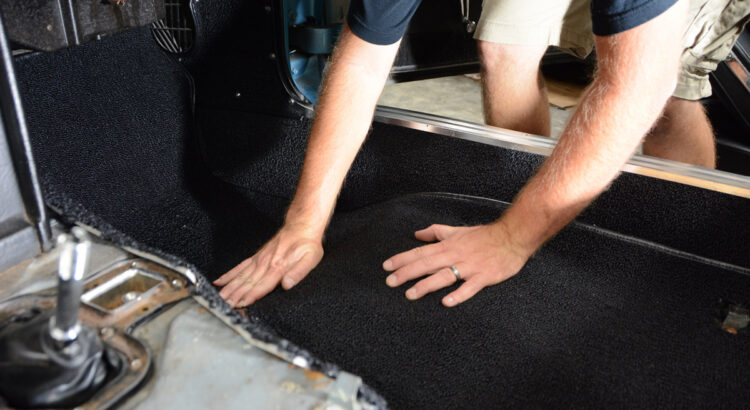
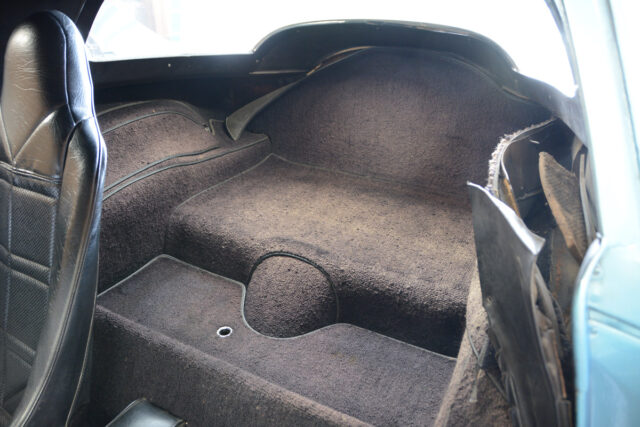
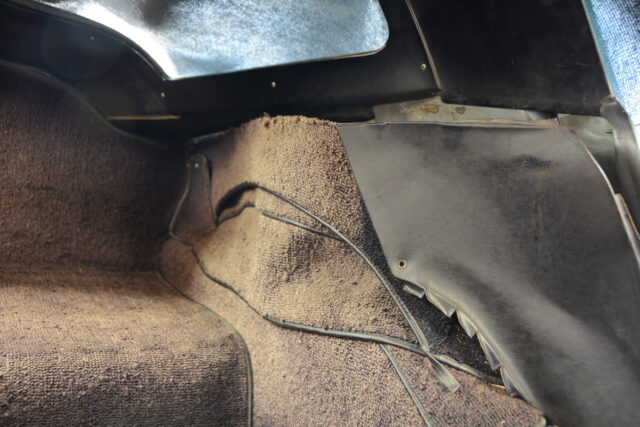
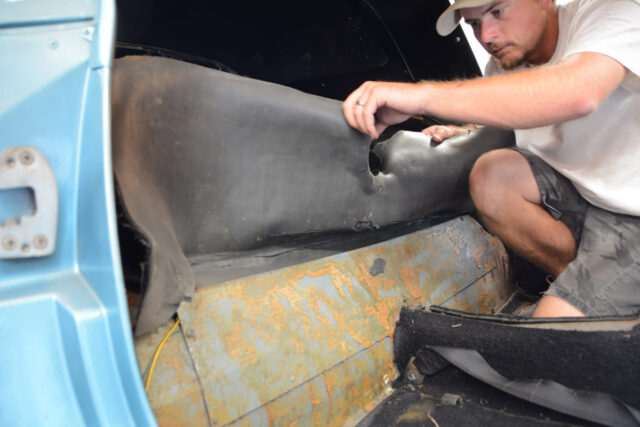
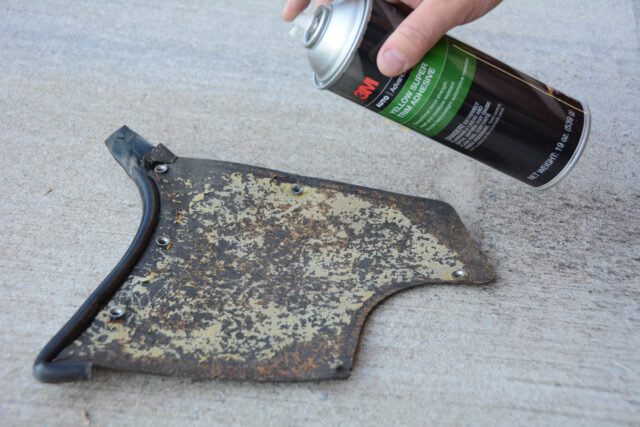
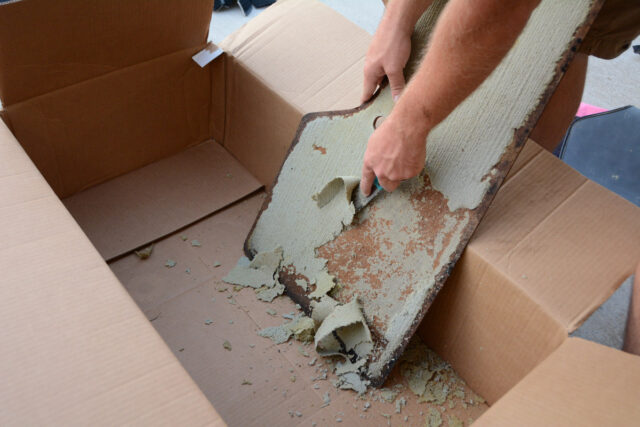
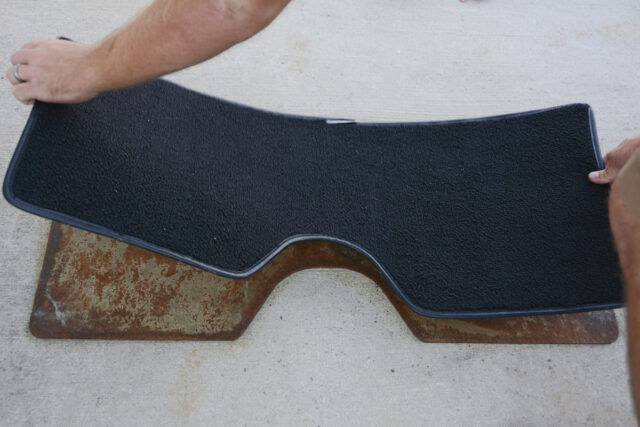
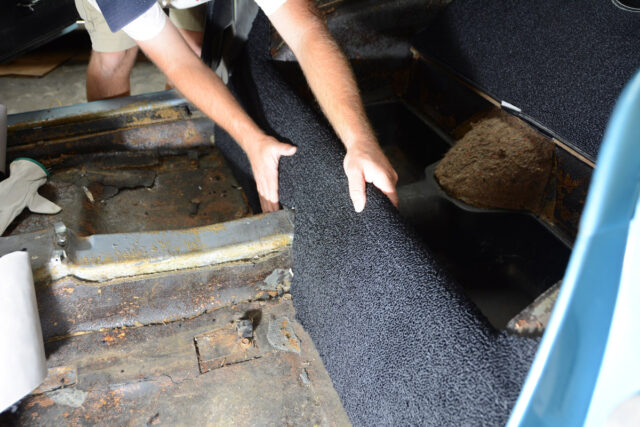
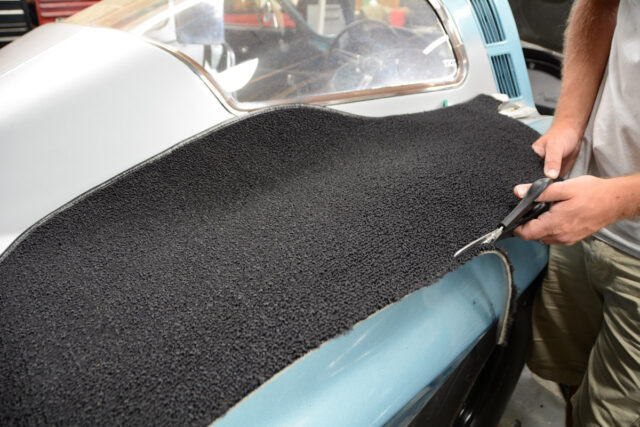
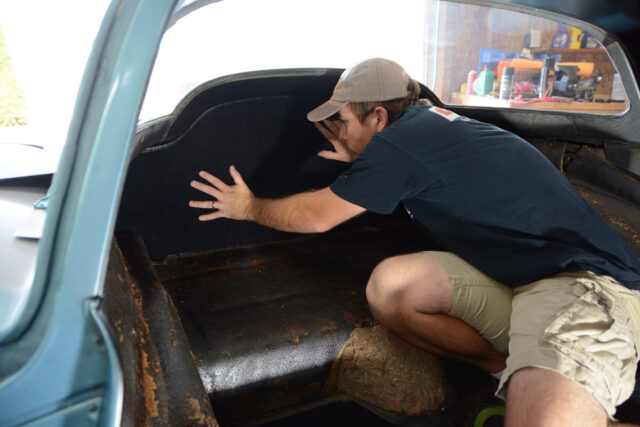
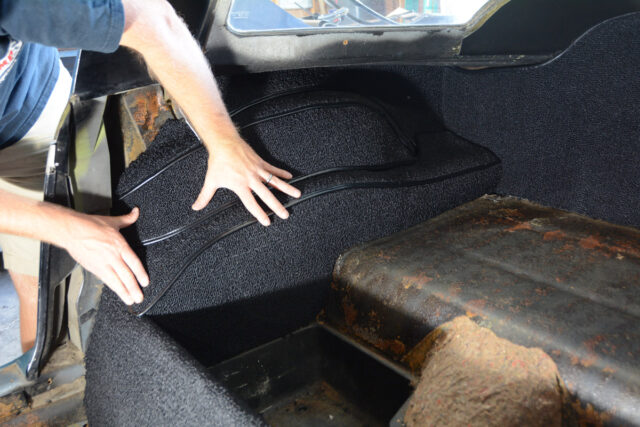
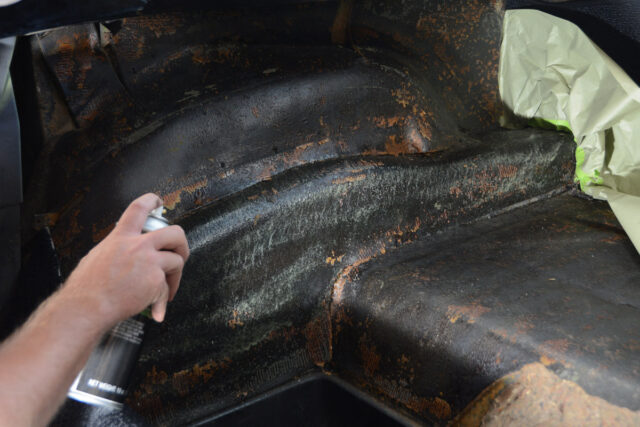
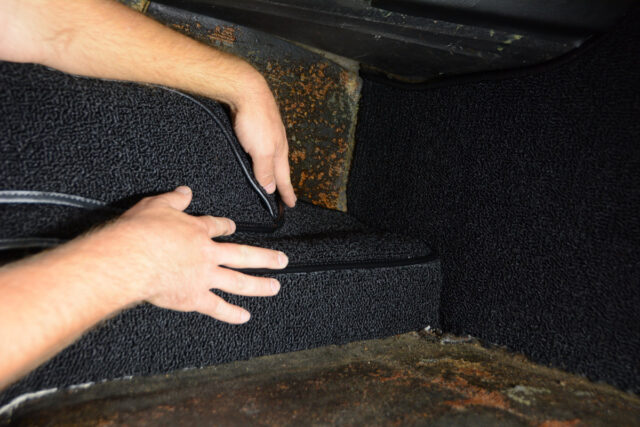
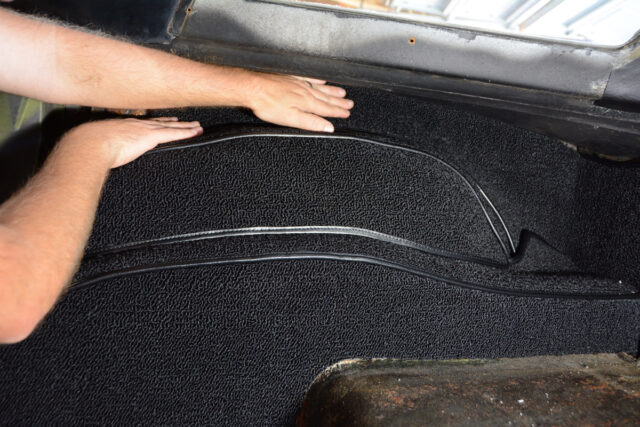
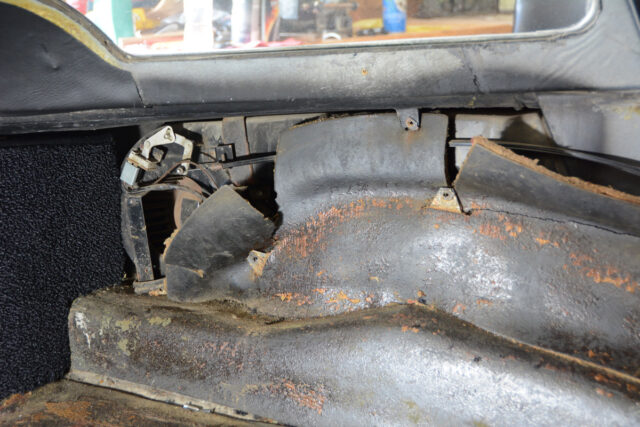
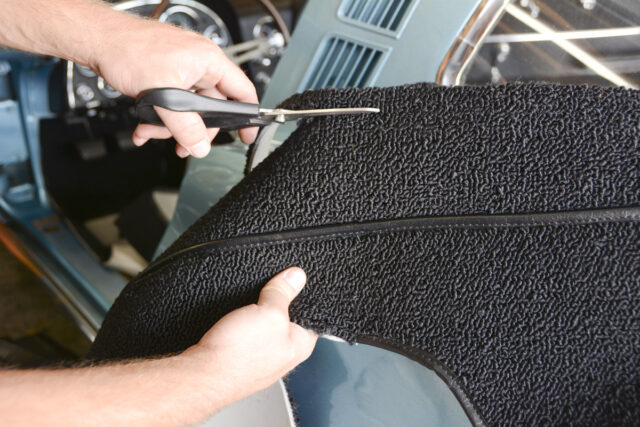
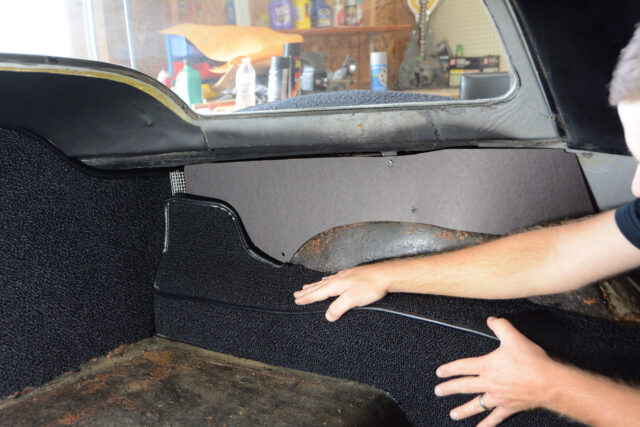
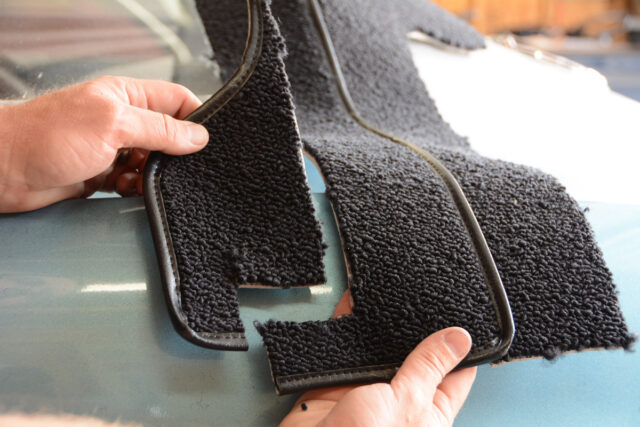
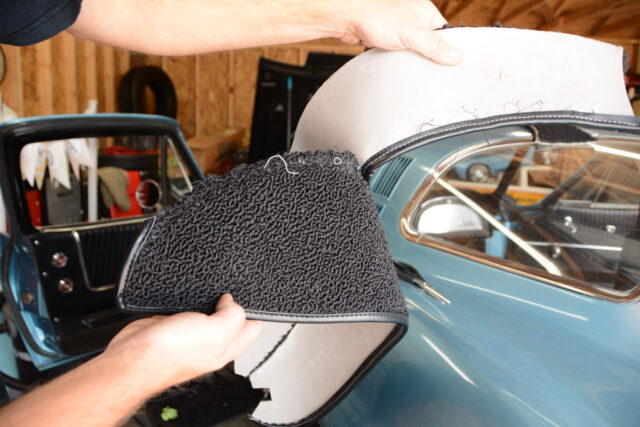
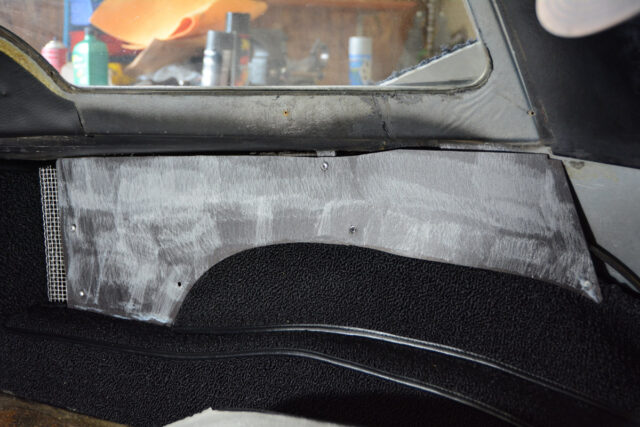
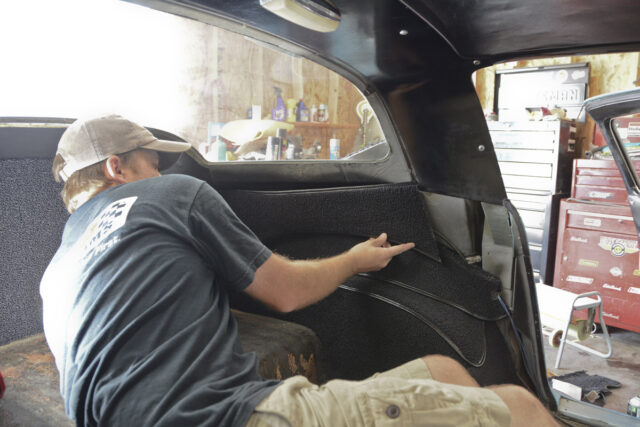
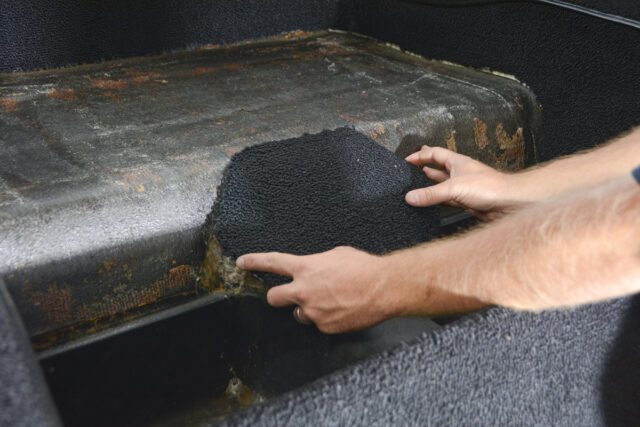
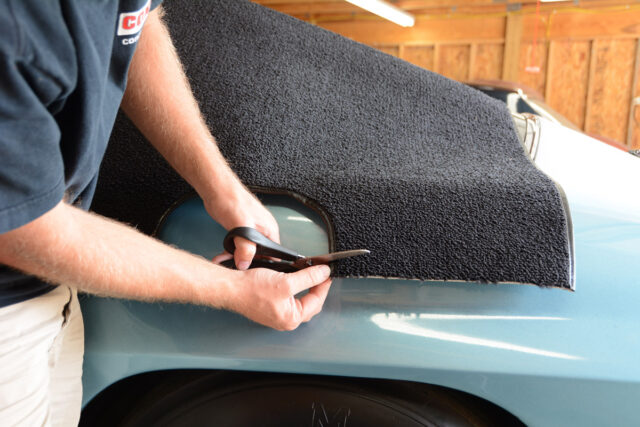
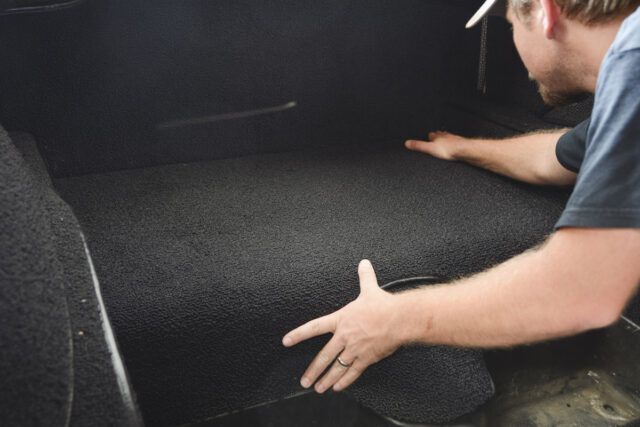
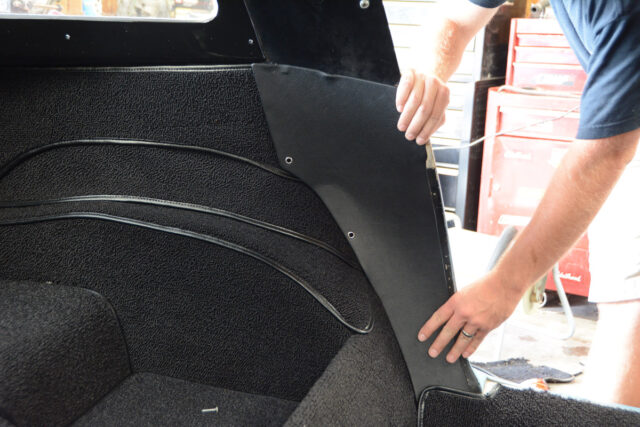
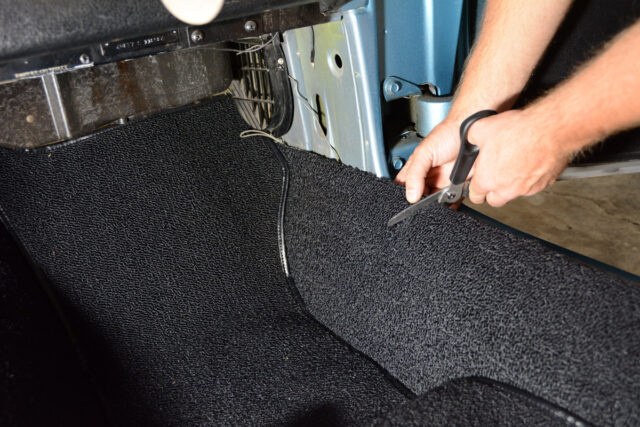
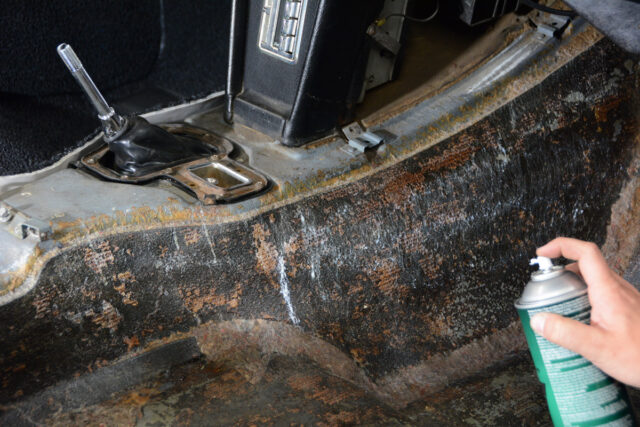
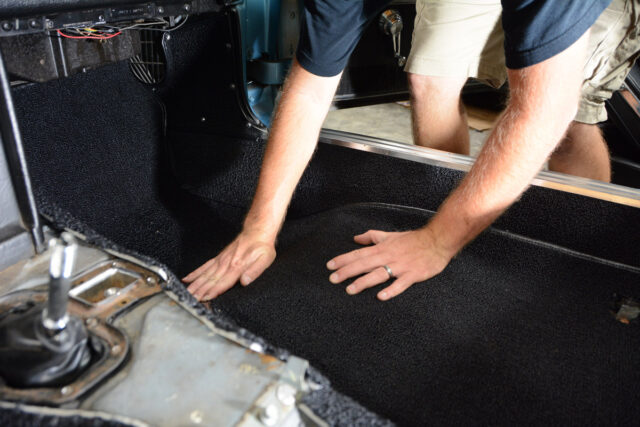
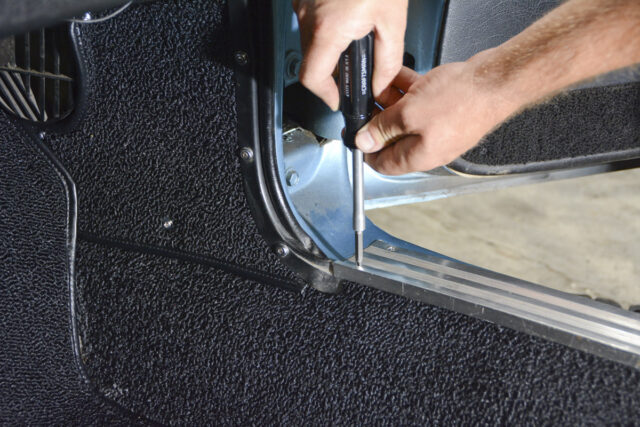
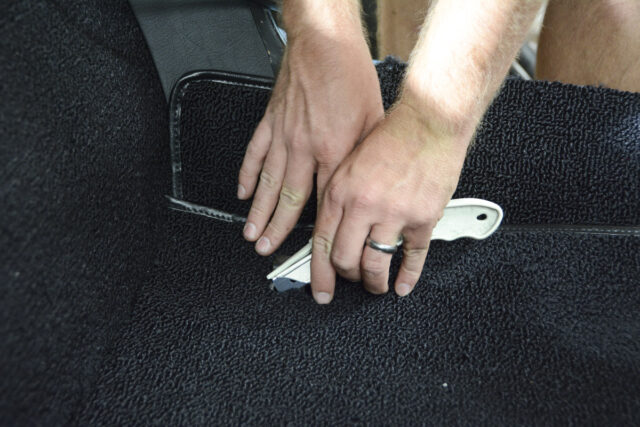
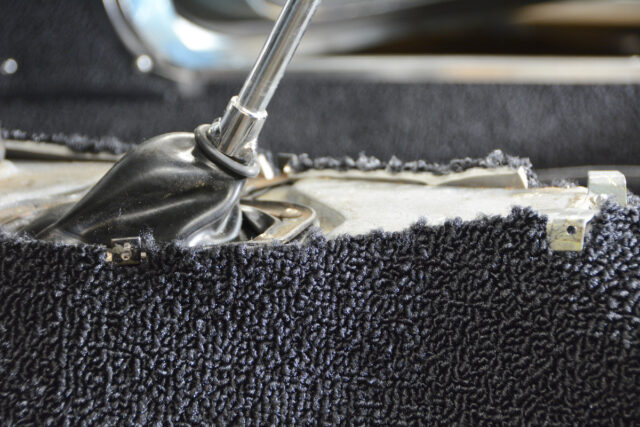
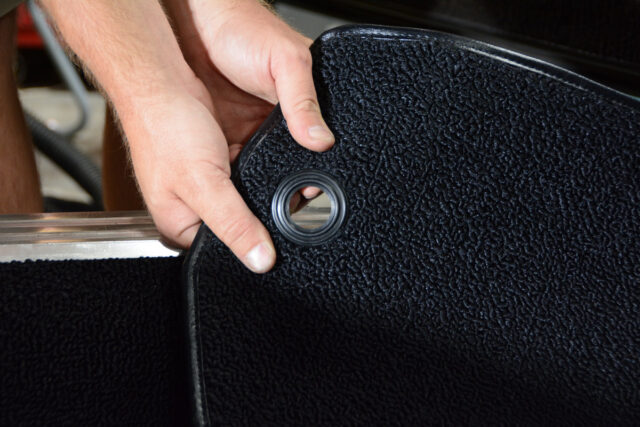
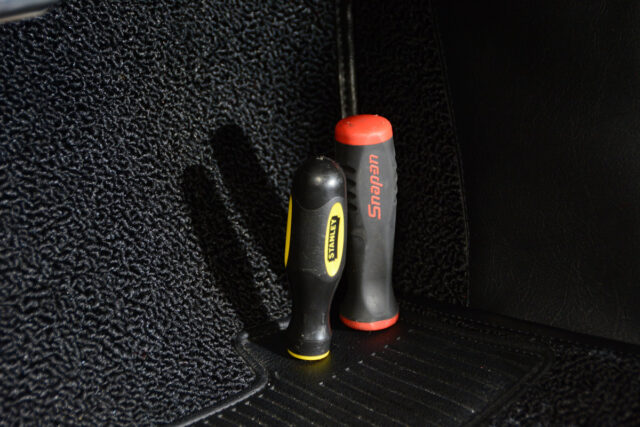
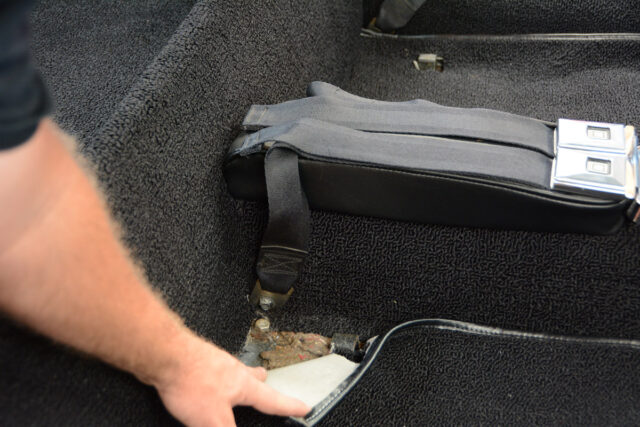
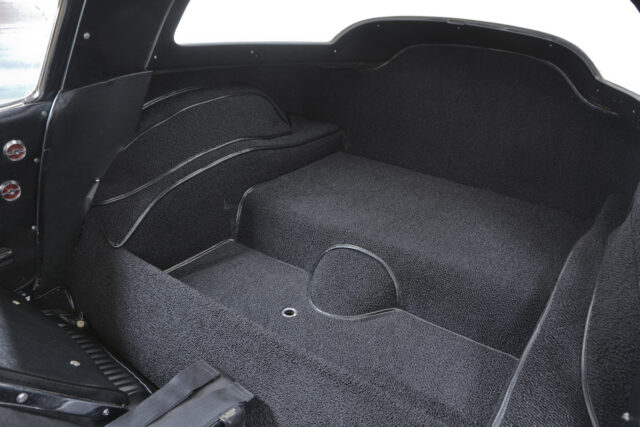
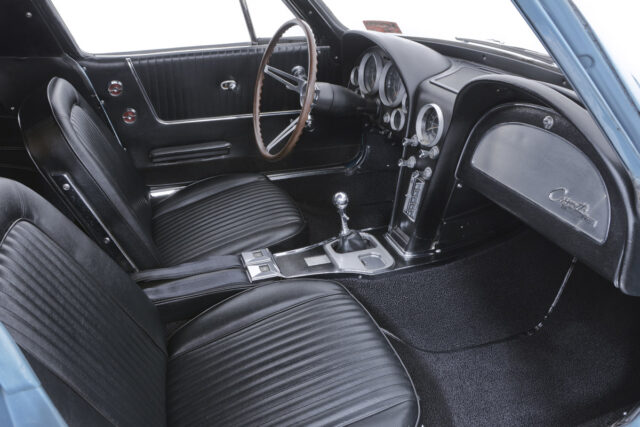
The carpet in our 1964 Corvette coupe was looking rough on all accounts. The black carpet had faded badly, and many pieces had lost adhesion after 30-plus years in the car.The unfortunate part about early C2 carpet is that most of it glues into place. That means as years go by, the elements will take its toll on the adhesive and the carpet itself, as evidenced by the buckled carpet over the driver’s side wheel well. Also notice the adjoining interior panels, which need to be replaced.Removing the carpet is a fairly quick process. In most cases, the carpet isn’t stuck to the interior panels hard enough to leave behind a mess. You’ll be removing 19 pieces of carpet, so you may benefit from keeping the carpet together in various sections to help with the reassembly process.The seats are removed, as is the console and center armrest. You’ll also need to remove the kick panels, the throttle pedal and the door sill plates.Corvette Central’s carpet set is specific for 1963 and 1964 Corvettes. It’s important to take all of the contents out of the box and lay them out in the sun to let them straighten out. This also allows you to do a quick inventory of the pieces.We started with the smallest pieces to get an idea of the setup time and the results of the 3M Trim Adhesive. After scraping the leftover foam and adhesive from the kick panels, we spray the panel and the backside of the new carpet.The cover for the rear storage area was our next subject, as it was also a straightforward process, like the kick panels. The old carpet was barely hanging on, and there was a ton of leftover foam and adhesive on the panel. We scraped it clean and sprayed adhesive on the panel, allowing it to sit a couple minutes to tack up.There are a couple ways to tackle the rear storage cover. The method shown here can work, but we found it easiest to line up the carpet with the panel by flipping the carpet over, and pressing the panel into place. The long, straight side of the carpet will leave about 1/8-inch of the board exposed, and it will be hidden when the panel is in place.Using a razor knife, we cut the carpet around the pull tab hole in the storage compartment cover. We reused the original chrome bezel, bending the three tabs around the panel to secure it. These tabs can easily break, but new pull tab bezels are available.After some studying, we decided the first piece of carpet to install in the car is the divider panel behind the seats. Since we’ll be climbing in and out of the car often, it’s best to leave the front portion of carpet for last. The divider panel carpet is trimmed to fit and glued into place.The back wall carpet requires trimming along the bottom edge for an exact fit. We used scissors to make long cuts, and used a carpet knife for some of the more intricate cuts.Get ready to climb in and out of the back of your C2 coupe dozens of times. Trim a little at a time until it’s to your liking and then spray the carpet underlayment, as well as the backside of the new carpet with adhesive. On a warm day, the adhesive sets up quickly, especially after it has made contact with the adjoining panel.An important step is to mock up the wheel well carpet. We started with the passenger side, laying the three pieces of carpet into place and figuring out how they are oriented. The piece closest to the floor goes in first, and requires trimming around the bottom edge, while the other two pieces require minimal trimming.Masking tape and paper can be used to prevent the adhesive from getting on the new carpet that we’ve already installed. You’ll notice that tape doesn’t stick very well, so we eventually used a scrap piece of carpet as a guide to keep the glue where we wanted it.We trimmed the carpet until the vinyl seam aligned with the curve of the fiberglass wheel well. Then, we installed the intermediate piece of carpet, which overlaps the bottom piece. At the rear, the intermediate wheel well carpet seam is split, allowing the lower piece to lap over. This orientation is why it’s important to mock it up before gluing.Finally, we can install the upper piece of carpet, which overlaps the intermediate piece, and tucks behind the lower piece at the rear. After fitment and minimal trimming, we glue the upper carpet into place.We also installed new interior quarter panel trim, which are factory-style cardboard pieces, wrapped in vinyl material. These pieces are a little tricky to install, thanks to the thickness of the new carpet. The panels slide in behind a piece of channel on the door jamb and they are held in place with two screws.This is where it gets a little more difficult. According to our research, the driver side wheel well of 1963 and early 1964 Corvettes was essentially a mirror image of the passenger side. However, late 1964 (and 1965) coupes featured a rear blower motor, which spaced the carpet out further.Here, we cut the bottom edge of the lower piece of wheel well carpet. It’s best to trim the carpet to have 1/8-inch gap at the bottom, to allow the main floor carpet to tuck in beneath it.The carpet kit comes with pieces to accommodate both styles of rear wheel wells, so you’ll end up with one extra piece. Our first step is to mock up the cardboard cover for the blower motor, and then mock up the lower section of carpet.Since our car has the blower motor, we needed to trim the lower section to fit beneath the cardboard cover. This is how we did it, and the fitment was spot on. After some trimming along the bottom edge, the lower piece is ready for glue.Another step that is necessary for blower motor cars is to cut the threads that connect the two pieces of intermediate wheel well carpet on the driver’s side. Completely separate the two pieces, and discard the upper piece. You will only use the lower portion of this two-piece section.The intermediate piece overlaps the lower carpet section, and tucks in behind the cardboard blower motor cover. Notice the small “cage” that fits between the cardboard panel and the back wall carpet. This is where the rear vent allows air to circulate out of the wheel well area.You’ll choose between two options for the upper driver side wheel well carpet. For 1963 and early 1964 coupes you’ll use carpet that tucks in behind the lower piece (like the passenger side). On late 1964 coupes with the blower motor, the kit uses a specific piece of carpet that has a vinyl seam around the edge. Factory restorations use exposed screws that go through the carpet and hold the cardboard in place. We installed the cover and glued the carpet to the cover without the exposed screws.Next is the small section to cover the rear differential hump. This piece glues into place with no trimming necessary.The main rear floor carpet requires trimming on the edge that folds down into the storage compartment area. Without trimming this area, the cover for the storage compartment will not fit correctly.The rear floor section has a vinyl seam around the sides and back, so it is designed to go in last. We left 1/8-inch gap in the lower wheel well carpet sections, allowing the vinyl seam to neatly tuck under the edge. After it is carefully fit into place, we glue it and press it down.Finishing off the rear carpet section is the driver’s side quarter panel trim. The panel has two small S-clips that slide into the upper “halo” interior panel. Then, the front edge slides into the channel in the door jamb and two screws hold it into place.After laying the front sections of carpet into place for mock-up, we can see what needs to be trimmed. Our first piece is the rocker panel carpet, which needs slight trimming around the front edge of the door sill plate and door jamb.The rocker panel section has very little wiggle room for front-to-rear fitment. The vinyl seam is designed to turn the corner at the rear of the door jamb, but you must also consider the overlap of the kick panel and the main floor carpeting when installing this piece.After the rocker panel carpet is glued into place, we glue the transmission tunnel carpet for the passenger side. The front sections of carpet require less trimming than the rear section.The main floor portion of carpet can now go in the passenger side. This piece has a vinyl seam around the sides and front, so it goes in last and requires no trimming for proper fitment.As we’re nearing the end of the passenger side front section, we can install the door sill plates, which overlap the rocker panel carpet, and hold it in place. The kick panels are also installed.Using a carpet knife, we cut around the front bolt holes and rear channels for the seats. You can allow the seats to rest on the new carpet, but you may need to find longer seat bolts to reach, due to the thickness of the new carpet.An area of concern on the transmission tunnel carpet pieces is console fitment. Be sure to trim the carpet around the console mounting tabs, but be careful not to notch the carpet too aggressively, as the console does not slide very far below these tabs.The main floor carpet on the driver side does not come with a hole for the dimmer switch, but it does come with a new grommet. After test-fitting the main floor carpet on the driver’s side, we found the appropriate place to cut the hole and install the grommet.One of the challenging aspects of the driver side main floor carpet is the fact that the carpet must be aligned perfectly with the throttle pedal bolts, as well as the transmission tunnel carpet section. We use two screwdrivers as guides for the pedal bolt holes.The last cuts are necessary to bolt the seats belts into place. Never use a drill to make the bolt holes in carpet—the bit can grab a thread and make a mess of your new carpet. Always use a knife to cut the holes, even if it’s more time consuming.We lost track of the time it took to install our early C2 carpet kit, but this is not something that you’d want to tackle on a single weekend. The most important tip we can give you is to take your time with trimming, and you’ll have carpet with a custom-tailored fit and finish.With the seats installed and the console re-assembled, our 1964 Corvette coupe looks like a totally different car. While time consuming to install properly, the carpet kit and related interior panels made all the difference in the world.