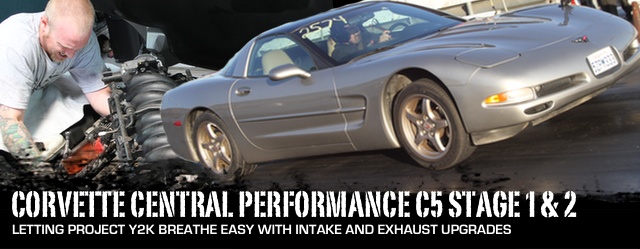
What follows has been reprinted with permission from Corvette Online. Written by Paul Huizenga
For a significant number of Corvette owners, the car as delivered from the factory is as good as it can possibly be – they go to great lengths to preserve originality and maintain their Vette exactly as it was when it sat in the dealer’s showroom. Others take pleasure in customizing their Corvette, extracting more performance wherever possible.
You might guess what category we fall into.
So, as soon as we got Project Y2k in the shop, we rolled it on the dyno to get some baseline numbers, then before the drum on our DynoJet had stopped turning, we had our friends at Corvette Central on the phone. You see, they’ve launched a new performance division, sensibly named Corvette Central Performance, and they’ve got staged upgrade packages lined up for the C5 – a perfect fit!
The idea behind their packages is to take the guesswork out of beefing up your 1997-2004 Corvette with upgrades that have been dyno-proven and build upon the previous step. All the stages use top quality parts from suppliers like Corsa, COMP Cams, and MSD.
Per Corvette Central’s Matt Gessler, creating the new performance brand was the next logical step. “As our website demonstrates, there is an impressive array of performance products available for Corvettes,” he explains. “But depending on the combination of parts ultimately selected, performance can either be improved or hampered. With this in mind, we want to eliminate the guesswork for late model Corvette owners who are searching for increased performance. The C5 performance packages are a great example of this. We’ve spent a lot of time researching and developing the product mix on Corvette Central Performance. As with every other product we sell, we source our performance products with the question ‘Would I install this on my own car?’ in mind.”
In this two-part series, we’ll show you where we started, do stages 1 and 2 with trips back to the dyno between each stage, then head to the dragstrip to get some real-world performance numbers. Follow along as we turn our decade-old project Corvette into a snarling hot rod that will outrun a stock LS3 C6!
Baseline Testing: A Factory Freak?
The 2000 Corvette was rated at 345 horsepower “at the brochure,” and based on the generally accepted 15% loss through a manual transmission, with a certain amount of hand-waving we arrived at an expected rear wheel horsepower number of something around 293. That’s consistent with the numbers you’ll find online for a stock C5 M6 – something between 290-315 horsepower at the tires.
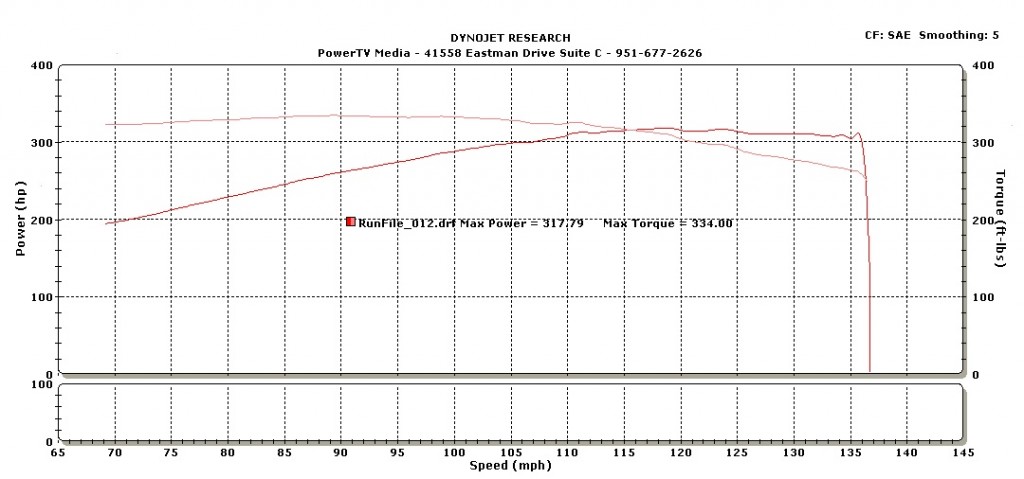
So, imagine our surprise when our Dynojet (which has proven to be both accurate and repeatable with the scores of cars we’ve tested here at powerTV) reported 317.79 horsepower and 334 pound feet of torque – very, very healthy for an 11 year old bone stock LS1 with 50,000 miles on the clock.
To confirm our findings, we also took Y2k to the dragstrip and made a few laps – while the engine was healthy, our rusty manual transmission launch technique left much to be desired, and the best we could do with an abused stock clutch was 13.480 at 105.43 – even with street tires and a slow 60 foot, a result that put us at the upper end of what an internet search would say is possible from a stock LS1-powered C5.
With the “before” part handled, it was back to the shop to begin our upgrade process with Stage 1, which consists of breathing upgrades on the front end, and Stage 2, which does the same for the outgoing gasses.
Stage 1: Breathe In…
Corvette Central Performance offers their C5 Stage 1 upgrade in two different versions: Part number 305341, for 2001-2004 LS1 Corvettes, and the version we used, part number 305322, for early 1997-2000 Corvettes. The primary difference is that 2001-up Corvettes came from the factory with an LS6-style intake manifold, so that’s not necessary in the kit for the later cars.
Stage 1 Contents:
- GM Factory LS6 Intake Manifold
- Callaway Honker Cold Air Intake
- Throttle Body Coolant Bypass Kit
- FAST Flash Programmer
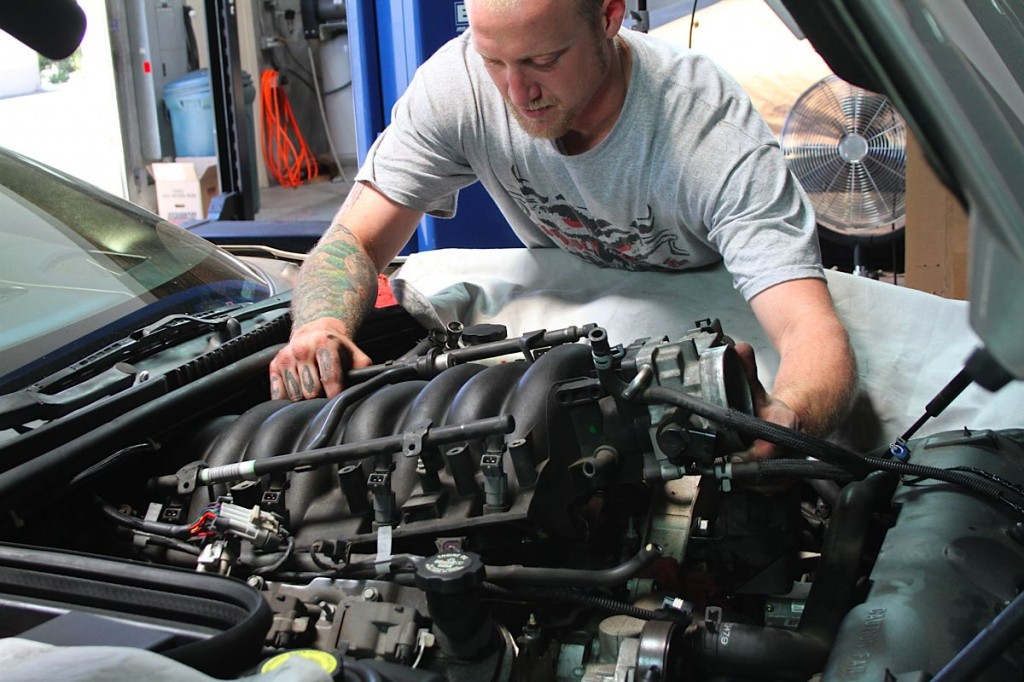 Our upgrades began with the removal of the stock LS1 intake manifold. Thankfully, the design of the LS engine makes intake swaps very simple, compared to doing the same thing on a traditional small block Chevy. No water in the intake, and no gaskets to scrape!
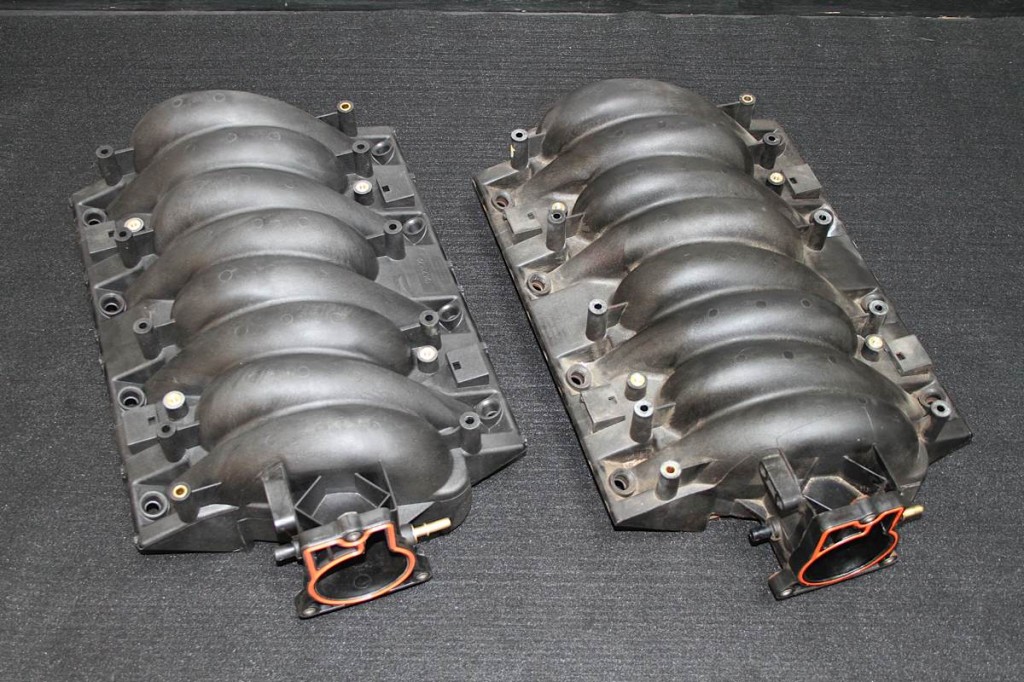
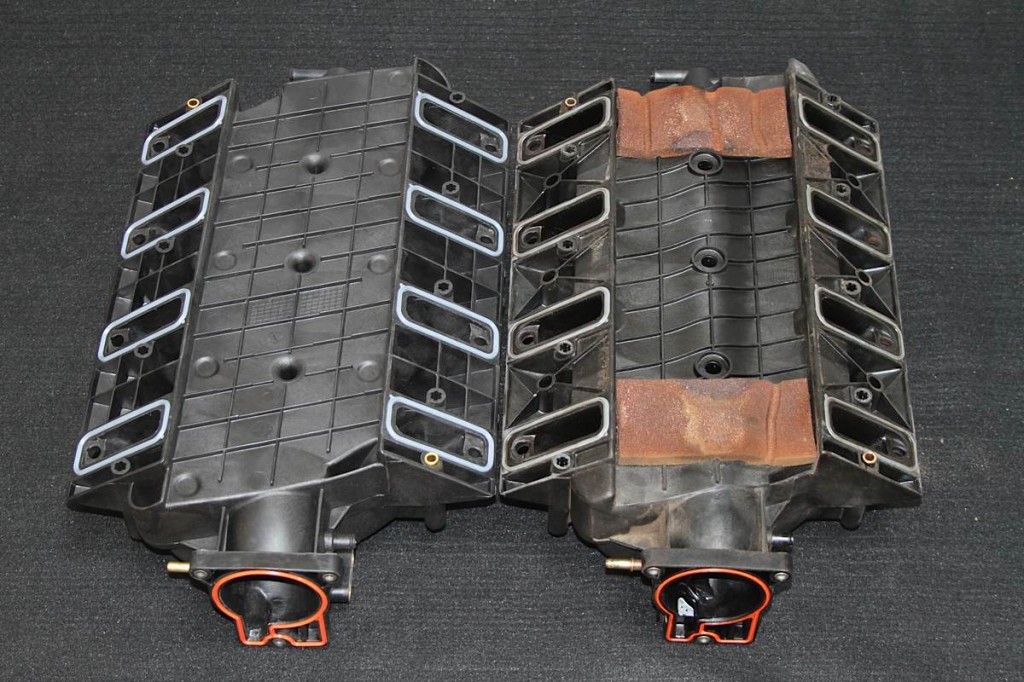
While the LS1 and LS6 intake manifolds are pretty much indistinguishable from the top, flip them over and the LS6 is easy to identify by its flat underside, compared to the recessed floor on the LS1. The stock cooling lines won’t clear an unmodified LS6 manifold, so Corvette Central provides a rerouting kit to go with the new manifold.
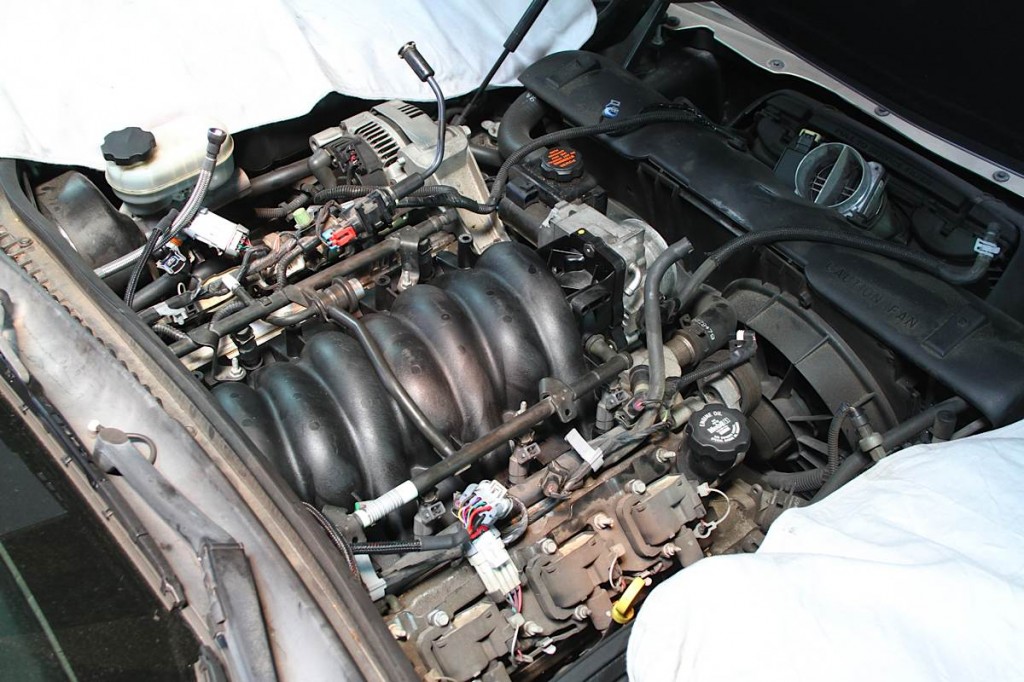
The new manifold is definitely a “stealth” mod for early LS1’s, and adds a decent performance increase all by itself.
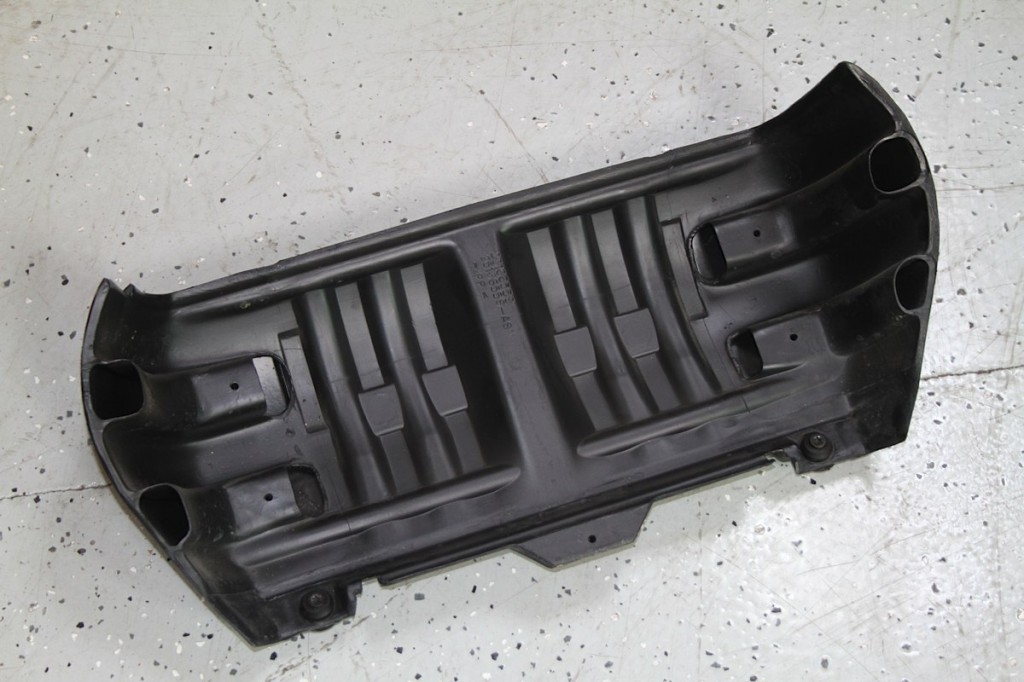
This is the inside of the stock airbox lid, which draws air from behind an enclosed part of the bumper, through those channels molded into the lid.
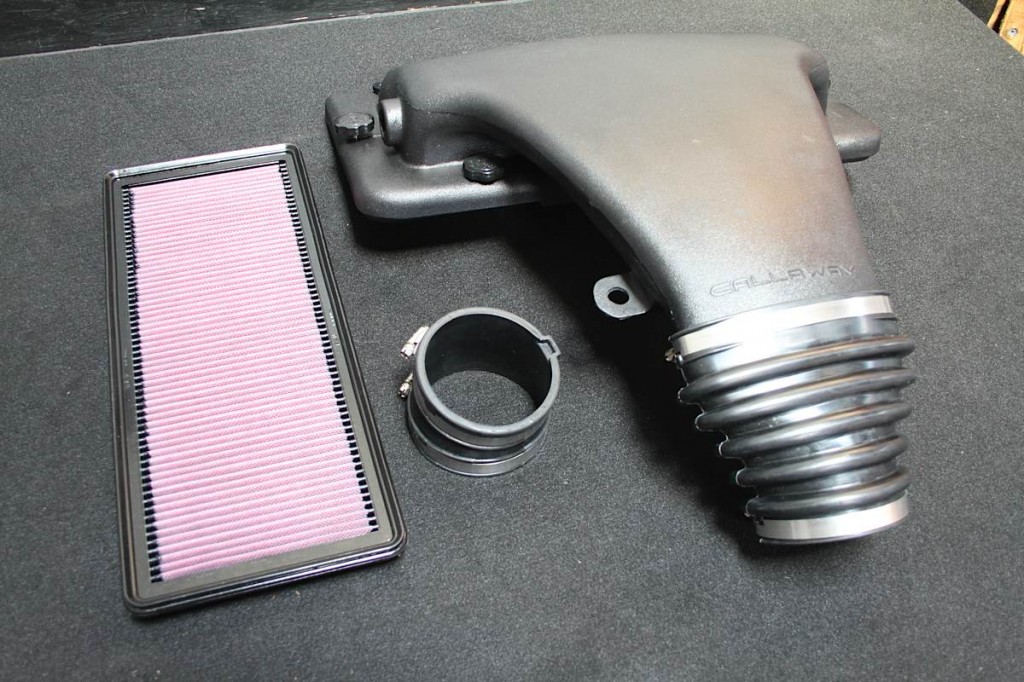
Callaway’s Honker air intake uses a high-flow reusable oiled cotton gauze filter element, and draws air from the high-pressure area also used to feed the radiator from underneath the nose of the car. It also replaces the stock “air bridge” that connects the intake to the mass airflow sensor.
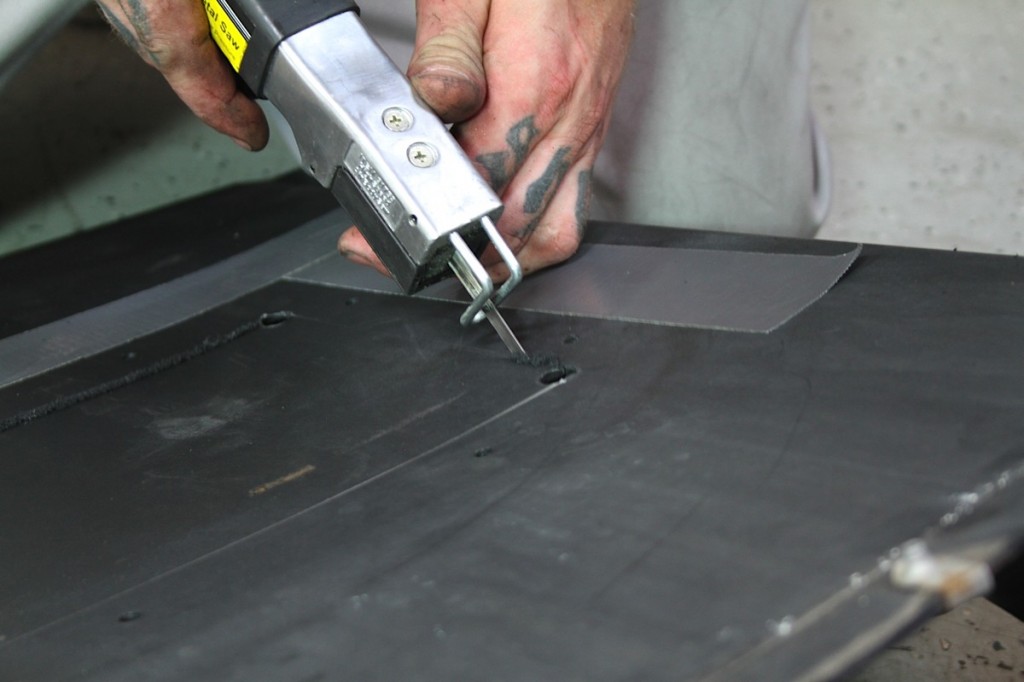
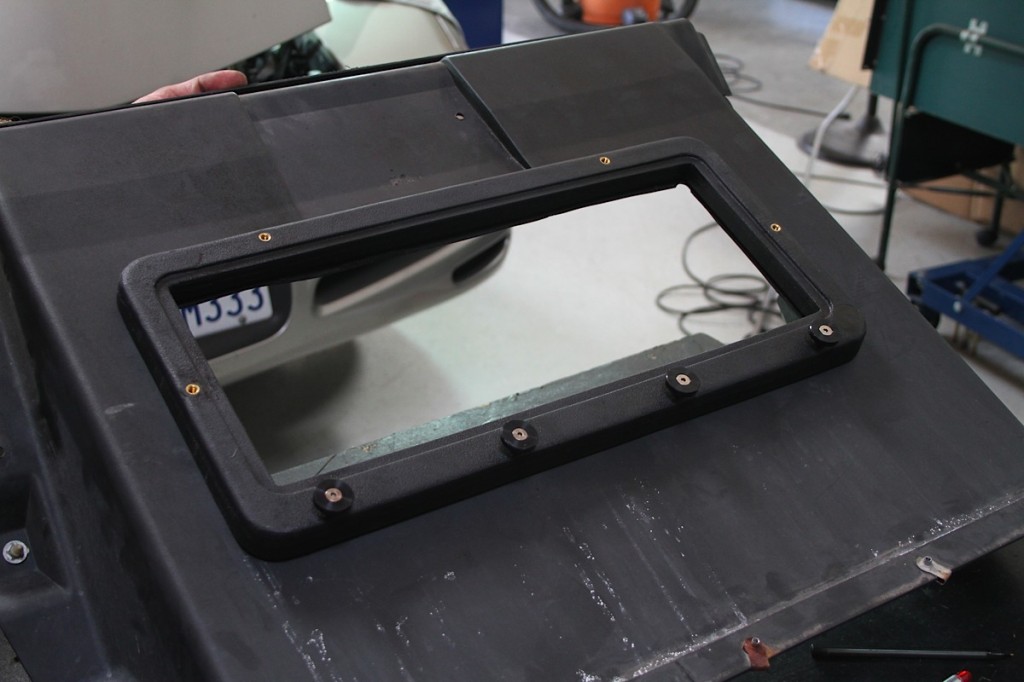
Installing the Callaway intake does require cutting a hole in the radiator shroud, but the provided template and comprehensive instructions make it an easy task. The base of the air cleaner assembly then gets pop-riveted to the shroud.
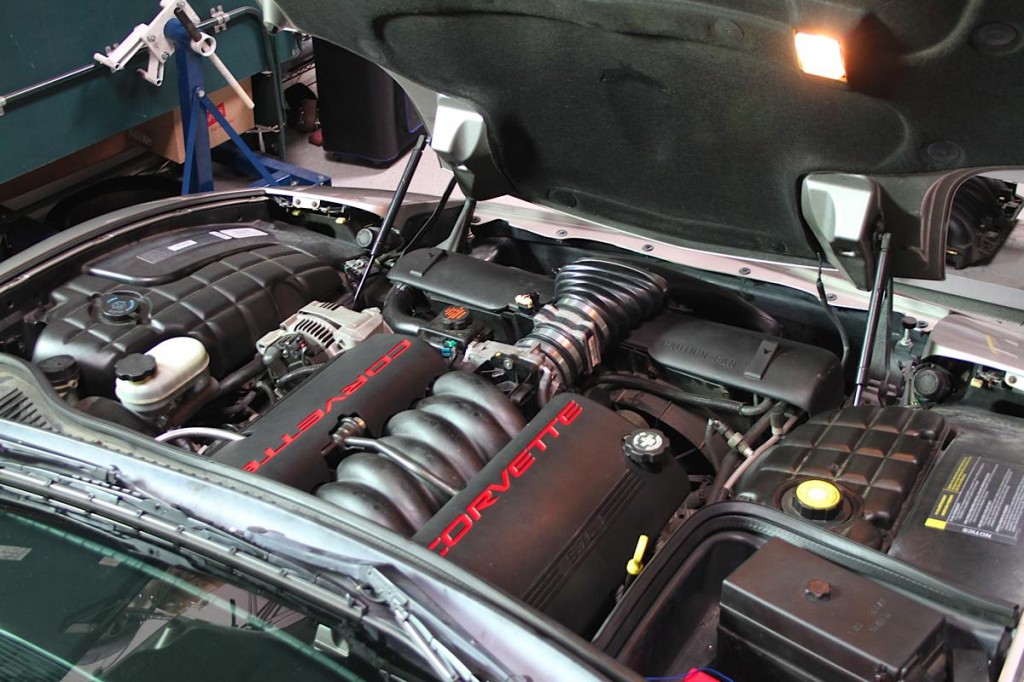
The final piece of hardware in Stage 1 is the throttle body coolant bypass, which is a simple barbed fitting that connects the feed and return coolant hoses together to help prevent the throttle body from warming up – Since we’re in SoCal, a frozen-shut throttle blade isn’t a real possibility. With all the pieces in place, there’s just one thing left before we head back to the dyno…
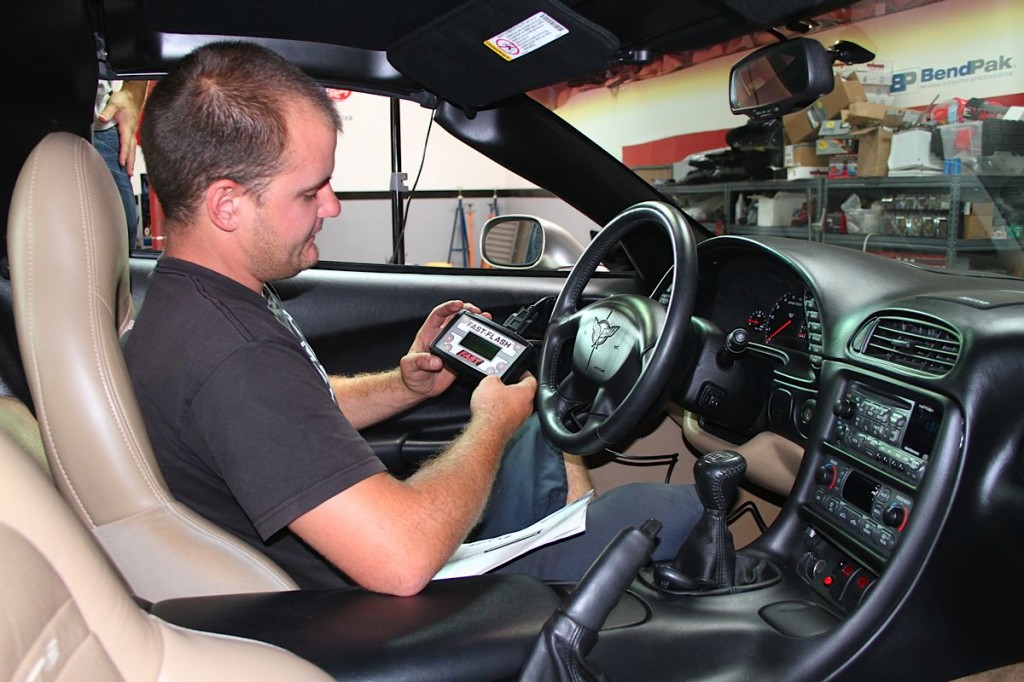
A major part of the Corvette Central Performance Stage 1 kit is the included FAST flash tuner, which we used to reprogram the PCM to take full advantage of the new, less restrictive intake tract. This component will also be important later on down the line as we progress through stages 2-4 and need to tune accordingly.
The Burden of Proof
The installation of Stage 1 was a process well within the capabilities of any moderately handy Corvette owner; not exactly “change the oil” simple, but a good project for someone who might be nervous about modifying their Corvette. Whether you do it yourself or have a shop turn the wrenches, Corvette Central Performance has you covered. Per Gessler, “We have product assistance reps in house for our DIY customers, but we also deal with shops around the world that help Corvette owners who may have more ambition than technical skill.”
With the parts installed, it was time to go back to the Dynojet and see what progress we had made. A few dyno pulls later and we had our result: an average of 337 horsepower and 345 pound feet of torque – an increase of almost exactly 20 HP and 21 torque just from freeing up the intake.
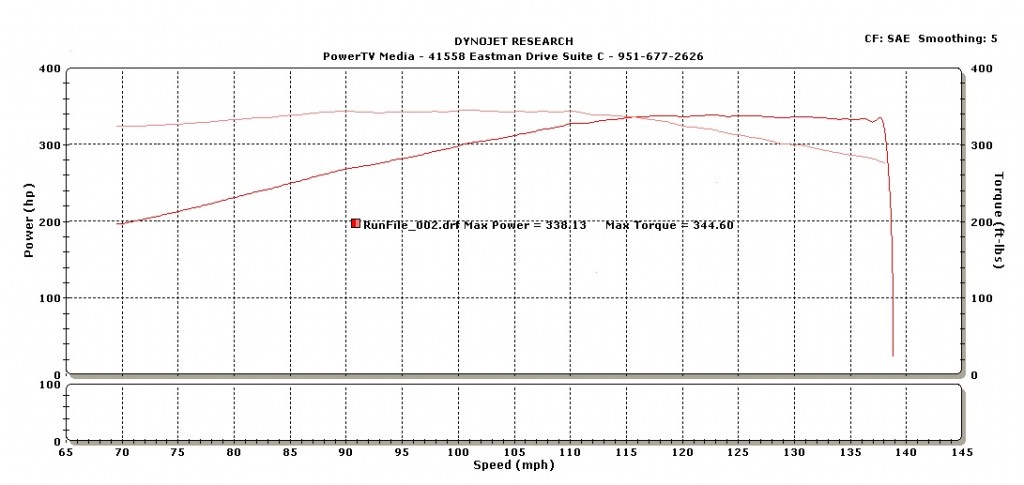
With our Stage 1 mods complete, we had gained 20 horsepower and 21 foot-pounds to the tires.
Stage 2: Breathe Out…
Pleased with what we had accomplished so far, we moved on to Stage 2 – a new axle-back exhaust, plus performance spark plugs and plug wires. Corvette Central Performance offers four different kit options for exhaust – a Borla Stinger system with either round or oval tips, or one of two different Corsa Indy Pace Car systems. We went for the gusto and selected the package with the Corsa system featuring quad 3.5-inch Pro Series stainless steel tips – part number 305418
Stage 2 Contents:
- Borla or Corsa Axle-Back Exhaust
- MSD 8.5mm Conductor Spark Plug Wires
- NGK TR5 Spark Plugs
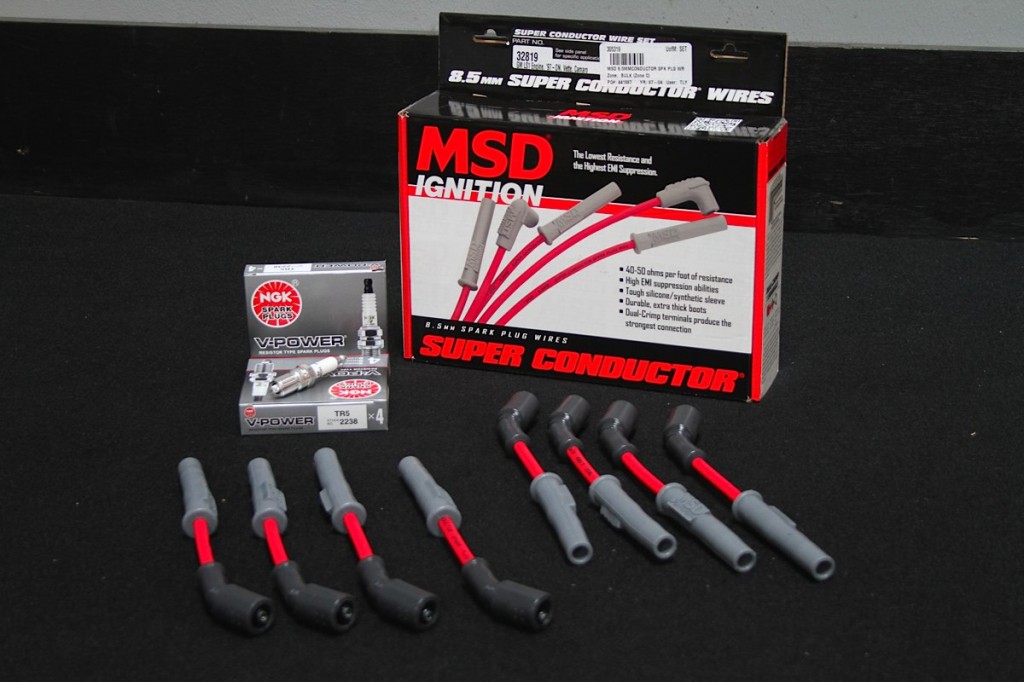
We’re not going to make any outrageous claims about how much horsepower some magic spark plug and plug wire combination will make, but after more than a decade of service, the stock components are plain worn out even if they look OK on the outside. A switch to top quality ignition components will ensure we’re getting all the spark we need.
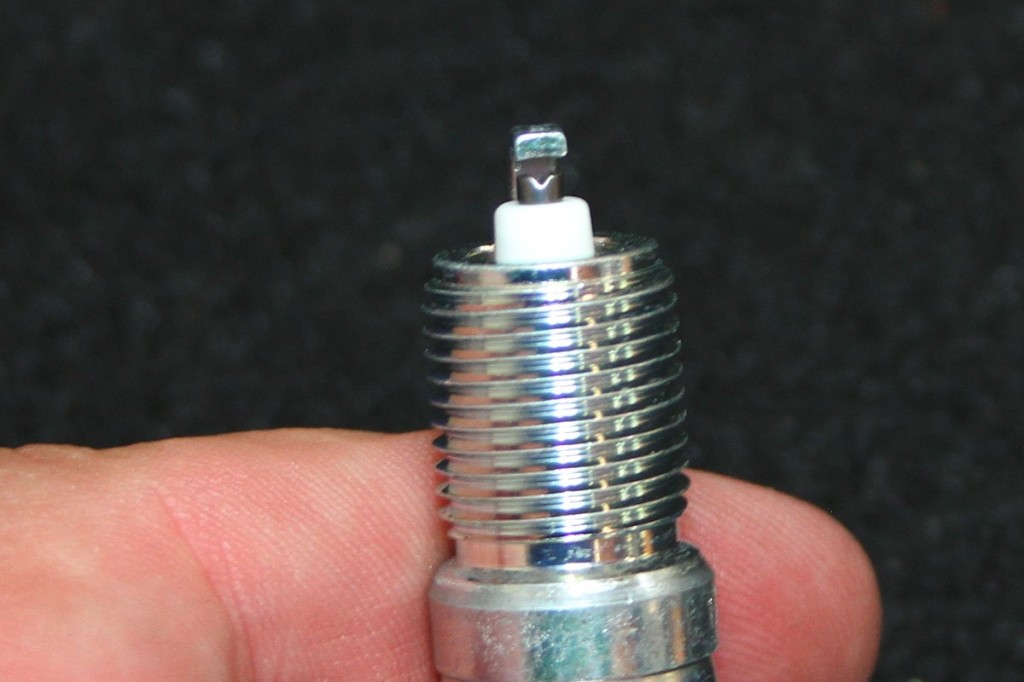
NGK’s V-Power plugs have a 45 degree center electrode, which offers improved anti-fouling characteristics. MSD’s 8.5mm Super Conductor plug wires are designed for high heat environments, which will be a plus once we get to Stage 3 and install headers.
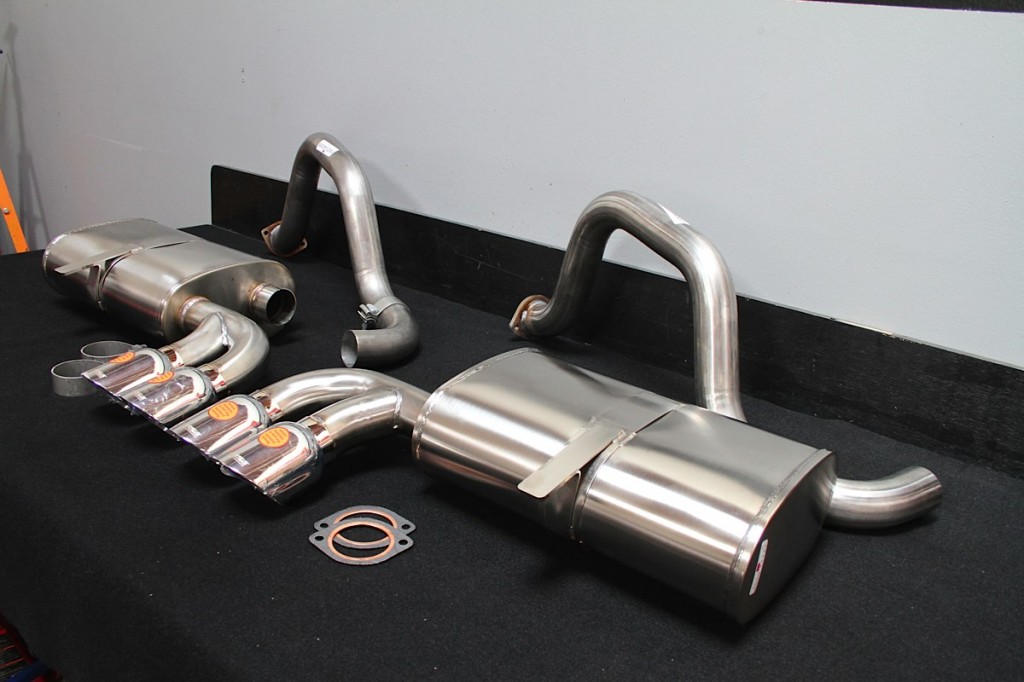
Corsa’s Indy Pace Car exhaust is part of their “sport” series featuring a straight-through muffler design for maximum performance. Their patented RSC technology makes for a free-flowing muffler that doesn’t have the interior drone you get with some other designs. If you’re looking for a quieter sound, their “touring” designs offer greater sound reduction through a slightly more restrictive layout.
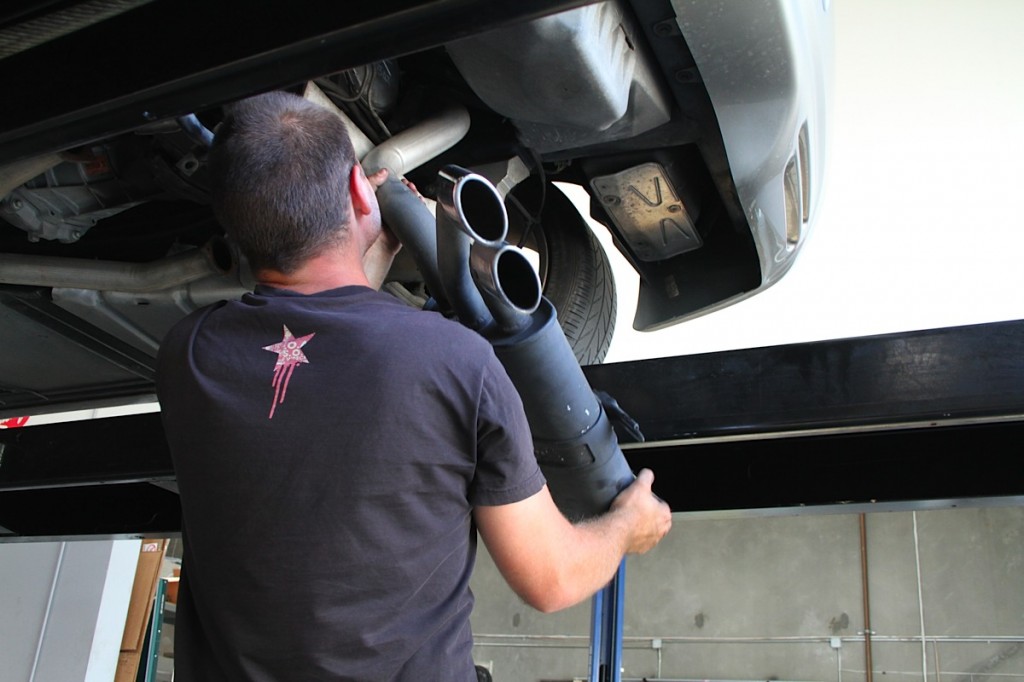
The wrenching on Stage 2 is about as easy as it gets, though removing and replacing those big mufflers is definitely a bit more convenient on a 4-post lift than jack stands…
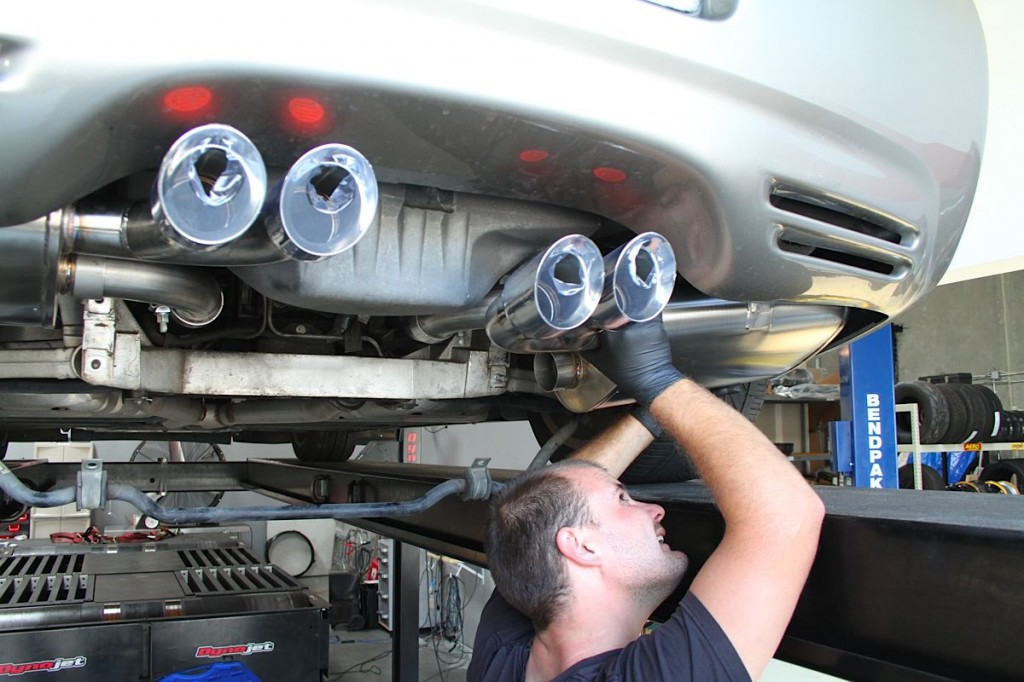
The new Corsa exhaust goes right back on – it features all-stainless 304 construction, right down to the clamps and hangers, and the mandrel-bent tubing allows a claimed airflow increase of up to 47% better than stock.
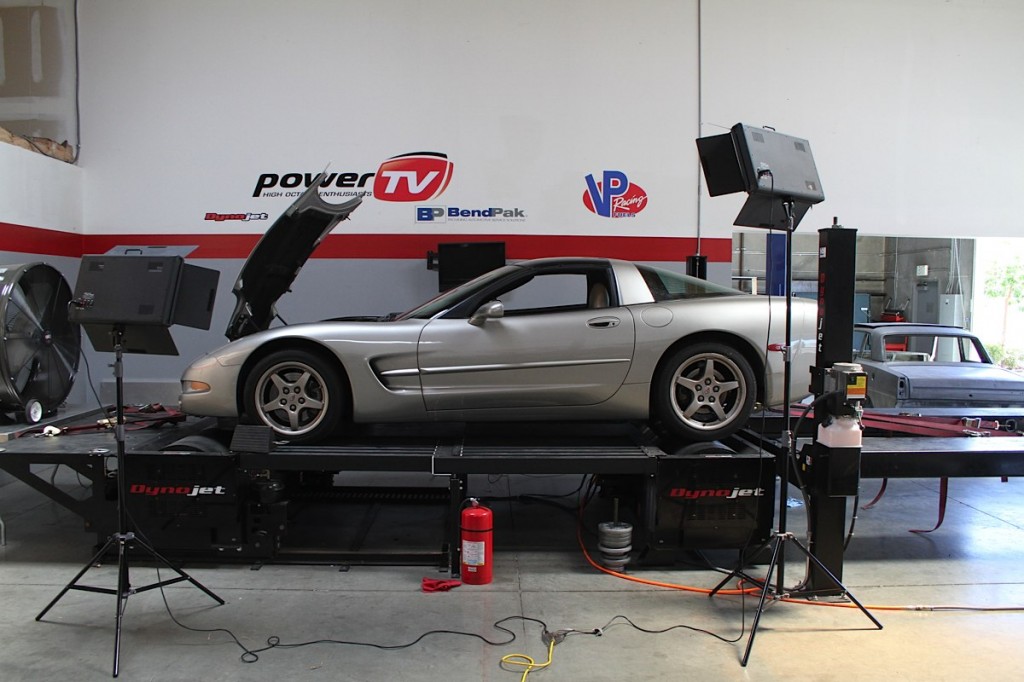
With the Stage 2 installation complete, we were back on the Dynojet to quantify our results…
Rounding Up A Few Extra Ponies
Before we dyno-tested Stage 2, we honestly didn’t know what to expect. Corsa says their exhaust system is good for “up to 10 horsepower,” but the Conventional Internet Wisdom is that until you get to somewhere around 500 rear wheel horsepower, the stock Corvette mufflers aren’t the bottleneck. As far as the spark plug and wire swap went, we had no reason to suspect that we were getting any misfires or power loss with the stock pieces, so we didn’t think any improvement attributable to the ignition would be measurable by the dyno.
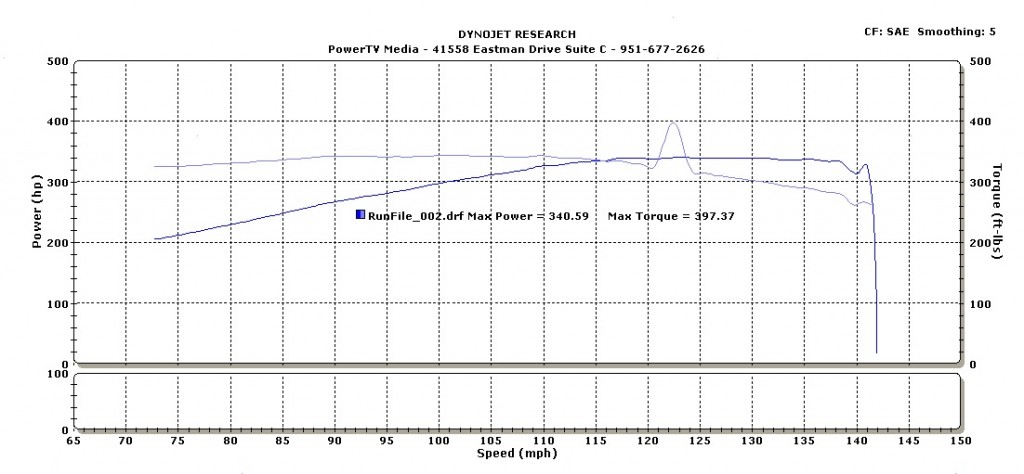
With those thoughts in mind, we were definitely pleased when our Stage 2 dyno pulls revealed an average of 340.59 horsepower and 343.00 pound feet of torque. While picking up three horsepower and dropping a couple of pound feet doesn’t sound like anything worth celebrating, it showed that there was a definite benefit to doing the first (and often last) mod most Corvette owners will perform – an axle-back exhaust swap.
There’s no point in making more power if you don’t intend to use it, though, and we did – Just two days after finishing Stage 1 and 2, we were off to our local 1/8th mile dragstrip to see what we’d gained. For reference, our best stock pass (the 13.48 we mentioned earlier) netted us half-track numbers of 8.751 seconds and 80.67 MPH.
With an additional 23 or so horsepower and another nine pound-feet, we knew that Y2k would be quicker, but how much? With the same 2,500 RPM, clutch-saving no-wheelspin launch, our best effort with Stage 1 and 2 complete was an 8.616 at 81.97.
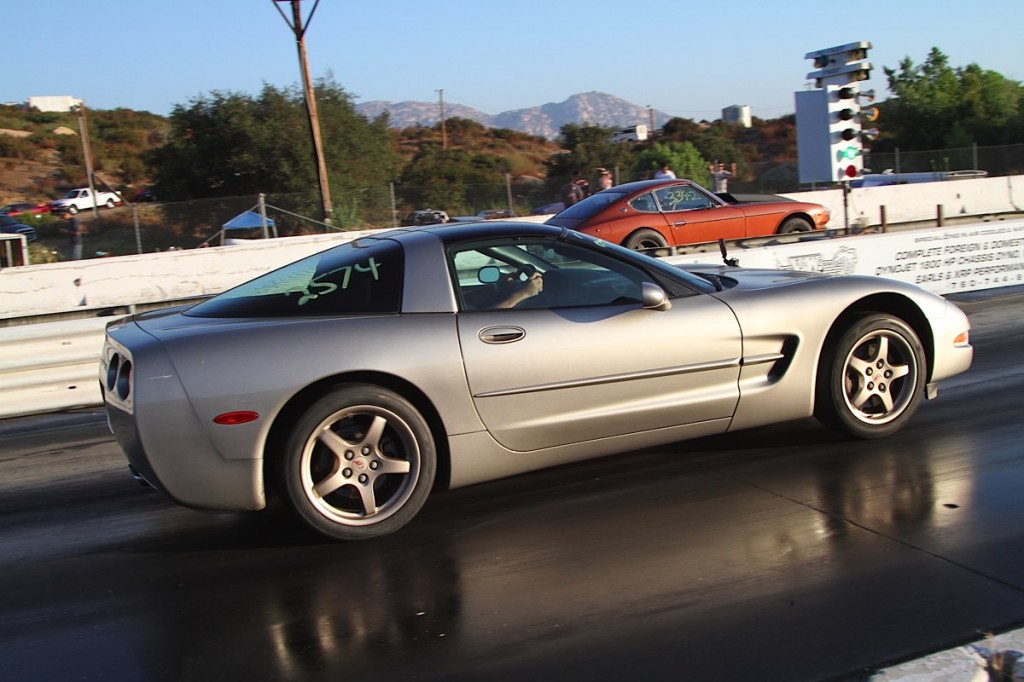
With Stage 1 and 2 installed, we went from 8.751 at 80.67 MPH in the eighth mile stock to a new best of 8.616 at 81.97.
Doing the math, that 8.616 translates to a 13.27 in the quarter mile – a very healthy gain of two tenths of a second. Now, you may be saying (and rightly so) that running the 1320 isn’t the primary mission for a Corvette, but it is a good yardstick for real world performance. Also, it’s a hell of a lot of fun, but that’s beside the point.
Most importantly, since Project Y2k is intended to be a blue collar supercar, competent at just about anything you ask it to do, by installing Corvette Central Performance’s Stage 1 and 2 C5 kits we made a good car even better. The additional power is evident on the street, and uncorking the intake and exhaust had the added side benefit of making the car sound much better too, from idle to redline. It’s a painless performance improvement from a comfort standpoint as well; this car is still a totally comfortable long distance cruiser, with no drone from the exhaust while hammering down the interstate at 70 MPH (where permitted by local laws, of course…)
What’s Next?
As you might logically infer, now that we have the first two stages of our four-part upgrade complete, the next time around we’ll be bringing you Stage 3 and 4, where we add long-tube headers and a mid-pipe, an underdrive crank pulley, then go for the gusto with a new camshaft to really wake up our trusty LS1. Keep an eye out for the next update, where we’ll once again be turning wrenches and spinning rollers with the help of Corvette Central Performance.
I have a 99 C5 and made similar changes to your stages 1 & 2. The last dyno run gave me 315 hp and 325 torque. I have an LS6 air intake, cold air induction with low restriction air filter, new plug wires, NGK cold plugs and dyno tune. I did not change the muffler and wonder how much if any difference that might make and I also wonder if changing the crank pulley to a larger one, will cause battery charging problems?
Changing the exhaust will vary HP wise, depending on which exhaust you go with, and also what modifications you already have. We typically hear anywhere between 10-15 HP. Assuming you meant putting a smaller pulley on rather then a bigger pulley. We don’t offer a pulley small enough to cause any battery issues, so you would be fine with any that we offer. You can expect roughly up to 10 HP with the SLP underdrive balancer (# 305155).