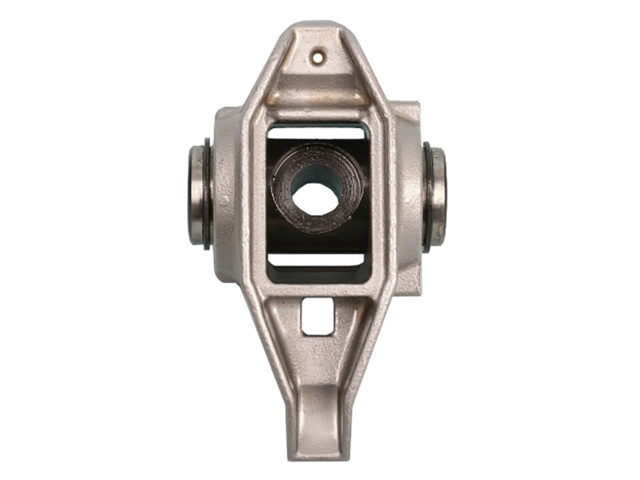
If you’re gonna pound on an LS engine that features OE rocker arms, you need to perform this simple aftermarket trunion/bearing upgrade!
In the process of building any LS engine, if you plan to use OE rocker arms (whether re-using originals or using new OE rockers), you should be aware of the critical need to perform an upgrade to the rocker arms. Specifically, the OE trunions and trunion bearings should be replaced with an aftermarket upgrade kit.
There’s nothing wrong with GM’s rocker arm design. It’s lightweight and stiff, and the OE rocker arms are strong enough to withstand most applications. However, in high RPM situations and when used with high valve spring pressures, the factory cageless trunion needle bearings may tend to begin walking out of the rocker arm’s pivot trunion bore, resulting in individual needle bearings scattering throughout the engine. Obviously, this isn’t good for either the rockers (no bearings) or the rest of the engine. If, during an oil change, you find small needle bearings in the oil or stuck to the magnetic drain plug, this is evidence of rocker arm needle bearings that have worked their way out of the rocker(s). This condition, although possible in any daily driver, is more prone to occur if the engine is operated at frequently high engine speed, and/or if high valve spring pressures are used (as when changing over to a hotter cam that includes higher-rate springs). Knowing that this possibility exists, the best course of action is to address the issue before it becomes a problem, either by changing to high quality aftermarket performance full-roller rockers, or by upgrading the original rocker arms.
Comp Cams, as an example, offers a trunion bearing upgrade kit, Corvette Central part #305346. This kit, applicable to LS1/LS2/LS3/LS6/LS7 OE rockers, includes new trunions, new caged and pre-lubed bearing assemblies, circlips and rocker arm mounting socket head cap screws (along with two thick installation-assist washers). The new trunions feature extended tips with circlip grooves. Instead of the bearing housings relying on a press fit, the additional circlips serve to prevent possible bearing assembly walk-out. The new trunions and bearings are also made of higher quality materials and are designed to withstand higher RPM and high spring pressures.
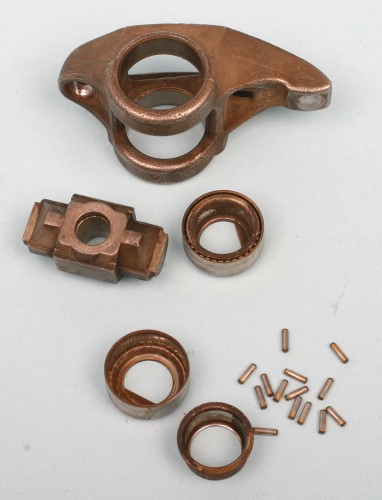
For performance use, get rid of the OE powdered metal trunion and the cheap uncaged bearings in favor of a durable aftermarket trunion kit upgrade. OE setup shown here.
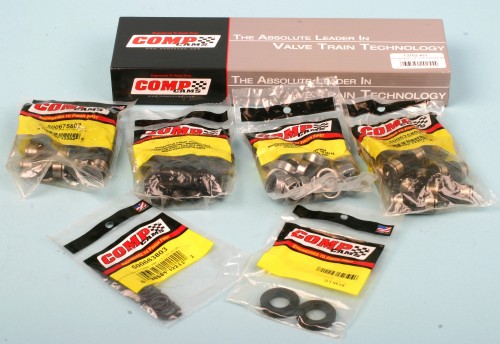
Comp Cams offers P/N 13702-KIT, a must-have upgrade for OE rocker durability.
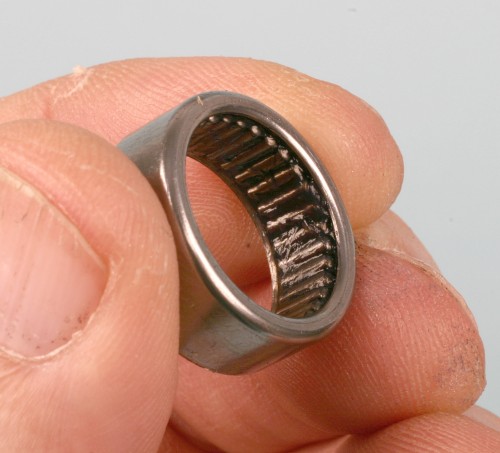
Comp’s fully-caged roller bearings are a sensible upgrade from the uncaged OE bearing assembly.
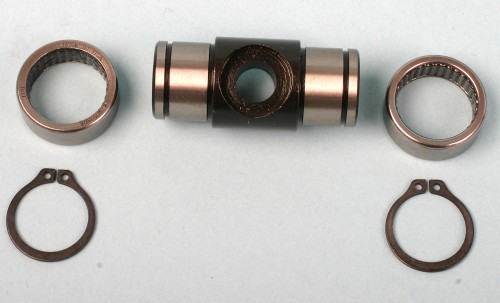
The Comp upgrade kit features high-strength steel trunions, caghed bearings and peace-of-mind circlips. There’s no way that this setup will ever allow bearing needles to fall out.
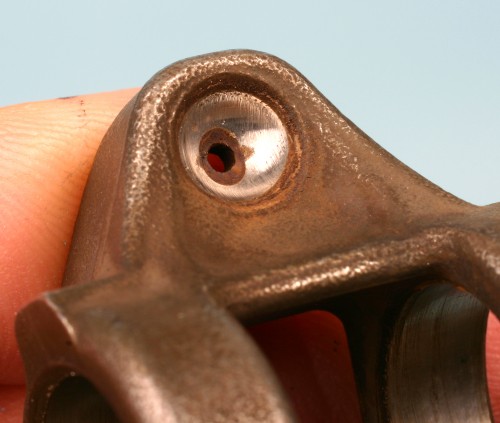
Before performing the upgrade, inspect your OE rockers. If the pushrod cups appear worn, such as this example, trash the rocker.
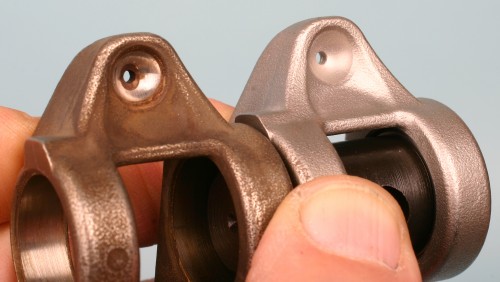
Shown here are two LS OE rockers. The rocker pushrod cup on the left is severely worn, as compared to the rocker’s cup on the right, which shows no wear damage.
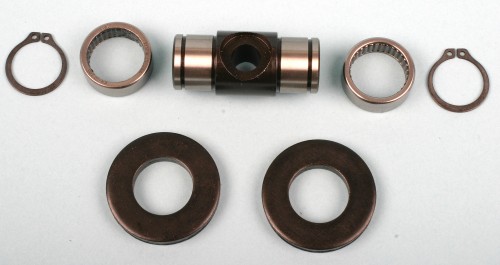
The Comp upgrade kit also includes a pair of thick steel washers which are used during the press-fit of the new bearings.
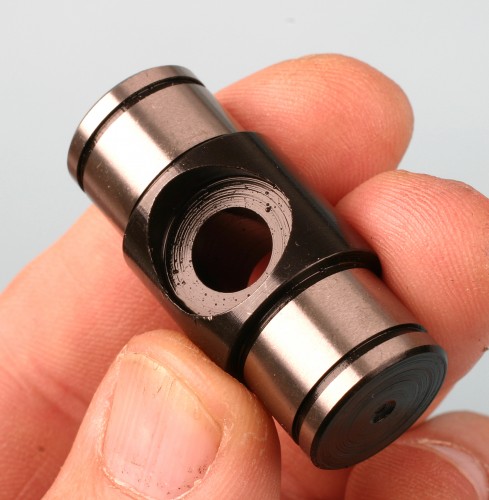
The upgraded Comp trunions are a tad longer than the OE trunions, featuring circlip grooves at each end.
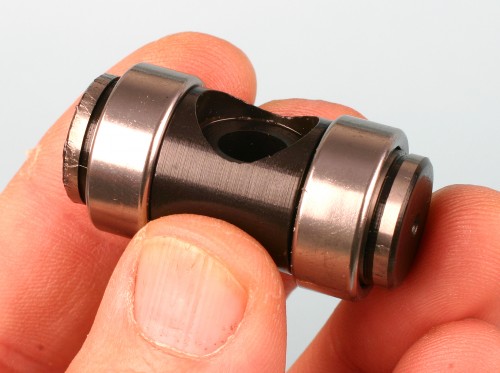
This photo is for illustrative purposes. Here, a pair of bearings are placed onto the new trunion. Notice the circlip groove at each end. In addition to the interference fit of the bearing cages into the rocker arm, the additional security of circlips insures positive capture of the bearing cages.
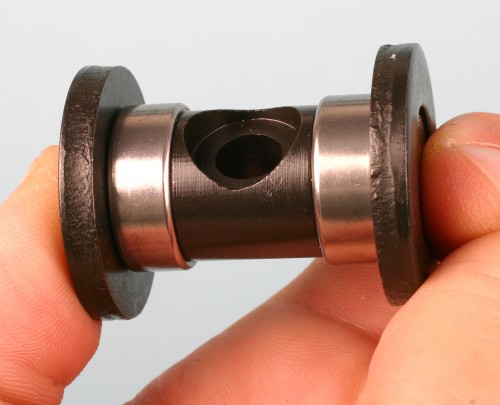
During assembly, the kit’s washers provide positive stops during the press-in of the bearings.
Comp’s upgrade kit replaces the cageless, loose OEM needle bearings and powdered metal trunions with premium 8620 steel alloy trunions and fully-caged roller bearings for vastly-improved durability. According to Comp Cams, this rocker arm upgrade has been tested and performance-proven for several years in the NASCAR GM LS spec engine series.
If you intend to “play” with your LS engine and you plan to use OE rockers, upgrading the trunions is a MUST-DO modification to avoid potentially catastrophic engine damage.
Trunion Upgrade Procedure
Performing this retro-fit upgrade is relatively simple, requiring no modifications to the rocker arm. You’ll need a punch, a press or vise, an appropriate-size socket and snap ring pliers. Specialty press kits are also available to ease the job.
Using a punch and an appropriate-size socket or steel tube to cradle the rocker arm, gently tap out the existing trunion, being careful notto damage the rocker arm. The factory trunion will unseat. Be sure to push out both sides. Inspect the rocker arm trunion bore and make sure that there are no burrs. By the way, this is a good time to clean the rocker arm bodies. If you want the rockers to look factory-fresh, clean with solvent, or have them tumble-cleaned with a fine-grit stone, or you can glass bead blast the rockers, but if you blast with fine glass bead, be careful not to dwell any blasting in the trunion bores. Do not run any type of hone or reamer in the trunion bores. If trunion bores appear to be damaged, replace the rocker arm.
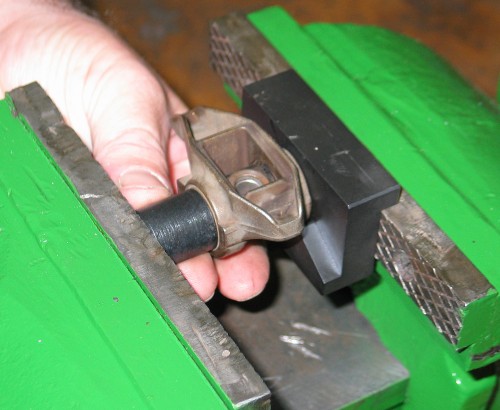
Using an appropriate-size driver (steel tube or socket), push the bearings and trunion out of the rocker. A specialty fixture on a bench vise is shown here, but a hydraulic press is commonly used.
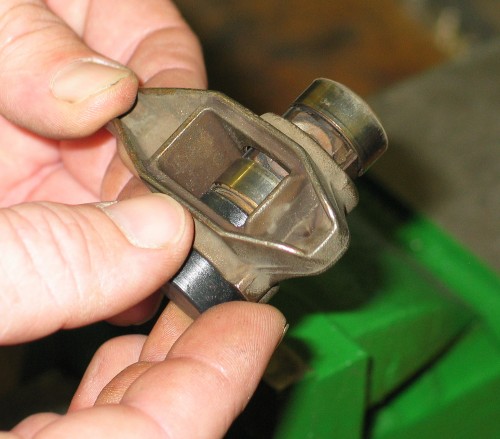
Push the old trunion completely out of the rocker along with both OE bearings (rocker out of vise here for viewing only).
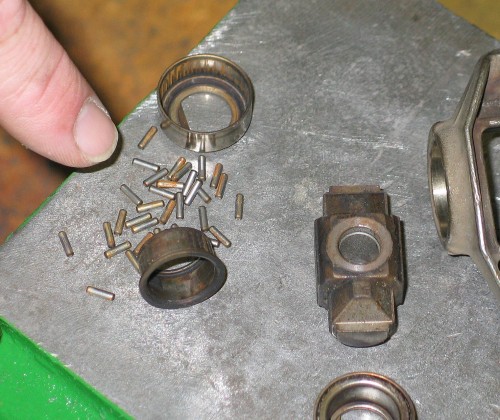
Here the OE trunion and bearings have been removed from a rocker. Notice the small needle bearings? How’d you like to have a bunch of these floating through your engine?
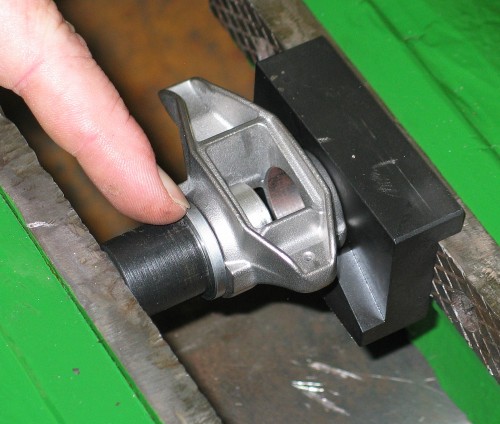
Using appropriate size drivers, push a new caged bearing into one side of the rocker.
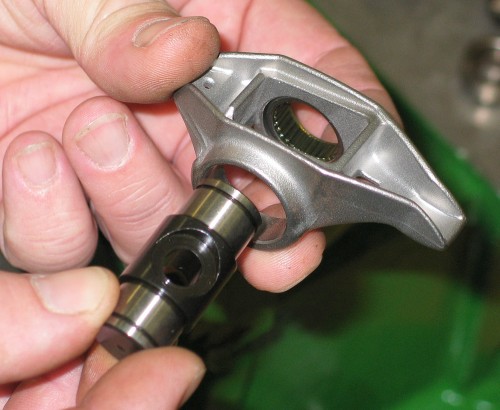
Once one bearing is in place, insert a new trunion (I suggest lubricating the trunion first).
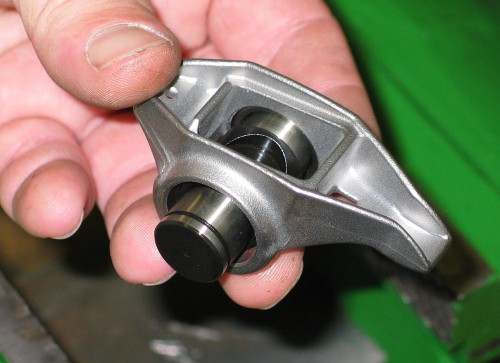
Insert the new trunion so that one end engages the newly-installed bearing.
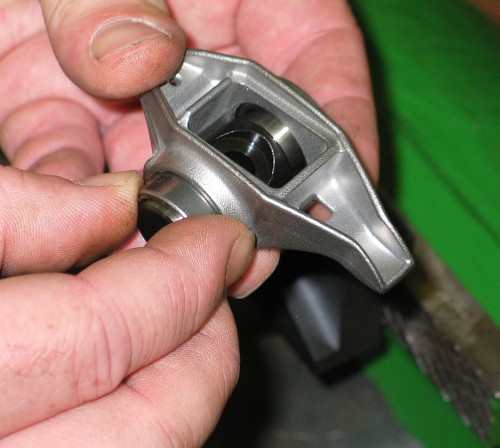
With the new trunion in place, insert the next bearing onto the trunion (this slips on). Make sure that all bearings are installed with the stamped lettering side facing outward!
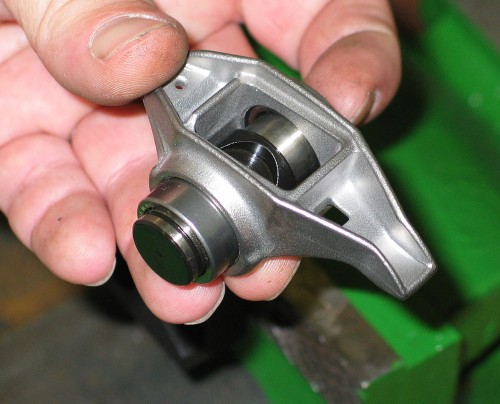
Here the second bearing is in place on the trunion.
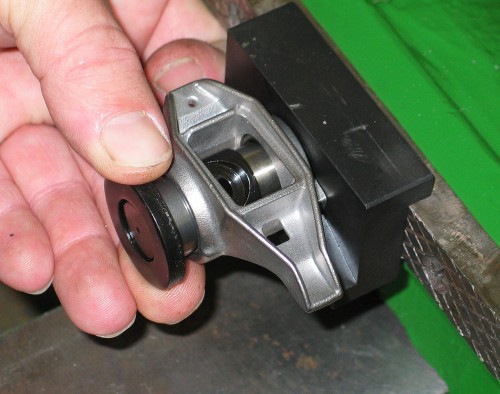
Place one of the kit’s washers over the exposed end of the trunion, against the outer face of the new bearing.
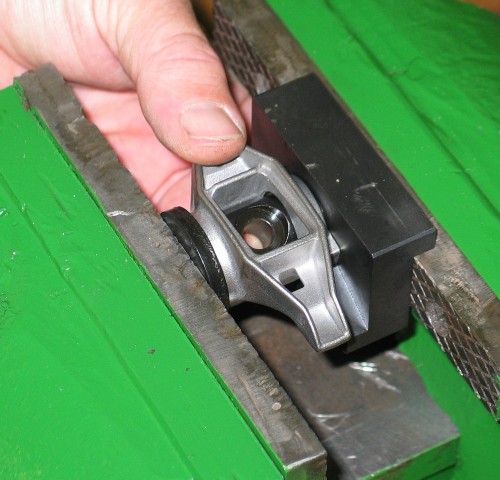
Using a press (or in this case a vice with a specialty fixture to secure the opposite side), press the bearing into the rocker, so that the outer face of the bearing is flush with the outer surface of the rocker body.
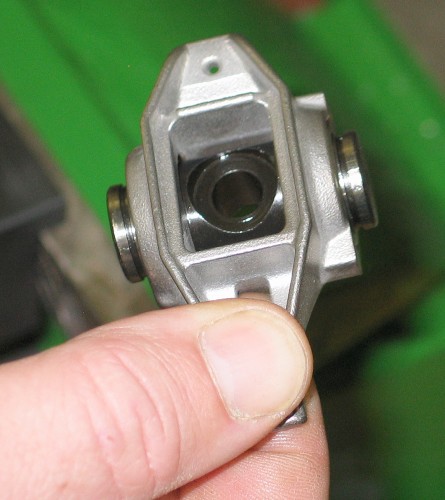
Here, both bearings have been press-fit into place. Notice the exposed circlip grooves on each end of the trunion.
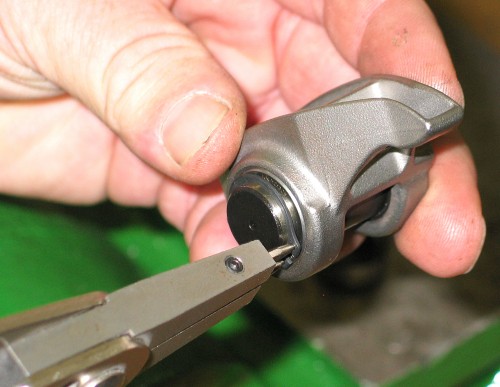
Using snap ring pliers, install one circlip into each end of the trunion. Rotate the trunion and inspect to verify that each circlip is fully seated.
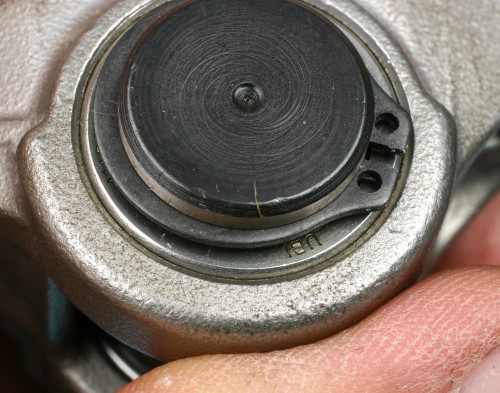
This closeup shows a circlip installed. Notice the small stamped letters on the outer surface of the bearing cage. Remember, the stamped letters of each bearing must face outward.
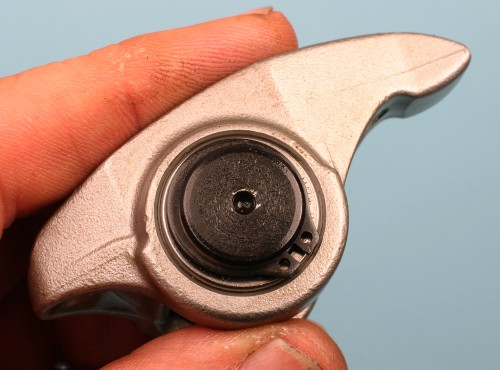
This rocker is done and ready for high performance use. Comp’s bearings are fully caged and of the highest quality, and the machined steel trunions offer much greater strength as compared to the powder metal OE trunions. Nothing against powdered metal, but 8620 steel is stronger and is more suited for higher valve springs pressures.
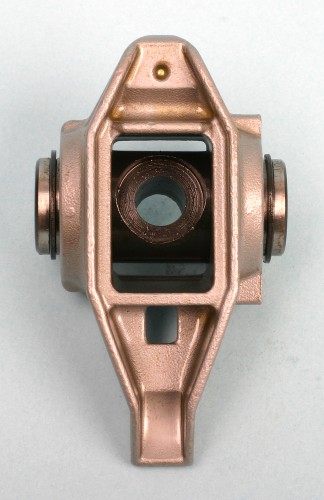
This overhead view shows a fully assembled rocker with Comp’s trunion upgrade.Notice that one side of the trunion mounting hole is recessed (countersunk with a flat surface). This recessed side of the hole must face upward during rocker installation (the opposite side of the trunion is round, to rotate on the rocker stanchion).
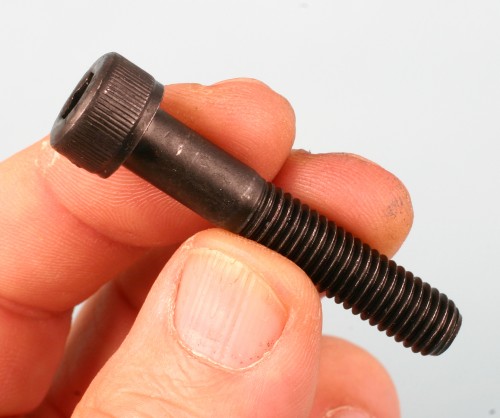
Instead of using the OE hex head rocker mounting bolts, Comp provides a full set of socket head cap screws.
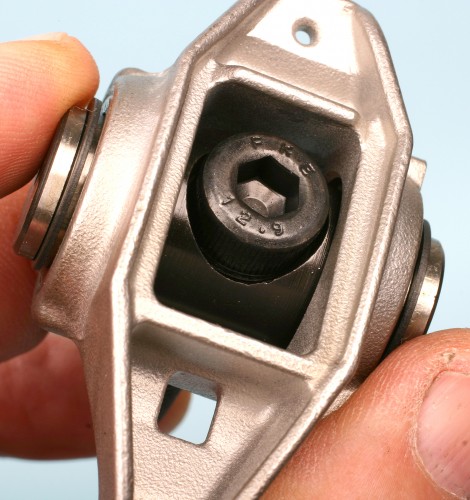
The cap screw head nestles into the trunion hole’s recess. Apply a bit of assembly lube under the screw head before installation, and torque to Comp’s recommendation of 22 ft-lbs.
1. Place the rocker arm body on a press and place a new bearing assembly on top of the rocker in a flat and even position. NOTE: Bearings MUST be installed with the identification letters facing outward on both sides of the rocker arm.
2. Carefully press the bearing into the rocker arm until the outside of the bearing assembly is flush with the rocker arm body.
3. Once the first bearing has been installed, flip the rocker arm over. Apply a coating of assembly lube or engine oil to the new trunion and install the new trunion. This will serve to locate the opposite bearing.
4. Place the kit’s installation washer under the rocker arm body. Make certain that the trunion fits through the center of the installation washer.
5. Place the rocker arm (along with trunion and washer) onto the press, with the washer on the bottom.
6. Place the next bearing on top of the rocker (flat and even), with the bearing identification letters facing outward.
7. Next, place the second assembly washer on top of the bearing (the trunion will pass through the washer ID). Press the bearing into the rocker until flush with the rocker body.
8. Using a pair of snap ring pliers, install one snap ring to each side of the trunion. Repeat this process for all rocker arms.
9. Install the upgraded rocker arms to the cylinder heads using the new socket head cap screws supplied in the kit. Be sure to rotate the trunion so that the flat recess side of the trunion’s center hole faces upward (the socket head cap screw must seat against this recessed flat side of the hole). Tighten the cap screw to a value of 22 ft-lbs, following the OE installation procedure.
We installed our trunion upgrade kit using a custom installer kit, using a bench vise instead of a hydraulic press, but either method is acceptable. Just remember that you should always smoothly draw the old trunions out and draw the new bearings in. Do not try to bang the old trunions out or attempt to install the new bearings with a hammer. Leave your hammer in the toolbox.