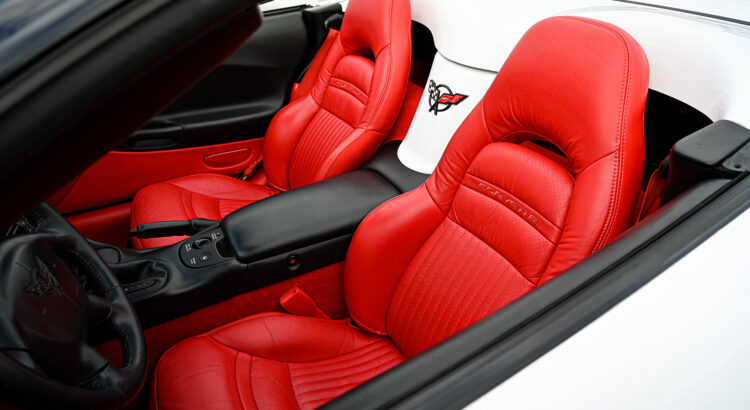
If you have a C5 Corvette (1997-2004) with electric seats and some miles on it, by now you’ve undoubtedly noticed that the driver seat (and the passenger seat too, if you usually have someone riding shotgun with you) rocks a bit.
In actuality, the seat slides forward during braking and slides rearward during acceleration. This is due to the factory seat track shims becoming compressed and/or worn, and the more they wear, the more noticeable and worse the rocking becomes.
So, what are your options? Well, you can spend more than $500 buying new seat tracks from GM, or you can get a Seat Track Repair Shim Kit from Corvette Central and repair the seats yourself for about $28.00 per seat (each kit does one seat).
In addition to the four self-lubricating nylon shims and clear instructions, the real treasures of the kit are the two special Torx Allen wrenches – one T25 and one T40 – that are included. While the T25 is readily available, the T40s are a bit harder to find – especially in the “L” configuration of an Allen wrench. Due to the location of the T40 bolt, an Allen-configuration is really the only way to get to it.
If you’re ready to have your C5 Corvette rocking seat fixed, then let’s walk through the process. The “patient” that got the repair treatment here is our 1998 C5 ragtop project car, which had a noticeable and annoying rock when giving it the go juice or applying the brakes. Since both the driver and passenger seats in this car are electric, both had developed rocking over the years. Two kits were ordered from Corvette Central to repair each seat. Here’s how to apply the fix.
How to Fix C5 Corvette Seat Rocking
#1. Free Covers from Tracks
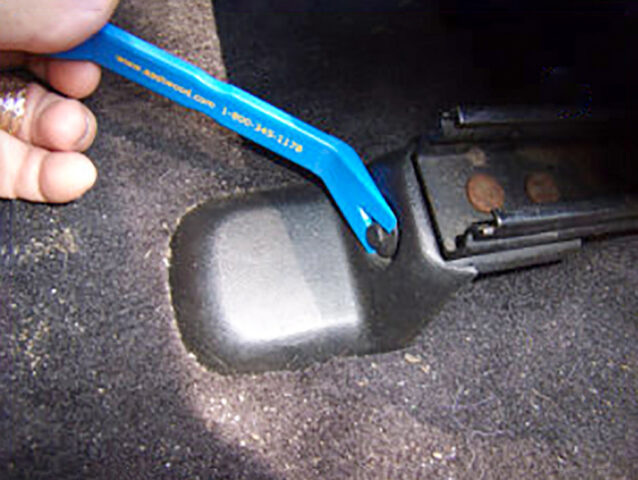
To get your C5 Corvette rocking seat fixed, start by using a pry tool or a tack remover to pull the plastic center push-pin retainer buttons out of both retainers that hold the front seat track covers. Pull the covers forward to free them from the tracks.
#2. Remove Mounting Bolts
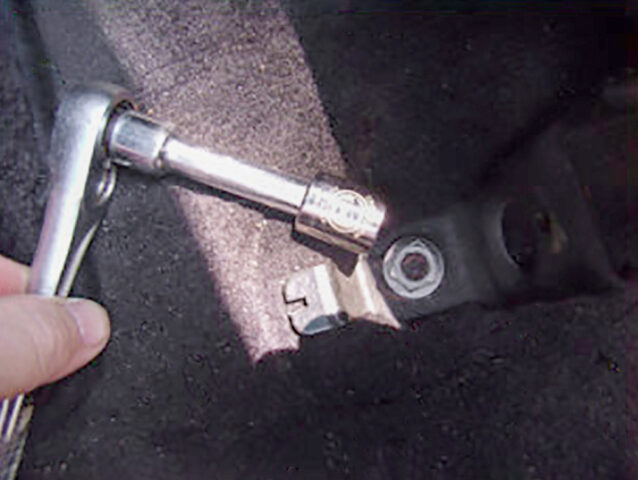
Move the seat rearward and use a 15 mm socket to remove the two front seat track mounting nuts. Then, move the seat forward and remove the two rear track mounting bolts. After that, move the seat about mid-way between front and rear and also elevate the seat as far up as it will rise.
#3. Lift Out Seats
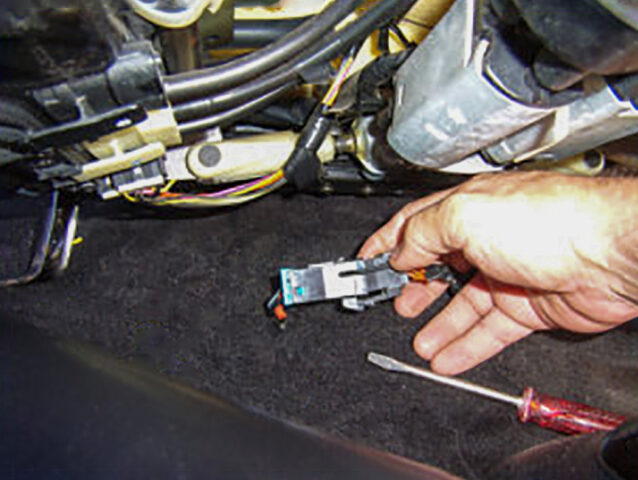
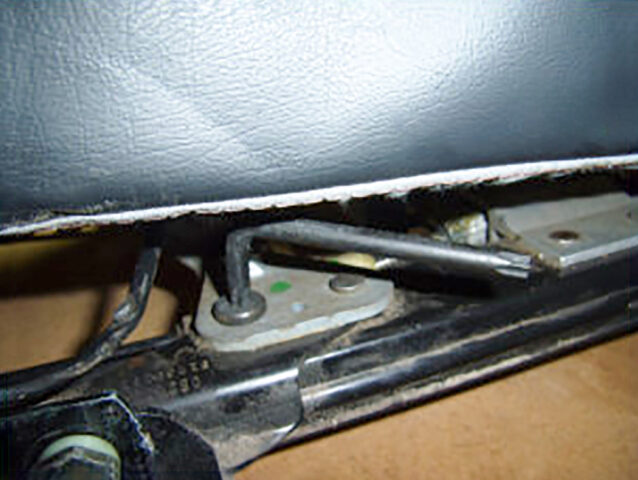
Lift the seat on the outboard side high enough to disconnect the electrical pigtail from the power supply harness. Release the snap tab that holds the pigtail to the harness with a small flat-blade screwdriver. Lift the seat out of the car—being careful not to hit any interior parts—and set it on a workbench.
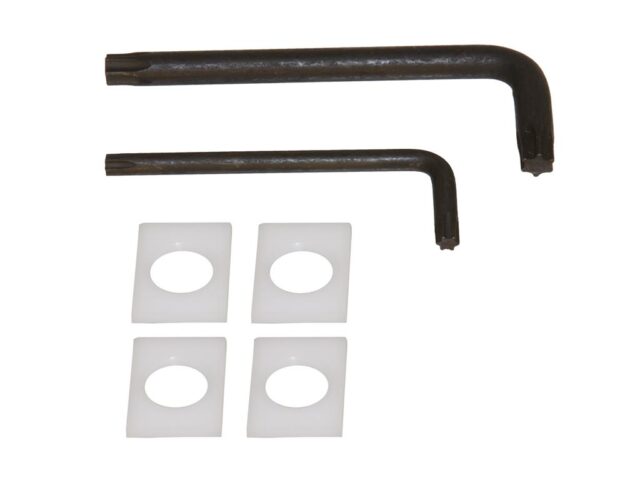
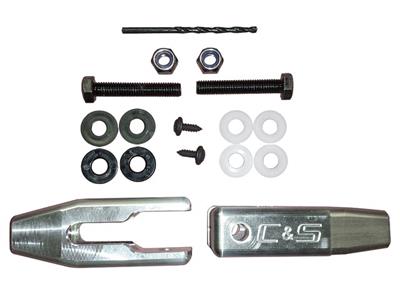
#4. Locate Your Kits
Here’s the content of the Corvette Central repair kit. Each kit does one complete seat, so you’ll need two kits if both of your C5 seats are electric.
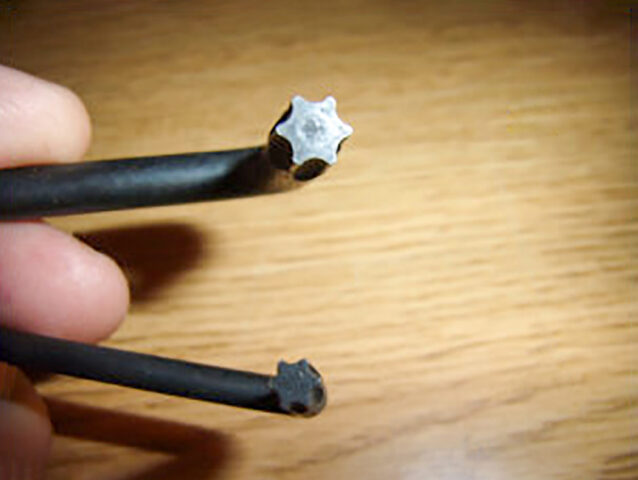
#5. Find Your Torx Tools
These are the special Torx tools in Allen-wrench configuration that are included in the kit. The larger one is a T40 and the smaller one is a T25. These tools alone are worth the price of the kit. It’s all but impossible to get your C5 Corvette rocking seat fixed without them.
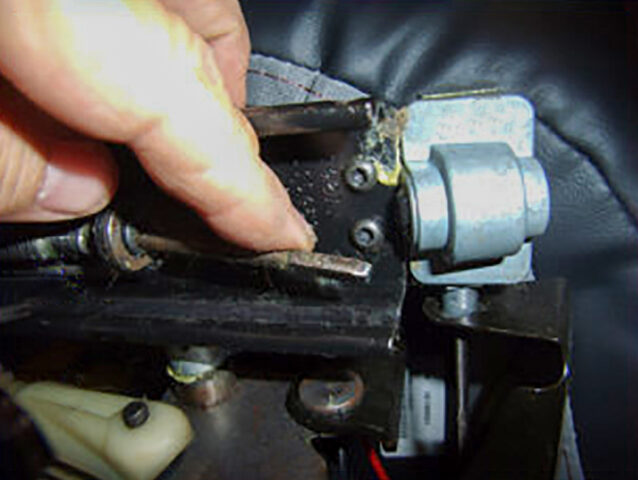
#6. Remove Torx Bolts
Invert the seat so that the bottom of the seat track is facing toward you and remove the wire retainer clip to expose the two Torx T25 bolts. Use the included tool to remove these two bolts.

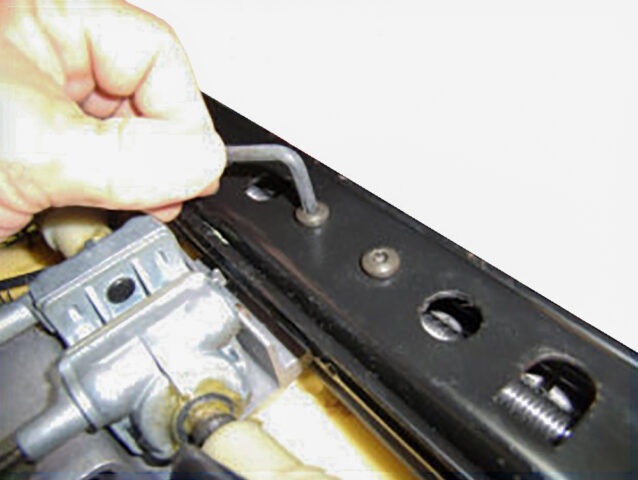
#7. Remove Large Bolt
On the topside of the seat track at the rear, you’ll find a large bolt with a T40 Torx head. Remove it with the tool provided in the kit. Removing this bolt allows the drive gear and the caged nut to be removed from the seat track. Corvette Central also offers a seat track rebuild kit that includes this bracket.
#8. Remove Transmission Cable
Slide the seat track back at the front of the track and remove the transmission cable by pulling it toward the rear of the seat track.
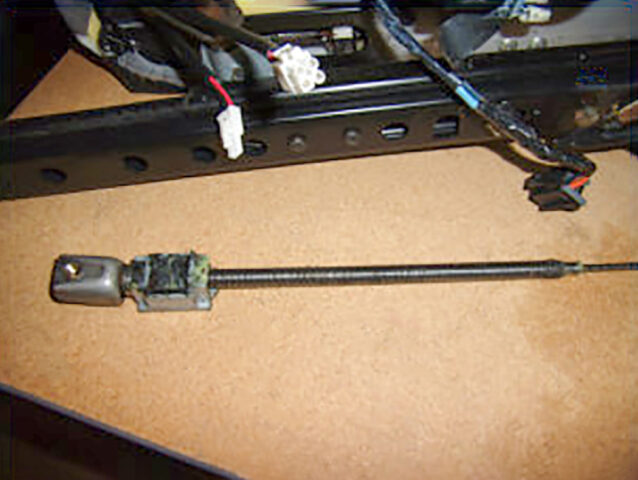
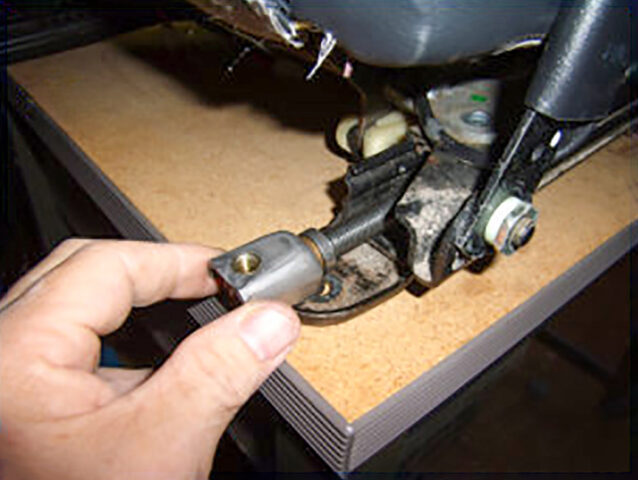
#9. Un-thread Drive Gear
Pull the drive gear out from the rear of the seat track and un-thread the drive gear from the caged nut housing. This shot shows the drive gear with the caged nut housing still on it.
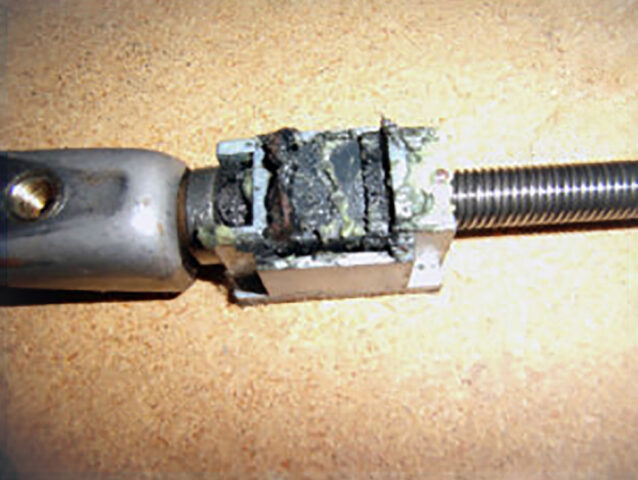
#10. Keep on Turning
Here’s a closer view of the drive gear and caged nut housing, threaded all the way to the back. It takes quite a bit of turning to remove it completely from the drive gear. There is also a repair kit available for this to replace the plastic parts that tended to disintegrate with age or shatter under load.

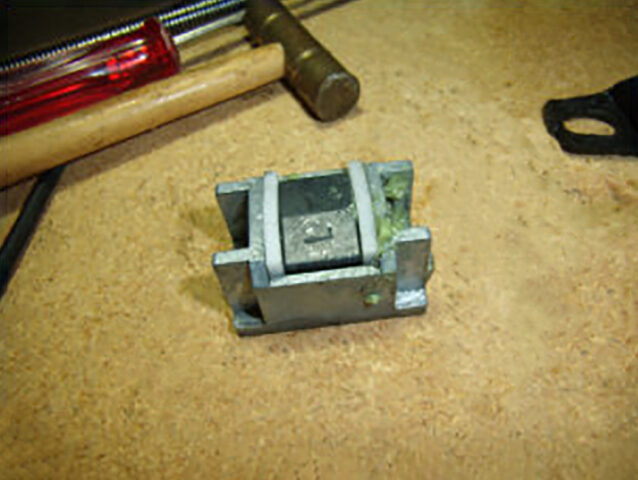
#11. Disassemble Cage Nut Housing
There’s the caged nut housing disassembled with the housing itself at the top, the rubber factory shims (badly crushed and deteriorated) in the middle, and the caged nut itself at the bottom.
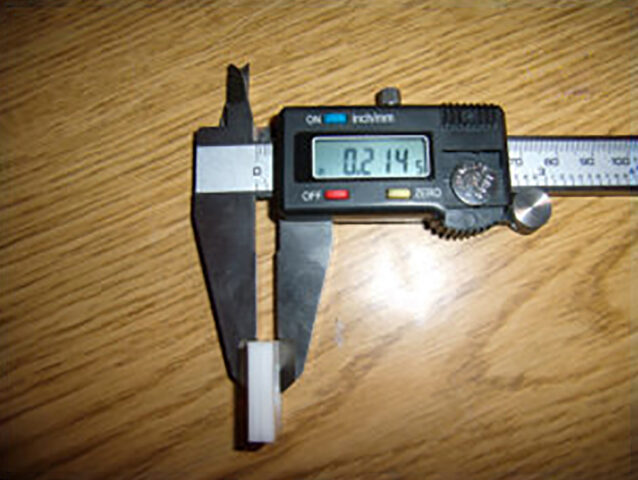
#12. Time to Add Shims
The micrometer shows the thickness of the two shims for this track together at a little under a quarter inch. These self-lubricating nylon shims make the back-and-forth seat movement a thing of the past.

#13. Push Shims on Each Side
Clean the caged nut housing out then insert the caged nut (important: the “peak” of the nut must face up). Push one shim in on each side of the nut to sandwich it. It’s a snug fit, so we tapped the second one into place using a brass tapping hammer.
#14. Install T40 Torx Bolt
Install the T40 Torx bolt back into the drive gear at the rear of the track, and then line up the seat track with the caged nut bolt holes. It is IMPERATIVE that both the left and right seat tracks are even with one another when the installation is done, but you don’t have to worry about it with the first side; it’s the second side (the opposite seat track) that you’ll have to match to the first one.
#15. Ensure Seat Track Alignment
Repeat these procedures for the opposite seat track and make sure the left and right seat tracks are aligned with each other. You may have to pull the drive gear out to move the caged nut assembly up or down on it to get a match, but it’s very important that they are aligned.
#16. Reinstall Your Seats
When the alignment is correct, reinsert the transmission cable in the drive gear shaft and the other end in the seat transmission at the front of the track. Put the seat back in the car, plug in the electrical harness, tighten down the 15 mm nuts that secure the seat, put the track covers back on, and enjoy a seat that doesn’t rock any more!
Ready to Get Your C5 Corvette Rocking Seat Fixed?
We’ve got you covered with cost-effective Seat Track Repair Shim Kits. Order yours today to get your C5 Corvette rocking seat fixed quickly and easily.
Photos and story by Tom Benford