All-American Look For Your Mid-Year Vette
Story by Jerry Heasley, Vette Magazine
Factory side pipes go on a Vette like a set of pinstripes on Mickey Mantle’s Yankee uniform. The combination just looks right and all-American.
Mike remembered side pipes on his ’67 big block coupe. Although that car is long gone, today he owns a ’66 coupe with no side pipes, officially RPO code N14, cataloged as “C2 Side Mount Exhaust” for 1965-66-67 Corvettes.
After the installation, Mike admitted the side pipes seemed a little louder than he recalled from the 1960s. Back then he was a foot loose teenager without a wife in the passenger seat.
Of course, a more robust exhaust is one reason for installing side pipes. His base 327 four barrel also felt a little stronger after the installation.
Of course, he got the look. Side pipes, with their aluminum covers, chambered pipes and stainless steel tips add flash and dash to any Mid-Year.
Mike ran into two surprises during the installation. Surprise #1 was he had to cut off an ear of each lower front fender. Surprise #2 was he had to bend back the steel brackets visible beneath the original side molding on each side of the car.
He also discovered the passenger side bend in the factory pipe near the header would not fit. Apparently, the pipes had suffered some damage sometime in the past. Luckily, skillful heating and bending restored them to their original shape. Possible wear and tear on OEM side pipes is why ordering a reproduction set, which saves money, might be the better alternative except for restorers after points in concours judging.
Buying a new set of side pipes from the aftermarket will assure a good fit of the pipes and the option of longer lasting stainless steel.
The installation is fairly straightforward with some important key points included in our picture set.
Installation
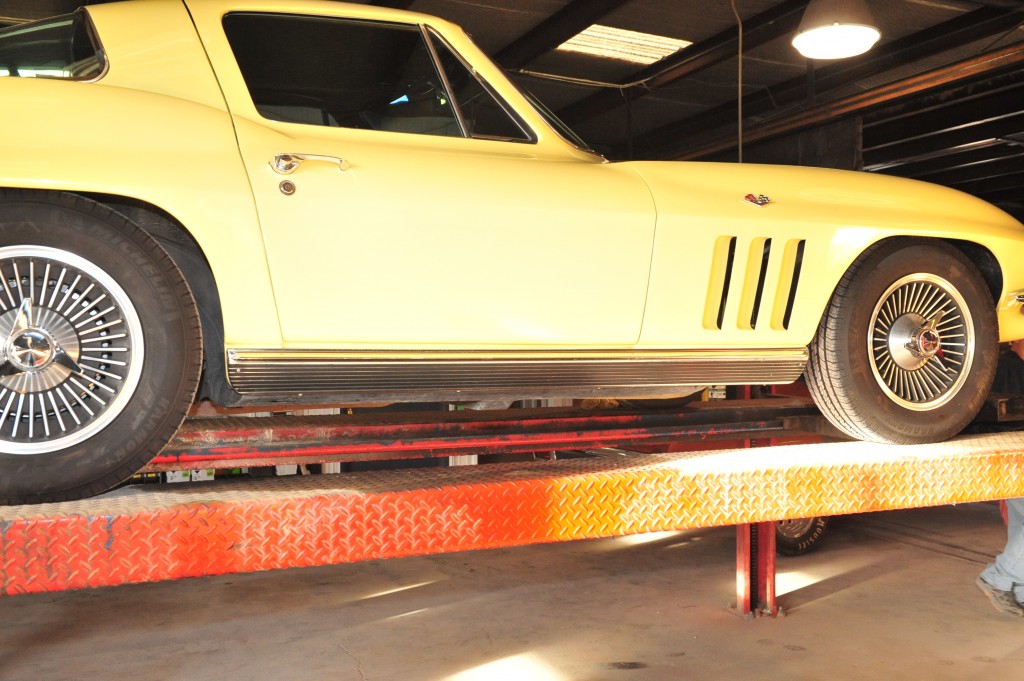
Mike’s ’66 came with the standard rocker panels. Chevrolet produced over 70,000 Corvettes for 1965-66-67, and 11% left the factory with their “Side Exhaust Package.”
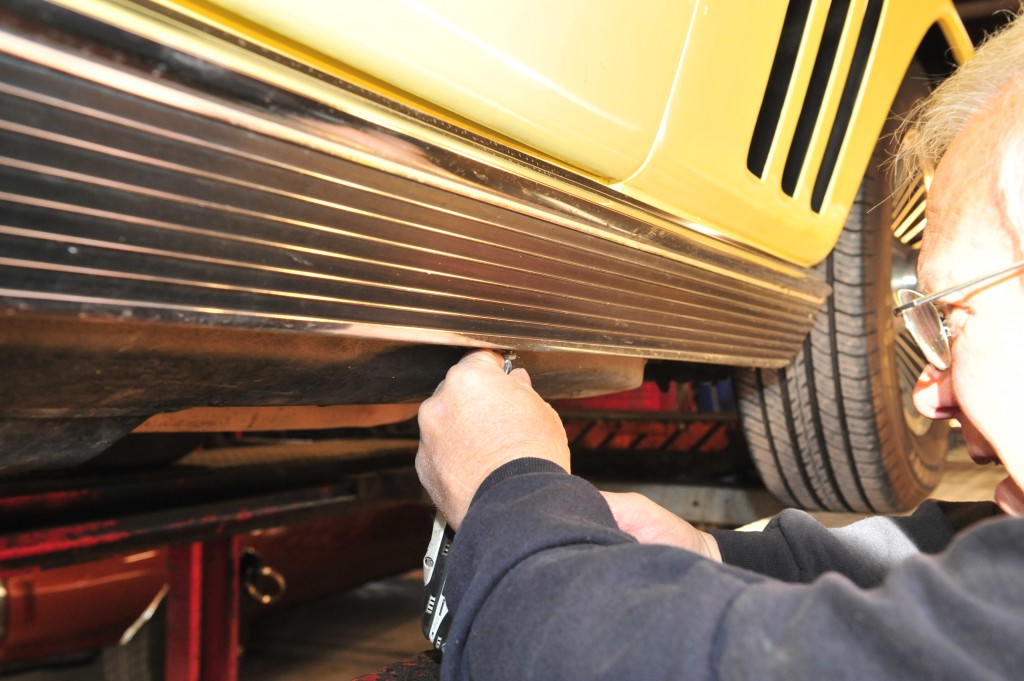
Removing the rocker panels is easy. Simply pull the screws that hold the rocker panel to the body.
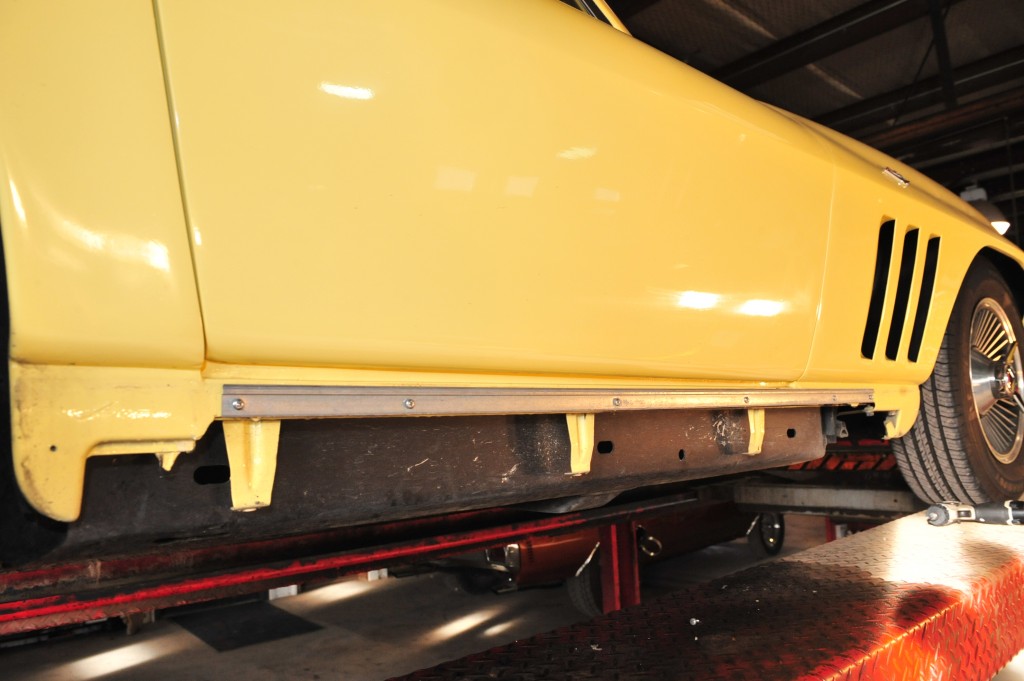
Corvettes with original side pipes do not have these steel brackets.
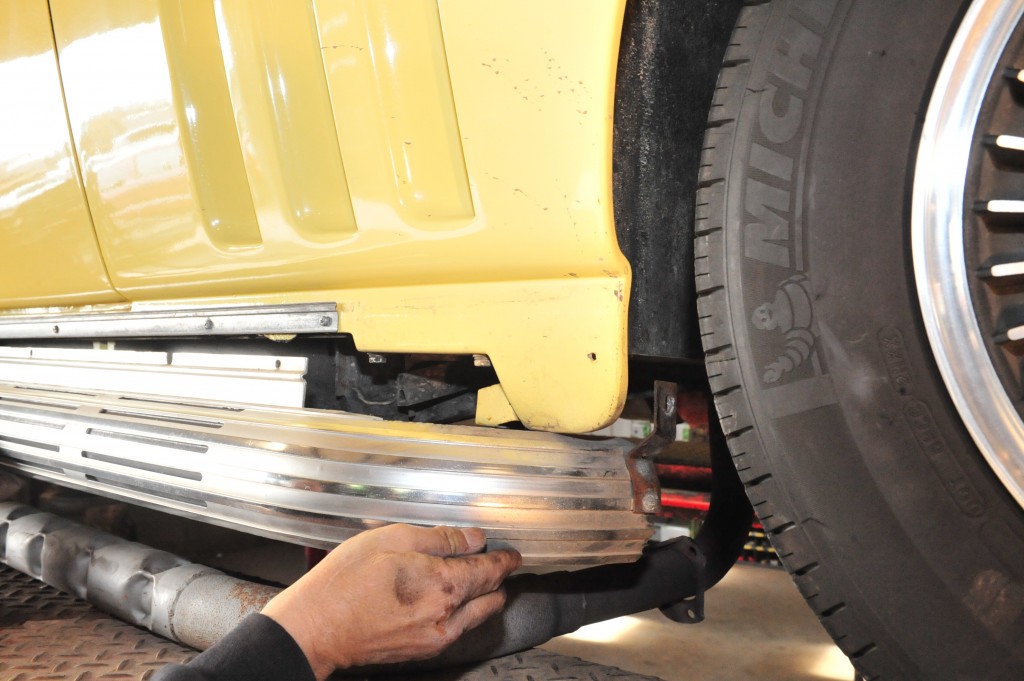
Mike mocked up the side pipe aluminum covers to reveal this lower front fender “ear” interferes with installation.
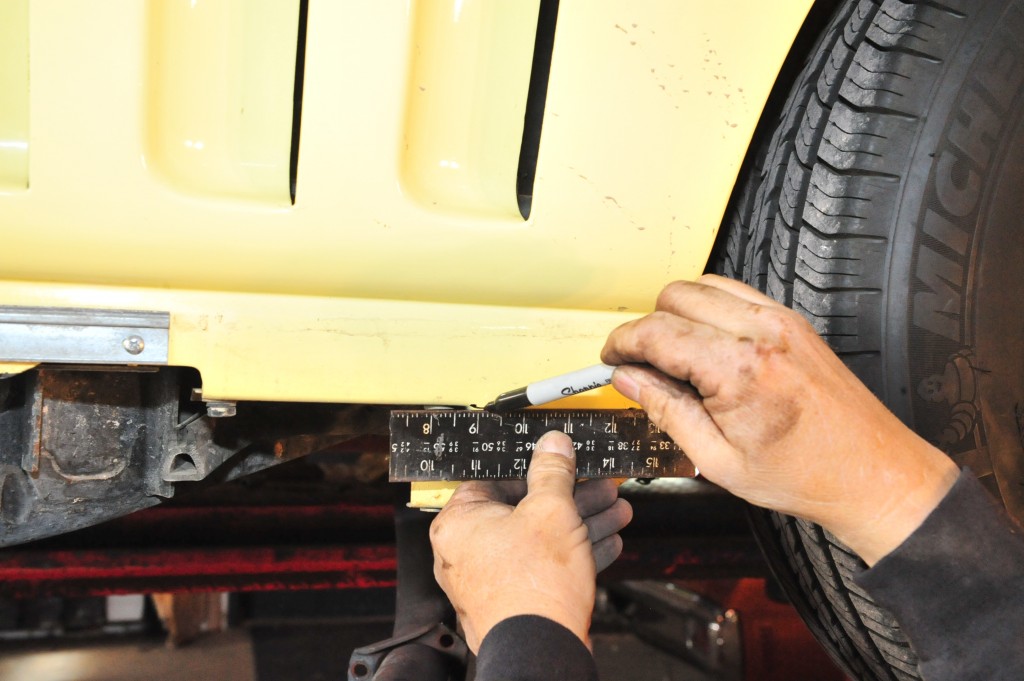
With a Sharpie and a ruler inscribe a straight line to cut off the lower front fender ear.
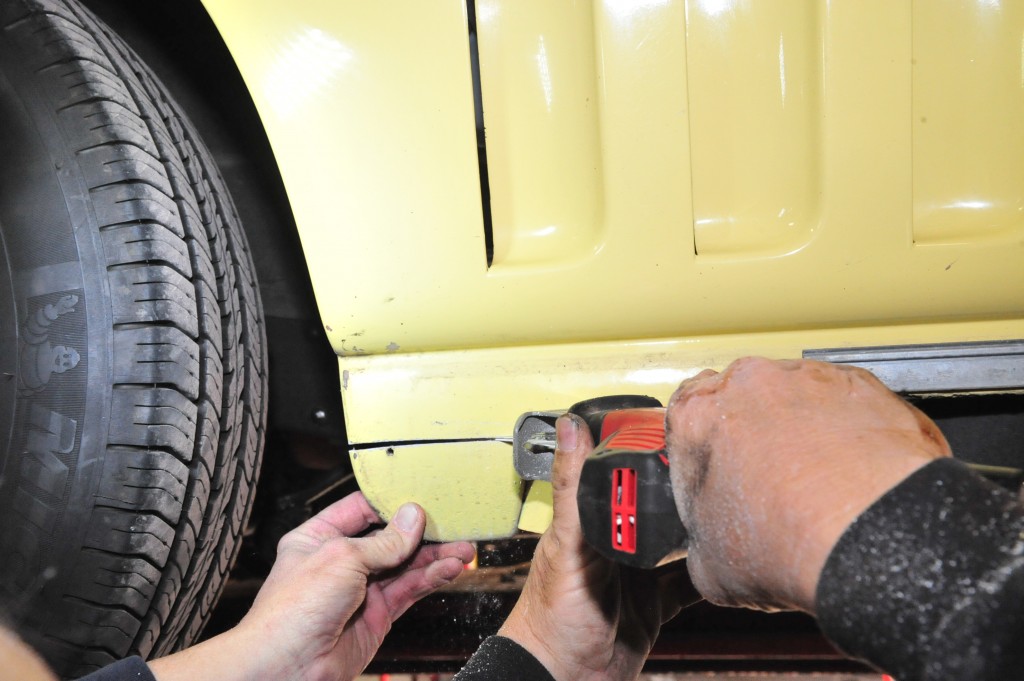
Saw off the fiberglass ears, one per side, along the straight line made by the Sharpie.
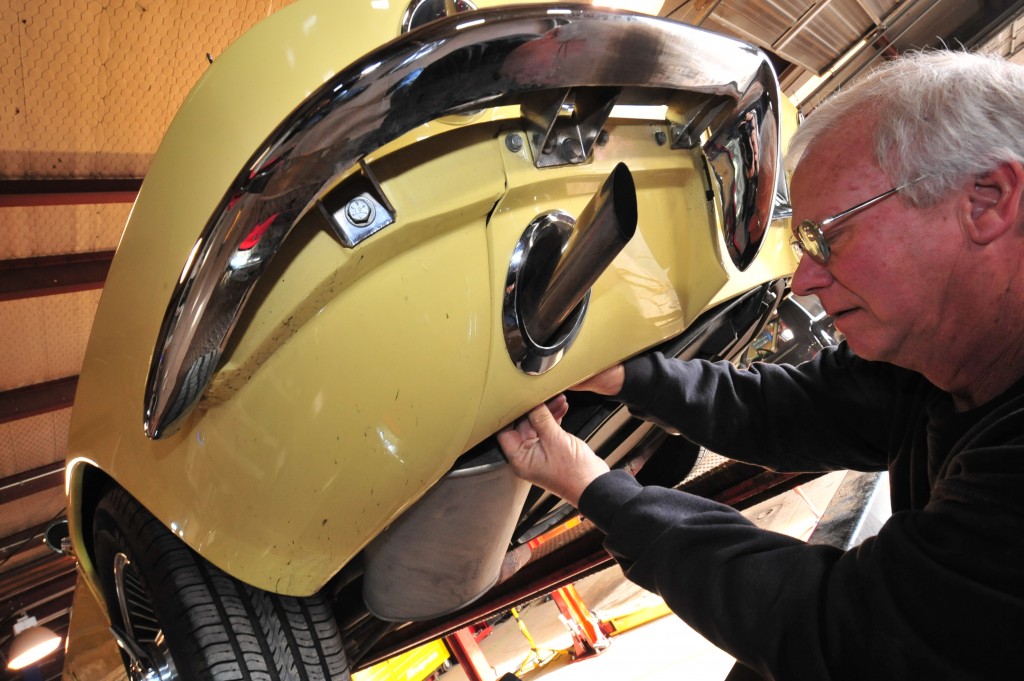
Cars that did not come with factory-side pipes have a rear valance with outlets for exhaust tips. Remove the exhaust tips in the rear valance.
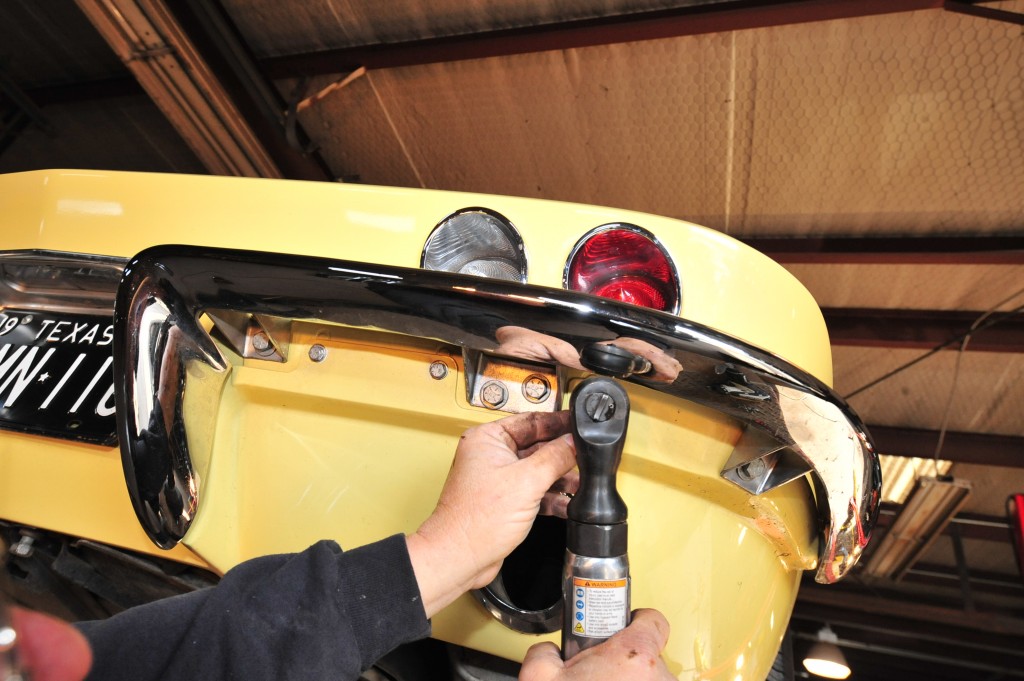
Remove the rear valance bolts.
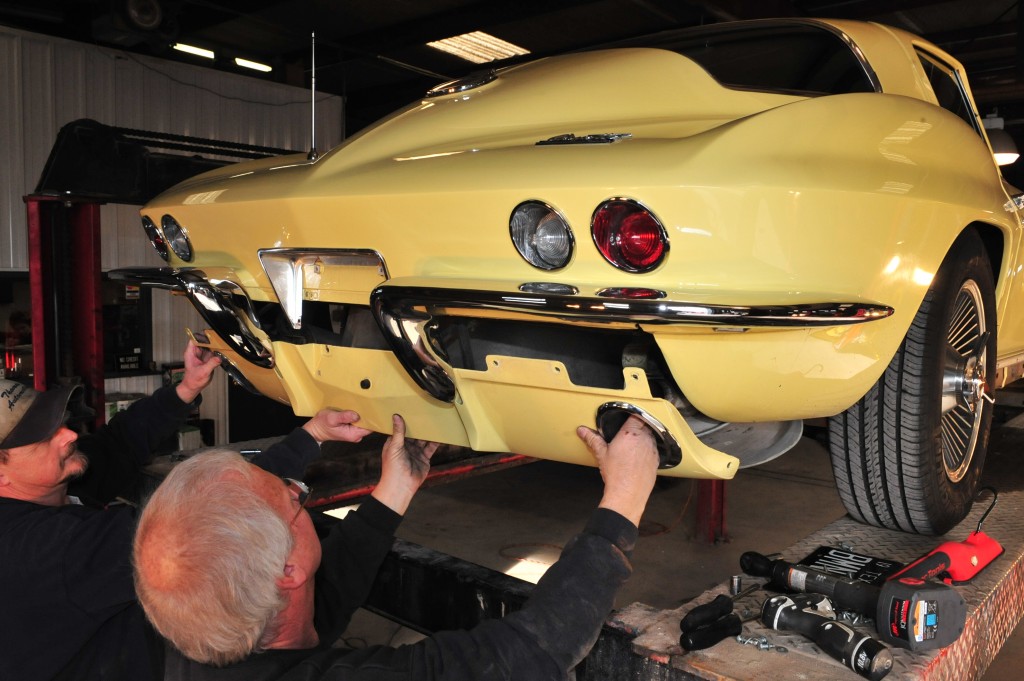
Remove the rear valance. The valance for Corvettes with side pipes has no holes for exhaust outlets.
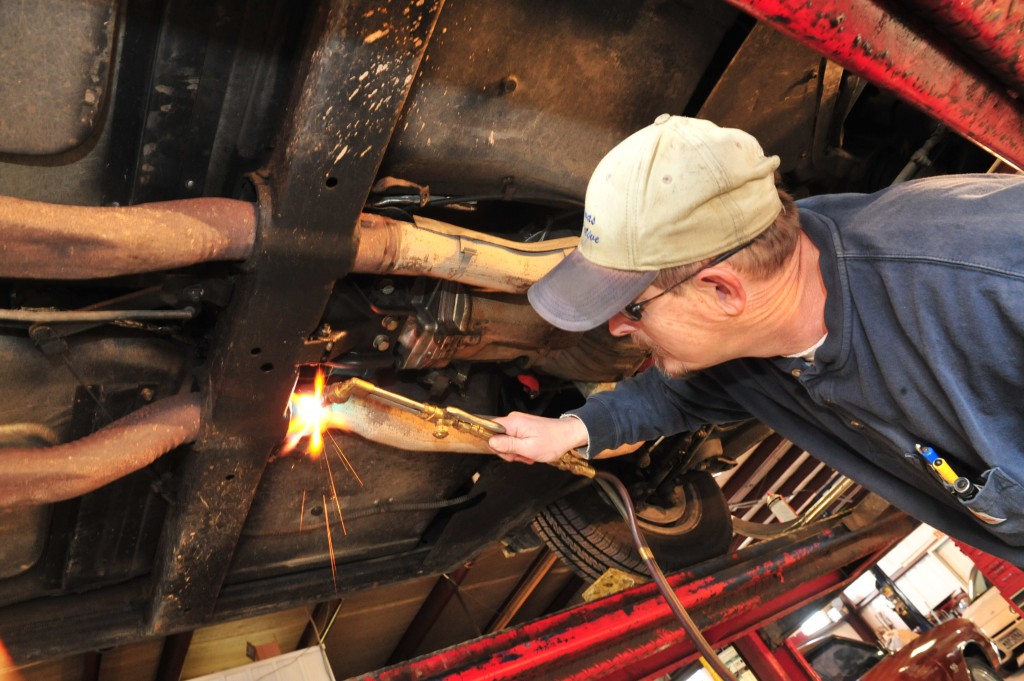
Remove the exhaust pipes. The pipe’s on Mike’s ’66 needed a little heat to swell the outside metal and separate.
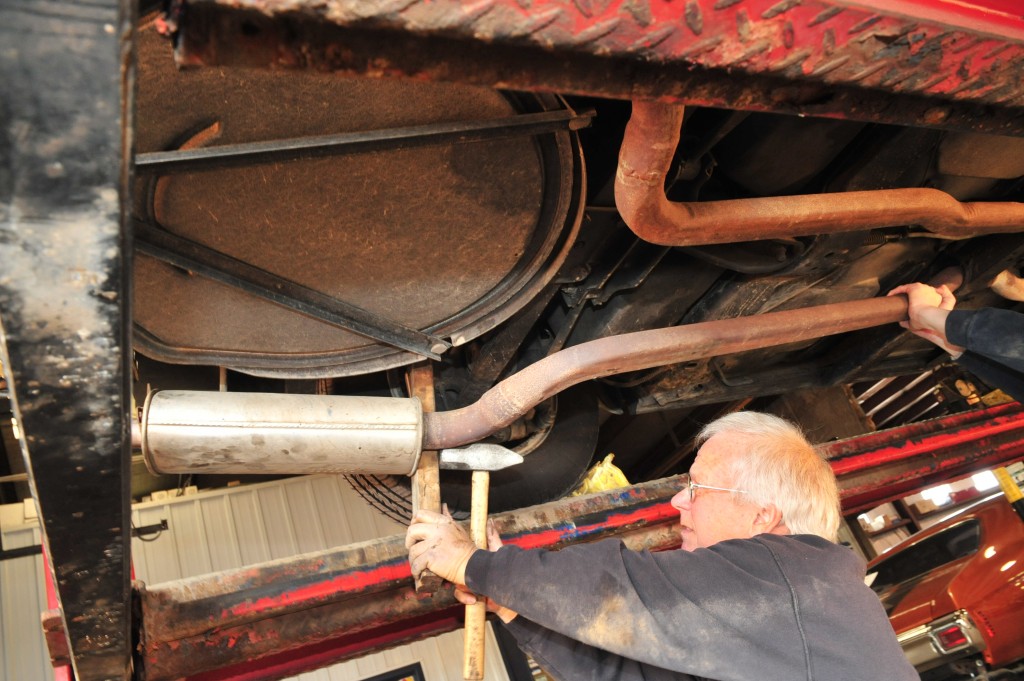
Mike used a wooden 2 x 4 and a rubber mallet to knock loose the rear exhaust pipes.
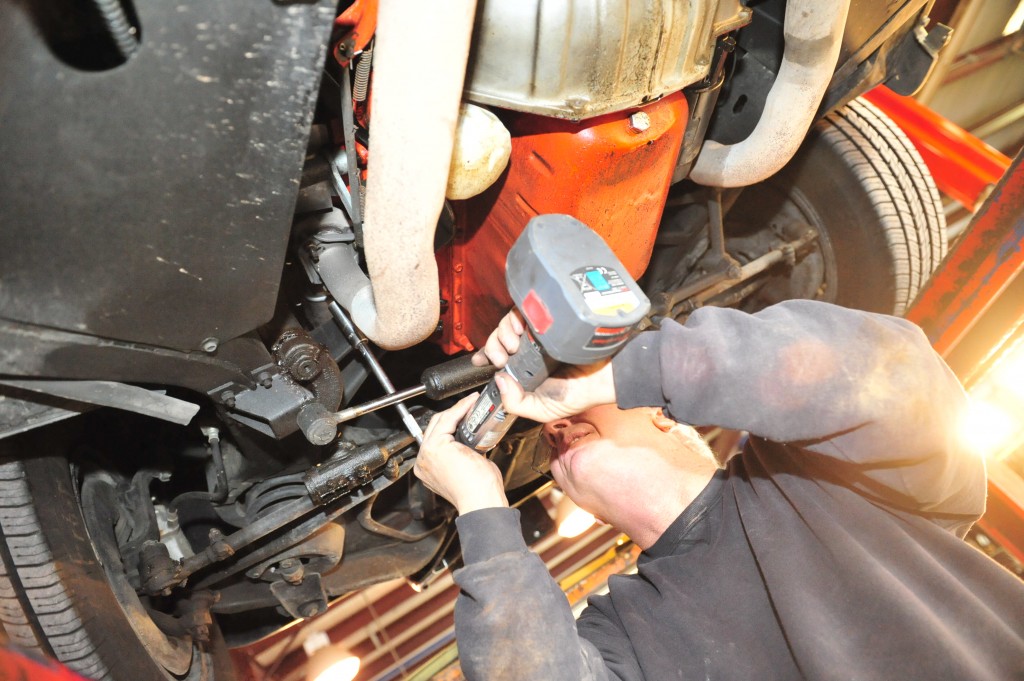
Remove the header pipes, one per side.
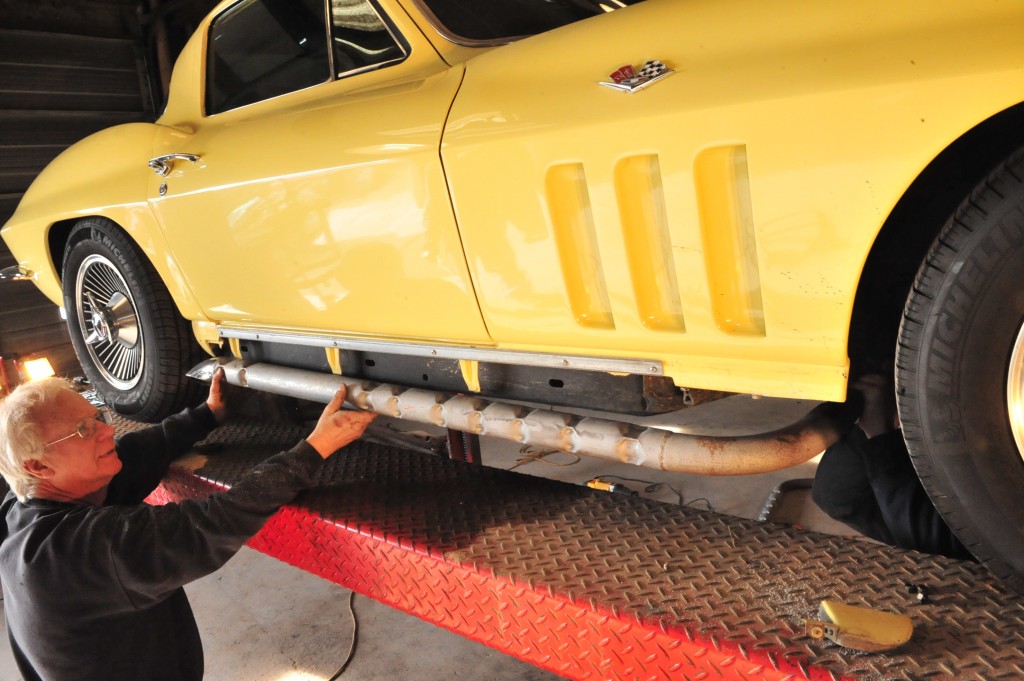
Side brackets interfere with the chambered side pipes.
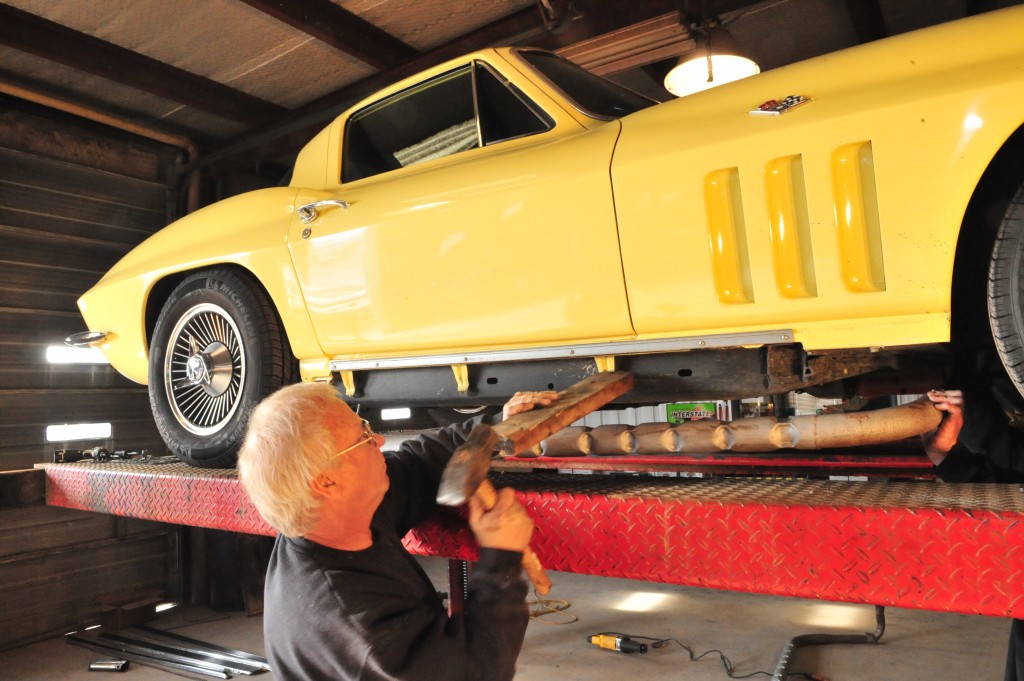
Mike hammered the metal brackets toward the body using a block of wood.
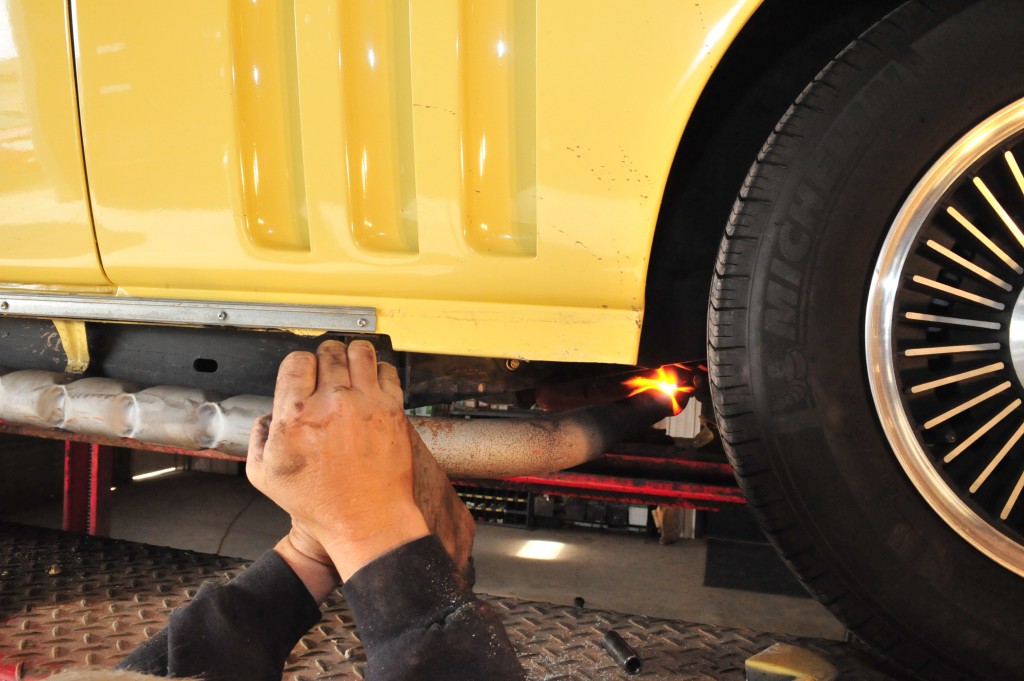
Our vintage (old) chambered side pipes did not fit. Apparently, the passenger side pipe had deformed, perhaps through long-term storage. Shaun Hon applied heat with a torch while Mike applied pressure with the block of wood to bend the pipe back to the stock radius. Luckily, this “Cletus” move worked.
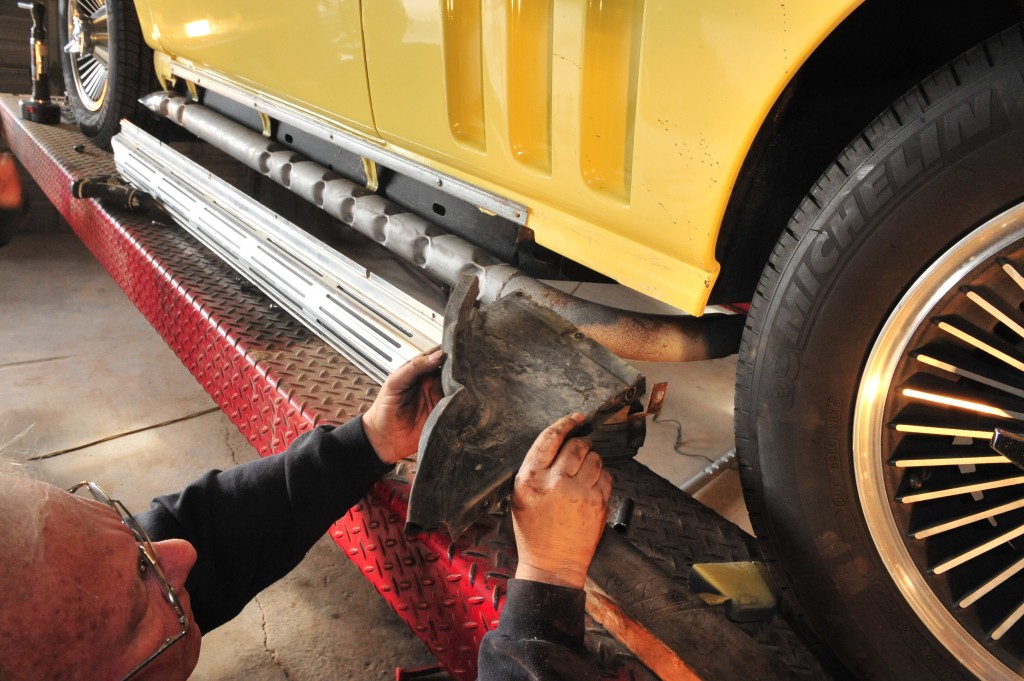
Remove this metal splash shield from inside the fender well.
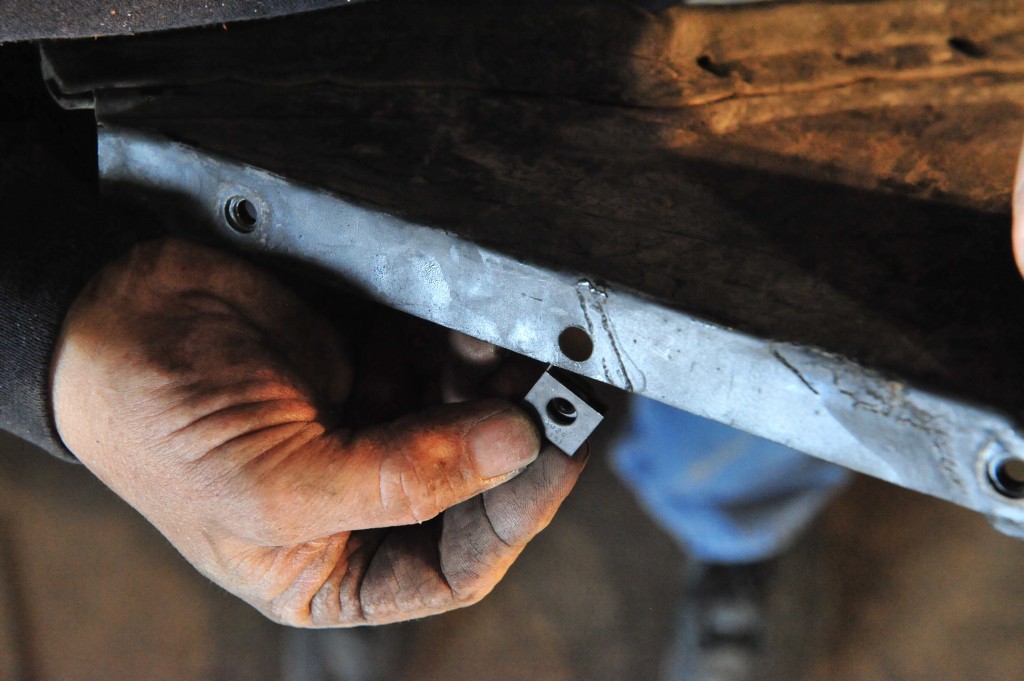
Install this fastener (also called a Tinnerman nut or speed nut) on the metal splash shield. Tightening the fastener draws two prongs together to act as a lock nut.
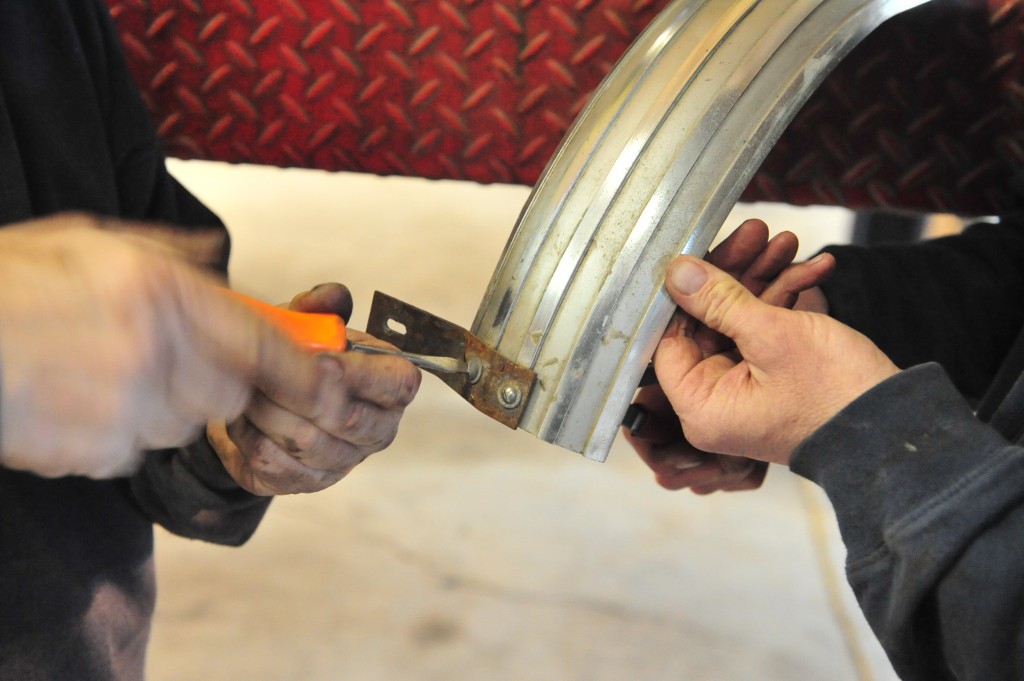
Another “mistake” on the used side pipes was screws in place of rivets on the front bend of the side pipe shielding. Buying a set of vintage side pipes is certainly not a guarantee the components are 100% correct.
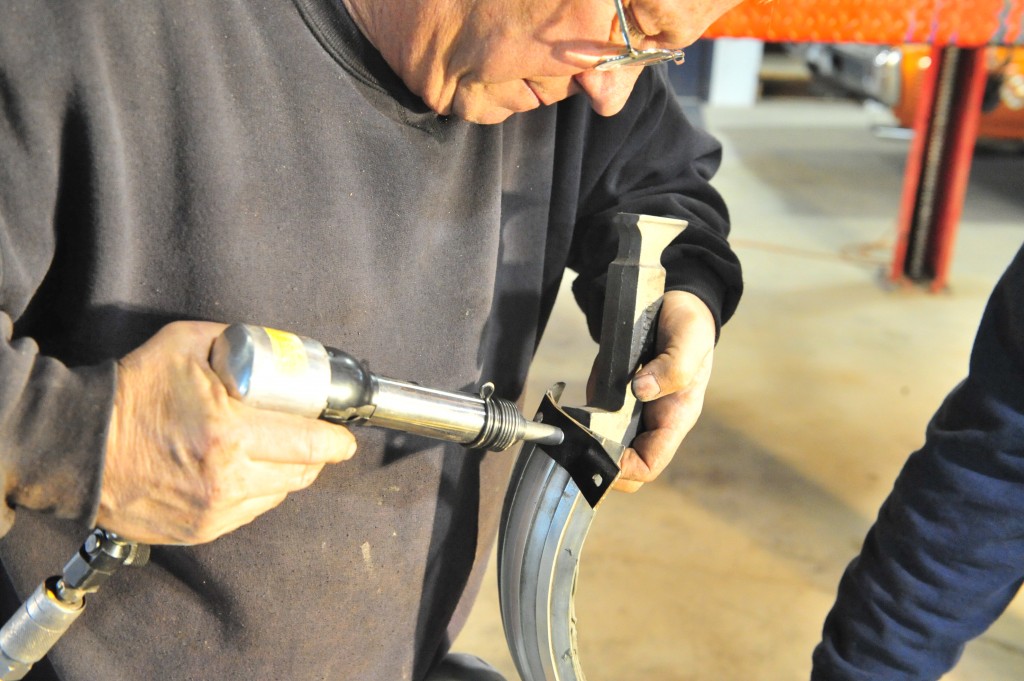
Mike took out the incorrect screws and installed rivets in his side pipes. New side pipes from vendors will already have rivets for the attaching bracket.
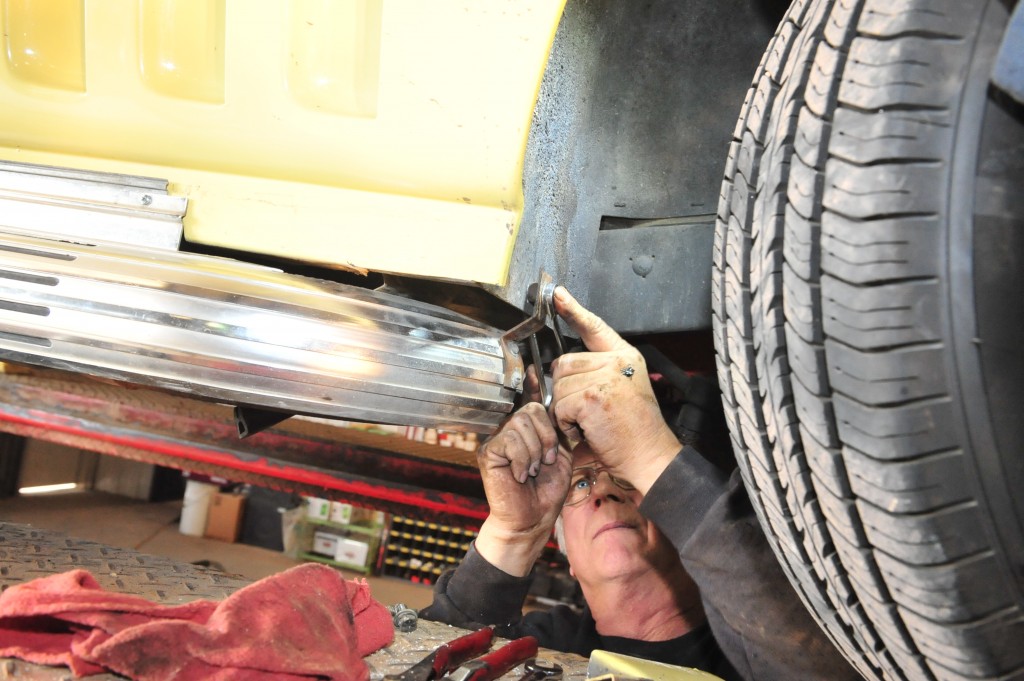
The top bolt of the brackets on the front of each side pipe cover goes through the body and into the Tinnerman nut in the metal splash shield. Tightening the top nut requires no backup.
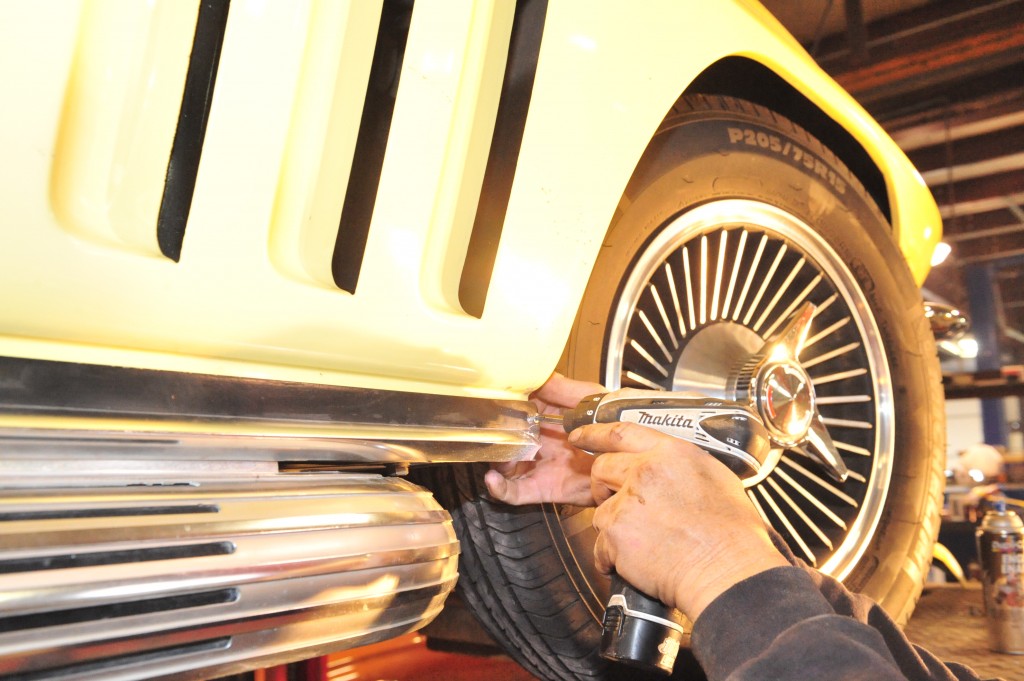
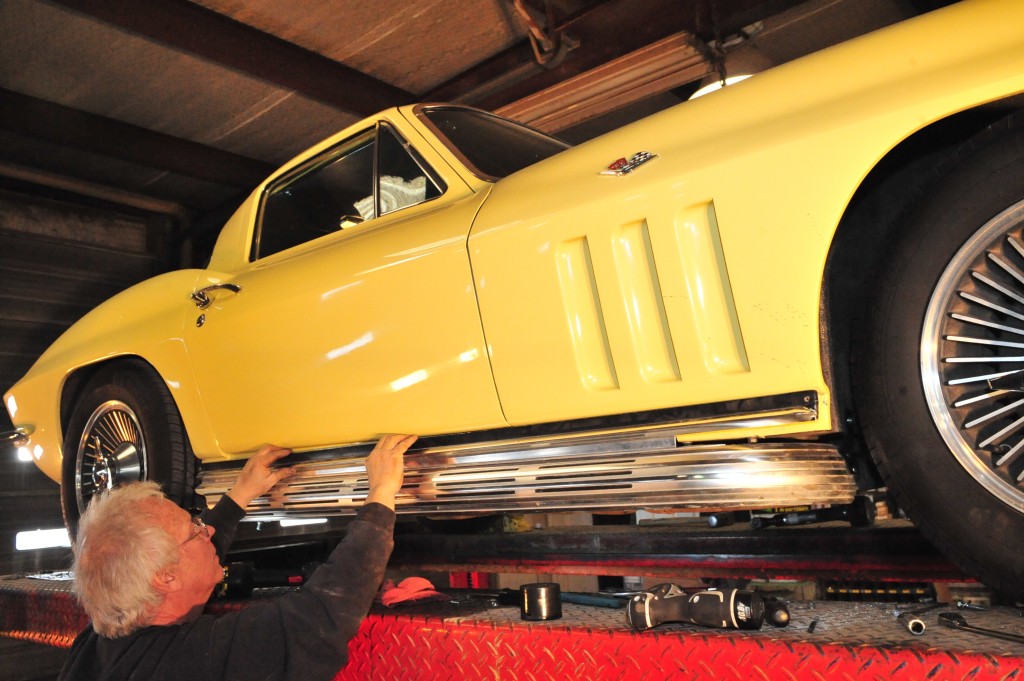
The rest of the installation is a piece of cake. Install the black molding unique to the side pipes.
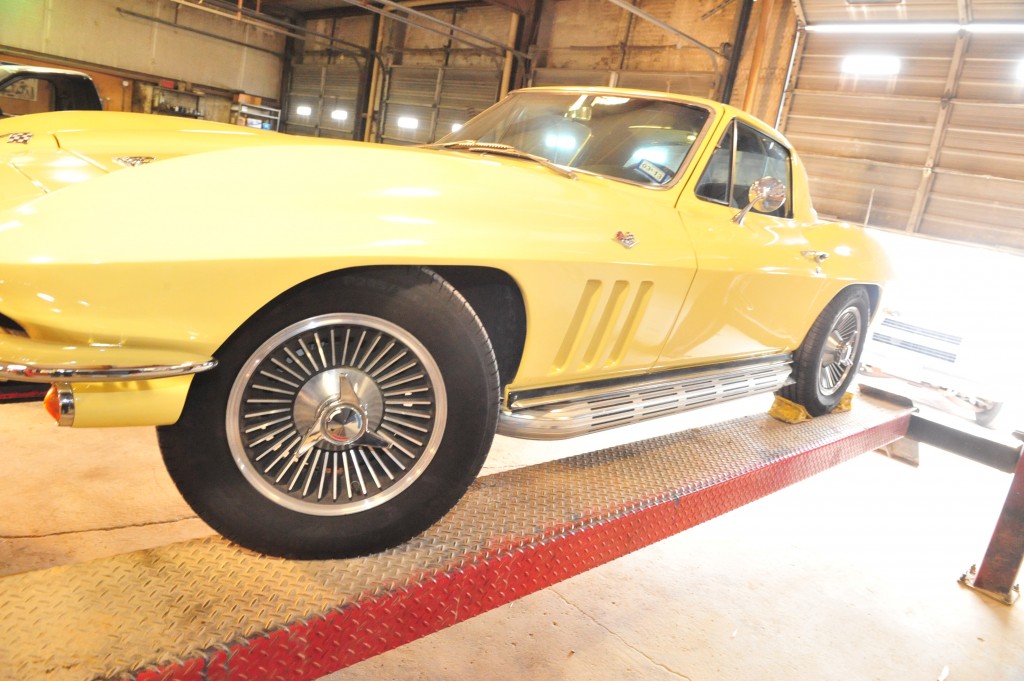
Completed, the side pipes add classic looks and a thunderous exhaust rumble to a 1965, 1966 or 1967 Corvette.
NOTE: Aside from complete Corvette exhaust packages, Corvette Central also has individual side exhaust components for those who need to replace a few mount brackets or missing bolts. These items can be found in our Corvette Parts Catalog or our C2 Corvette Exhaust section on our website.
NOTE: If you have spent time and money making your 1963-1967 Corvette’s Exhaust look and sound just right, adding our Corvette Side Exhaust Cover Protectors may not be a bad idea. They will help protect the front most edges of your Corvette’s Side Exhaust Covers from scratches and road rash that are very common on 1963-1967 Corvettes with side exhaust.
What length do I need for a 1963 c2 corvette?
I have a stock 66 with a stock 327/350 with stock cast iron manifolds. It looks like a 2in piple that does into the manifold and then a piece is welded on to increase it to 2.5in, will both sizes of 2in and 2.5in work// What’s the correct one. I want yo get it right the first time
For your 66 all small block manifolds were the same size. The systems were either a full 2″ or they stepped up on the front pipes from 2″ to 2.5″. So as long as you have correct/stock fitting manifolds any of our small block systems will fit. Your 350hp car should step up to a 2.5″.
Doing this to a 63 is there a part number for the rear valance without the exhaust holes? I looked in the catalog and don’t see one,Thanks
Part #142077
Will this part number fit on a 1964?
The same part for a 64 would be part #142144, the only difference being it is a press molded part instead of hand laid, so it has a smooth finish on the back of the panel.
https://www.corvettecentral.com/c2-63-67/body-frame/rear-end-fiberglass/64-66-rear-exhaust-filler-panel-with-side-exhaust-142144?returnurl=%2fsearch%3fcurrentsearchcategoryid%3d%26q%3d64%2brear%2bexhaust%2bfiller%2bpanel
I am tryin gto get this done on my 64 coupe. However, I have the chevy bowtie heads on a 355 ci the car was a basket case when i bought it.Is there an option for this set up to do side pipes with no heavy mods?
I am restoring my ‘66 at this time. What type adhesive is best for attaching the heat shield to the chrome cover.
The fiberglass insulator is bonded in place using epoxy.
Regards,
Gus
Corvette Central Product Assistance
I don’t see any mention of exhaust pipe hangers to support the 66 corvette side pipes. Do they mount only from the exhaust manifold? no hangers would contribute to the pipes bumping the brackets that you bend in. If I no longer have heat risers do I need some sort of spacer where the pipe attaches to the manifold. I’m concerned they will not hang correctly or be centered.
Side pipes are supported at only 2 points – the exhaust manifold and at the very rear by the attached bracket – I have some assembly manual pages I will send to you by email.
For proper fit, you will need either the heat riser valve or the spacer.
Small block needs the 2 inch version, 322110 Big block has a 2 1/2 inch, 322113
Gus Gustafson
Product Assistance
Corvette Central
800 345-4122
im finally getting around to installing my side exhaust on my 1967/427
I too am in need of the instructions or measurement for the rear hanger..any any other installation instructions you may have..
Thank you
Richard
Gus,
I would appreciate a copy of those pages as well. In the process of removing Hooker headers and going back to factory pipes from CC. Thanks
I followed the tech article and to clear the rocker panel tabs on my 1964 coup I found I had to hammer them nearly flat against the frame to get any clearance at all between the tabs and the pipes. I checked each one to make sure it was clear of the pipe. After cranking the engine back up there was what sounded like a definite clank of the pipe against the frame. Checking with my local corvette restoration guru he told me I would have to cut the tabs off above where the pipe would sit. I pulled the pipes, cut the tabs off using a cutoff wheel on my die grinder and re-installed the pipes. I cranked up the engine and had no clanking.
I want to install side pipes on a 64. I understand that I will need to trim the lower front and rear fender well? I watched the video on the 67 installation and saw how you trimmed the front fender..is the 64 the same and what other hurdles will I have?
The 64 will essentially be the same as the 1966 in this article.
Is there a product to reduce the amount of heat generated by the side pipes on the Door Sill area that transfers to the inside of the coupe?
Unfortunately, there is no product specifically for this on the Mid-years. In 1969 they started using a side exhaust shield insulator with aluminum skin, Located between the frame and body reinforcement channel (323104).
I live in Aruba & intend to install side exhaust system on my 1963 Corvette using fiberglass covers, Headers, 2 x glass pack exhaust mufflers welded inline on each side and connecting headers and mufflers with flexible pipes. I have several questions. #1: will 3″ mufflers fit into the covers? #2: will these two mufflers lower the noise? #3: will exhaust wrapping around mufflers dampen the noise? #4: will cabin heat be lowered? #5: will this setup hamper performance greatly? Hope you can help me out and thank you in advance.
My reproduction rocker molding trim (black & alum.) does not sit down firmly on the bottom edge. There is a very slight gap between the bottom of this molding, and the heat shield. Looks okay from normal viewing positions. Also, the screws provided are not long enough to go through the two layers of fiberglass AND the little square nut.
If you purchased them from Corvette Central please give us a call at (800) 345-4122.
Will these side exhaust work on a 61? Length ok? Any foreseeable problems?
Our side pipe exhaust kit was designed for 1963-1967 only. Unfortunately it wont bolt up to a 1961.
Your video does not show where to bolt up the back end of the side pipe?
If you’re still experiencing issues you can give us a call at (800) 345-4122 and we can try our best to walk you through bolting the back of the side pipes up.
I have a 66 coupe that had side exhaust when I bought it in 94. It took only a few road trips for me to decide I did not like the exhaust note in my left ear. I tried several things to quieten it down. Nothing worked. So, off came the side exhaust and on went a rear system. AH! Now I can hear again. But, the fenders had been cut and the brackets were not there. No easy way to install rocker moldings. I have driven that car for 20 years with the aluminum covers and no one yet has noticed it has a set of rear exhaust on it. So, I get the looks and don’t have to suffer the noise. The side exhaust lights up every squeak and rattle in a coupe. Not so bad on a Roadster. I have all the parts and these are factory pieces. I have two sets of side pipes. One is a 2 inch system which is correct for the 66 and the other is a 2 1/2 inch system with a section added at the exhaust manifold to narrow down to a 2 inch. This is the system that came on the car. I bought the 2 inch pipes in hopes of quieting it down. Didn’t work.
I appreciate the Tech help. My 2 questions involve the side exhaust installation. #1) The step where the “ear” is cut off to fit the pipe. A fellow Corvette Club friend of mine, who knows more than I do about Mid year Corvettes says I don’t have to cut the “ear” off to install the pipes. Is this true? I don’t see how it will fit. I also believe it will not look right. Your opinion? The Corvette I will be working on is a 67 Coupe that came with standard rear exhaust. Question #2) Does any company make anything to fill the rear valance holes, rather than replacing the whole valance? A good product would be something like a color matched plastic exhaust hole filler. It would not look like it was a factory side exhaust car, but it would look ok and save the money spent on a new valance and the cost of painting it. Thanks.
Yes you will have to modify the ear. Here is a link with directions https://https://tech.corvettecentral.com/2012/05/installing-a-side-pipe-exhaust-system-on-a-c2-vette/
At this time it looks like we’re only offering the entire valance.
Do you have a complete side exhaust kit that includes headers that replace the stock manifolds? Would like this kit for a 1965 327 coup w/AC.
Yes, please check out our side exhaust kit options for your generation.
Hello,
Like the gentlemen above, I’m looking for a header that is compatible with the factory style side exhaust system. I have the Doug’s long tube side exhaust on now, I want the factory look without the header tubes coming out from under the fender. Do you have a shorty style header that is compatible with the factory style side exhaust system?
Thanks,
Jeff
I apologize we do not.
Thank You,
Corvette Central