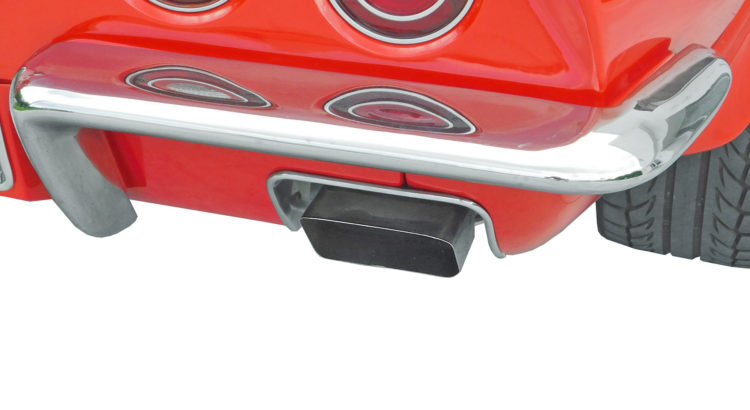
For many Corvette owners, the sweet song of a Chevy V8 is a cherished part of the soundtrack of our lives. But the exhaust system is a wearing component, or more accurately a corroding component, of our cars.
Fortunately, Corvette Central manufactures their exhaust systems so you can count on USA-made proven quality at a very reasonable price. And we offer many options for various applications and tastes. Two videos can aid in your choice and they are at the end of this article. One presents the sound from old stock Corvette mufflers. The second video is after the installation of new N11 off-road Corvette mufflers.
Installing 1963-1973 Corvette Mufflers
Let’s look at the choices for C2 and C3 Corvettes when it’s time to replace the mufflers. Then we’ll show muffler replacement with some installation tips. Yes, sometimes it can be exhausting work (sorry) but the reward is music to your ears.
The following mufflers are available from Corvette Central:
Available C2 Corvette Mufflers:
- 322361 63-67 2″ Mufflers
- 322362 63-67 2-1/2″ Mufflers
- 322319 63-67 2″ Magnaflow Mufflers
- 322080 63-67 2-1/2″ Magnaflow Mufflers
- 322349 63-67 2-1/2″ Off Road Mufflers – Clamp On
- 322419 63 2″ OEM Style Welded Mufflers
- 322425 64-67 2″ OEM Style Welded Mufflers
- 322363 63 2-1/2″ OEM Style Welded Mufflers
- 322634 64-67 2-1/2″ OEM Style Welded Mufflers
- 322104 64-67 2-1/2″ Off Road Welded Mufflers
Available C3 Corvette Mufflers:
- 323371 68-72 2″ Mufflers
- 323372 68-72 2-1/2″ Mufflers
- 323380 73 2″ Mufflers
- 323381 73 2-1/2″ Mufflers
- 323112 68-72 2″ Magnaflow Mufflers
- 323416 68-72 2-1/2″ Magnaflow Mufflers
- 323505 68-72 2″ OEM Style Welded Mufflers – 4 Speed
- 323514 68-72 2-1/2″ Auto OEM Style Welded Mufflers
- 323564 68-72 2-1/2″ 4-Speed OEM Style Welded Mufflers
- 323571 73 2″ Automatic OEM Style Welded Mufflers
- 323524 73 2″ 4 Speed OEM Style Welded Mufflers
- 323549 73 2-1/2″ SB Automatic OEM Style Mufflers
- 323501 73 2-1/2″ OEM Style Welded Mufflers
- 323325 68-72 2-1/2″ Off Road Mufflers Clamp On
- 323025 68-72 2-1/2″ 4 Spd N11 Off Road Welded Mufflers
- 323102 68-72 2-1/2″ Auto N11 Off Road Welded Mufflers
How To Install Mufflers On a 63-73 Corvette: A Step-By-Step Guide
01. Determine whether you want separate mufflers or a welded pair.
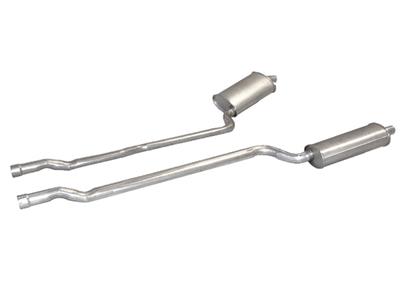
In a welded pair of Corvette mufflers, the muffler is welded to the intermediate pipe, as it was from the factory. For originality and judging choose the welded pair as shown here (68-72 MUFFLER 2 1/2″ 4 SPEED OEM STYLE WELDED, #323564). However, after 50 years of use, it’s common for Corvettes to have the replacement clamp-on mufflers and that opens up more options, including many separate muffler selections.
Corvette Central offers original-style Aluminized mufflers that have five baffles. They are the least loud but still sound healthy and are a good choice for drivers who want to avoid the exhaust droning when cruising.
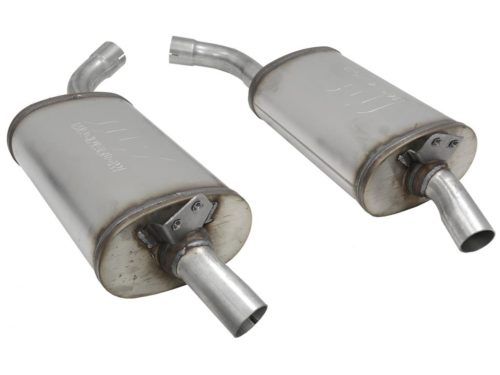
Magnaflow mufflers shown here are another option. They have a Stainless Steel case but look close to stock and are a little louder. The pipe goes straight through the muffler with no chambers, baffles, or louvers so if you want the least resistance to exhaust flow Magnaflow is a good choice.
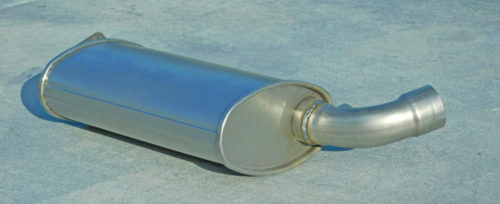
For the purposes of this step-by-step guide to installing mufflers on a 63-73 Corvette, we are installing the factory optional off-road 68-72 N11 mufflers (Clamp-On). These were developed by Corvette Central to replicate the sound of the original N11 muffler. Like the originals, they have only three baffles and are the loudest. These N11s are aluminized so they’ll look good for years — if not decades.
02. Make sure you have all the materials you need.
Beyond the mufflers themselves, there are
a few extra parts and pieces you might need for this muffler installation project.
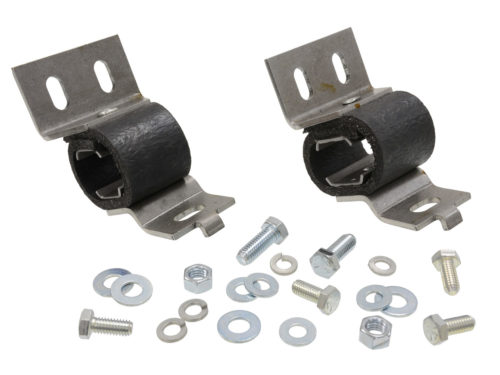
Exhaust Clamps. Corvette Central offers multiple choices for the exhaust clamps. Heavy-duty clamps (3/8-16 with 9/16 nuts) are available in both steel and stainless steel. If guillotine clamps are your preference, they are also available in both steel and stainless steel. Tip: If you are ordering clamps for the exhaust extensions, be aware they may be 2” even if the exhaust pipes are 2-½”.

Hanger Kit. It’s a good idea to order a hanger kit too (63 322176, 64-67 #322187, 68-72 #323289, 73 #323290). The rubber gets tired or stretched after years of heat and strain. The kits include all needed bolts, nuts, and washers.
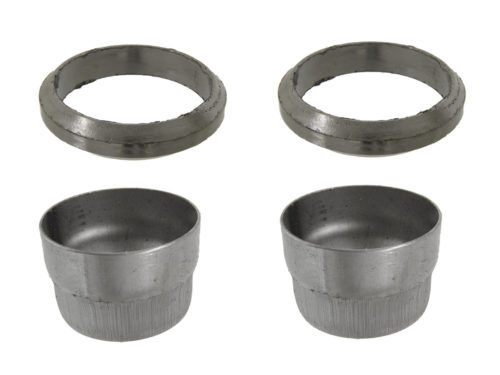
New exhaust donuts and sleeves. These are a good idea to have handy if you are removing the front pipes at the same time. It is not uncommon for the sleeves to have been left out in previous work and they aid sealing at the exhaust manifold.
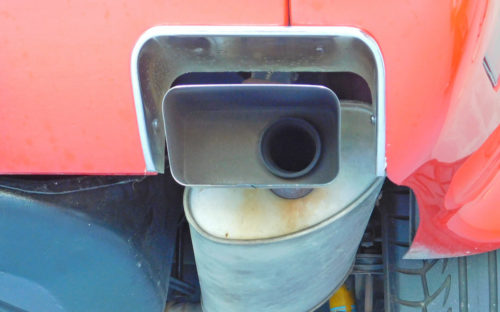
03. Check your muffler outlet pipe.
Some Corvette models feature an offset muffler outlet pipe. For example, the muffler outlet pipe is offset where it goes into 70-72 Corvette exhaust extensions. For 1973, the pipe was centered. Because 73 mufflers were one-year-only, there are fewer options for this year.
Tip: Switch to 70-72 mufflers and extensions on your 73; you’ll have a wider choice of mufflers and only an NCRS judge will notice the difference.
04. Gather Your Tools
Here are some of the items that can make installing your 1963-73 Corvette muffler a little easier.
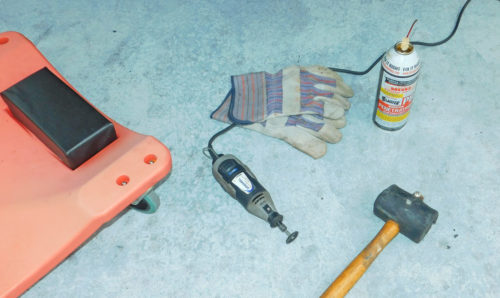
- Rubber hammer for removing and installing the exhaust extensions.
- Penetrating oil for clamps, bolts and for the pipe itself.
- Heavy gloves to protect your hands when twisting and wrestling with the muffler.
- And a Dremel tool with cutoff discs if the muffler resists coming off.
05. Remove the exhaust extension first
When possible, remove the exhaust extension first. It’s easier to pull and twist the extension while the muffler is bolted solidly to the exhaust pipe.

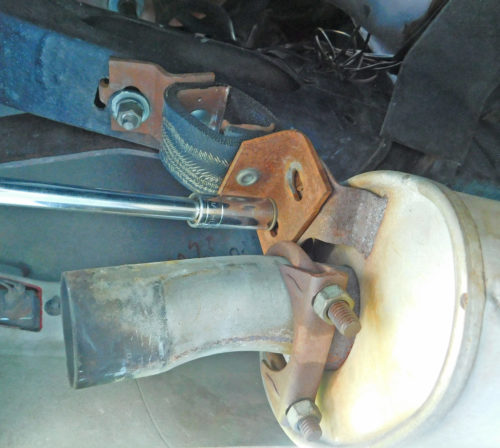
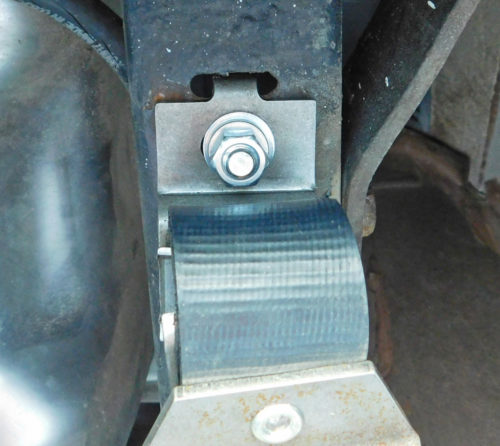
06. Remove the two bolts that attach the hanger to the muffler.
Then remove the nut and bolt that attaches the hanger to the frame. Insert a 9/16 wrench through the wide slot in the frame to keep the bolt from turning. With the hanger and extension out of the way, it’s easier to twist the muffler back and forth to remove it.
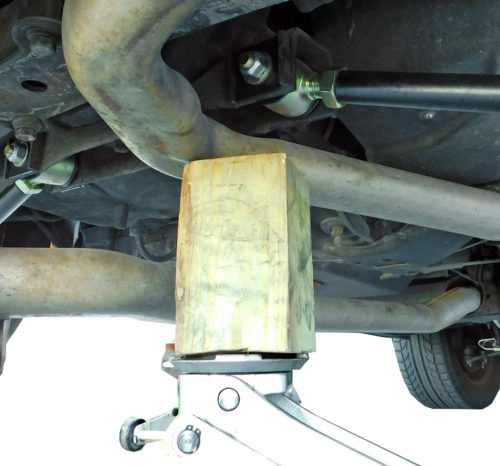
07. Remove the original muffler.
Here’s a tip for removing the original muffler on your 1963-73 Corvette: use a jack to hold the intermediate pipe firmly up against the strut rod bracket. That makes it easier to wiggle and twist the muffler off the pipe. Don’t worry if the exhaust pipe is somewhat flattened where it goes under the strut rod bracket – that’s normal.
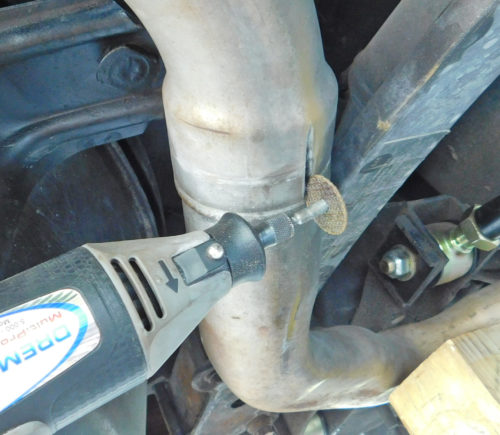
If the muffler is too tight on the pipe, use a Dremel tool with a cutoff disc to cut through the muffler pipe. When available, using an air impact hammer with a chisel bit or heating it with an oxy-acetylene torch is even faster. Twist the muffler back and forth until it comes off. Heavy gloves can help protect your hands from getting smashed.
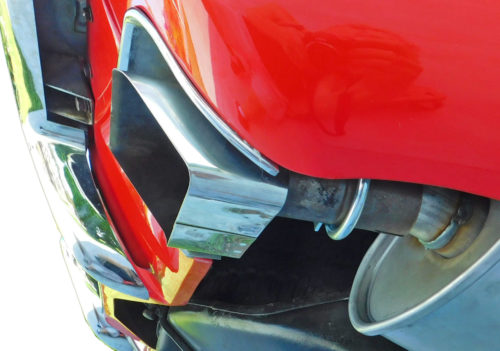
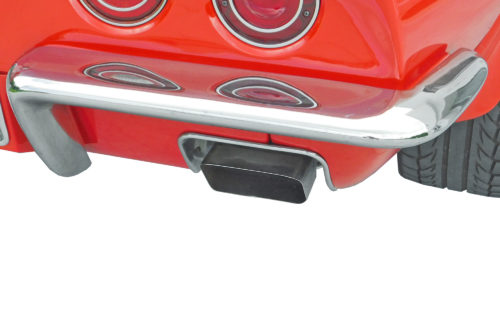
08. Install the extension after the new muffler is installed and clamped to the exhaust pipe.
Once the new muffler is installed and clamped to the exhaust pipe, it’s time to install the extension. A rubber hammer can help tap it into the desired position. Once in place and aligned, tighten the clamp. I generally place the nuts up but on some years the nuts face toward the center of the car if originality is a concern.
The slots in both ends of these hangers enable a lot of adjustment to help position the exhaust extension up and down and left to right.
09. Tighten nuts and bolts.
When you’re satisfied with the alignment and position of the exhaust extension, tighten all the nuts and bolts down securely, and then enjoy the sweet music of the big V8.
10. Enjoy your newly installed 1963-73 Corvette muffler!
It is impressive how long aluminized exhaust mufflers and pipes last. After decades of use, this muffler still is solid and looks good. However, well over 100,000 miles of use and abuse caused a baffle to finally come loose and rattle. This proved to be a good excuse to install the more aggressive sounding N11 mufflers.
Story and photos courtesy John Pfanstiehl
Stock exhaust sounds on a C3 Corvette
Exhaust sounds on a C3 Corvette with Corvette Central’s Off-Road N11 Welded Mufflers
How much of an overlap is there at the connection between the front and rear exhaust pipes of a 1973 L82 exhaust system?
Purchased front 64-65 2 1/2″ 327 exhaust pipes and welded 73 L82 rear 2 1/2″ exhaust pipes & mufflers. Both front and back pipes have female/expanded ends at the center connection point. Intend to use a short section of 2 1/2″ pipe to join the front & back pipes..
Want to know how much to shorten the pipes at the connection point so the total length of this setup is factory correct and the exhaust tips do not stick out too far.
1964 with 21/2 exhaust, it seems like the new original mufflers have the attaching bracket welded on the wrong side of the muffler it should be on the outside of the muffler at the rear, is this correct?
insure the car as a collector car and it wont be subject to emisions
I have a 63 corvette that i am putting back together. It has a 327 engine and 4 speed manual trans. The pile of parts that came with it has manifolds and pipes and mufflers that are 2 inch. Can i use 2in. with a manual trans or does it have to be 21/2inch?
Hi I live in Maricopa County AZ and my C3 1978 Corvette failed emissions. I was told that it will cost $4500 to replace everything in the exhaust. This includes both maifolds, the catalytic converter, and the entire exhaust. I have side pipes and that the car is not set up in this state thats legal. This $4500 is to do the entire work including labor at a repair facility. Does that seem reasonable or unreasonable a price? Thank you
Seems a little high.
Great article love reading them. Wish y’all
Would include a video of that car with the magma flow muffler installed for comparison