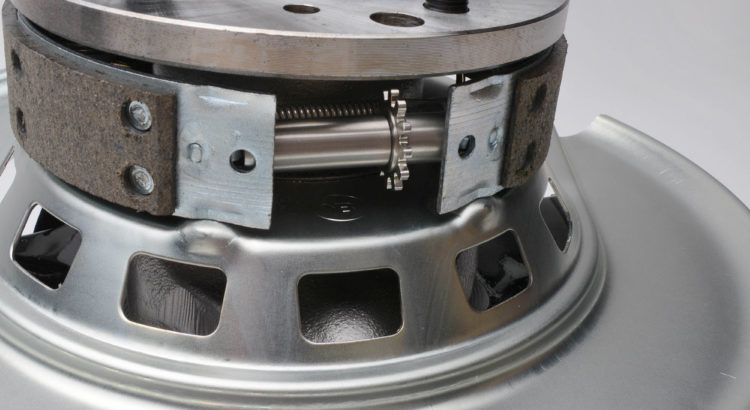
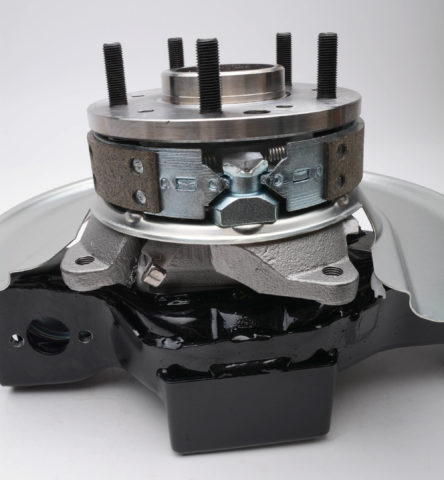
From 1965 to 1982, Corvettes were equipped with parking brakes that were drum brakes inside the disc brake rotors of the rear wheels. Can you believe that?
Don’t worry; we’ll get into the nitty-gritty of how to replace Corvette parking brake shoes. However, let us preface this article by saying that replacing these brake shoes on a C2 or C3 Corvette is an arduous project – but Corvette Central is here to help!
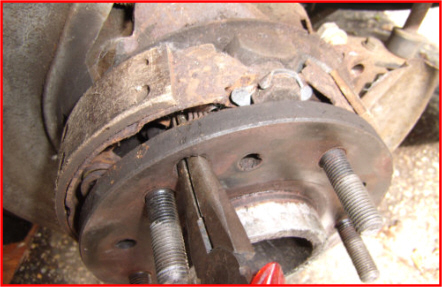
Why is this parking brake shoe replacement so difficult, you ask? When the factory assembled the Corvette parking brake shoes, they did so before installing the spindle, so everything was easily accessible. Now that the spindle is pressed on, you’ll have to work on the fully-assembled unit, making things a bit more difficult.
How to Replace Corvette Parking Brake Shoes
Taking the old brake shoes off is a piece of cake, and it can be done in a matter of minutes once the rotor is off the spindle. But getting the new shoes on will take some patience and perseverance.
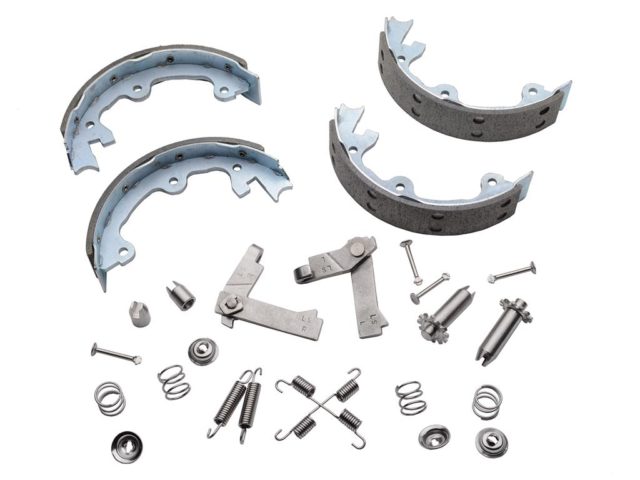
Here at Corvette Central, we acquired stainless steel parking brake shoes and a stainless steel parking brake hardware kit to do the job first-class.
We’ll assume that you’ve already removed the rear rotors from the car, and that’s where we’ll start the process of removing and replacing the Corvette parking brake shoes. These procedures are identical for Mid-Years and Sharks
Parking Brake Shoe Replacement Step-by-Step
Step 1: Prepare Your Materials
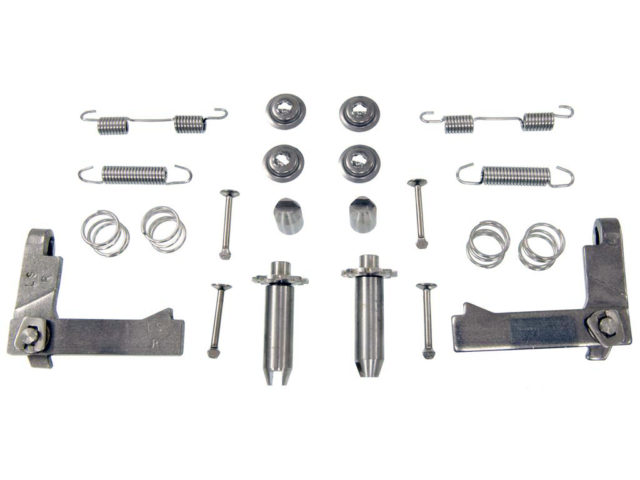
This is the stainless steel parking brake hardware kit from Corvette Central .We prefer to use fresh materials whenever possible, and the stainless parts won’t rust as the original OEM hardware did.
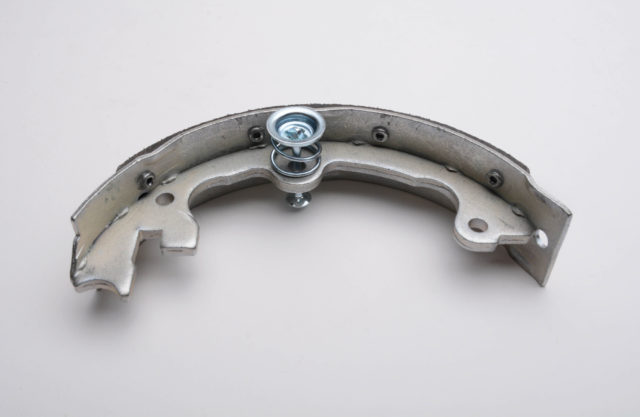
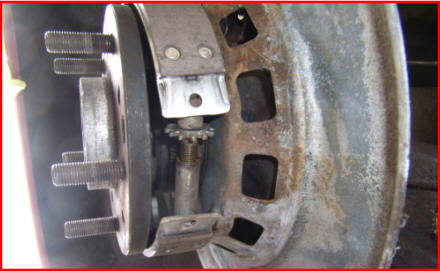
This shows you one of the side spring retainers–the part you’ll undoubtedly spend a good chunk of your time trying to install. The photo is of the retainer installed on the parking brake shoe since it is virtually impossible to show once it’s on the car (thanks to the spindle obscuring a good view of it).
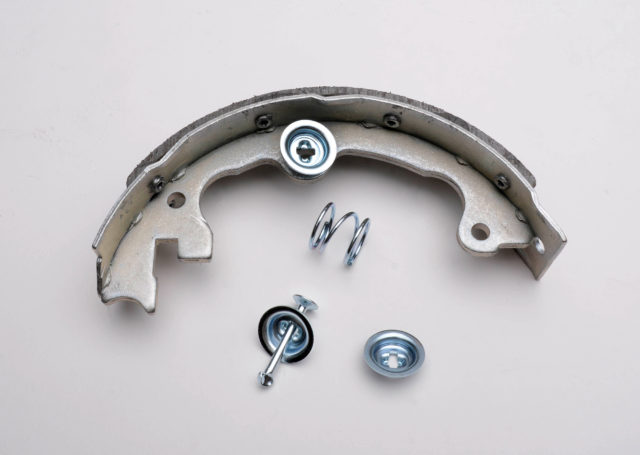
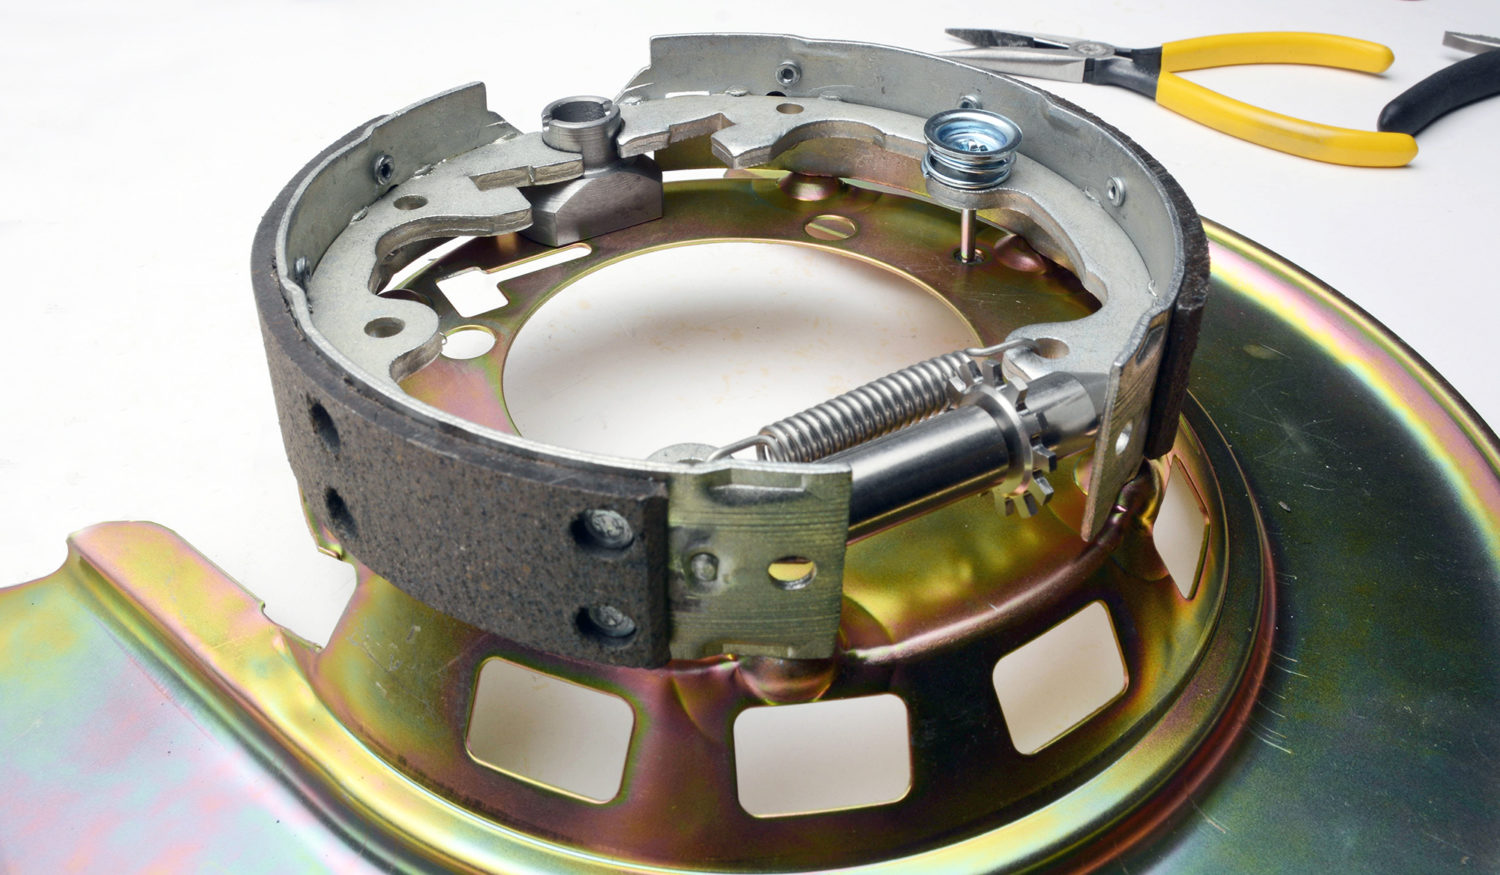
This shows you the components of the side spring retainers below the installed assembly. There are two on each side of the car (one assembly for each parking brake shoe).
Step 2: Gather Your Tools

A good pair of long needle-nose pliers is an absolute must for this project, and a pair (or a couple of pairs) of surgical vein clamps (known as hemostats in medical jargon) will also prove to be invaluable.
Step 3: Expand Parking Brake Shoes
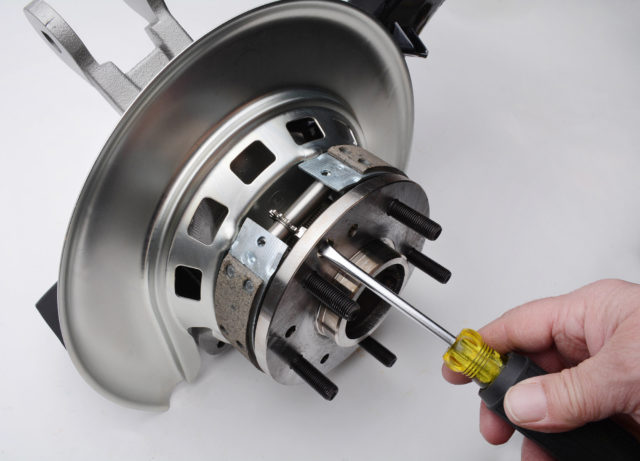
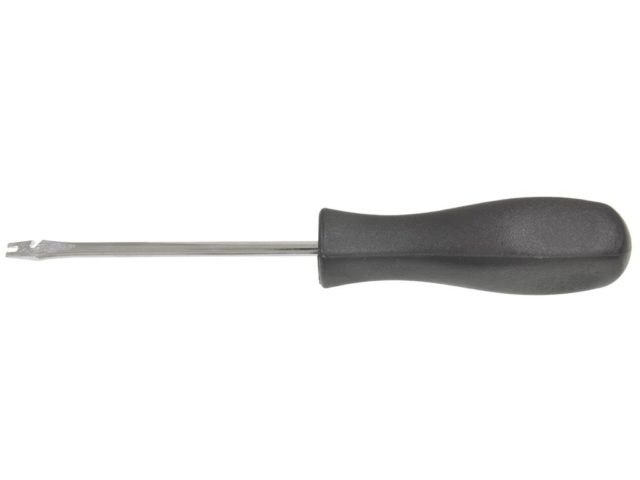
Start by expanding the parking brake shoes as far as they will go by inserting a thin flat-blade screwdriver in the adjusting hole and moving the star wheel with it. When you expand the shoes, it makes accessing the fasteners easier.
Step 4: Get in Line With the Access Hole
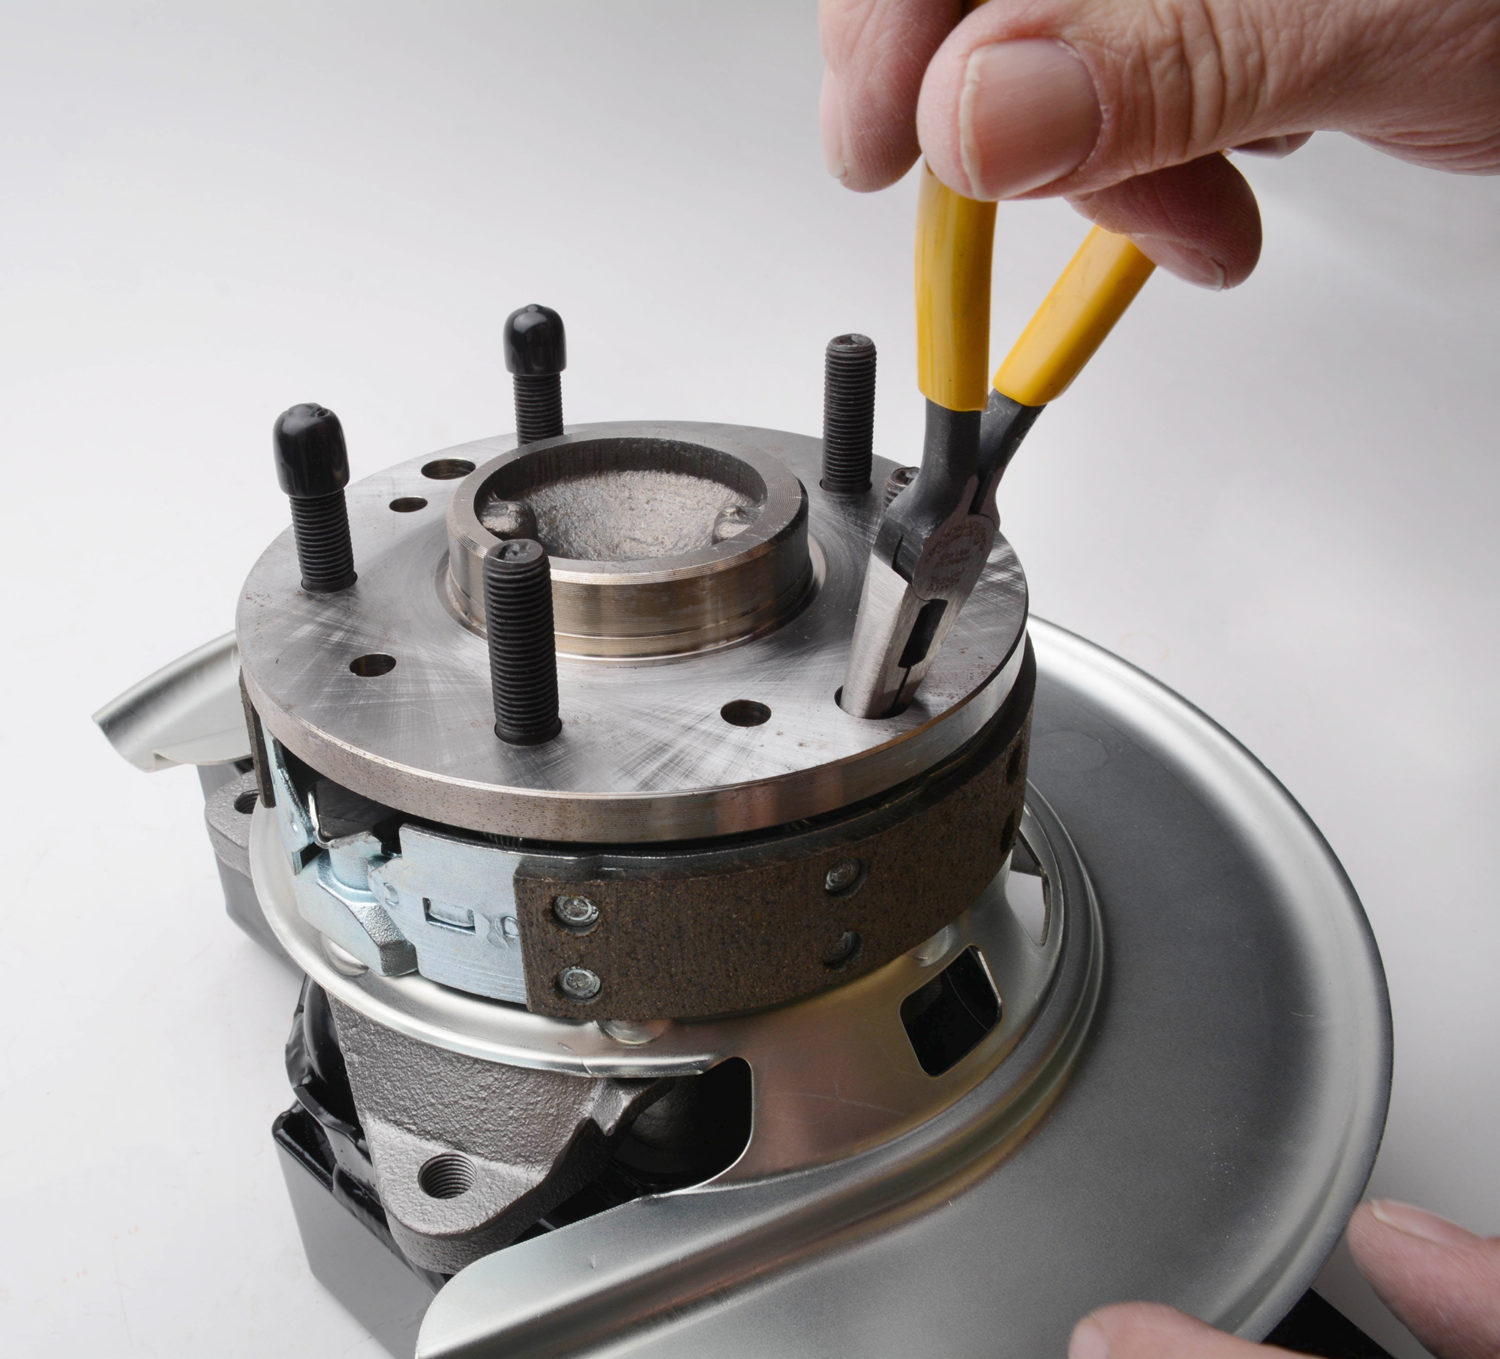
Rotate the spindle to line up with the access hole used for adjusting the shoes so that it corresponds with the end of the upper connecting spring. Then, use needle-nose pliers or a pick tool through the access hole to unclip the upper connecting spring; this spring holds the tops of the two parking brake shoes together.

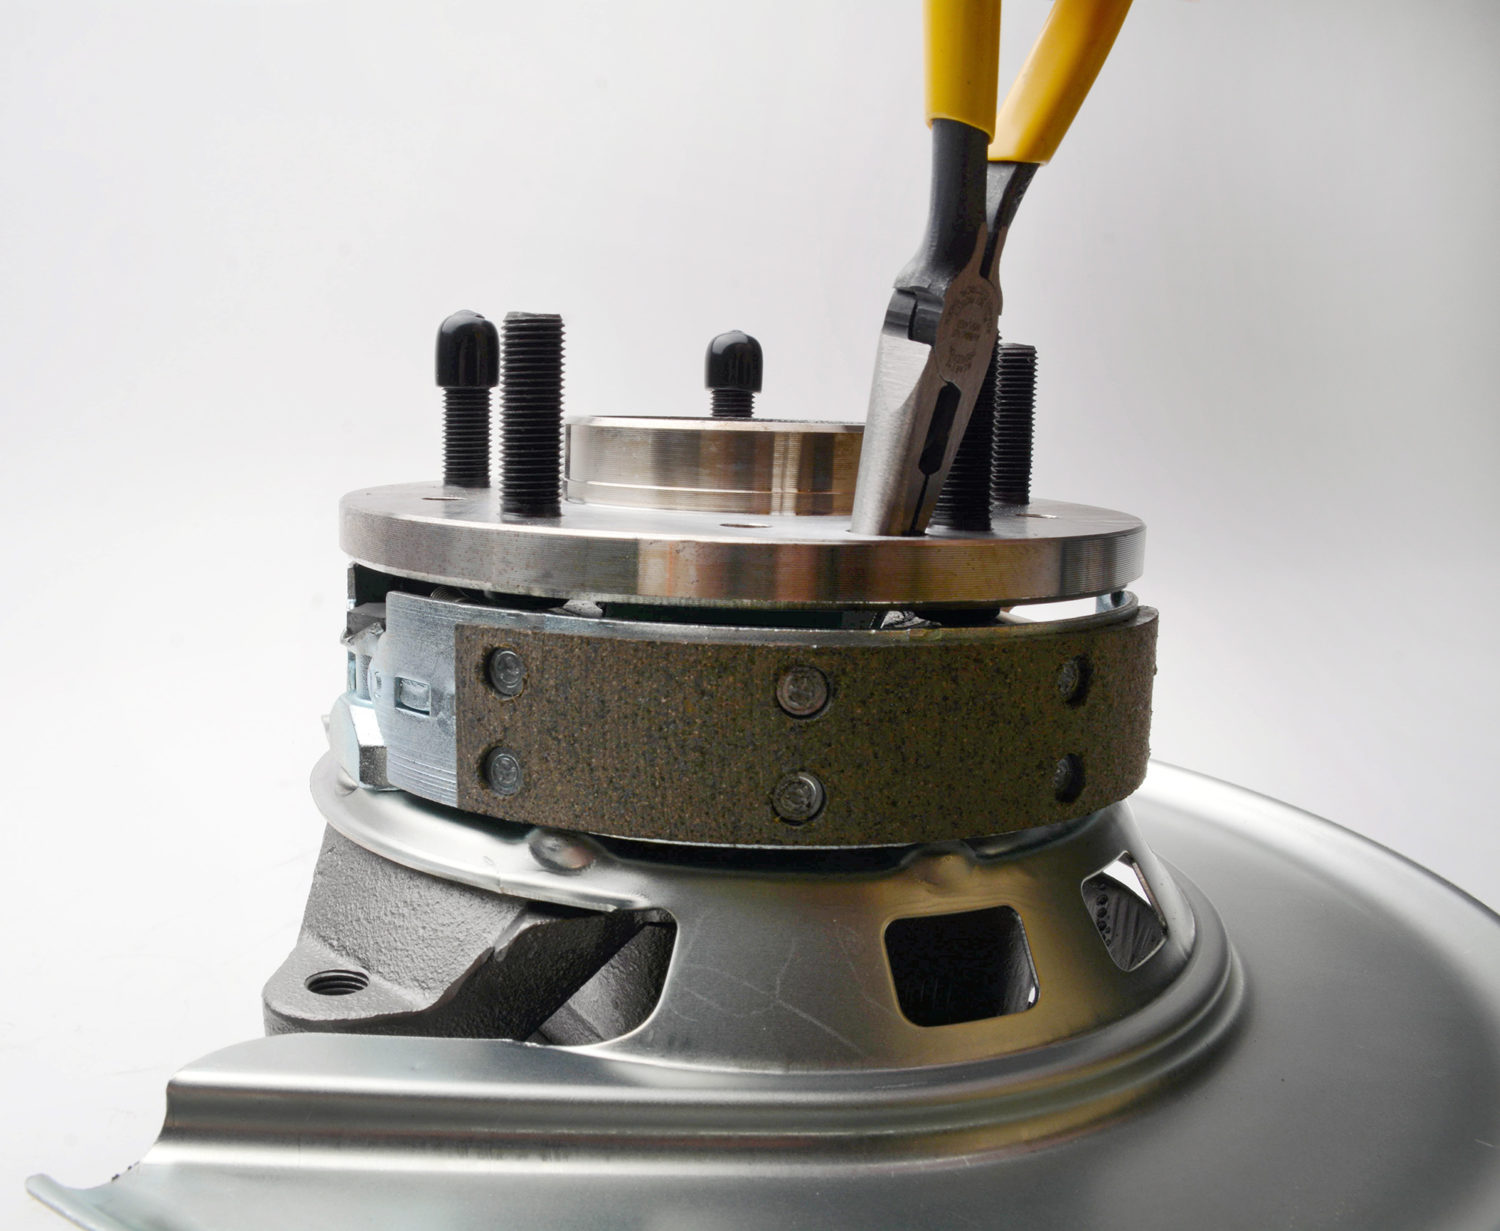
Rotate the spindle again to line up the access hole with the side spring retainer pin, insert the needle-nose pliers (while pressing in on the spring plate), and rotate the pin so that its flukes line up with the slots in the plate. This will free the plate and spring. Repeat this procedure with the other parking brake shoe side spring.
Note: The front retainer pin can be removed from the spindle; the rear retainer pin is captive and cannot be removed.
Step 5: Lubricate or Replace the Actuating Lever
All of the hardware shown is being replaced with new stainless parts from Corvette Central. At this time, you can lubricate or replace the actuating lever if it is seized or frozen. This one was not, so it was merely lubricated with white lithium grease before proceeding with the new shoe installation.
Step 6: Attach the Upper Connecting Spring
Attach the upper connecting spring to one of the brake shoes and hold it in position. Put the opposite brake shoe in position and attach the other end of the spring to it (this may take some trial and error– the needle-nose pliers and/or hemostats come in handy here). Next, insert the adjuster at the bottom of the shoes between them.
Note: The star wheel must always face the rear of the car. Expand the adjuster all the way to gain maximum spread of the brake shoes.
Step 7: Compress and Lock in the Side Springs
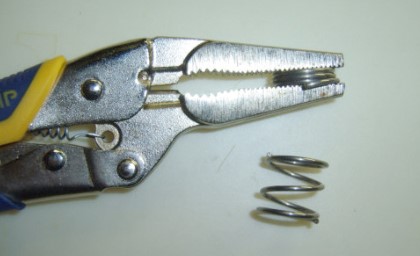
Now comes the intricate and difficult part. Use a pair of long-nose vice-grip pliers to compress one of the side springs and lock it in the compressed state. Use a thin monofilament fishing line or dental floss to tie the loops of the spring on both sides of the vice-grip jaws so that the spring stays compressed when the pliers are released. Sometimes, fishing line works better than dental floss, which tends to stretch.
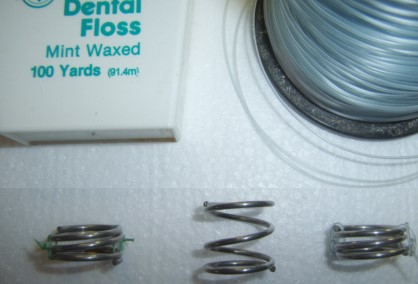
Even when compressed and tied, installing and locking is difficult. If you don’t compress these springs, it is virtually impossible to install them. Compress and tie the other springs. Here’s a spring tied with dental floss on the left, an uncompressed spring in the middle, and one tied with fishing line on the right.
Step 8: Expand the Springs and Finish Up
Slide a compressed spring over the captive spring retainer pin and put the end cap on, rotating it so that the slots are at 90° angles to the flukes on the pin. When you get it on, use a match or lighter to melt the fishing line or burn the floss so that the spring expands. Repeat this process with the other shoe. Then, re-install the rotor and caliper, adjust the shoes, bolt the wheel back on, and do the other side.
Corvette Central also offers a tool to help with installing brake shoes and rebuilding kits without extensive disassembly, saving you time. Check it out!
Now that you’ve had your initial trial by fire on this first side, you might find that the other side will go a bit smoother!
More Helpful Information: 1963-1982 Corvette Front and Rear Suspension Assembly
Replace Your Corvette Parking Brake Shoes With the Help Of Corvette Central
Corvette Central is here for all your Corvette needs! When you’re tackling a new project for your car, there’s no need to do it alone. For parking brake shoe replacement parts and more, contact our helpful team or browse our online inventory.
By: Tom Benford
my body control module and rpo codes do not match could you help me please.
I have a 1977 Corvette I replaced the wheel bearings parking brakes stick on the lift side of the car I am putting new parking brakes in and when I get them in order the spendels catch them and pull them apart it’s the bolts on the back where you tighten the lugs to that is catching them I don’t know why
If you didn’t get it fixed, make sure the lever on the top is on correctly and where it is supposed to be. If it’s under the shoes they won’t sit where they are meant to and open the shoes correctly