
It doesn’t happen often, but when a headlight actuator control module bites the dust, your 1997-2004 C5 Corvette’s headlamps will no longer go up or down. If you’re running into problems with your Corvette’s headlights, we can help you understand what’s happening and find a fix. Read on.
Before You Get Ahead of Yourself: Check Your Corvette’s Fuse Panels
If your headlights aren’t going up or down as they should, the first order of business is to check your C5 Corvette’s fuse panels — both the one under the passenger side kick panel and the one under the hood. Also be sure to check Fuse #6 on the inside panel (parking lights/10amp). If this fuse is blown, it will interfere with the headlight motors.
Not seeing any issues there? The next likely culprit to suspect is your Corvette’s headlight actuator control module itself.
How to Replace a C5 Corvette Headlight Actuator Control Module in 10 Steps
Before getting started, it’s important to make sure you have the right setup and tools in place. You’ll have to get under the right front side of your C5 Corvette to access the module, so you’ll need to jack the car up and support it with jack stands while you’re working on it. You’ll also need a set of metric sockets and wrenches.
After this preparation, you’re ready to replace your Corvette’s headlight actuator control module. Follow these 10 steps.
1. Check Fuses
Here’s the problem: your Corvette’s headlights are stuck in the Up position and won’t retract automatically. To get them back down, they must be lowered using the knobs on the backs of the headlight motors. Fuses are the first items to check before you go any further, and that means checking them on both the inside and under-hood fuse panels. 
2. Use Jack Stands & Inserts
As we stated above, you should always use jack stands to prop your car up while working on it. Use a jack insert in the frame rails of your C5 Corvette to avoid any rocker panel damage when jacking.
Never get under your car without jack stands. Nothing can ruin your day faster than having your C5 come crashing down on you.
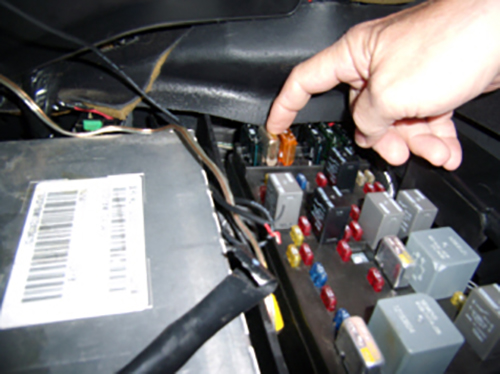
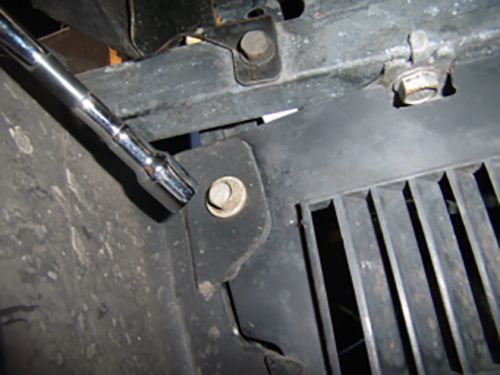
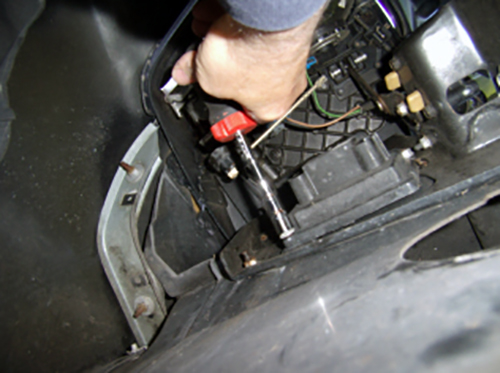
3. Check Headlamp Maxi-Circuit Breaker
The finger is pointing to the 20amp headlamp maxi-circuit breaker (#52) on the instrument panel fuse block located on the passenger side under the toe board.
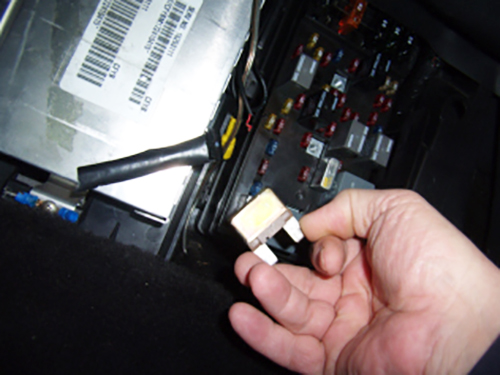
4. Remove Breaker
Remove the maxi-circuit breaker before changing the control module, as you don’t want any current going through the circuit wire while you’re working on it.
5. Raise & Unplug Right Headlamp
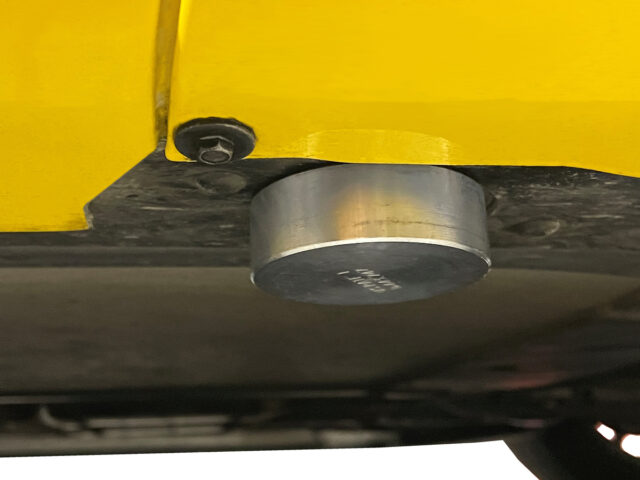
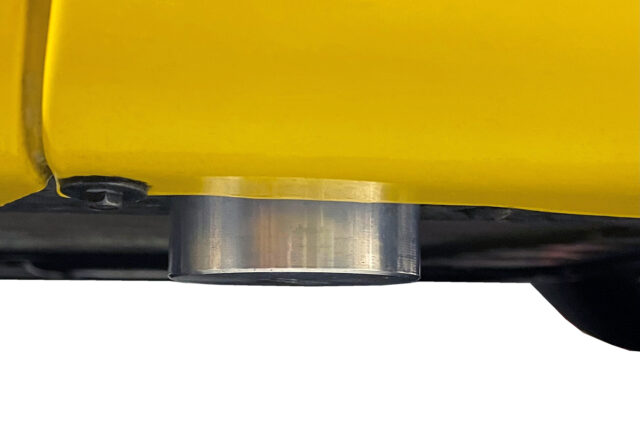
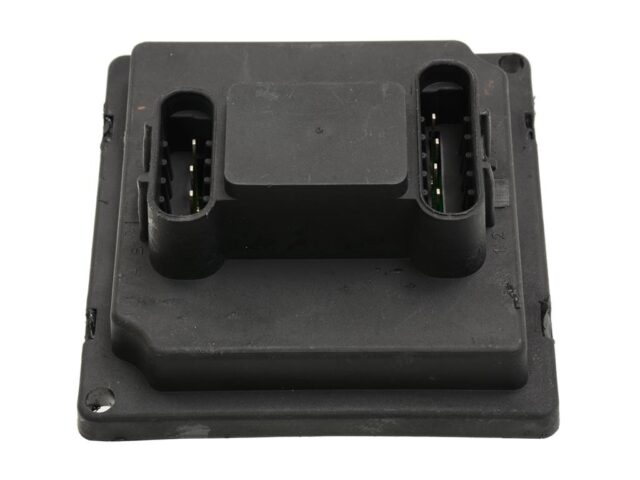
Open the hood and raise the right headlamp manually if it isn’t already up. Then unplug the right headlamp wiring connector from the forward lamp wiring harness.
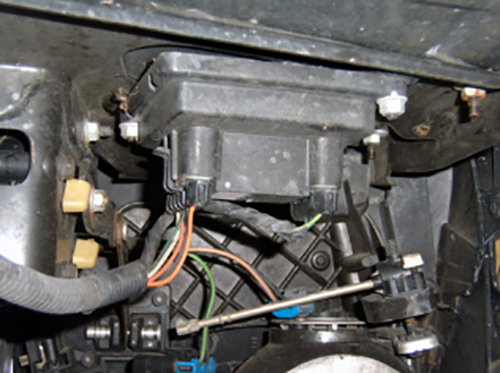
You should then see the actuator control module. It looks like this.
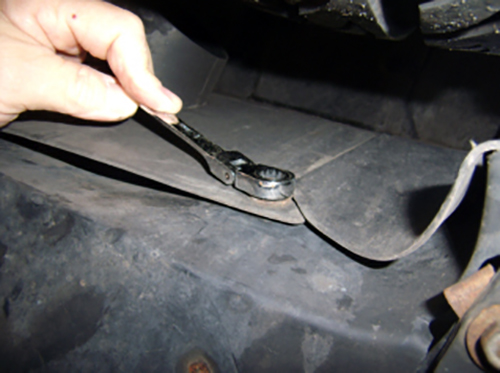
6. Remove Closeout Panel
Go under the car and remove the front fascia lower closeout panel by removing the bolts that attach it to the wheelhouse panel.
7. Remove Valance Panel
Remove the bolts that hold it to the valance panel. The closeout panel can then be removed by pulling down on it.
8. Release Brake Caliper Cooling Duct
Once that’s out of the way, release the brake caliper cooling duct from the front fascia and reposition the duct so you have access to the actuator control module above it.
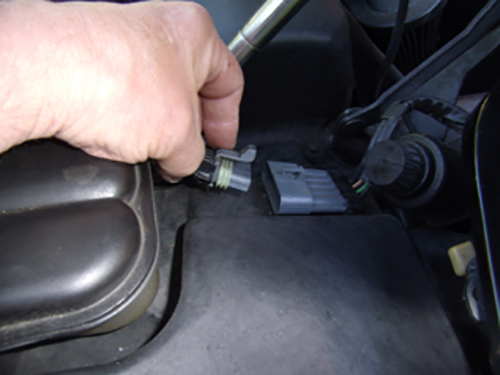
9. Unplug Connectors
Unplug the two connectors from your Corvette’s actuator control module.
10. Replace Headlight Actuator Control Module
Use a 10mm socket or nut driver to remove the two bolts that retain the module, and then replace it with the new one. Secure it with two bolts, plug the connectors back in, reposition the cooling duct, and replace the closeout panel — making sure you secure all components with the fasteners removed previously.
Next, plug in the headlamp wiring harness connector, replace the 20amp maxi-circuit breaker, and check out your now properly functioning headlights. Job complete!
For More Tips & Corvette Replacement Parts, Contact Corvette Central.
Have another Corvette project you’re working on and need parts for? Browse our inventory or contact our team. We’re happy to help you find what you’re looking for — quality guaranteed.
My 2003 Corvette 50th headlamp after retracting is making a growling noise would it be the actuator or the gear?
Gary
The bright headlight will not come on (right side only), but the dim one works fine. The left side lights work (bright and dim). I have changed the bulb, but it still will not come on. I had a friend tell me I need to replace the Headlight Actuator Control Module. Based on what I have read, this module controls lights going up and down. What do I need to check first before installing the control module?
C5 headlights popping up even after key off?
Are you sure the gold colored self resetting circuit breaker isn’t bad? Jeff 1999 FRC 108453 miles
Bought new actuator and plugs. The lights don’t raise up’ after i raise them manually, i turn the key on and they retract, can you tell me why that is ? All parts matched when i received them and i followed color pattern , from original ones.
Did you ever figure it out