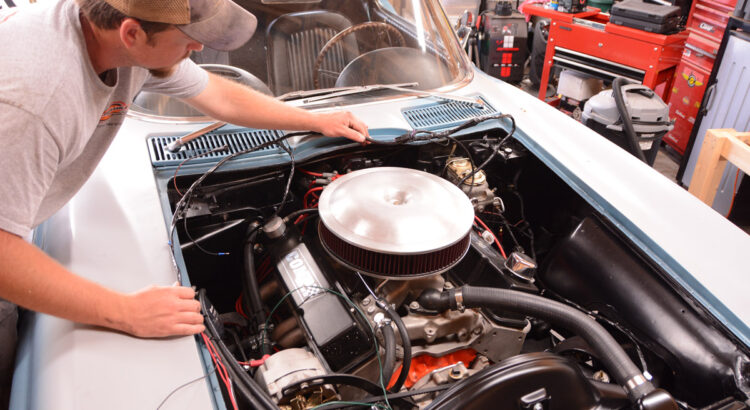
There is no documented lifespan for an engine wiring harness, because every car lives a different life. It’s safe to assume that car manufacturers didn’t think we’d still be fooling with these cars 50 and 60 years later, so longevity was not part of the original engineering. Wires, connections and terminals suffer from age and corrosion, and these issues can show up in the form of a nasty electrical gremlin. A faulty engine wiring harness can cause major issues, and that’s what we’re diving into in this tech article. These issues can be hard to diagnose, as they are often intermittent, only causing problems at inconvenient times. Such is the case with our C2 Corvette project car, a 1964 Corvette coupe, which retains its original engine wiring harness.
The reality is that even the most pristine survivor can suffer from wiring gremlins. This is especially true in the Corvette world, as our prized automobiles have the natural disadvantage of a fiberglass body. This makes proper grounding a little more difficult.
Faulty Engine Wiring Harness Symptoms
Our project has been through a few engine swaps, but still utilizes most of its original engine wiring. Our wiring gremlin started with a glitch while cruising down the highway. We experienced a brief loss of power but it fired back up and we went on our way. The next time it happened, it required some wire-wiggling under the hood to get it back going. We found that wiggling the bulkhead connector helped restore the power, but even that eventually stopped working.
Diagnosing the Problem
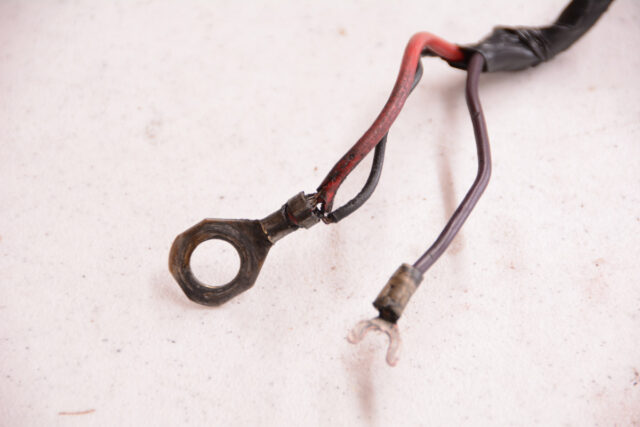
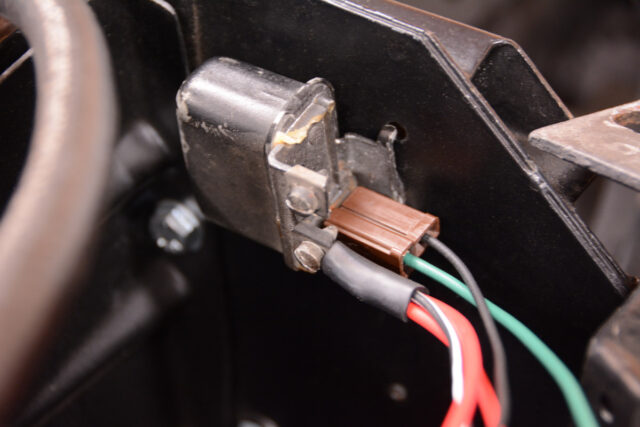
A little bit of internet research revealed we had a case of “Red Wire Syndrome”. As it turns out, Red Wire Syndrome is just a name that was coined on an Internet forum, but it’s a very real problem for C2 Corvettes. The issue is the main red wire in the engine wiring harness that comes out of the bulkhead connector on the firewall. This red wire goes to the horn relay, which acts as a junction point for the wires that go to the starter, voltage regulator and alternator. Over time, the terminal corrodes and causes the wire to heat up. In our case, the wire got hot enough to melt the socket on the plastic connector. This is obviously a concern.
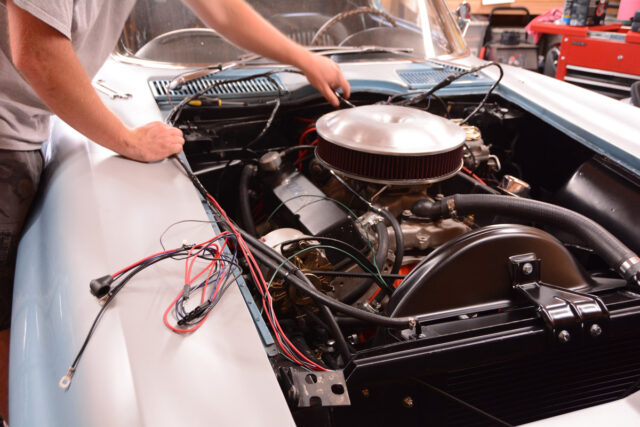
Replacing the Engine Wiring Harness
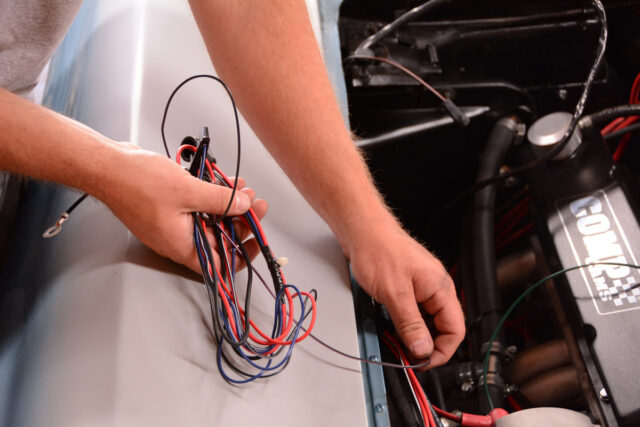
Although there are some alternative choices, the best option to repair this wiring gremlin is to replace the engine wiring harness. The harness is built with original-style connectors and it’s designed for original cars, but there are several versions, depending on the year of the car and options like fuel injection, transistor ignition or air conditioning. This project already had an HEI distributor and one-wire alternator in place, so we made some changes to the harness to accommodate the prior modifications.
If your Corvette is all stock, the wiring harness is a very simple and straight forward install, as all terminals and connections are correct. It took us a few hours to replace the engine wiring harness, and it was well worth the effort as our Red Wire Syndrome is now a thing of the past. The car’s electrical gremlins are gone, and we’re back on the road with confidence.
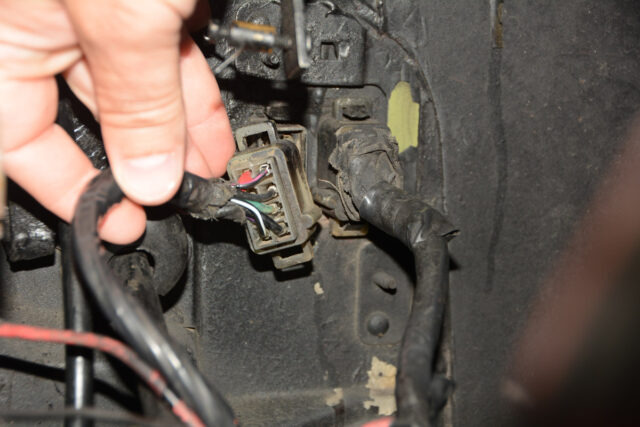
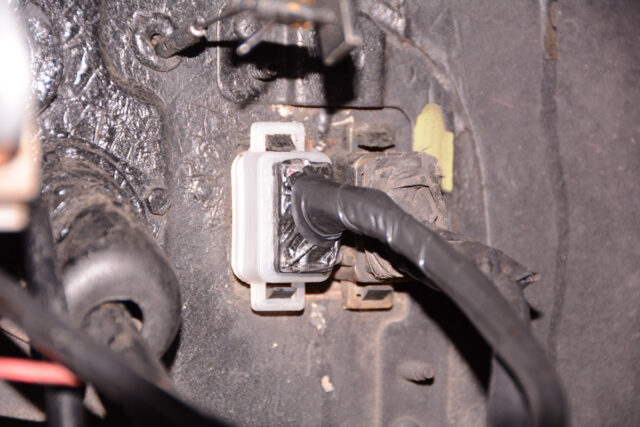
1. Unplug Bulkhead Connector
Our wiring gremlin reared its head on a weekend drive, but seemed to improve when we wiggle the bulkhead connector at the firewall. This tells us there is a connection issue, so we remove the connector to inspect it.
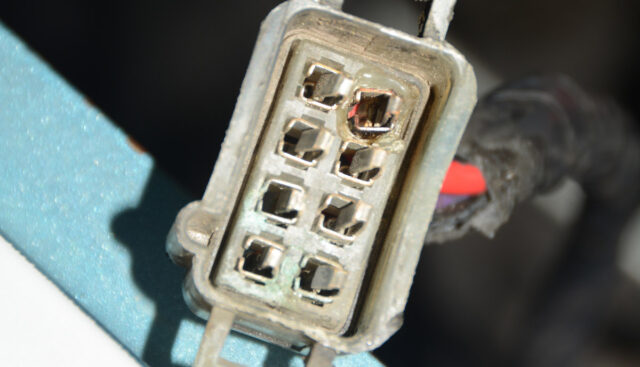
2. Corrosion Leads to Heat
3. Wiring Harness Inspection
4. Starter Wires
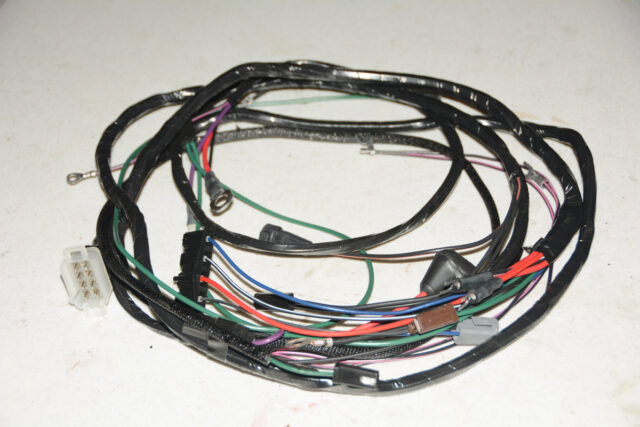
5. New Engine Wiring Harness
To repair the Corvette’s wiring gremlins, we’re installing a new Ignition Wire Harness (part number 662020), also known as an engine wiring harness. This kit is offered in several variations, to fit all years of C2 Corvettes, with or without fuel injection, transistor ignition or air conditioning.
6. Wiring Harness Layout
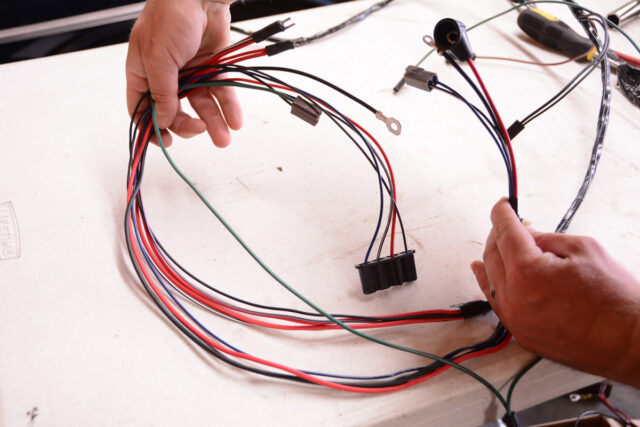
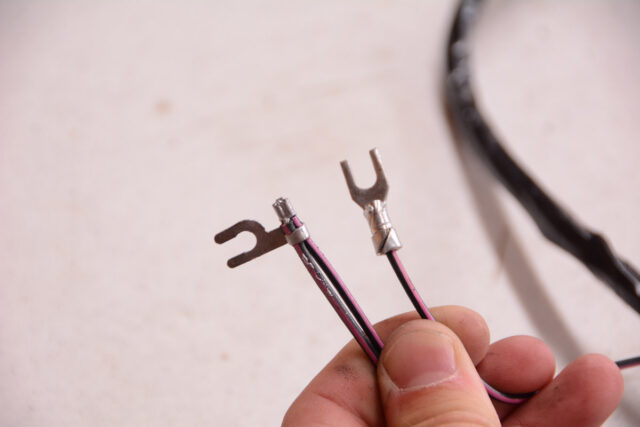
7. Resistance Wire
This group of wires goes to the starter but notice the smaller pink and black wire. This is a resistance wire, which is used with points ignition systems. If your car is upgraded with electronic ignition, do not use the resistor wire. It can be removed from the harness or taped up to prevent the terminal from contacting anything in the engine bay.
8. Additional Resistance Wires
9. Plug in New Engine Wiring Harness
The engine wiring harness install begins with the simplest step: snapping the connector to the wiring bulkhead on the firewall. A small tab on the connector ensures that it cannot be installed upside down.
10. Routing the Wires
11. Voltage Regulator
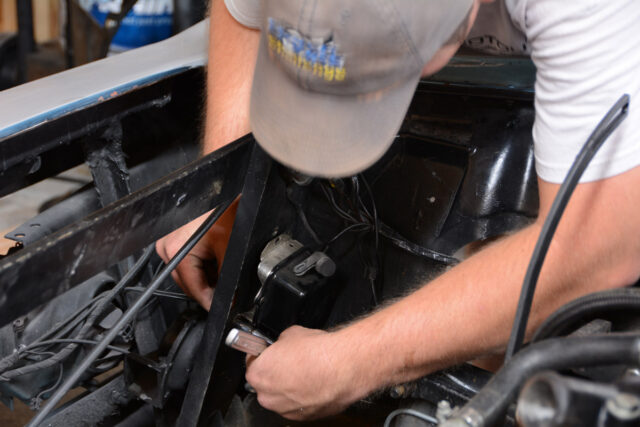
12. Horn Relay
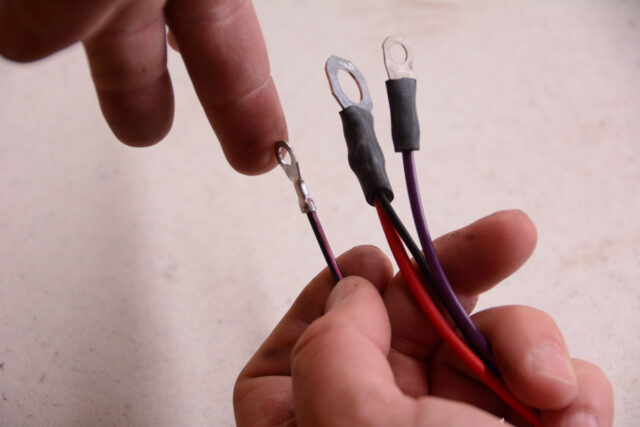
The horn relay on a C2 Corvette serves two functions. Obviously, it sends power to the horns, but its main function is a junction point in the engine wiring harness. The three-wire bundle is joined by a spade connector that connects to the horn relay. This is your main power supply coming from the bulkhead and to the starter.
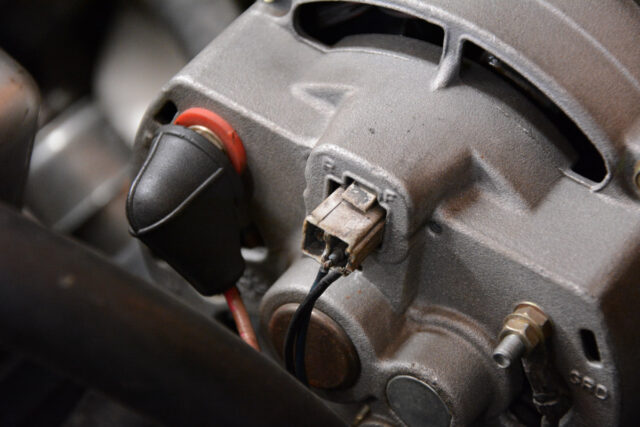
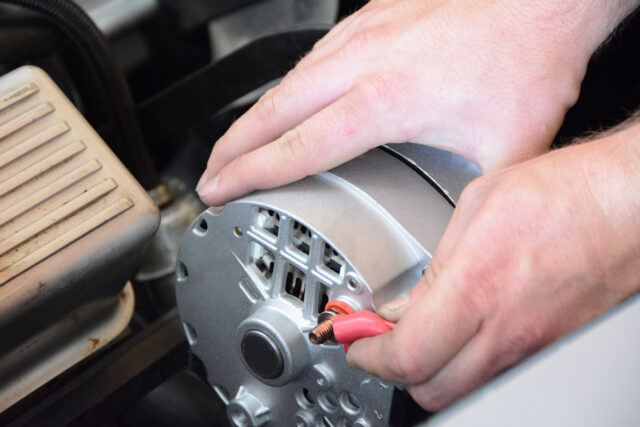
13. One-Wire Alternator Modifications
Since we opted for a one-wire alternator, this large bundle of wires that runs to the voltage regulator and original alternator is not necessary. We retain the horn relay wiring, as well as the necessary wiring for the heater blower motor and windshield wiper motor.
14. One-Wire Alternator Installation
For our one-wire alternator, we used a charge wire with ring terminals already installed (sourced from Powermaster) and installed one end on the back of the alternator, and the other end of the positive battery terminal. The charge wire is not part of the engine wiring harness, but Corvette Central offers various conversion harnesses for alternators. If you’re working with an original style alternator, you simply attach the two ring connectors and the plastic plug-in connector in the back of the alternator to complete the install.
Great article. Preparing for a body off restoration and information like this is very valuable. Thank you.
Purchased my first C2 this past summer and found I have the “Red Wire Syndrome”. Planning on replacing engine harness, very helpful and instructive video, many thanks.
Concise commentary backed by cleat photographs. A big help whether you are restoring or
doing preventative maintainance.
You did an awesome job. Thank you.
Very thorough and laid out CLEARLY showing the problems and steps for a SUCCESFUL REPAIR
Great article for the C2 owners
Very good information, thank you