Time: 4-5 hours per shaft
Tools: sockets, wrenches, hammer or mallet, needle-hose pliers, screwdriver
Talent: intermediate
Tip: you can also use a large “C” clamp to press the roller bearing cups of the u-joints on and off using appropriately-sockets for each operation.
Performance Improvement: you can’t drive a Shark with a failed u-joint on your half-shafts; this project gets you up and running again.
While You’re At It: this is a good time to lubricate the main drive shaft u-joints through their grease fittings.
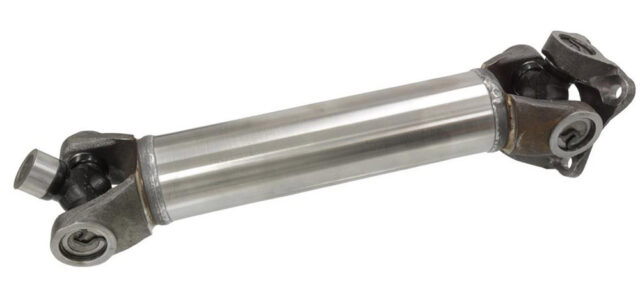
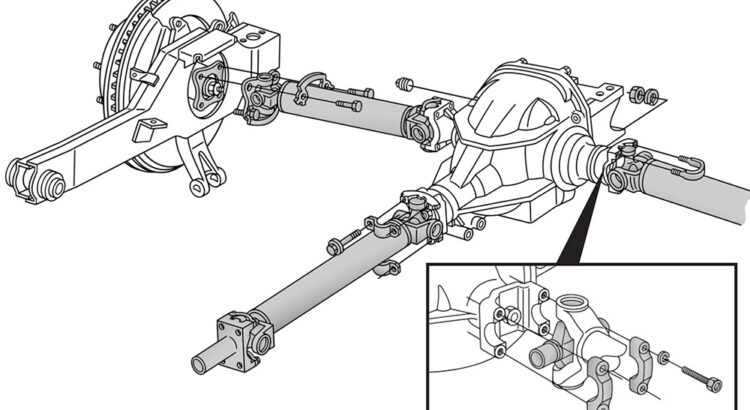
Starting with the 1963 model year, independent rear suspension became standard on Corvettes, foregoing the solid axles that had been used for the previous decade. The universal joint, or u-joint, made IRS possible and the same basic parts and layout was retained through the entire Shark generation, with only a slight change being made in 1980 when the rear suspension used aluminum rather than steel construction. While U-joints had always been used to couple the front of the driveshaft to the transmission and the back of the shaft to the rear differential, with IRS now their role expanded to also coupling each rear drive shaft (or half-shaft) to both the differential and the rear wheels. U-joints play a crucial role in the overall scheme of things, since they are responsible, ultimately, for the delivery of power from the transmission to the rear wheels.
Normally, these little workhorses require no maintenance other than periodic greasing. However, as with all things mechanical, parts eventually fail or wear out. You’ll be able to tell when a u-joint is failing or about to fail when it starts making noise. Such was the case with my ’76 Vette. I was cruising along happily at 65 MPH when I noticed a slight vibration that quickly became very pronounced, accompanied by a loud thumping sound. I immediately pulled over to the side of the road and called a towing service to flat-bed the car home. At this point I suspected a u-joint failure, although I didn’t know if it was a driveshaft u-joint or a half-shaft u-joint that had given up the ghost. When I got the car home, I discovered that the outboard (wheel side) u-joint on the passenger side of the car had given out. I decided to replace all of the u-joints on both half-shafts, reasoning that if one let go for apparently no good reason, the others also may follow suit eventually.
Elevate the car by placing the pad of a floor jack beneath the rear spring securing plate. Once the car is at the maximum elevation the floor jack can give it, place jack stands under the chassis rails just in front of the rear tires. A piece of ½” plywood under the jack stands will keep them from digging into the blacktop if you’re working in your driveway. Once the jack stands are securely positioned, lower and remove the floor jack.
Put the car in neutral, regardless of whether it has an automatic or manual transmission. This is necessary so that you’ll be able to rotate the rear wheels while working. This is a messy, greasy job so wearing a pair of disposable gloves is highly recommended.
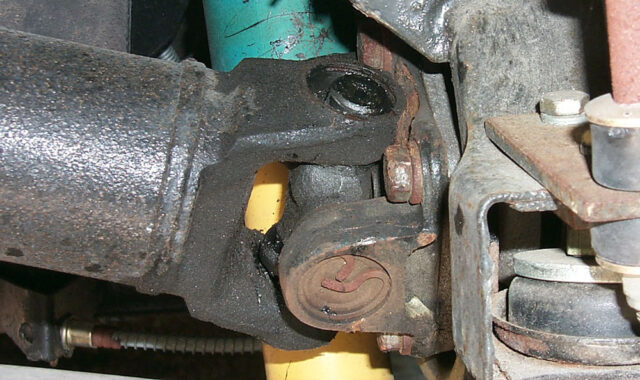
The four bolts that hold the trunion (half-shaft flange) to the wheel assembly are secured using “french locks.” These are metal strips with ears that are bent against the flat surface of the bolt side that prevent the bolt from coming loose. Use a flat-blade screwdriver to bend these ears back, then use a ratchet and socket to remove all four bolts.
The nuts on the u-bolts that hold the u-joint to the rear differential spline shafts are removed next. A gear wrench definitely makes this task easier, since you’ll only have about 7-10º of wrench swing because of the proximity of the struts, spring and stabilizer bar.
When the nuts are off, remove the u-bolts. You may need to wedge a screw driver between the u-bolt and the u-joint bearing cup to persuade them out. With the u-bolts out, by rotating the tire about half-way in either direction, you’ll be able to slide the entire half-shaft with u-joints out.
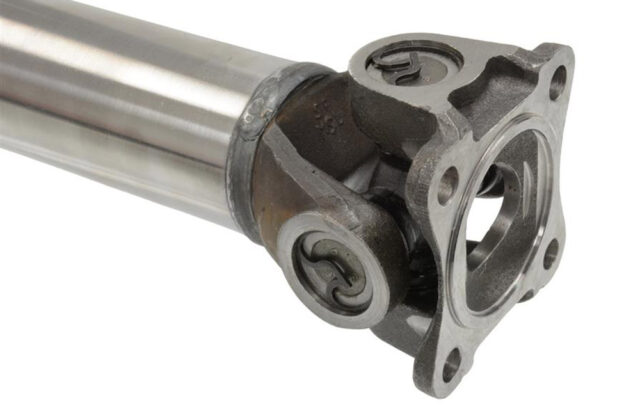
On the workbench, use needle-nosed pliers to remove the snap retainer rings on the u-joints. There are a few different ways to remove the old u-joint and install the new one. The first method involves the purchase of a tool designed specifically for removing and installing u-joints that will set you back about $75.00. Unless you figure you’re going to be doing a lot of u-joint work, I advise you to save your money.
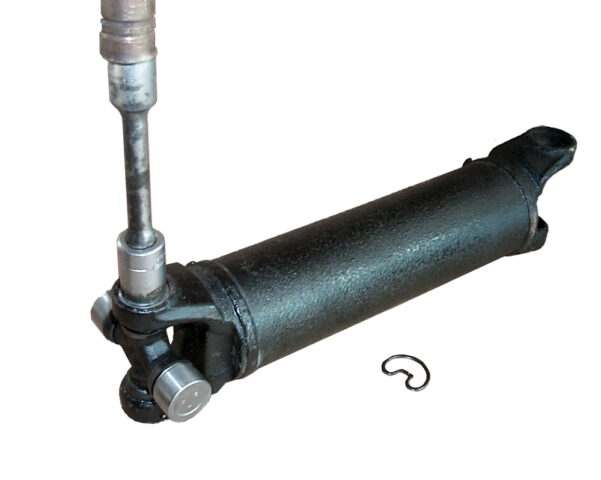
The second method is what I call the socket and mallet method. Support the half-shaft with a block of wood so the lower bearing cup is elevated from the work surface. Use a 7/8” socket and mallet to tap the upper bearing cup down, which will drive the lower cup out of the half-shaft. After removing the lower cup (a pair of vice-grip pliers may make it a bit easier to extract it if it’s stubborn), flip the half-shaft over and repeat the process for the remaining bearing cup.
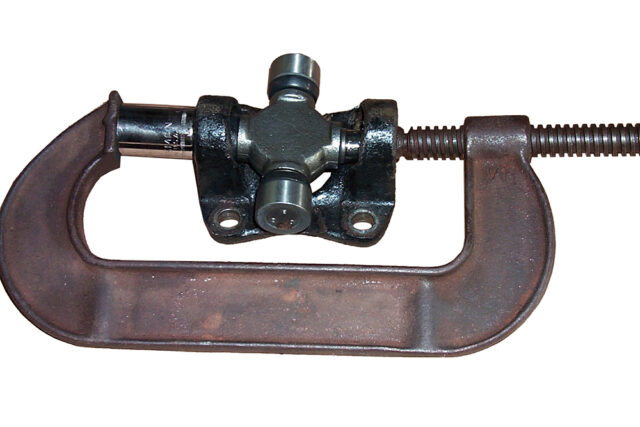
The third method is using a large “C” clamp as a press for removing and installing u-joints. The pad on the end of the threaded shaft is used to push the bearing cup out as it is tightened down. Use a socket that is larger than the bearing cup as a receiver when removing the u-joint, and a socket that is smaller than the bearing cup when installing the new unit.
Regardless of which method you use, the objective is to remove the old u-joints. When that is accomplished, it’s time to install new u-joints. Place a new u-joint with the bearing cups removed in the differential-side flange of the half shaft. Be careful when you remove the bearing cups, as they are lined with needle bearings which can fall out fairly easily. Place a bearing cup on one of the u-joint shafts and tap it down with a mallet, then flip it over and repeat the procedure on the other side.
You can use a 7/8” socket with a mallet or a “C” clamp to sink the bearing cup down just slightly below the groove that holds the snap retainer clip. Needle-nose pliers are then used to install a snap retainer clip over the bearing cup so that it seats in the groove of the flange. Repeat these procedures for the opposite bearing cup as well.
Tap the snap retainer clip all the way into the groove using a screwdriver and mallet; this is very important, since this clip can and will pop out if it isn’t solidly seated in the groove.
Next, place a new u-joint without bearing cups in the trunion, install the bearing cups using either the 7/8” socket and mallet combo or the socket/”C” clamp combo.
Joining the trunion with the half-shaft is the next step. Insert the remaining ends of the u-joint (with bearing cups removed) into the half shaft, then place a bearing cup on one end. Repeat the installation procedures described earlier to seat the bearing cups using either the socket and “C” clamp or the socket/mallet combo again. Then install the snap retainer clips and make sure they are seated properly.
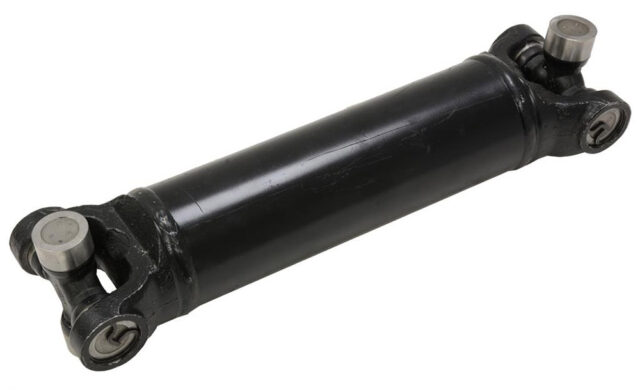
The half-shafts I removed from this car had lock washers on the trunion retaining bolts, which was OK, but not correct; they should have had french locks to keep them from coming loose, so a set of french locks was obtained and used for the reinstallation. Start by seating the bearing cups in the differential spline, but don’t secure them yet, so you can wiggle or move the half shaft as required to install the trunion bolts with french locks, which is the next order of business.
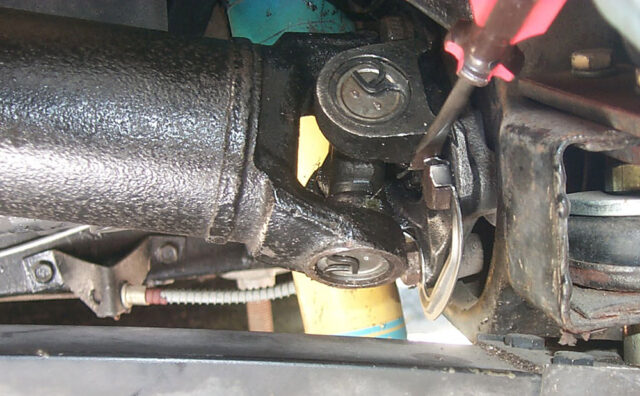
After tightening the trunion bolts, use a screw driver to bend the ears of the french locks down against the heads of the bolts; this will prevent them from working their way loose.
Insert the u-bolt in the spline holes after making sure the bearing cups are seated properly. Use a mallet to tap it home. Install the other u-bolt as well, rotating the tire as required to make it accessible.
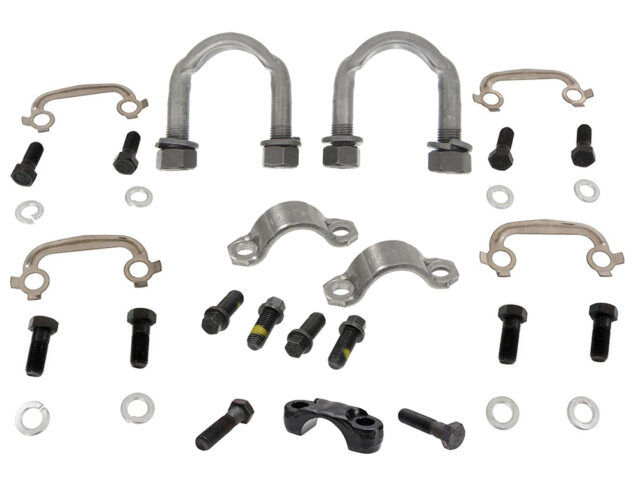
Install the lock washers and nuts on the u-bolts and use a gear wrench to tighten them down. Corvettes with heavy duty suspension or the 396, 427 or 454 engine use a cast retainer cap with bolts. Rotate the tire and re-check tightness of the nuts on both u-bolts, then proceed to install the half-shaft on the opposite side of the car, repeating all of these procedures.
Lower the car and take the Corvette for a test ride. Start out slowly and gradually increase your speed until you reach highway cruising speed. All the while, keep your stereo turned off and listen for any sounds that aren’t normal and any vibrations. If everything checks out OK, you’ve done the job properly and you can relax and enjoy the rest of the ride.
Note: New Half-Shafts with U-Joints and flange installed are also available from Corvette Central
582139 63-73 Rear Axle Half-Shaft w/ Flange Attached
583030 74-79 Half-Shaft w/ U Joint & Flange
583148 80-81 Rear Half-Shaft w/ U Joint – Auto
583145 80-81speed & 82 Auto Rear Half-Shaft w/ U-Joint
Shop Now
1963-1967
1968-1982
Photos and story by Tom Benford
I loved this article, I have a major problem with a car I am building that uses the Corvette hub/flange to a half shaft to a Jag diff. Is it possible that you may be able to help me please?
Thanks, Pat
Great description on the half shaft u-joint replacement procedure. Thanks for the information.