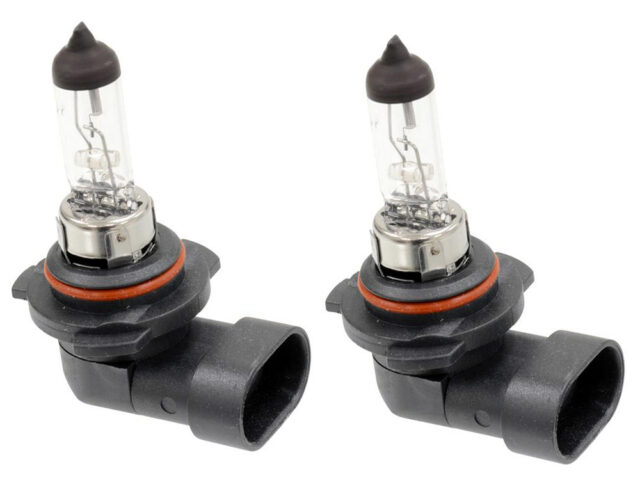
Sooner or later one of the headlight bulbs in your 1997-2004 C5 Corvette is going to give up the ghost and will have to be replaced. You’ll only need some basic tools and under an hour of time. You can purchase replacement bulbs and associated components from Corvette Central at the following links: C5 (97-04)Lights & LampsBulbs
You can use stock replacement halogen bulbs or upgrade to a higher-output bulb like the Xenon Blue for a couple of bucks more and then spend some quality time in the driveway with your tools and C5.
Regardless of whether you have to replace a low-beam or a high-beam bulb on either side of the car, the procedures shown and described here are identical. It’s not rocket science and you don’t have to be an ace wrench to replace the bulb – it just takes a little time and a desire to save some money. That being said, here’s how to do it.
Tools needed:
Torx screwdriver
Phillips screwdrivers (stubby #2 Phillips driver)
10mm socket with ¼” drive socket with extension
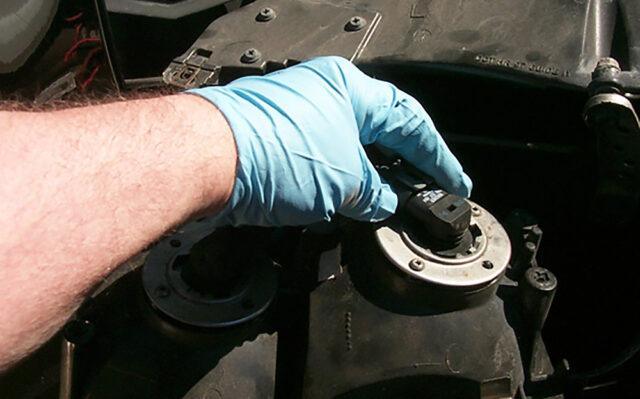
Optional (but very useful if you have one) is a telescoping magnetic wand (the thing with the red handle) – handy for picking up dropped screws, sockets, etc. (hey, it happens!). Not shown, but also useful is a pair of disposable nitrile gloves (they’ll keep the hands clean and prevent finger oil from getting on the new halogen bulb which you don’t want).
How To Replace C5 Corvette Headlight Bulbs
The first step is to determine which bulb is out; the outer bulb on either side of the car is the low-beam, while the inner bulb is the high-beam.
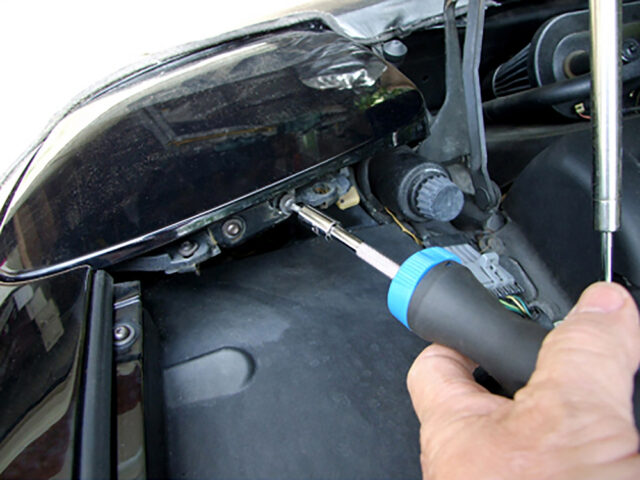
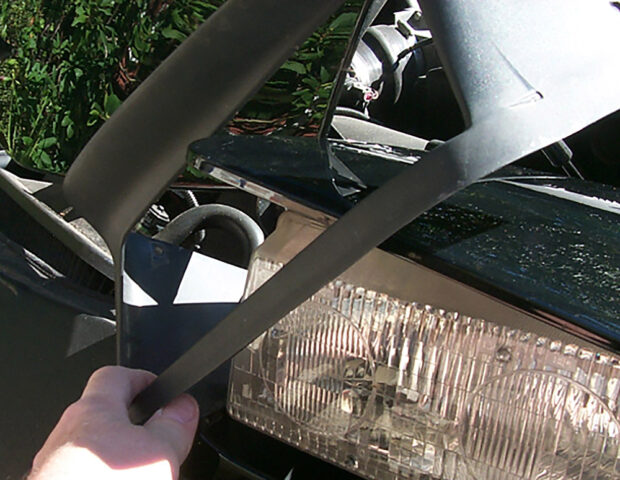
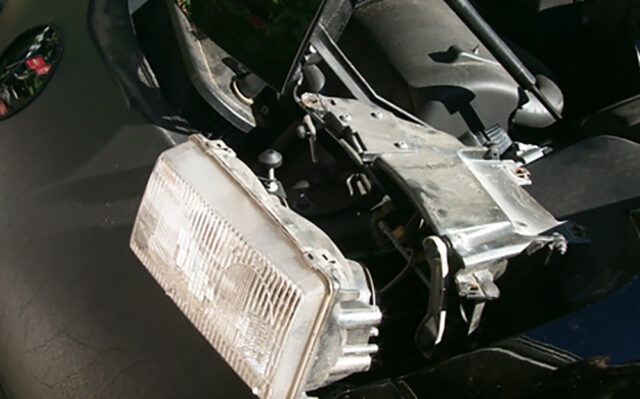
With the hood open, but with the headlights still in the down position, use the Torx driver to remove the two Torx screws that hold the rear of the headlight cover in place. When these are out, you can open the headlights so that they are in the up position.
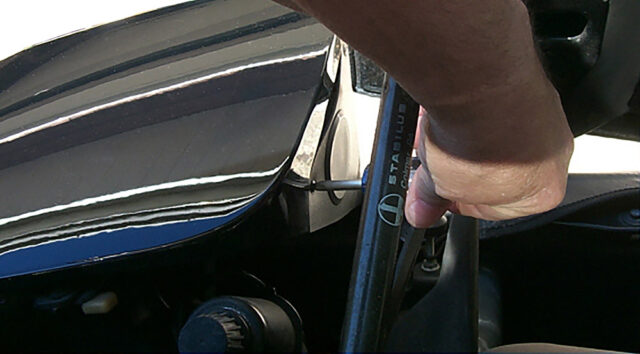
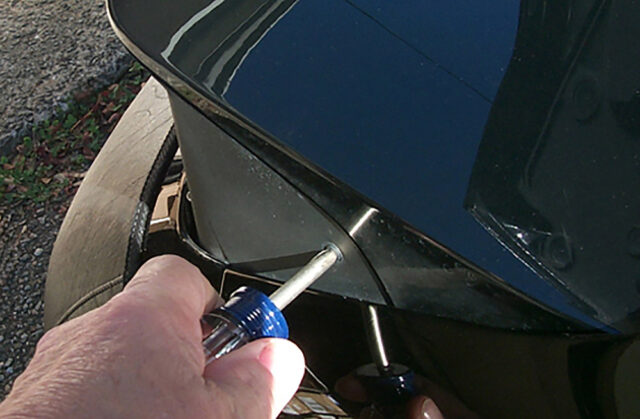
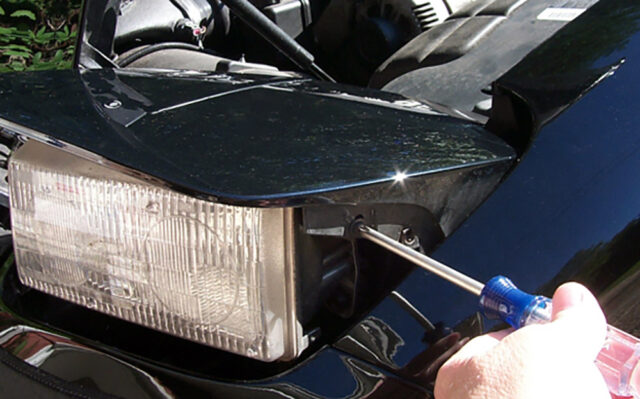
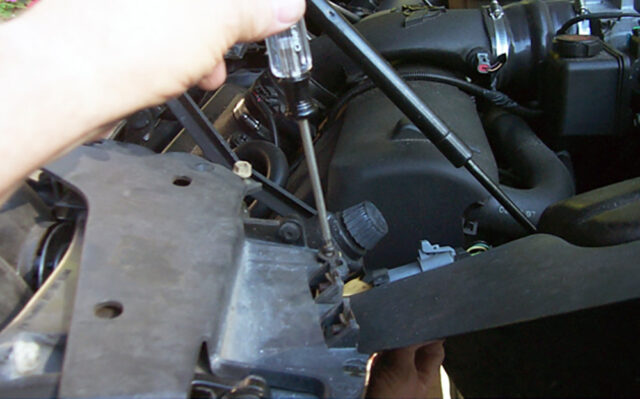
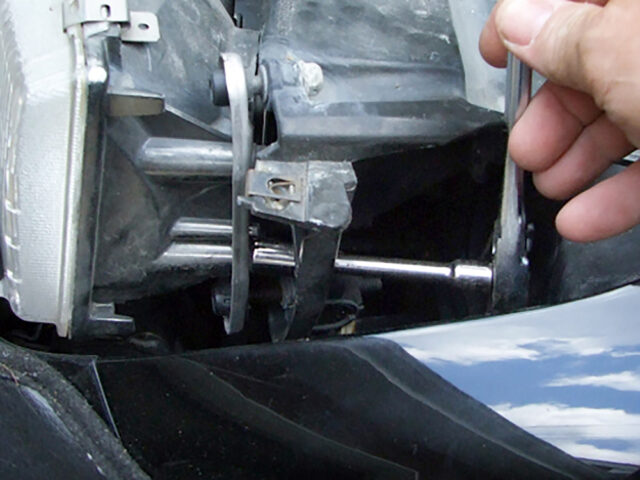
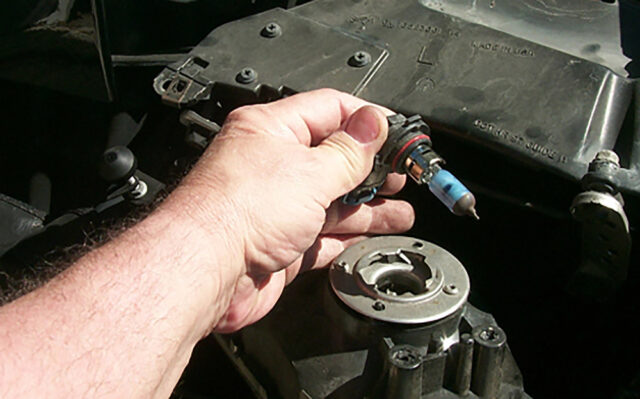
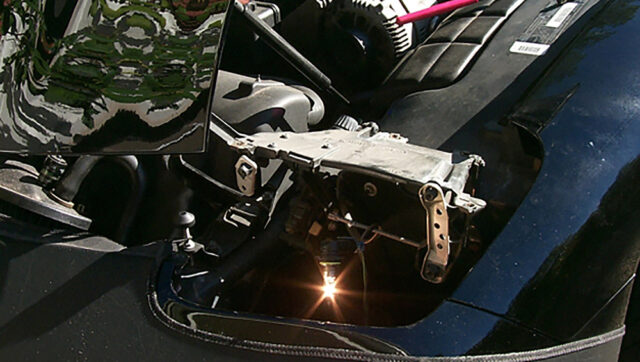
The headlight surround trim is the next item that has to be removed. It is held in place with three Phillips screws: one on the inside of the headlight and two on the outside. A stubby #2 Phillips driver comes in handy for chores like removing the inner screw, shown here.The outer two Phillips screws that retain the surround trim are removed next.When all three of the screws are out, the surround trim can be removed by pulling up and outward on it at the same time.The two remaining Torx screws that are still holding the headlight cover in place, one each on the inside and outside of the headlight assembly, are removed next. The headlight cover can then be lifted off.Four Torx screws are used to retain the upper headlight frame assembly, and these are removed next. When they are out, you can lift off the upper frame. Be careful not to drop any of the washers that may be used as spacers.With the upper frame out of the way, accessing the three 10mm bolts that hold the headlight in place is considerably easier. Two of these bolts are on the outside, and one is on the inner side. A ¼” drive socket with extension does the trick nicely. Be careful not to drop the bolts as you’re removing them, otherwise you’ll need a magnetic wand for their retrieval.With the three retaining bolts removed, you can pull the headlight free. Here you see it out of its housing with the upper frame piece removed.Removing the old headlight bulb is simply a twist-and-pull operation. Be careful not to touch the glass element of the new bulb, since the oils on your fingers can shorten its life considerably. The bulb, with its plug, simply unsnaps from the harness.Snap the new bulb into the harness and turn the headlights on just to make sure the replacement bulb lights up as it should. If there’s a problem, now’s the time to find out about it rather than after you get everything buttoned back up.Wearing nitrile gloves is a good idea to eliminate the chance of touching the new bulb’s element. Push the new bulb into the headlight assembly and twist it until it snaps in place. It will only fit one way, so you can’t get it wrong.
That concludes the installation. Now it’s just a matter of putting everything back together. Secure the headlight assembly with the three bolts removed earlier and put the upper frame, cover and trim surround back in place, securing them in the reverse order of their removal. That’s all there is to it.
4 thoughts to “1997-2004 Corvette Headlight Bulb Replacement”
C5 head light lenses are the problem
Light bulbs help but after market lenses really make a huge difference in night
I’ve changed bulbs a few times by just removing the the surround trim and reaching in behind the light. No need to pull the cover or remove the light housing.

C5 head light lenses are the problem
Light bulbs help but after market lenses really make a huge difference in night
I’ve changed bulbs a few times by just removing the the surround trim and reaching in behind the light. No need to pull the cover or remove the light housing.
Well I think CC has a great idea showing people how to do simple but rewarding thing to there car.
Well I think CC has a great idea showing people how to do simple but rewarding thing to there car.