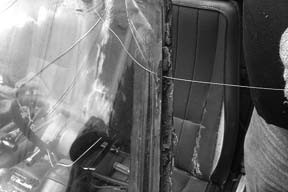
I purchased a fathom green ‘69 big-block tri-power T-top coupe with only 42,000 original miles on it recently. I’m the third owner of the car, and I got it for a very good price because it needs some heavy doses of TLC. The car had been exposed to the weather during its 31 years of existence and, as is a common malady of Sharks, the upper windshield frame had rusted through,
badly resulting in lots of water damage to the interior. Additionally, the windshield had a large crack in it.
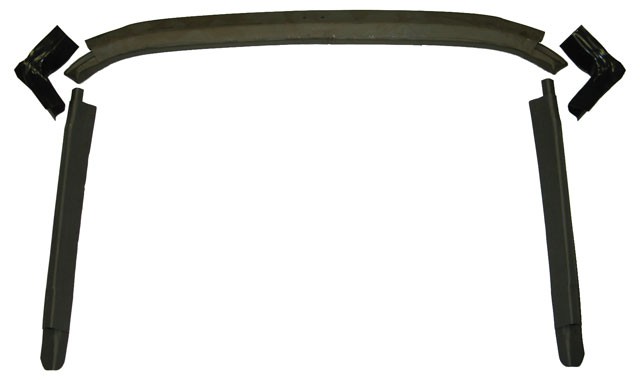
Corvette Central offers a new upper windshield frame and upper left and right corners – just the items I needed to do this repair. Since I don’t own a MIG welder, I decided to let a local body shop weld the new components; however, to save time (and money) I removed the old windshield, moldings and trim pieces and I supplied the parts and materials for the body shop. Such “sweat equity” is a good way to keep the costs down. Here’s what it entailed.
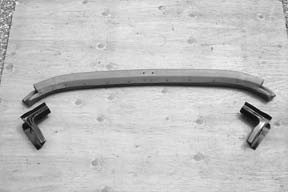
Here are the left and right upper frame corners and the upper frame itself. The original frame was so badly rusted that repair was not possible; replacing these components was the only solution.
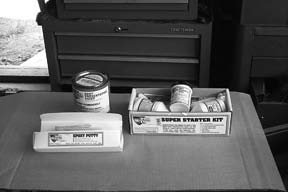
Rust control and prevention was a top priority on this project, so a POR-15 Super Starter Kit, POR-15 Epoxy Putty and an extra quart of POR-15 rust preventative paint was ordered. As it turned out, the extra quart wasn’t necessary since the starter kit provided plenty for the job. The putty would be used to fill in any rust holes and to build up rusted areas on the lower frame arms if necessary.
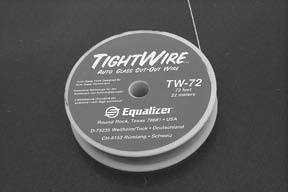
A roll of windshield removal wire was also ordered. The wire is used to cut through the factory butyl tape that holds the windshield in the frame.
After removal of the T-tops, the sun visors are the first interior components to be removed.
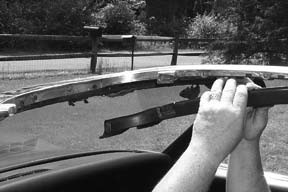
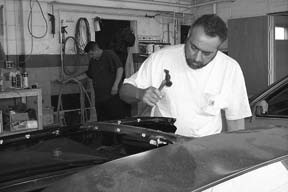
The windshield header trim is the next component removed.
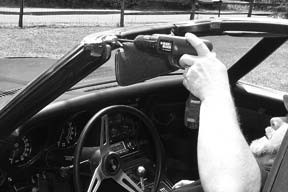
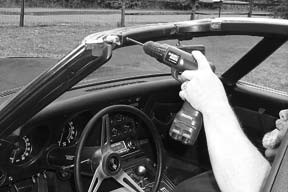
The rear-view mirror and its mounting plate are removed next.
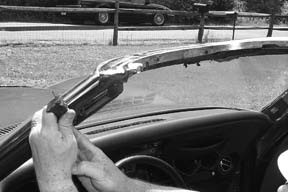
Some of the screws had “rust welded” themselves to the frame and an impact driver was used to break them free where possible.
With the mirror and its mounting plate out of the way, the T-top center trim panel can be removed by gently tugging on it. Work it on each side gently, rather than pulling hard on it, as this panel is easy to crack and expensive to replace.
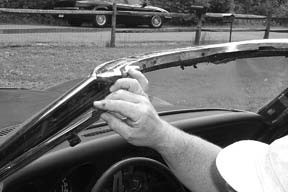
The screws retaining the windshield post side trim are removed and the trim pieces follow. Velcro-type retainers are also used to hold these trim pieces on, so you may find that sliding a long screwdriver down between the post and the trim makes it easier to pry them free.
Gently peel back the pillar post weatherstrip from the weatherstrip retainer if it is in good condition. Mine was dry-rotted, as was all of the weather-stripping on this car, so I just ripped it off since it was going to be replaced with new rubber anyway.
With the weatherstrip removed, the four screws that attach the weatherstrip retainer are removed next.
The weatherstrip retainer can then be removed. If it doesn’t come free by itself, pry gently using a screwdriver, being careful not to dent it.
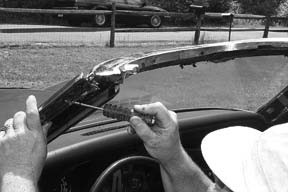
The stainless steel pillar post windshield trim can be removed next. Use a thin-blade screwdriver to gently work this trim piece free, since it is being held in with butyl tape and caulking. Repeat steps 10-13 for the passenger side as well.
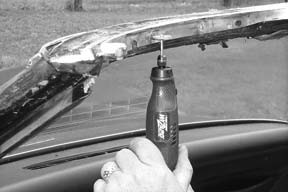
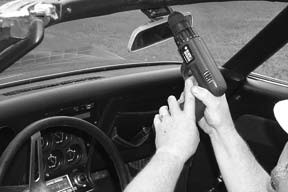
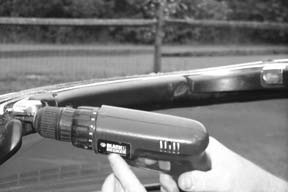
The screws retaining the stainless steel upper windshield/T-top interior trim (also called “T” trim) are removed next. Again, “rust welding” was a problem here, and the impact driver was used to no avail. A Dremel or other high¬speed handheld grinder comes in handy for cutting the heads off these stubborn screws.
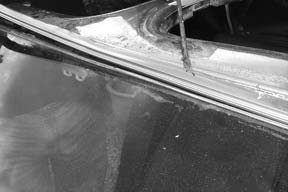
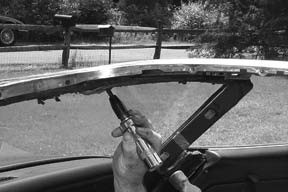
Prior to removing the “T” trim, use a screwdriver to pry the upper exterior stainless windshield trim, since the “T” trim sits underneath this trim piece.
Gently pry the “T” trim up, moving only 2-3 inches at a time across from both sides. This trim is secured at the rear with two pop rivets that can be drilled out.
When the interior side of the “T” trim is loose, move to the outside of the car and start prying gently from above the windshield. Care should be taken here as well not to dent the stainless steel trim panel.
The left and right front T-top lock brackets at the corners of the windshield are the last trim pieces to be removed. Work carefully and gently with these – they are made of pot metal and snap easily. They will probably have a lot of dried caulking underneath them, which will hold them fast. Work slowly and methodically – eventually they will release and can be removed.
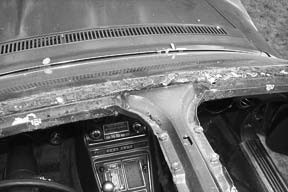
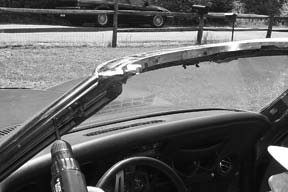
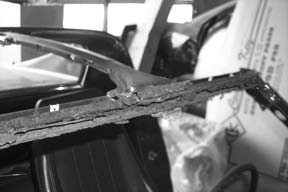
Here’s an overhead view of the badly rusted upper frame with all the trim removed. Windshield removal is next on the agenda.
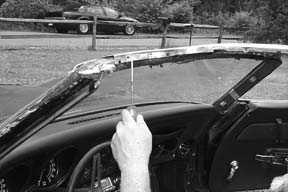
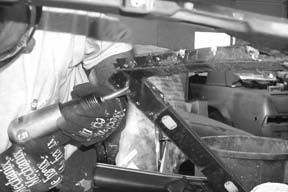
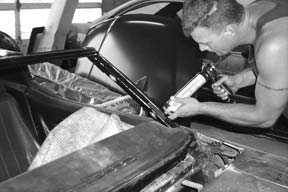
If you have an older Shark (X68-X72) with the retractable wiper cowl, now is the time to remove it. If your car is a ’73 or later, you don’t have the cowl. Now is also the time to remove the windshield wiper arms. With these items removed, find a spot along the windshield where there’s an opening between it and the frame and insert the windshieldremoval wire at that point. If necessary, use an ice pick or thin screwdriver to create an opening to pass the wire through. Apply pressure to the wire while using a sawing motion to cut through the butyl tape holding the windshield in place. Keep feeding new wire with each stroke for the sharpest cutting edge since the butyl tape dulls the wire as it passes through it. Take extra care when doing the lower edge of the windshield to prevent doing any damage to the upper dash pad.
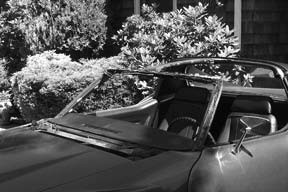
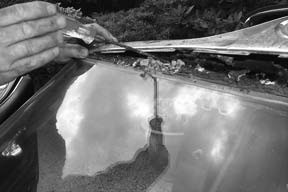
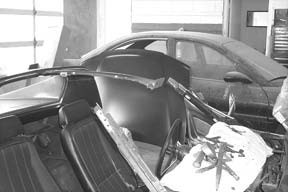
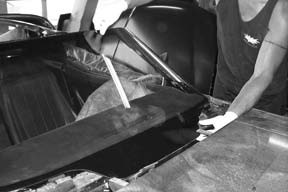
Here’s a shot of the car with the windshield removed, prior to flatbedding it off to the body shop.
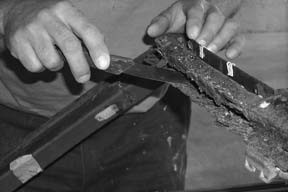
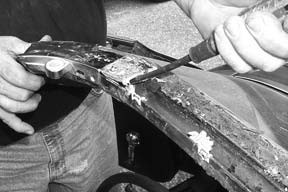
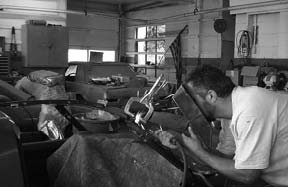
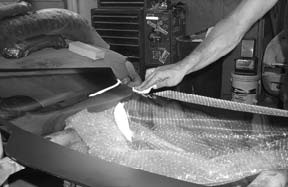
A scraper is used to remove the loose rust in an effort to locate the spot welds on the corners and upper windshield frame.
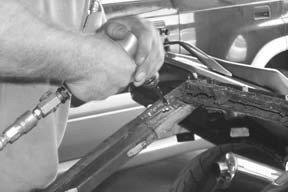
All spot welds connecting the corners to the pillars are drilled through.
An air chisel is then used to separate the corners from the pillars.
The spot welds of the “T” bar are also drilled out and air chiselled to separate the brace from the upper frame. This shot shows it already separated.
In this shot the upper frame and upper corners are already removed and we are ready to install the new components.

The replacement upper windshield frame is designed for a convertible and can be used on a ragtop without any modification. However, if you’re installing it on a coupe, you’ll have to notch out a section to receive the “T” bar. The notch can be seen in this shot.
The corners and frame are trial fitted using sheet metal screws to keep everything secured temporarily. The corners and frame fit like a glove and mated perfectly with the pillars and “T” bar.
A MIG welder is used to permanently fasten the corners to the pillars and upper frame and to weld the joint of the “T” bar to the upper frame. Clamps keep everything aligned during welding, since the sheet metal screws were removed and their holes filled in with welding bead.
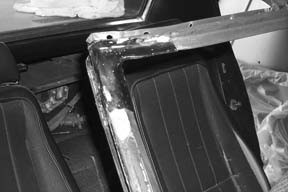
Here’s a look at a completed corner. The light colored area below the corner is where the POR-15 epoxy putty was applied to fill in some rust and sanded flush with the rest of the pillar.

A view of the completed welds of the “T” bar mating with the upper frame. All welds were ground down to give the joints a smooth, even surface.
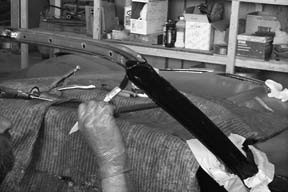
The entire windshield frame was given a coat of POR-15 rust-preventive paint as added insurance so that we won’t have to do this job again in a few years!
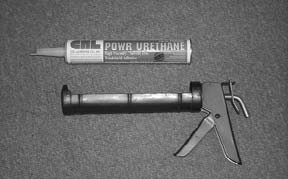
While butyl tape was the OEM windshield adhesive in the old days and purists would probably still use it for this installation, I opted for the benefits of current automotive technology elected to go with polyurethane windshield adhesive instead.
The windshield frame is cleaned with a solvent and allowed to dry completely. A ^5-inch bead of polyurethane is then applied along the pinch weld of entire windshield frame, ensuring that there are no gaps anywhere.
The windshield is cleaned with an ammonia-free cleaner, dried, and then a coat of glass conditioner is applied. When the conditioner dries completely, a coat of polyurethane primer is applied and allowed to dry as well.
The bottom of the windshield is positioned on the windshield stops mounted on the firewall and aligned so that the glass is centered side-to-side.
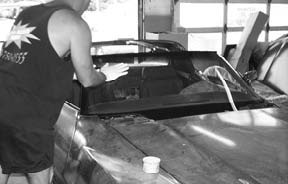
When all is well with the alignment, the windshield is pressed in place against the polyurethane bead and hand pressure is applied around the entire perimeter of the windshield to create a solid bond without any light spots or gaps.
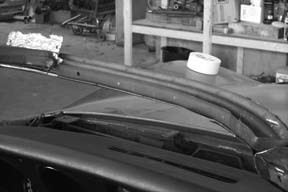
Clips are tapped in place over the holes in the upper frame to accommodate the trim screws. The car is now ready to have its exterior and interior trim components put back on.
Reassembly is basically the reverse order of disassembly, using new components (such as replacing rusted screws and weatherstripping) where necessary.
General Motors used caulking compound back in the old days to fill in the voids in the upper frame and “T” bar, presumably to prevent spaces where water could accumulate and promote rusting. Obviously, this didn’t work too well. I used polyurethane windshield adhesive instead of caulking, although silicone caulking compound would probably work just as well. The whole idea is to fill up these voids. Even though the car itself is fiberglass, the windshield frame is steel and rust never sleeps!
CORVETTE CENTRAL PARTS
#413108 : 68-82 Corvette Windshield Frame Kit
#413101 : 68-82 Windshield Top Frame
#413102 : 68-82 Windshield Frame Upper Corner
#412027 : Windshield/Rear Glass Cutout Wire
#183011 : POR-15 Epoxy Putty
#412001 : 68-82 Windshield Butyl Tape (optional)
#101566 : POR-15 Starter Kit
#633125 : 69 Coupe Deluxe Weatherstrip Kit (optional)
Correct Date Coded Shaded Windshield
Story and photos courtesy Tom Benford
Thank you for the article. I am trying to put the clips back on my 69 convertible. Are there 10 across the top to hold on the molding? I guess just space them out along the top? How did you determine how far down to drill the holes? I have not found any pictures of these clips. Thanks
Going through same procedure on a 68 convertible. Frame ok but stainless needs
a lot of work. Upper corner moldings can not be removed until windshield removed.
Mounting screws located under windshield. Like your idea of filling voids with poly to prevent water accumulation.
Plan to use butal rubber as a sealant also.
Nice article, well documented.
Great article! Very thorough.
This is an excellent article. I was wondering what the total time frame is from start to complete finish to replace the frame and what the body shop cost to replace it as mine also needs replaced?
Hi Ron, Glad you like the article! Since this project took place some time ago, the time/cost details are no longer available and would be outdated anyway. However, local body shop(s) can probably quote you updated time/cost.