Story by Chris McDonald, Auto Enthusiast Magazine, November 2011 (Reprinted with Permission)
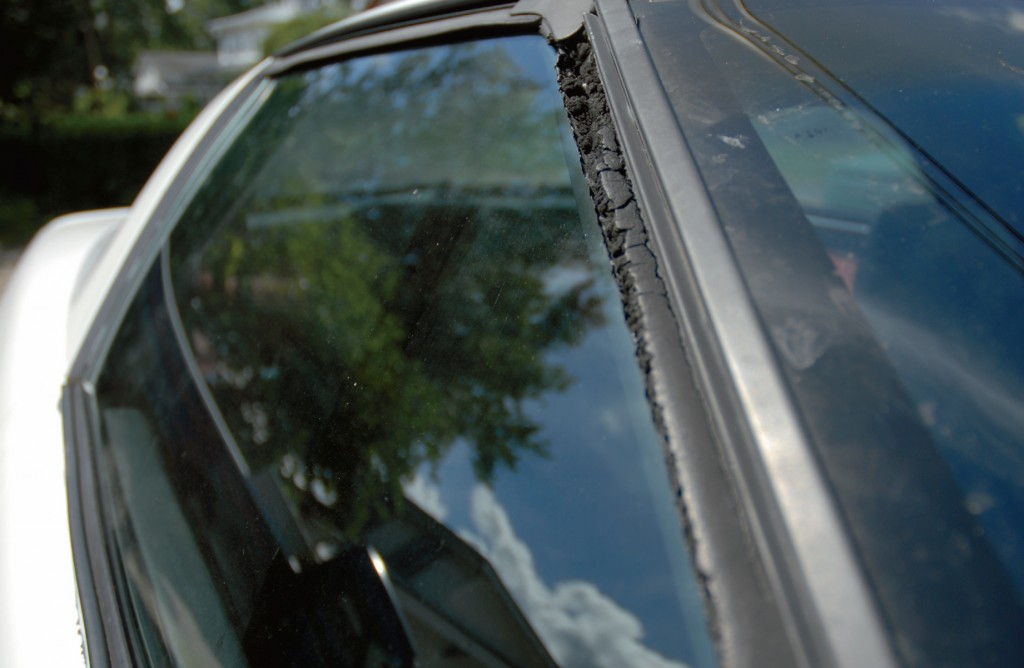
There are many reasons why you would consider changing the weatherstripping on your C4. Over time, the rubber breaks down, hardens and cracks, leaving an unpleasant appearance, poor seal, wind noise, and the dreaded drip.
If you own a C4 and actually drive it in the rain, you will eventually experience the dreaded drip, leaving your floor soaked and pant leg soggy. No matter how slick the paint, or well maintained the machine may be, dry, cracked weatherstrip will be the last detail, often overlooked and leaving an otherwise stunning car to just be rather ho-hum.
The good news is, curing the dreaded drip and taking years away from the appearance of your car is a great weekend project that any do-it-yourselfer can tackle with the help of products and tools from Corvette Central. Our weekend adventure began with a call to Corvette Central for a weatherstrip kit (p/n 634565), which also comes with a tube of adhesive. We ordered a weatherstrip tool kit (p/n 634588), and a pair of outer upper door seals (p/n 284067).
Doorway to improvement
With parts on hand, we ventured out to the garage. We broke it down into sections starting with the doors, then the windshield, B pillar, and finally the rear window hatch. The first order of business was to remove the door panels. With the door panels removed we have access to the upper portion of the door strips and the outer window seal. It is a good idea to get a few sandwich bags and label them with specific screws and hardware removed from each section, as the hardware will be needed to reinstall the parts.
While it is possible to replace the outer seal strip without removing the door glass, we opted to pull our glass to make the replacement as clean as possible. We know we will have to adjust the glass upon final assembly to get the best possible seal against the new rubber. Once the aluminum accessory plate is removed from the door shell, the three nuts securing the window are easily accessible with a 10mm socket. We removed the anti-rattle pads, positioned the glass to remove the window glass stud (which requires an Allen wrench and vise grips) then separated the glass away from the regulator and pulled the glass out through the top of the door.
The outer seal strip is held in place by three rivets. There are notches in the door frame to allow access for drilling and removing the rivets. The old strip can be pried free from the door via the retainer clips and discarded. The new strip comes with the retainers and replacement rivets. It simply pops in place and is riveted in the original location. Reverse the process to slide the window back in place. While your glass adjustment is subject to change with the new strips, it is a good idea to observe the markings left from the fastener’s previous location and tighten them back where they were. This will provide a good base for final adjustment. The aluminum accessory panel can be reinstalled, as there is access to the adjustment points even when it is in place.
Next, we located and removed the weatherstrip retaining screws at each end of the door strip. The upper corners of the strip will be glued down about six inches on each side of the door frame leading to the retaining push clips. Your weatherstrip tool kit includes a handy clip remover that makes quick work of popping the strip free from the door. Once the strip is removed, take a few moments and scrape the excess glue from the door frame. With the door frame clean, we pulled the new strip out and test fit the piece in preparation for permanent assembly. We pushed the clips in place along the bottom and sides of the door strip leaving the upper portion loose.
There is a process to getting weatherstrip adhesive to work. A thin layer must be spread on the door frame and weatherstrip. Allow the surface to get tacky, then apply another thin bead on either surface and press the strip against the frame. With the glue beginning to set, we inserted the retaining screws and snugged them in place. We repeated the process on the other side.
Windshield Pillar
Moving onto the windshield, or A pillar, both doors need to stay open and the roof panel needs to be removed. The rearview mirror should be unplugged (if lighted) and removed. The plastic garnish around the inside of the windshield and trim inserts along the top where the roof panel secures must be removed. Unless you are also replacing the sun visors, there is no need to remove them at this point. Once the center upper windshield garnish is loose, it can rest on the sun visor posts with ample room to access the weatherstrip.
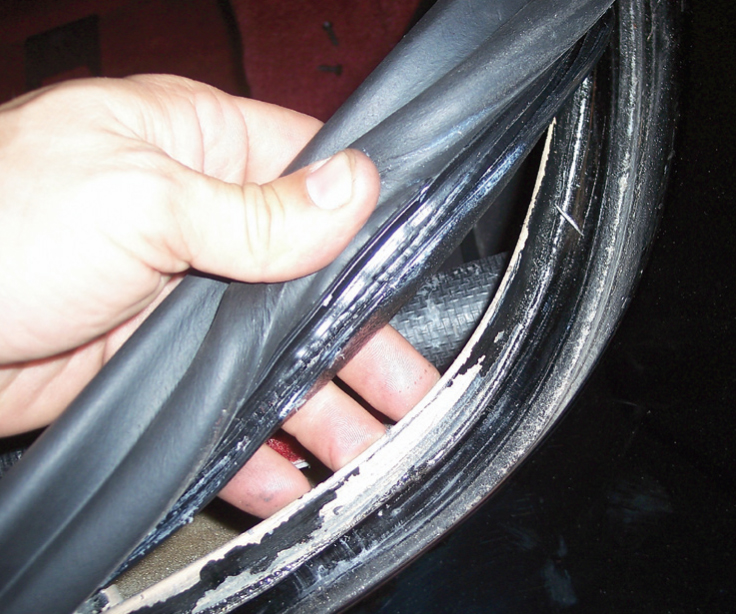
Grab your plastic bag and tag it for the A pillar hardware, as some of the retainers have a specific purpose and location. You will want to return them to the appropriate place. We tagged our hardware and began peeling the old strip out of the channel. The strip is held in place by retaining screws, pinch welt, and adhesive. This is where the removal tools come in handy, as you have to put some elbow grease into getting the channels clean and ready for new seals.
While not a requirement for the weatherstrip replacement, we decided to take advantage of the opportunity to inspect the metal frame below the windshield trim. After removing the upper windshield strip trim screws and prying it free from the frame we found a disaster waiting to happen. Years of moisture trapped under the strip had developed rust along the entire upper windshield frame. The good news is, this was just surface rust and was easily fixable with a grinding disc across the top and fresh coat of black Rustoleum paint. Reinstalling the windshield trim channel requires either high quality two-sided seal tape, or an ample bead of sealant between the trim and windshield frame to prevent future moisture intrusion. If you venture down this route, be prepared to deal with retaining screws that strip or break off when removed. Have a drill handy and some one-size-over screws in the spots that need to be drilled out.
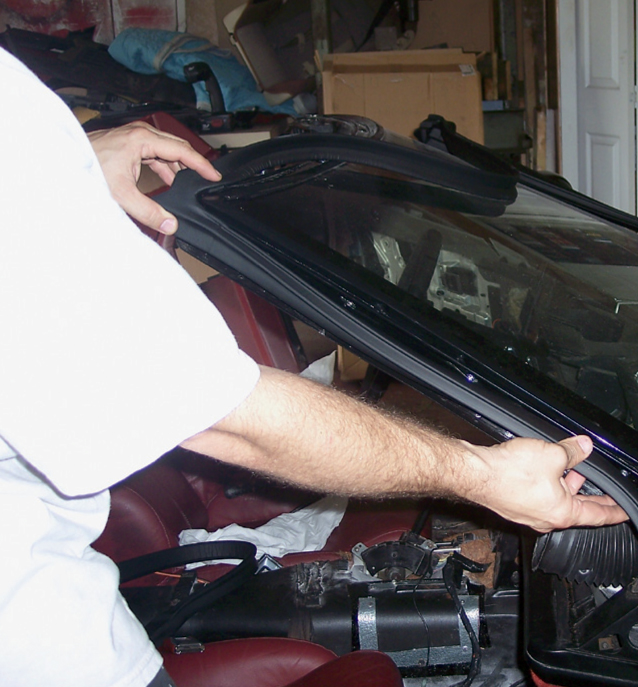
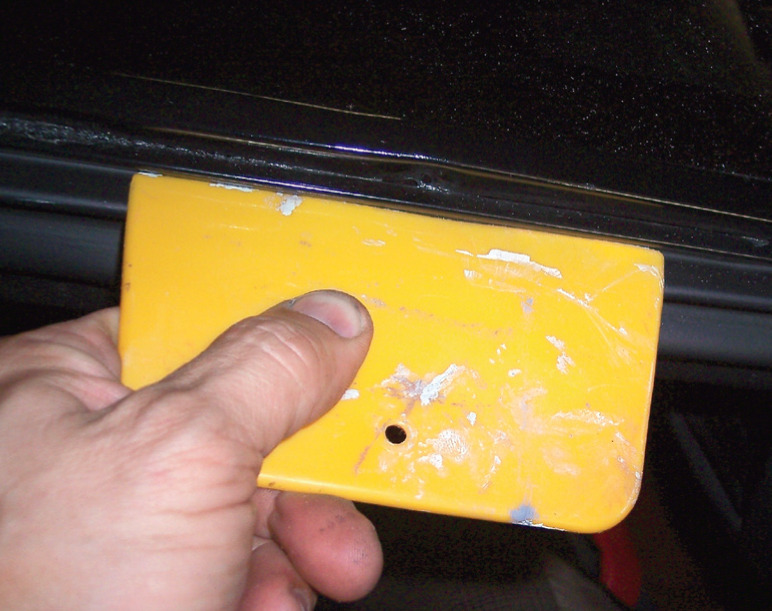
Now is a good time to have a helper handy. Start the reassembly process by first test-fitting the new strip across the windshield. This is tricky as it takes more than two hands to hold each side in place. The goal is to determine where the center, corners, and edges fall so once the adhesive is applied, everything slides into the right place. A spot of masking tape can be used to mark alignment points for the perfect location to install the strips. Once again, apply a thin coat of adhesive across the entire windshield channel and the backside of the weatherstrip. Allow this to tack for a few minutes, then apply another thin coat of adhesive on the windshield trim side just prior to assembly. This is where the helper really comes in handy. Carefully drape the strip across the car and position from the center and work your way out. We used a plastic body filler spreading tool to press the edges of the strip under the channel lip. Be careful with metal tools as sharp edges can rip and tear the rubber.
Work quickly from the inside out with your helper keeping the edges from flopping. It is easy to work from front edge to rear edge of the strip, slipping and pushing it in place. It is okay to apply extra adhesive in the corners where it turns down the side of the windshield. Work the strip in and install the retaining screws as soon as possible. You have a few minutes before the adhesive fully hardens to continue sliding and moving the strip even across the mounting channel. Once the retainer screws are back in place, the inner windshield garnish and rearview mirror can be reinstalled. Be very careful not to overtighten the garnish screws to avoid cracking any of the plastic trim.
B pillar
With two areas down and two to go, we moved onto the B pillar, which runs across the top of the car, sealing the top of the rear of the doors, back edge of the glass, and roof panel to the car. There is no garnish trim removal necessary for this install. Remove the retaining screws from the lower corners of the old strip and pry it free from the car. Using the scraping tools, remove all excess adhesive from the weatherstrip-mounting channel. Again, with the assistance of a helper, test fit the new strip and determine the center. Make your marks and remove the strip. Apply a thin bead of adhesive to the channel and to the back of the strip. An extra amount of adhesive is a good idea where the upper channel and side channel meets on the corner of each side. Allow that to tack, and then apply another thin bead to the trim on the car. With your helper, carefully lift the sticky strip over the car and into place. Using the plastic spreader or spatula, press the strip into the channel groove from the center out. Replace the fasteners at each lower corner and take a break. One strip left to go.
Rear window
The rear window uses a different kind of weatherstrip that incorporates a pinch welt glued to the strip that fastens to the body rim around the rear hatch opening. First, open the rear window and find a suitable prop rod, as the struts will have to be disconnected. We took a piece of one-inch PVC pipe measured to length with the window open and positioned it between the floor and the latch striker on the glass. With the window secure we snapped the retainer clips and released the strut rods from the car side and twisted them out of the way. We grabbed our handy sandwich bag and used it to collect all the retainer trim screws holding the three rear plastic garnish trim pieces. The old strip came out easily.
The new weatherstrip is not marked top or bottom, so take a few moments to test fit. Be very careful not to tug, pull, or stretch the piece. After the correct location has been determined, the new weatherstrip presses in place starting at the lower corners of the window opening and is secured by the pinch welt trim. Press it around the opening and continue going around until it is fully secured. Reinstall the rear hatch trim, fasteners, and struts. Reconnect defogger if equipped.
The weak spot for the C4 coupe is in the lower corner where the strip comes together. We applied adhesive to the corner of the strip and pressed it tight to the body on each side to help secure it from being torn as use and time takes its toll.
Rooftop
Although our targa top strips were in good shape, new ones are available from Corvette Central (p/n 634562) and are not included in the coupe kit. However, changing them is a snap.
Following the same process already described, remove and save the retainers, peel out the old strips, and scrape the adhesive. Apply a thin bead on both surfaces, allow it to tack, then apply a bead to the roof panel and press the new strip in place. Reinstall the fasteners and mount the panel back on the car.
Wrapping it up
Once all the strips are in place you can carefully close the doors with the windows rolled up and the roof panel fastened in place. Observe the general fit of the glass. If the window is not lined up in the opening, close yourself or a helper in the car and access the three 10 mm nuts holding the glass to the regulator.
Loosen the nuts and slide the window around until it is evenly pressing on the A and B pillar strips. This goes much faster with a helper. Test run the window up and down a few times to make sure nothing shifts or slips after it has been adjusted. The felt strips along the top of the doorframe can be adjusted to apply pressure to the glass and make it press tighter against the body seals. This is a trial and error process, so no need to rush. Once the fit is satisfactory, re-install the inner door panel.
Now it’s time to roll the car outside and test. Run a hose around the glass and strips looking for leaks. Use an unrestricted water flow and start at the base of the glass and seal area working up with a helper inside the car spotting for leaks. Once a leak is detected, mark the area with a grease pencil and continue on until the whole car has been checked.
An alternative includes putting baby powder on the seals and gently closing the doors. Open the doors and inspect for areas that have not made a transfer contact. Finally, go for a quick spin and listen for air leaks. Mark the spot of the leak with a piece of tape or grease pencil until you can return home and remedy the problem.
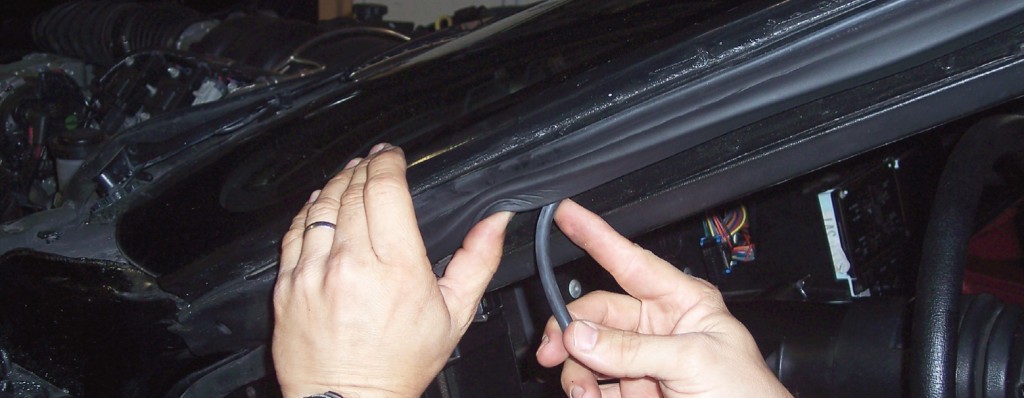
While there is some adjustment possible by rolling the weatherstrip back, loosening the mounting screw and sliding the entire assembly in and out, that isn’t always possible due to the risk of damage to the strip and frozen screws or limited movement due to the weatherstrip retaining being glued to the A or B pillar. An easy solution for sealing leaks can be accomplished by shimming the strip out with a piece of rubber, vacuum, or small fuel hose behind the void in the strip. We found an air leak along the lower portion of the A pillar. The problem was solved by slipping a 16-inch section of 5/16-inch fuel line in the void causing the strip to spring out tighter to the glass. We also found a minor leak in the passenger B pillar rear window section, simply solved with a piece of ¼-inch vacuum hose stuffed in the void.
Once the strip is in and sealed, you can keep it in like new condition by regularly applying weatherstrip lubricant (p/n 101232) on the surface. Now stand back and enjoy your handiwork, knowing that you will not have to make any more excuses for your wet pant leg. You will be in awe of the huge change this simple weekend project has made.
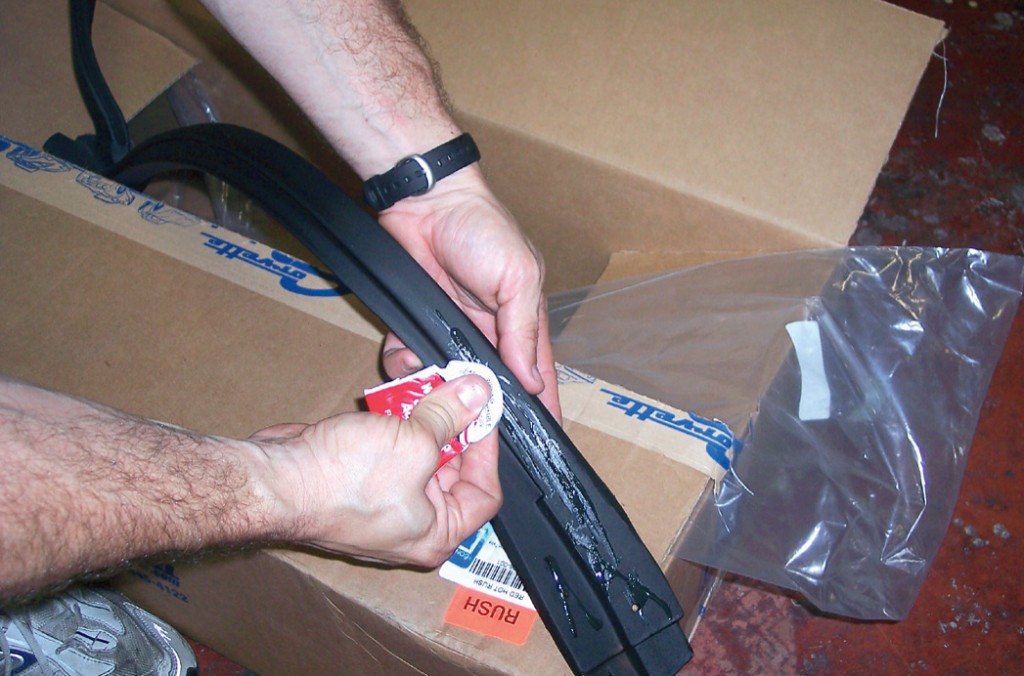
It is important to follow the adhesive application directions for maximum bond. Here we are putting the final layer of adhesive in before gluing the weatherstrip down.
Test fitting the A pillar weatherstrip.
Applying the adhesive to the A pillar strip.
Inserting a 5/16-inch rubber line behind the void in the A pillar eliminated gaps that could create wind noise and leaks.
Pressing the rear window hatch weatherstrip over the pinch welt.
An old body filler spreader works well to press the strip in place, and is much safer than using a metal object or tool. An old credit card will work just the same.
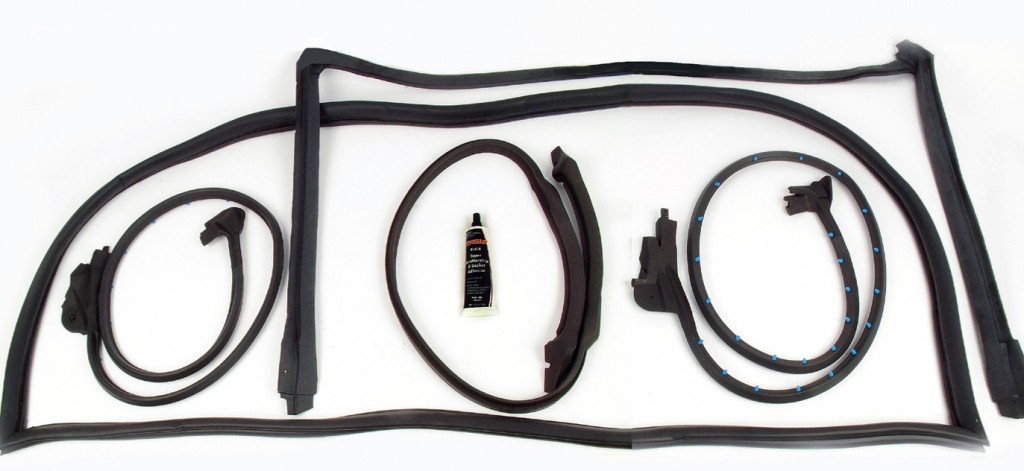
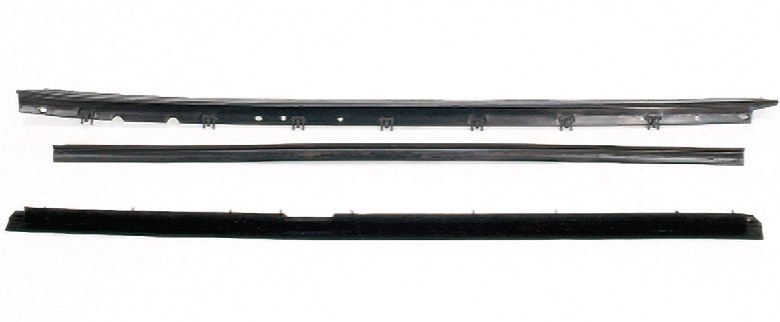
The C4 weatherstrip kit (p/n 634565) comes with the main weatherstripping for around the doors, over the windshield pillar and the B pillar, as well as the rear hatch window seal.
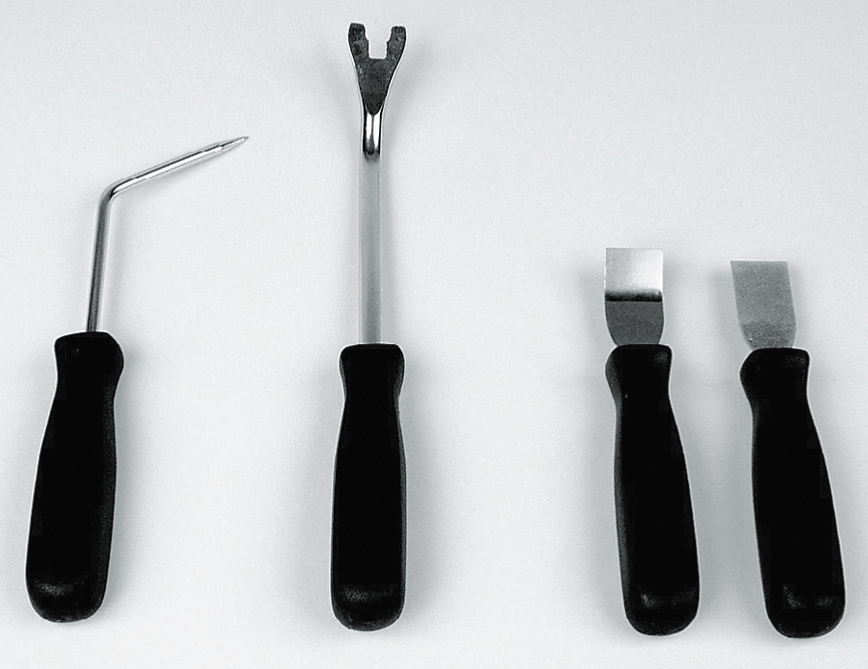
These four tools, found in the weatherstrip tool kit (p/n 634588), will greatly aid in removal of the old weatherstripping and installing the new.
Upper door seals (p/n 284067) like these will typically crack over time and you’ll start to notice getting “pinched” more often if you rest your arm out the window of your C4.
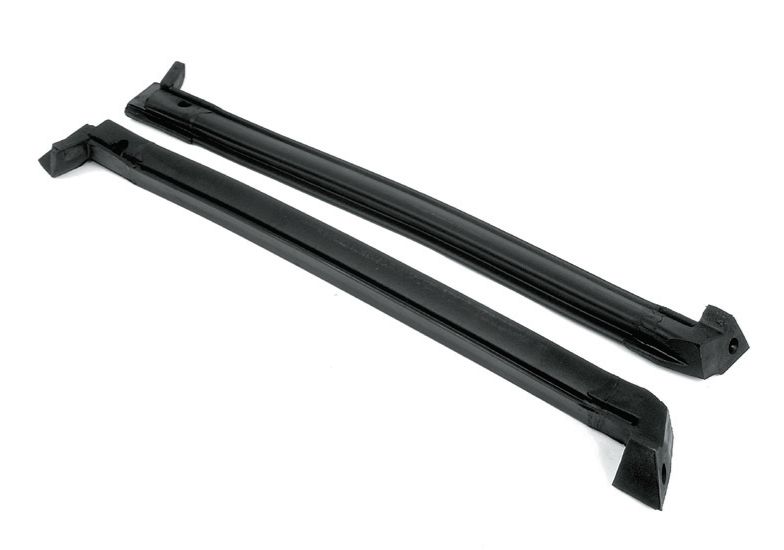
Targa top seals (p/n 634562) are simple to replace and will complement the other new seals, but they don’t come in the main weatherstrip kit so don’t forget to order them!
For Your Information: Corvette Central (800) 345-4122 www.corvettecentral.com

Im looking for a RH pillar post for a 1987 Convertible Corvette. This is not the bracket that holds the weatherstrip. It is a steel piece with holes in it that go under the weatherstrip retainer and the tops fabric goes under it. It goes n the rear rail section of the window. Been looking everywhere.
I changed the weather strip on my 87 c4 convertible and the side horizontal do not butt together when the top is up. I looked at a 93 c4 convertible and the weather strip overlaps and doesn’t leak, is there anything that I could do to rectify the leak on the existing new weatherstrip?
i have a 1990 c 4 convertable the rubber around the windows and cross the top of the windows needs to be replaced can you help me in what kit i need to do this if you can give me a ph num i can call and talk to you and order it so i get the right stuff thanks james culley
You may call product assistance at 1-800-345-4122. They are available Monday-Friday 9:00 am through 5:00 pm.
Thank you,
Corvette Central
My 88 convertible had a problem with the side weather stripping leaking badly. I had a body shop realign the door and glass on the worse side. Some help, but not a total fix. then I began examining the relatively new w.s. and discovered something unexpected. Some time in its previous lifem someone had reversed the forward side channels! Probably a top installer or an owner replacing the w.s. Perhaps the factory got it wrong. Getting them corrected helped a lot. Still prefer to hand wash the old girl, but she leaks a lot less! Check all of your channels. the differences are subtle but the difference can cause real trouble.
I have a1987 C4 and the shop where I take the vette tells me the weather strip is still soft and shouldn”t leak
but it does at the front post area on both sides right at corner of the windshield, the targa top and side window. ( I’am sorry if my description of the area isn’t spot on ) even if I put tape around the whole area when I wash the car it still leaks where else could it be leaking.
What if the top seal seems to be to long when trying to replace it
I replaced my C4 weatherstrip (perhaps with epdm but I’m unsure) and it became cracked, spongy and nearly useless within two years! Words truly fail! I don’t mind paying for quality. Is a warranty offered? Please advise? Thank you!
Steve, send us a message to mail@corvettecentral.com if you have the invoice number that will help, or at least provide a customer number.
I have a 91 convertible. I had the top replaced, however, the weatherstrip has not fit well. Especially, the vertical strips on the rear part of the windows. They appear to be too short and the windows do not go under the top part of the strip as they should, compressing the top portion. I bought the strips from Corvette Central. Could they actually be too short? Could they be for another model year? Is there a different in length for C-4 convertibles based on year?
Please give us a call at 800 345-4122
I want to change the waterstrip in targa top. Corvette 1988. The old weather strip has inside. Two plastic pieces front and rear. Is necessary to replace this plastic in new waterstrip?
I was curious if there is any difference in the weather stripping on a 84 through 89 versus a 90 through 96?
How close is the quality of your weatherstrip compared to OEM from GM?
You can compare the majority of our weatherstripping to OEM and not tell a difference. We offer the best weatherstrip on the market.
I have a 1994 corvette with removal top. The top has not been removed in 15 years and I feel the top is vacuum sealed. I tried removing all bolts but it will not budge leading me to my conclusion. Any ideas on getting the vacuum released, I realize I will need to replace weather stripping but dealership was way too high in the cost to remove and install weather stripping. Any home remedies?
If the top hasn’t been removed in 15 years it may take some force to be removed. Try using heat from a hair dryer then pry around until it budges.
Hi, I have a 1990 convertible. All the rubber is looking rough. I am wondering what a kit is worth. I am Canadian, do you ship to Canada? If not, would you ship to Indiana or Montana?
Hi Holden! Yes, we carry weatherstrip kits for convertibles and we do indeed ship to Canada. Follow this link to shop online: https://https://www.corvettecentral.com/c4-84-96/weatherstrip/