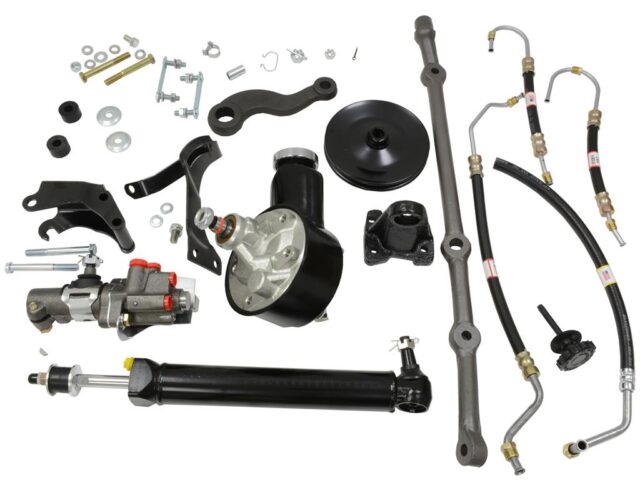
Power steering is a mechanical wonder that many of us often take for granted. For some, it is hard to even remember a time without power steering. Today’s systems are cost effective to manufacture and are very reliable with just basic maintenance. It is likely that these systems will remain in place for several more years despite the pressure to continually increase fuel economy.
The power steering system consists of a reservoir, pump, relief valve, control valve, power cylinder, and high/low pressure hoses. The system is effective because of the pressure differential that is created by the power steering pump. A quick explanation of how power steering works is in order. The reservoir supplies the fluid to the pump, which is driven by the engine via belt. The fluid is pressurized and sent to the control valve and the relief valve. When the steering shaft is turned, the control valve sends fluid to the power cylinder and the power cylinder uses a piston to aid in reducing steering effort.
General Motors did not intend to give the Corvette effortless, Cadillac-like steering. Instead, they opted to design the system to provide steering assistance while offering good feedback and response on the road at speed. While you cannot expect to turn your Corvette in a parking lot with just your fingertips, the steering assist system is a vast improvement over not having power steering at all.
The power steering assist system does have an Achilles heel, however. The hydraulic cylinder shaft seals are subjected to sand, debris, and all of the elements which wear them down and inflict damage. In addition, control valves can wear and, with their multiple fluid connections, leaks are inevitable. Many control valves are replaced due to what appears to be excess play in the ball stud. In order to make a proper diagnosis, however, the engine must be running with fluid pressure. When the engine is running, the ball stud play should subside. If not, control valve replacement is necessary.
Many times the control valve is also blamed for excess steering play when indeed the steering coupler is worn. Steering couplers are comprised of a rubber disc sandwiched between two metal flanges. The steering couplers job is to eliminate steering wheel vibration. Over time, the rubber deteriorates and causes excess play in the steering wheel. The steering coupler has two pins as a safety precaution to prevent a total loss of steering.
As a result, a cottage industry has formed because of the number of control valves and cylinders in need of replacement. The same items appear on several Corvette generations, making it beneficial to the manufacturers. When it comes time to renovate your power steering system, you have plenty of options. New and remanufactured components are available, as well as hose kits. Unless you are aware of the replacement history of both the power steering cylinder and control valve, it is best to replace both including all of the hoses. The photos that follow will guide you through the process.
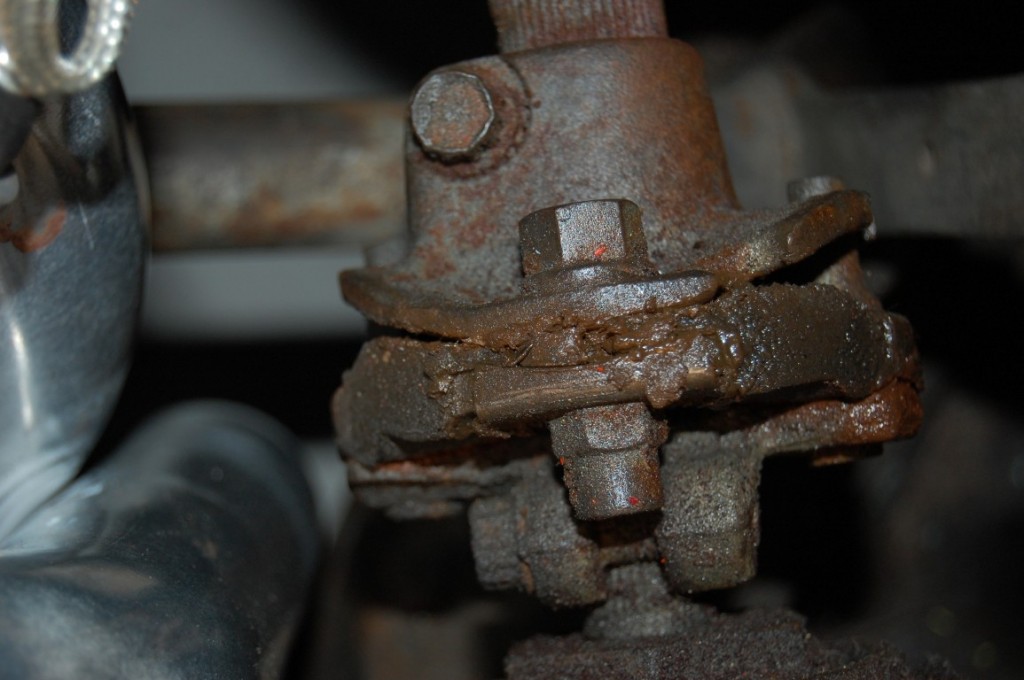
This oil soaked, well-worn steering coupler off of a 1969 Corvette created excess play. The best way to check this coupler is to have someone turn the steering wheel within the free play range. Watch for movement in the coupler that does not transmit to the lower flange.
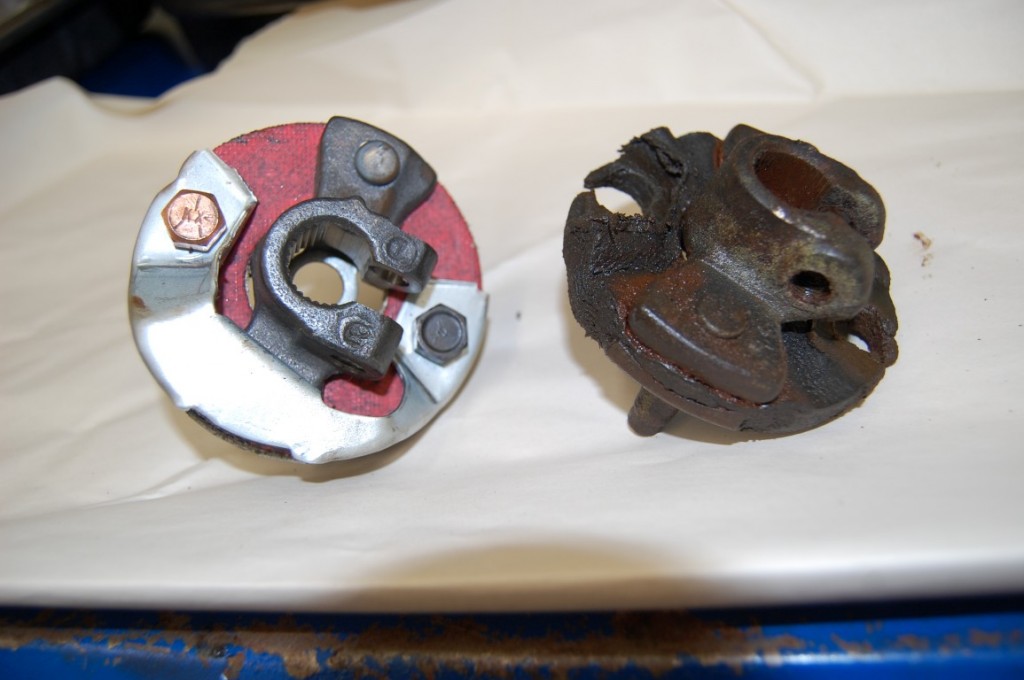
What a difference this correct Corvette Central complete lower flange and coupler assembly makes. There are rubber disc replacement kits available that can save you some money, but require quite a bit of work to install. Keep in mind that the majority of these vehicles are 40+ years old and the metal flanges do wear, so it is a good idea to replace the entire assembly.
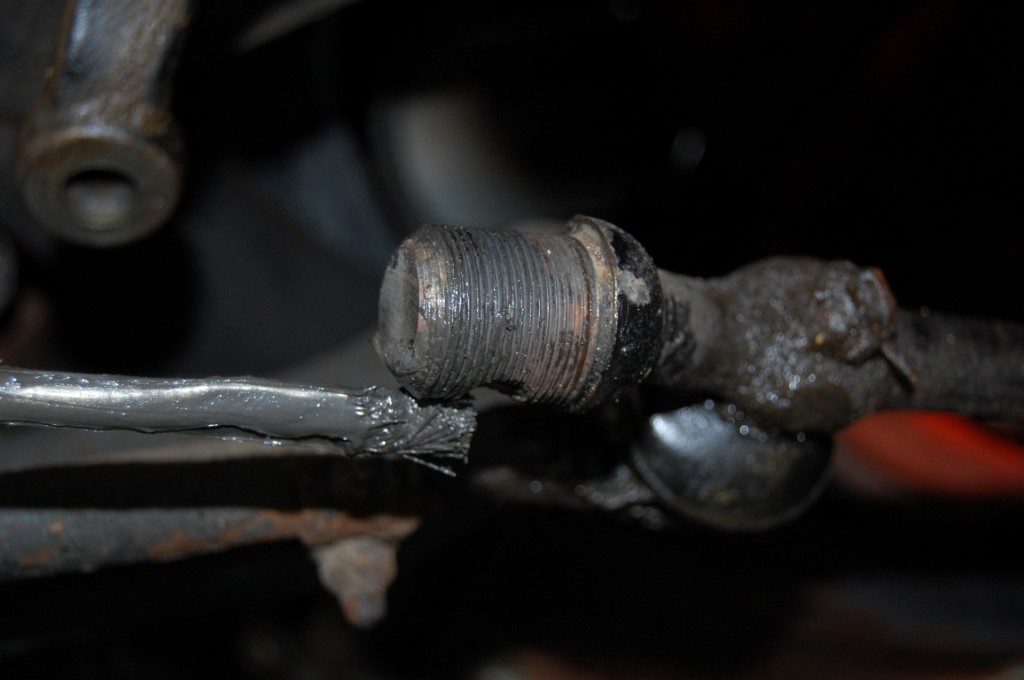
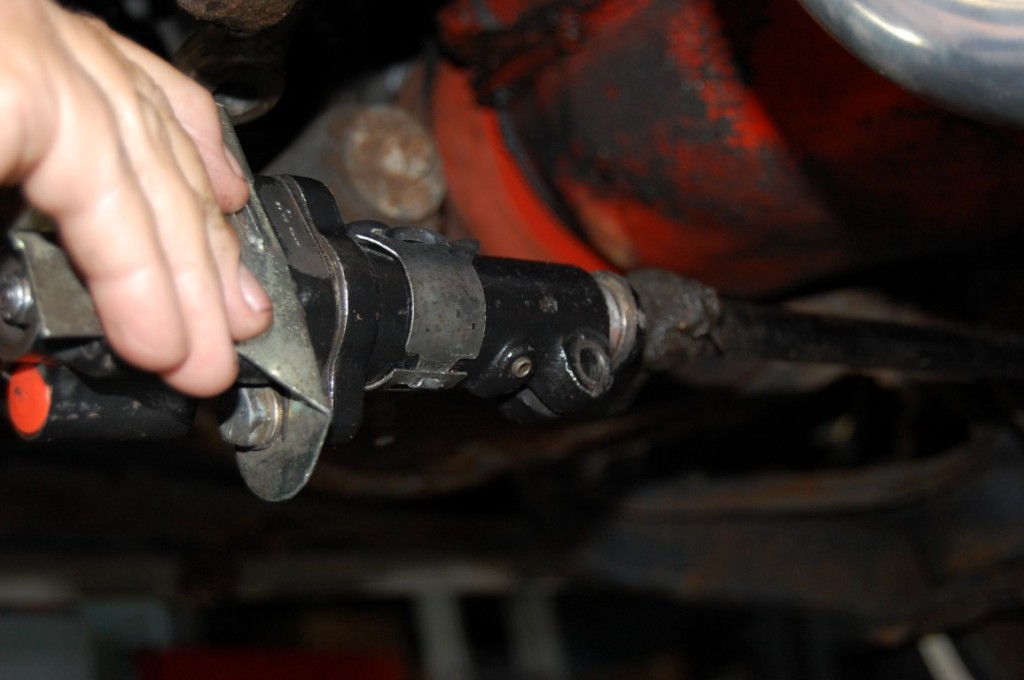
Apply anti-seize to the drag link threads to ease installation and future removal of the power steering control valve.
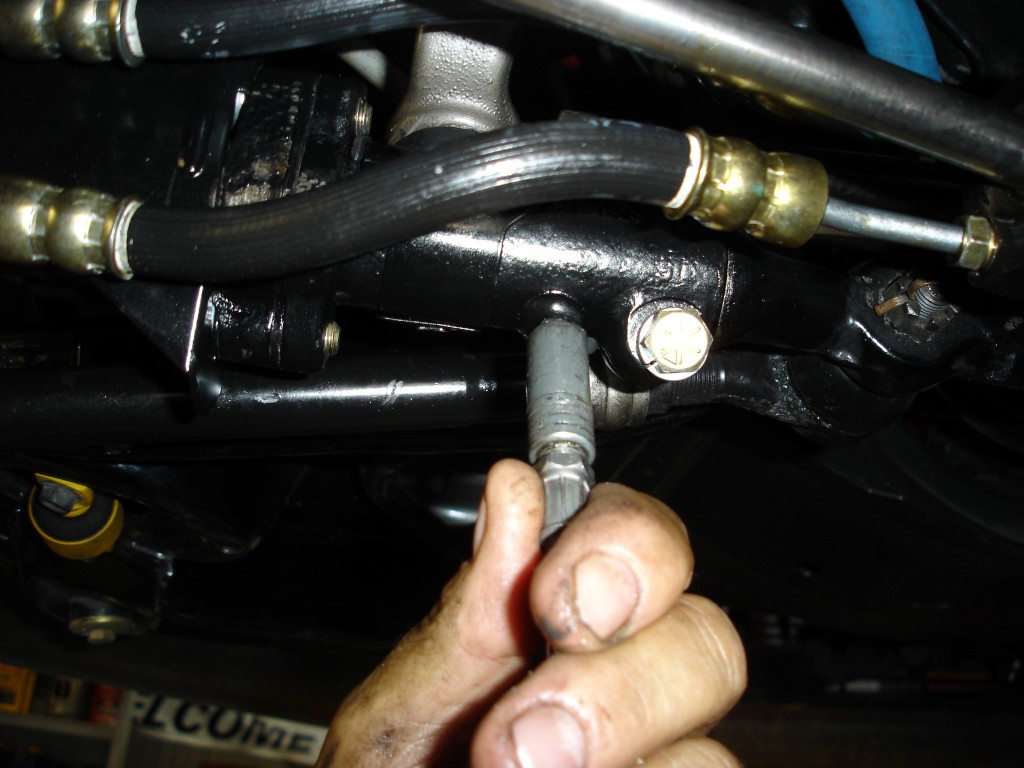
During the installation of the power steering control valve, it is critical to ensure that the control valve screws on at least 3 or 4 turns with light effort at first. After 3 or 4 turns it will require more effort to seat the valve. Use a ¾“ box end wrench placed on the ball stud to tighten.
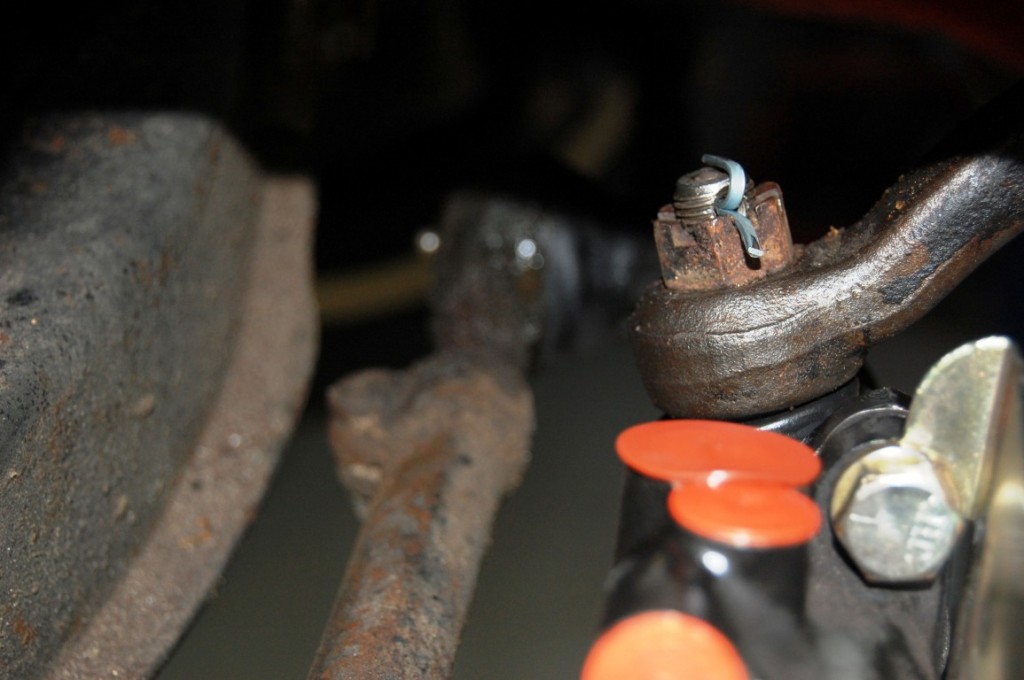
The castellated nut is tightened, with an additional half turn until the cotter pin hole is lined up.
In order to ensure your comfort and minimize the risk of inadvertent injury, the cotter pin ends should be bent over and pressed down.
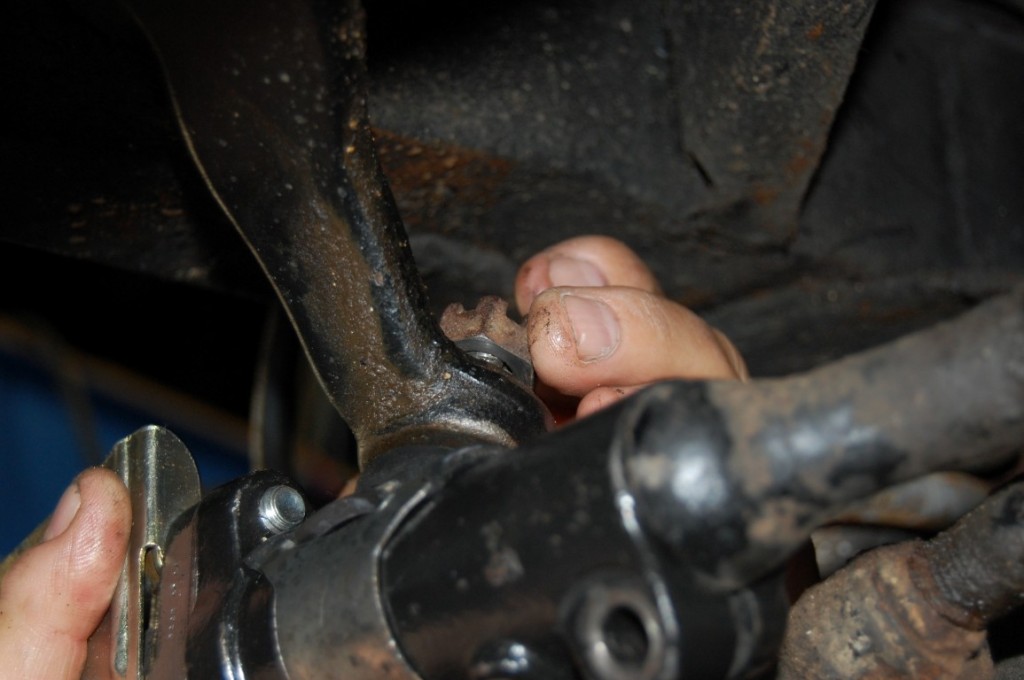
Make sure that you have the machined spot in the drag link lined up with the control valve bolt hole, then install the grade 8 bolt and torque it to 45 ft. lbs.
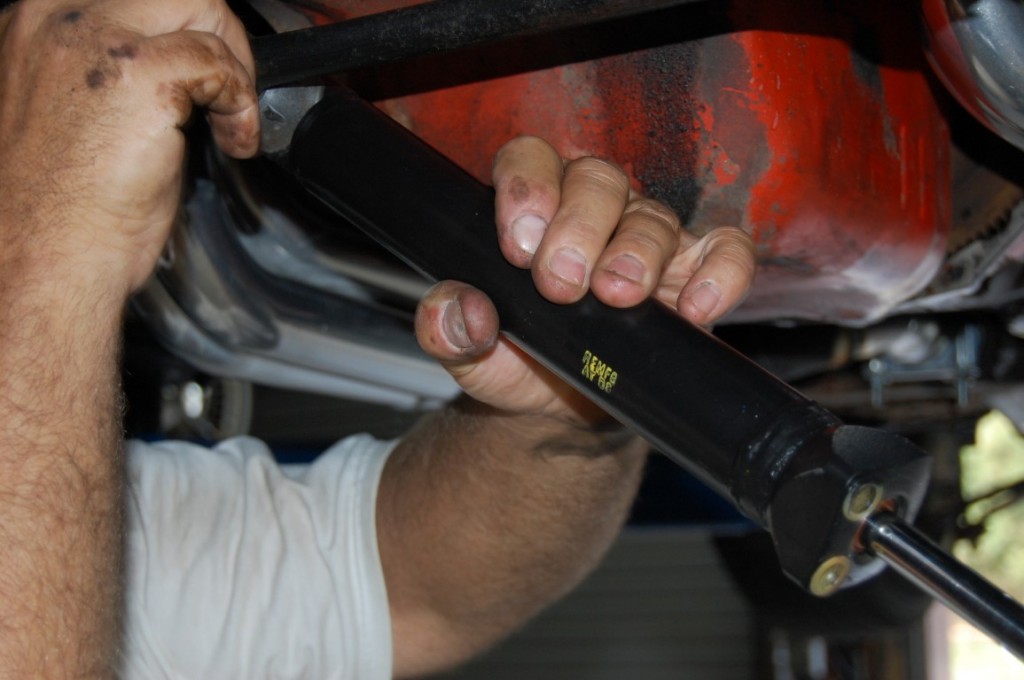
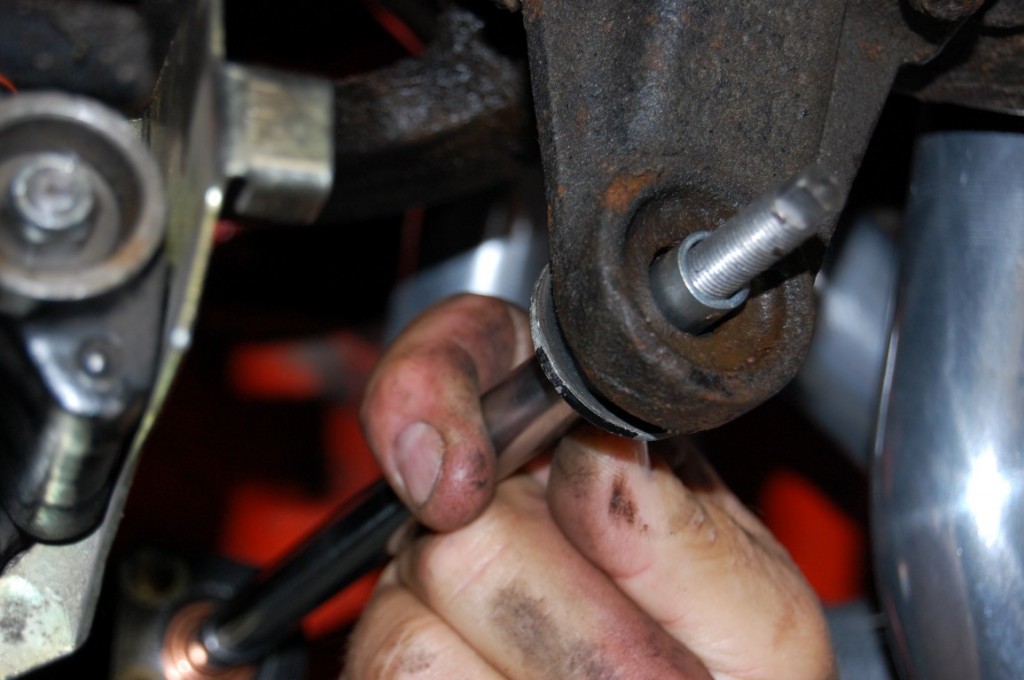
Install the hydraulic cylinder using the same method as the castellated nut on the power steering control valve to tighten it.
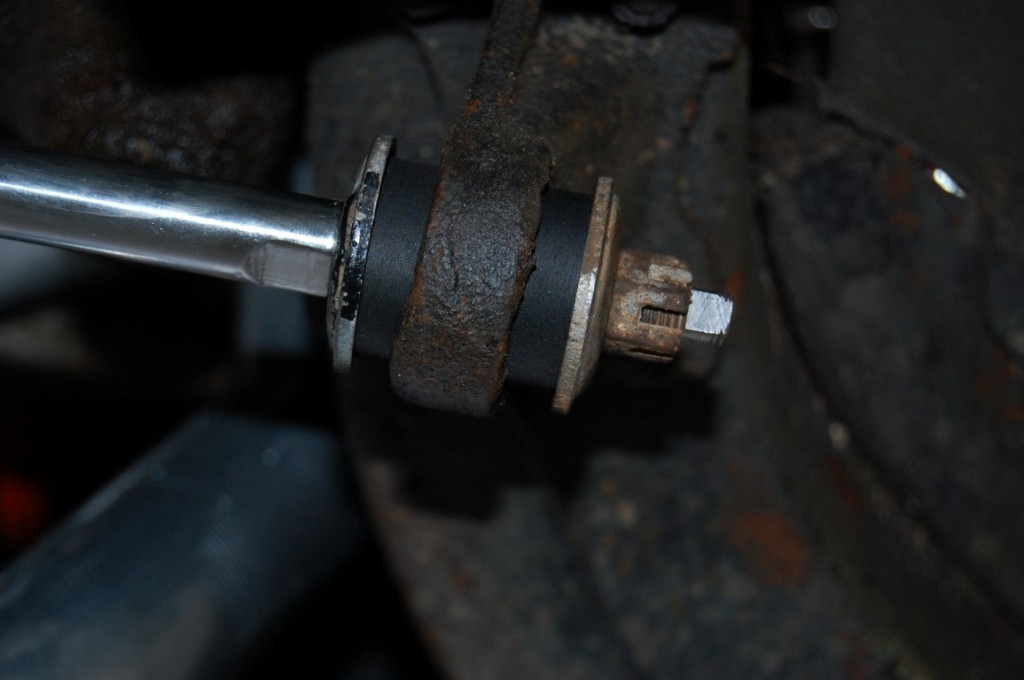
At the frame side of the hydraulic cylinder we install a large washer, rubber bushing, and sleeve. Make sure that the sleeve is installed. The sleeve is often omitted, resulting in crushed rubber bushings.
This is the correct installation of the washers, bushings, and castellated nut. The castellated nut is turned down until the washers contact the sleeve, and then an additional quarter turn is applied to line up the cotter pin hole.
We find that it is easier to install the hose at the power steering pump before the power steering pump control valve.
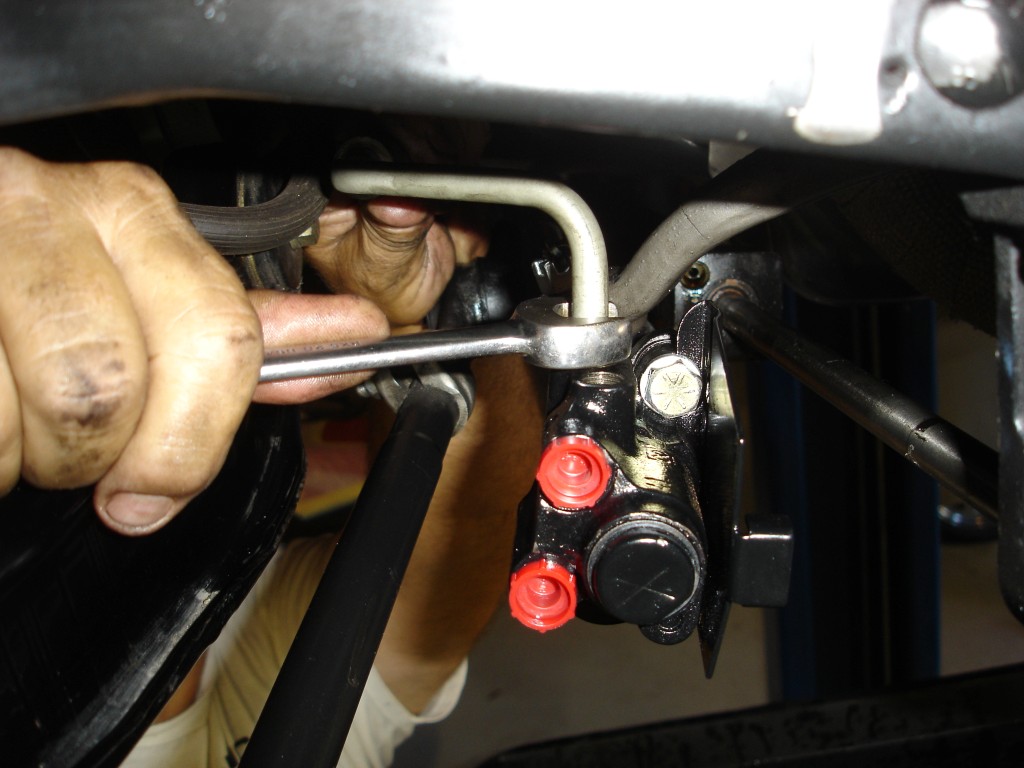
Again, it is easiest to install the power steering pressure hose onto the control valve next. We are using a wide fitting wrench to prevent line nut damage.
Using a fitting wrench, the power steering return hose can be installed now.
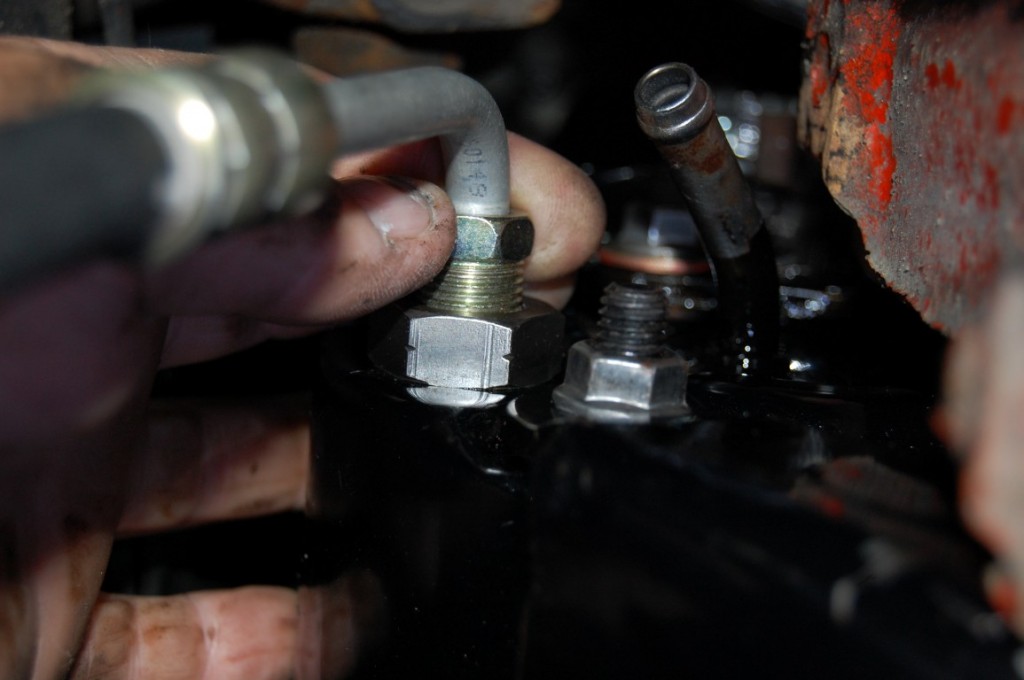
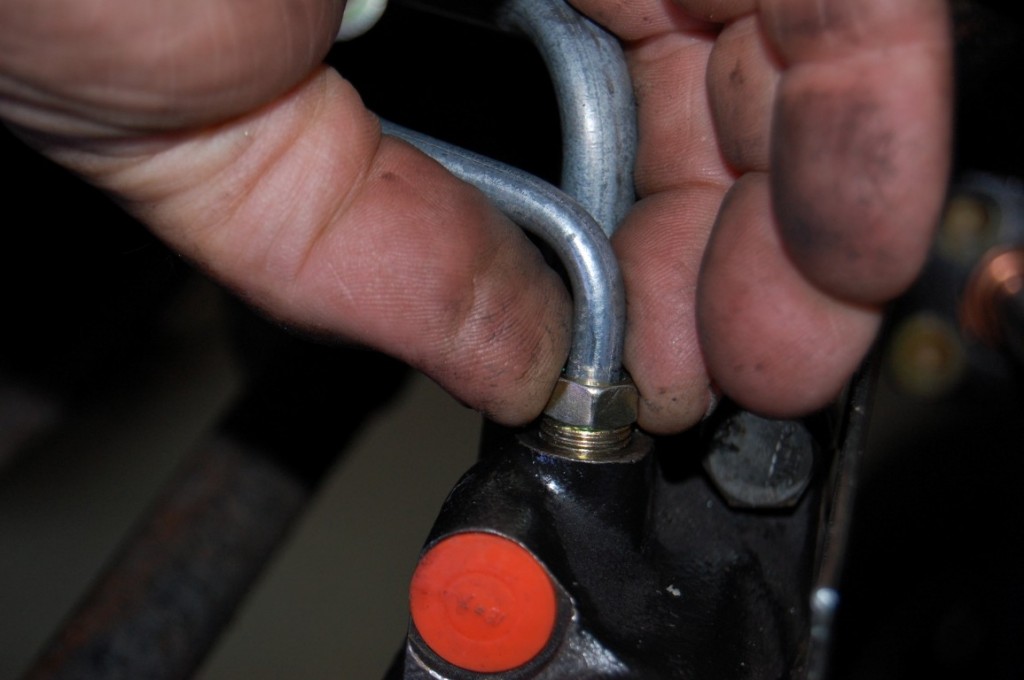
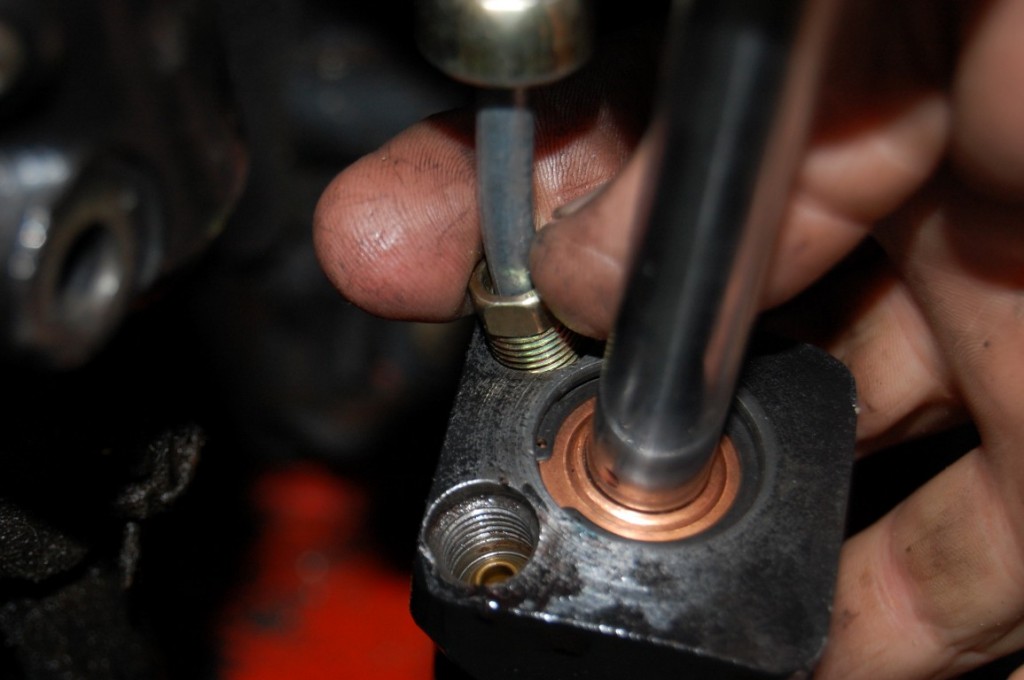
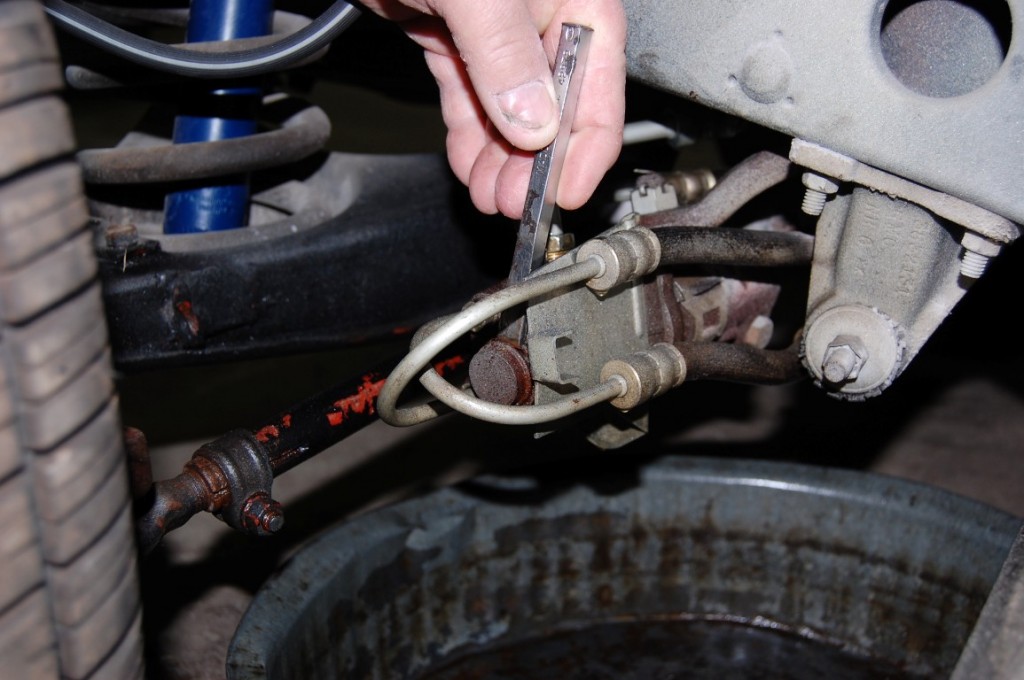
The hoses can be tricky to install on the power steering cylinder since they angle outward and slightly upward. Do not use a wrench to tighten these until you start them by hand and secure them with at least 3-4 turns manually.
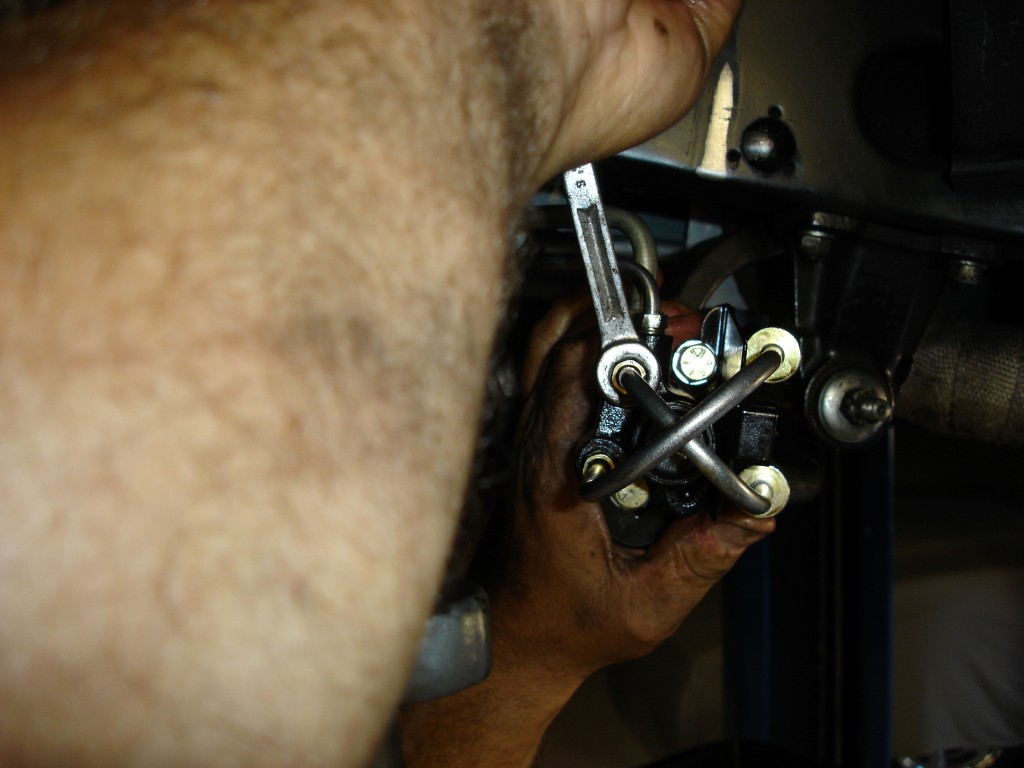
The cylinder to control valve hose is installed at the control valve. These hoses must crisscross each other or your power steering will be non-existent.
After the installation has been completed add chassis grease, if required, using a grease gun and a maximum of 3 pumps. Check with your control valve supplier to verify whether or not greasing is necessary.
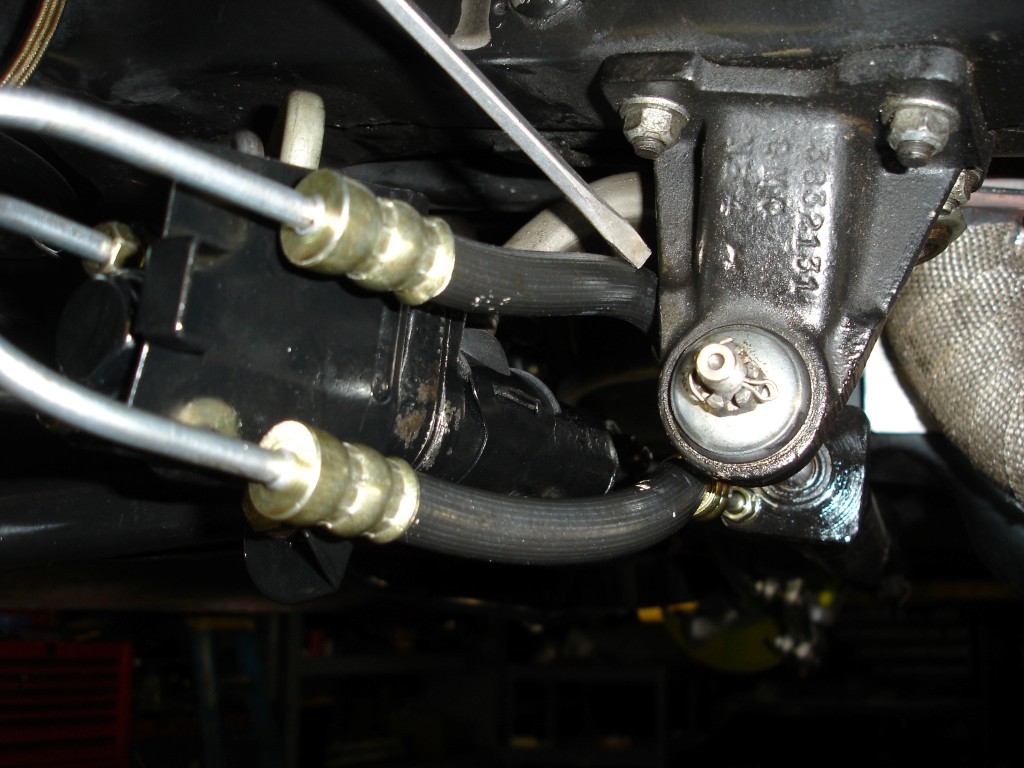
The small screwdriver indicates a possible friction point where the control valve hoses will hit the cylinder mount. Before starting the engine, move the wheels right to left and left to right throughout the full range of travel watching the hoses for any possible friction or binding points. Be sure to look at the power steering pressure and return hoses for binding concerns as well.
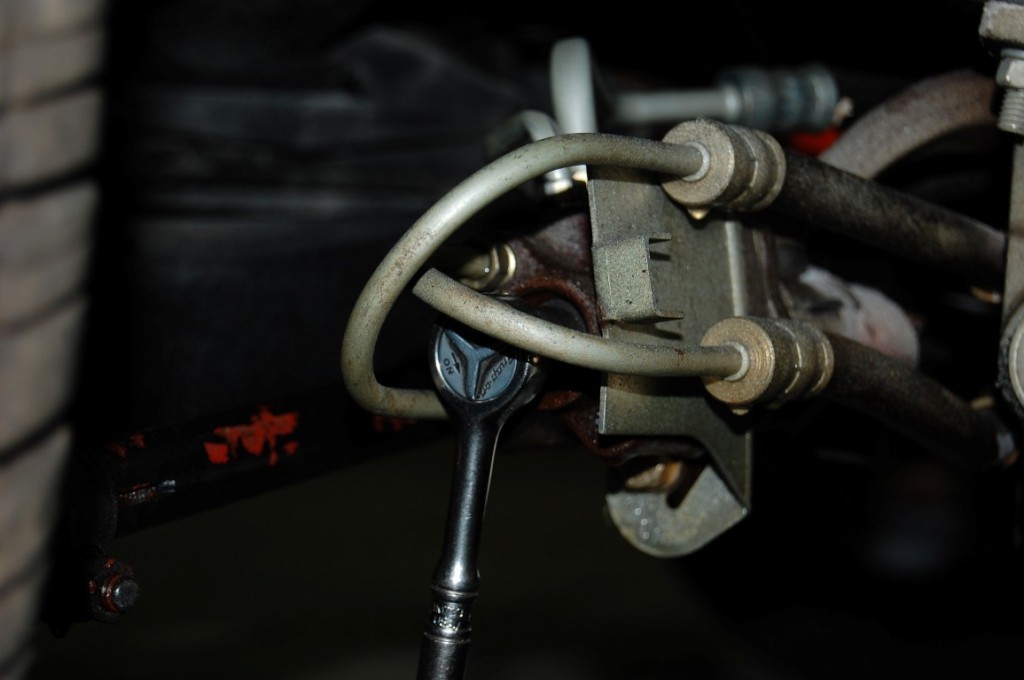
Upon initial start-up, do not place your arm between the steering wheel spokes. A maladjusted control valve can cause the steering wheel to turn abruptly left or right on its own. We are removing the cap to gain access to the control valve balance adjustment 7/16” nut. This particular 1964 coupe exhibited a pull to the right. Before implicating the control valve, we attempt to adjust the balance.
We place our ¼” ratchet with 7/16” socket on the balance nut; then the engine is started. We adjust the balance nut clockwise until the steering wheel begins to move slightly and then rotate the nut counterclockwise until the steering wheel turns in the opposite direction. This will give us the approximate number of turns required to allow the steering wheel to rotate in both directions. For example, if two clockwise turns were required then one counterclockwise turn would center the valve.
If you would like to enjoy the benefits of power steering on your 1963-1979 Corvette that was not factory equipped with power steering, Corvette Central has kits available to make the conversion.
TIPS
- Be prepared; this is a messy job with multiple lines containing fluid to detach and reattach.
- When you have the hoses disconnected, do not move the wheels or a shower of power steering fluid will ensue.
- Refill the reservoir with power steering fluid as opposed to automatic transmission fluid which is sometimes used. Power steering fluid is specially designed to offer higher heat resistance.
- Power steering systems have a return that constantly shuttles fluid back to the reservoir making bleeding the system unnecessary.
- When first started do not overfill the system. Watch carefully because once the engine is running the fluid level will drop. Rotate the steering wheel back and forth 3-4 times with the engine running. Shut off the engine, open the power steering reservoir fill cap, and allow the air to escape the fluid. After 10 minutes, check the fluid level again and if necessary add more fluid.
PARTS
562330 ’63 – ’82 New Power Steering Cylinder
562336 ’63 – ’82 New Power Steering Control Valve
562355 ’63 – ’82 Rebuilt Power Steering Cylinder
562350 ’63 – ’82 Rebuilt Power Steering Control Valve
562209 Redline Power Steering Fluid (Quart)
Corvette Central has a variety of hose kits and complete kits with hoses, valves, cylinders, in your preferred configuration of new/remanufactured components.
Story and photos courtesy Chris Petris

i just did a new pump and valve on a 1978 Corvette. My return line and pressure line is different than in the one picture. After start up it would turn itself to the right and took a lot of effort to turn to the left. Any suggestions?
I purchased a new cylinder and cannot get it to extend. Any tips would be awesome!
I am installing your p/s valve reseal kit, I checked my 65 corvette service manual and cannot find
torque for bolts to valve housing and adapter housing no info came with seal kit. I just ordered a new valve 562336 from CC will be keeping old valve for back up.
I am having trouble with the 2 hoses that come from the power steering pump. They are both leaking after replacement of a rebuilt power steering control valve. All new hoses, no leaks anywhere else. I have tried many times to tighten up the connection. No success. I am thinking the rebuilt unit threads made be bad. Any suggestions would be greatly appreciated. Thanks Frank
I would try Teflon tape on the threads.
Thank You,
Product Assistance
Corvette Central
I believe that this is a flare joint connection so Teflon tape on the threads of the nut would not be of any value. I would look for scratches on the flare on the pipe to see if there are any. If not there, then check the other end of the connection on the pump or control valve or cylinder.
In this article we come to know about the services of corvette power steering.It is one of the wonderful article.You will get the best review over here,it gives some true and insightful information . It is an article worth applauding for based on its content.
Your article about 1963-82 Corvette Power Steering Service is educative. I enjoyed this post. You have such a fantastic experience with Power Steering Parts. Thanks for sharing such a Knowledgeable article. Keep going on. We are waiting for your next article post eagerly to read it.
I got a problem with my powersteering on my 78 vette. It leaks out of top of the powersteering pump when I turn the wheel. Why is that ?
I had the same problem, the cap did not seal tight to the pump. I added a additional o ring on the cap that sealed up the issue
what is the power steering pump psi of c3 76 corvette
Is this system interchangeable with the 1964 Chevy impala? I need to replace mine as it is leaking in several locations. Thanks
Hi. My question has to do with a new control valve. If there was too much grease pumped into the control valve will it prevent the adjustment needed? I have backed the adjustment nut almost completely off and the cylinder will not push back in. If too much grease is the reason will removing the grease fitting allow the grease to be pushed out when pushing the cylinder back in? Will this solve my problem?
It used to be easy to turn my front wheels with the car bearing weight. I replaced the steering control valve and cylinder but now the steering feels like no power steering, difficult to turn while bearing the vehicle’s weight even though I properly adjusted the control valve in out balance.
the two lines going to the control valve may be backwards, this will certainly cause the problem you are experiencing.
take the rod end of the cylinder loose again, start engine, if cylinder rod starts moving re center until it stops.
After installing the new control valve and cylinder my steering wheel does not line up straight like it did before. Also, steering effort is noticeably stiffer with the new valve and cylinder than with the old leaking system. Any advice?
Did you buy them from Corvette Central? If so give us a call at (800) 345-4122
Can I just tape up power steering? Black rubber hose has small cut. Will duct tape be ok?
I would recommend you fix the issue correctly. Last thing you want Is too burn up a pump due too a leaking hose.
Replace the hose.
I bought POWER STEERING CONVERSION KIT Item#:563013 from you. My mechanic had some trouble mounting the power steering pump. There was no manual with the package. Can you help me with some picture how to mount the pump and brackets. I have seen some video on your homepage how to mount it but can not find it now.
Give us a call at 800.345.4122 and we’d be glad to send you a copy of the assembly manual and photos of the diagram.
Thanks. Get it by mail. We fix it. Do you have a video before that show how you convert to power steering?
I have a 1979 C3 and I replace my power steering pump, power cylinder, control valve, and all hoses. The steering wheel chatters when making turns now. It did not do this before the replacement. What could be the cause?
If you bought the replacement from us please give us a call at (800) 345-4122
I have replaced the power steering valve at least 4 times in 2 years, it lasts 4 months and starts leaking again. How can I take care of this?
Did you buy the steering valve from us? We sell new and rebuilt steering control valves. CC # 562336 and CC # 562350
I had the same problem , I have replaced all the components including new lines.
I have a question about the power steering conversion on my 65, I bought all new hoses & a Delco reman pump plus a reman power control valve and a reman cylinder, both from Lares, my problem is that the return hose is building pressure & has separated from the steel line at the control valve, I replaced that return hose assembly & put double clamps on the return hose to prevent the hose from coming off again, then when I started the car again, it blew out the return hose this time, do you have any idea what is happening with this system? Thanks for any help you can offer.
Sounds like you were sold a bad system or something wasn’t installed properly. Here’s a conversion kit that will work correctly.
Hello there, this was very good and instructional reading. I think I’ve gotten another bad modulator control valve again. I bought my last one from “Orilley’s” auto parts here in Tucson, AZ. where I live. Of course both times I have replaced this thing it seems to still leak (profusely) from the top of the bolt where the cotter pin goes through. The (2) times I replaced it, it started leaking within the first 2 or 3 months. Now I have to use that very expensive LUCAS POWER STEERING FLUID just to get the leak to slow down… but even that eventually ends up on the ground! So now I’m considering removing it again from my Vette and try to overhaul it myself. I think the place it is leaking is somewhere near the “shuttle”, whatever that does. I know it’s not the power steering lines or anything I did wrong. It’s definitely leaking from this shuttle area on top of the valve assembly. Any suggestions? Because I would hate to have to buy another one.
Seems to be a common issue on the 1963-1982 control valves to leak in that location. I would suggest investing in a rebuilt control valve that we sell. These are thoroughly tested and come with a limited 5 year warranty.
Hi. 1974 corvette. Power steering is soft turning to the right but hard turning left. Sometimes when turning to the right, it kicks in after about 1 second later. Meaning after I turn the steering wheel, the tires turn a second later. Turning to the left is a lot harder. Pump and valve is new and cylinder has the seals replaced. I did adjust the nut on the valve. Help!!!
I recommend bleeding the system to make sure all air is completely out. If you’re still having issues after being readjusted, you may have a bad valve.
Disconnect the rod end of the cylinder, start up and see if the cylinder rod moves inward. adjust the the nut until the cylinder has no movement. connect the rod end of the cylinder again. this worked on my 66 vette. It was hard turning when I turned right. Very easy during left turn. after this adjustment both were the same.
I have a 70. When I turn the wheel a little while driving, the car turns then a half second later turns more. At first I thought the rear end had something loose. Is it the control valve or the slave cylinder or something else?
It’s hard to say without personally looking the car over. A good guess would be somewhere along the lines of the Control Valve. I recommend you have it checked out by a certified technician that’s experienced with Corvettes. Issues with steering can be very dangerous.
Will this cause my car to dart to the right? Or when in park and revved up, steering wheel turns to right by itself?
Upon initial start-up, do not place your arm between the steering wheel spokes. A maladjusted control valve can cause the steering wheel to turn abruptly left or right on its own. We are removing the cap to gain access to the control valve balance adjustment 7/16″ nut. This particular 1964 coupe exhibited a pull to the right. Before implicating the control valve, we attempt to adjust the balance.
Which hose is retract n contract going to the cylinder?
Here’s an illustration that might help.
CC Tech. In addition to the question from Louie L. I too am having a bit of trouble spotting where the lines from the control valve connect to the slave cylinder. The diagram you provided shows the lines on the control valve, which is great, however, do you happen to have a diagram that shows the lines going to the slave cylinder? I am confused as to what either the top or bottom line connects to on the cylinder.
Thanks in advance for any help!
Hopefully this diagram will help you!
Can you tell me how much Redline to put into the P/S Pump of my 1982. It is empty I believe and I do not know what the capacity of the pump is?