Shock absorbers are considered a consumable product with a limited lifespan here’s why…
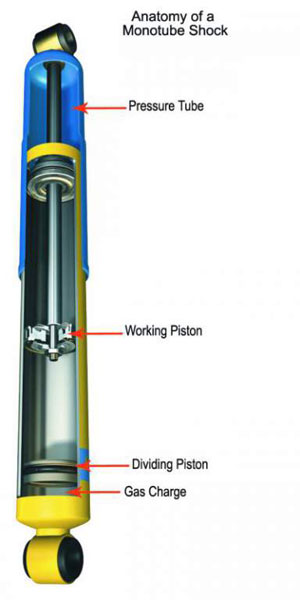 The C5, C6, and C7 shock absorbers are all Mono-tube design. Mono-tube shock absorbers construction begins with a single cylinder (tube) filled with hydraulic fluid. Another piston is used to separate the gas charge from the oil charge. Together the hydraulic oil and high pressure gas with proper valving dampen suspension oscillations. The rod that protrudes out of the cylinder is connected to a piston with seals to keep fluid in check. Another seal is used at the end of the cylinder where the connecting rod comes out to keep the fluid and gasses in while trying to keep debris out. One of the major benefits of mono-tube shocks is the pressurized gas is separated from the oil via a piston. The constant gas pressure on the hydraulic oil minimizes aeration of the hydraulic oil preventing foaming. Foam affects shock absorber performance because it can be compressed while fluid cannot, in turn; the shock reacts quicker with predictability. Overall suspension performance is enhanced with quicker reaction times with the tire on the pavement as much as possible.
Now we delve into the controversial subject of when shock absorber replacement should occur.
The shock absorber piston seal wears from rapid movement depending on how rough the road surfaces you traverse. Also dependent on the environment the shocks rod end seal wears from grit, dust or just plain dirt that coats the shocks rod surface. A light film of oil is present on the exterior of the shock absorbers exposed connecting rod attracting debris which is unavoidable. You can expect to see evidence of slight seepage on the shock absorbers cylinders exterior over a long period of time. It appears as a stain not wet to the touch, if there is a film of oil present on the exterior of the shock absorber, emanating from the rod end seal area, the shock absorber should be replaced.
There is no visual way to check the shocks piston seal without cutting into the cylinder. Once the piston seal wears shock absorption begins to go away and poor suspension control results. Another factor is valving which controls the compression and rebound rate of the shock absorber. The valving is precise drilled orifices placed in the hydraulic fluid piston controlling the dampening rate. Depending on the suspension engineers specifications the valving control rate is tweaked for the best overall suspension control. Road-race shocks are closer to neutral (50/50) on rebound and compression while drag-race shocks have a big spread. For instance the front shocks have a very low (10) percent rebound rate to help weight transfer with a (90) percent compression rate. For this reason installing a set of shocks that “look correct for fit” does not mean that they will restore the correct handling, in many cases they can hurt with poor suspension control. Finally the rubber mounting cushions or rod end sleeves wear and deteriorate from age. The loose fitting shock absorber mounting cushions cause rattles over bumps and rough roads while negating precise suspension control.
There are many conditions that affect a shock absorbers life as mentioned in the preceding paragraphs. One major factor that is often not considered is wheel/tire assembly vibration; the resulting up and down oscillations can quickly kill the shock absorbers piston seal and valving. If you pay attention on the interstate from time to time you will see a wheel/tire assembly that is bouncing up and down at a rapid rate destroying a perfectly good shock absorber. If the unbalanced situation is overlooked for thousands of miles suspension component and shock absorber damage is inevitable. Neglecting a wheel/tire vibration issue and the repair that could be as simple as balancing the assembly could cost big in the long run. Where you live can be a major concern in how quickly your shock absorbers wear, northern sections of US roads are peppered with potholes giving your shock absorbers a beating. By the time your Corvette reaches 60,000 miles it most likely is time to replace all four shock absorbers if you are driving on rough road surfaces. Southern Corvettes driven primarily on interstates can go upwards of 100,000 miles before any loss of shock absorber control is obvious. Something to consider, if you are expecting the best possible suspension control, 60,000 mile shock absorbers are not going to be in peak performance condition.
One of the most common ways to check shock absorber performance was pushing downward on the front or rear of the vehicle. The idea was to see how many times the vehicle went up and down after bouncing the vehicle. If the vehicle kept bouncing more than one time it was time to replace the shocks. While this method works on really worn shocks I prefer to observe the Corvette from another vehicle as it goes down the road. If you watch the vehicle closely you can see if the front or rear bounces three or four times after traversing a rough road surface. During braking watch for the back end bouncing after the vehicle comes to a stop. You can look at your tires for uneven wear across the tread. Really worn shocks let the tire bounce and then dig into the pavement creating square bald patches. The square patches will be evenly distributed around the tire. Keep in mind that as mentioned earlier a severe tire vibration will cause the tire to do the same thing creating small patches of wear. The difference is you will feel the vibration in the seat of the pants or the steering wheel which is hurting your shocks. Finding oil dripping out of the shock requires replacement. Always replace shock absorbers in sets of two front or rear preferably all four.
What Shock Absorber Should I Buy?
C5 Shock absorber prices go from $50.00 to $175.00 for Original Equipment replacement shocks. If you set the $50.00 shock absorber next to a $99.00 shock absorber the differences will be apparent. The low buck shock may or may not be a mono tube, at best it will a smaller diameter connecting rod and in most cases light duty hardware. The front shock lower mounting tube on lower quality shocks also has slots cut into the mounting bosses making them universal. While easy to install they are weaker when used in performance applications. Chances are very good that the lowest cost shocks will not be much better at suspension control than the shocks you are replacing. The inexpensive shocks smaller cylinder diameter lessens the piston area and requires less hydraulic oil. Less oil in the cylinder increases the temperature of the oil and diminishes the shocks effectiveness. The sign of a better shock absorber is a connecting rod and cylinder tube diameter similar to the OE shock. You know that you cannot go wrong with using the OE style Sachs shock absorber for street and mild performance driving. Corvette Central has three options the OE Sachs, QA-1 and Bilstein shocks. The QA-1 shocks are a great deal, large mono-tube cylinder with large diameter connecting rod for long term suspension control. They work very well on street driven Corvettes that occasionally visit the race track. Bilstein shock absorbers are also a good choice for the performance orientated driver. If you have had your C5 long enough and remember the original suspension feel, and it works for your driving style, replace the shocks with Sachs OE replacements.
RTD Shock Absorber Simulator
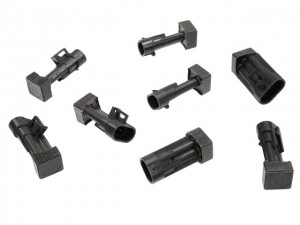
(1997-2013) Eliminate MIL Light and Associated Codes when Replacing Factory Shock Absorbers. Active suspension was a great idea for the Corvette. But, when replacing leaking factory dampening socks, you got “shocked” when you discovered that the cost of one factory shock could enable you to replace all four shocks with the best aftermarket shocks! If you do this, however, the MIL light turns on and the car’s top speed is limited to 80 MPH! By using our kit, you can then choose any shock absorber that suits you, and turn the MIL codes off. Kit consists of eight modules, two for each wheel location. Simple “Plug-and-Play” installation. Part # 575036 for 1997-2002 C5 Corvettes, or Part #576100 for 2005-2013 C6 Corvettes.
Shock Absorber Myths
Many vehicle owners hear that shock absorbers will raise the vehicle or influence ride height. Back in the old days shock absorbers were filled with hydraulic oil, when the shocks were removed from the box the connecting rod stayed where the factory left them. Today when you pull a gas-charged shock absorber from the box they extend to their maximum length. This prompted many to think they have some influence on ride height, which they do but the effect is negligible. Nitrogen gas is pressurized between 300-350 psi in the tube not adding much lift to a 3500 pound vehicle. In simple terms if your C5 or C6 is lower at one corner or one end new shocks will not make it sit back at the correct ride height.
There are very few people that can drive your vehicle and say unequivocally that the shock absorbers are worn and need replacement. Race car drivers would be able to point you in the right direction concerning shock replacement, not the weekend warrior.
Any sign of leakage on the shock tube is bad, as mentioned earlier; you can expect a film of dirt to stick to the area near the connecting rod. If there is oil that is wet to the touch the shock is ready for replacement. It’s time to go through the shock replacement on a typical C5.
Rear Shock Installation
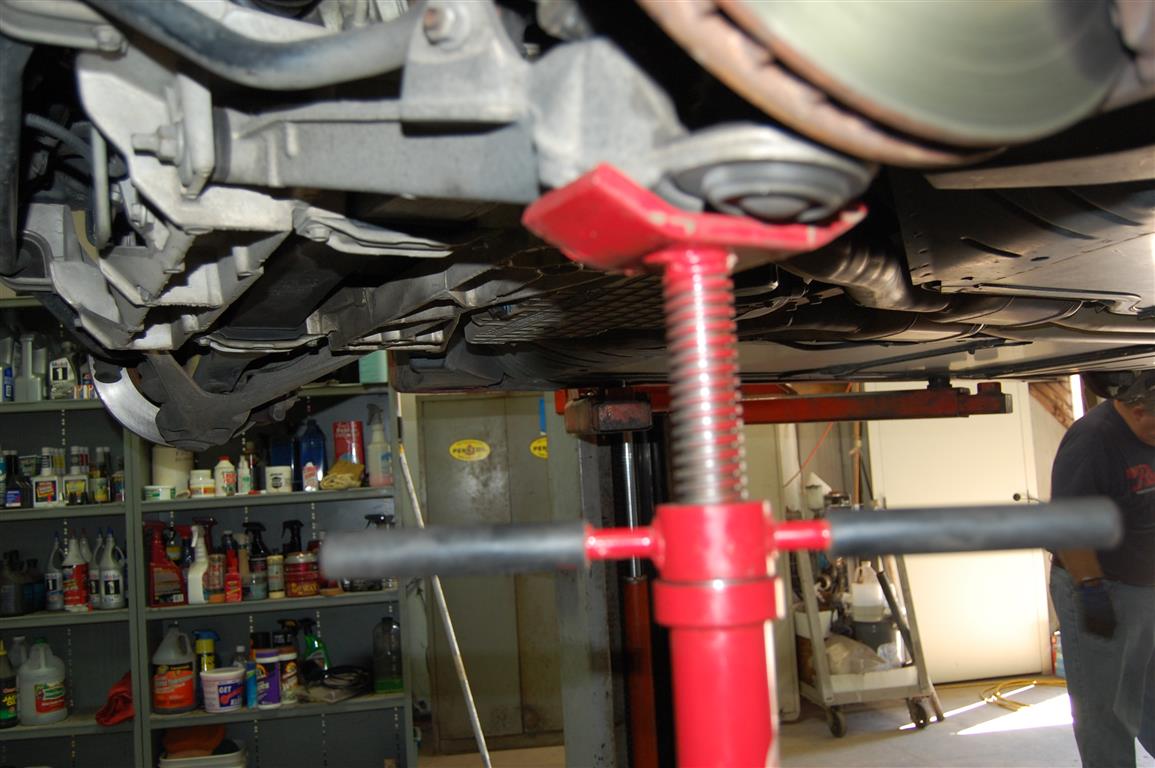
Although I have the luxury of a vehicle lift, your shock absorbers can be replaced using a floor jack on the ground. I wanted to point out that I have an undercar jack stand applying light pressure to the driver side front end opposite the passenger side rear end. You can never be too safe when applying pressure to remove a shock from the opposite end of the car. Most vehicle lifts are set up for traditional vehicles with more front end weight which can get you in trouble. The front crossmember where the jack stand is placed works well for picking up the front end during shock replacement. A trick is driving the front tires up on a couple of 2×12 wood pieces to raise the front end enough to get the jack under the front end. Before jacking up the front end make sure you have the floor jacks cup centered on the aluminum crossmember not the oil pan or front spring.

The same applies to the rear end when replacing the front shocks, taking a few minutes to assure the vehicle does not get out of control during the maintenance work. You can lift the rear of the Car at the same crossmember that the jack stand is applied to replace the rear shocks while leaving the front end and tires on the ground.
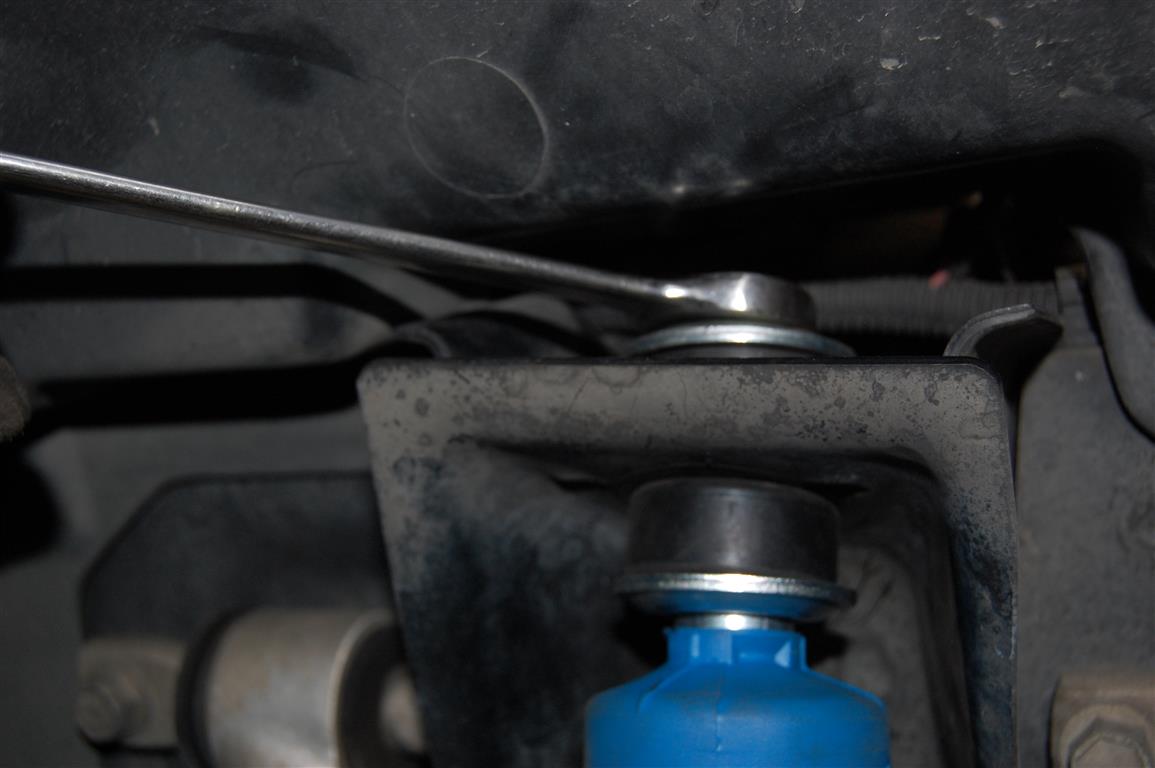
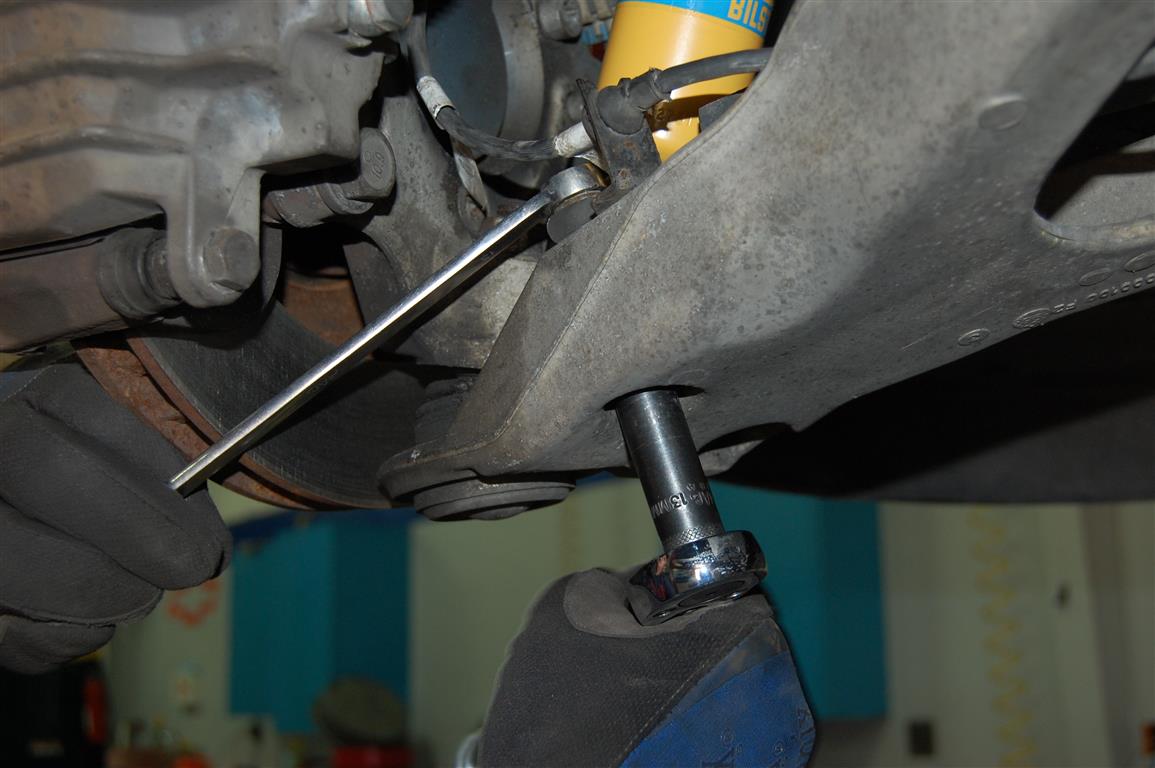
The correct length shock absorber should not require any suspension compression during removal. In some cases the shock is slightly shorter and you can be surprised when the last bolt is removed. For this reason I always apply pressure under the lower control arm, taking the spring load off, to avoid a surprise during removal and the reason for the opposing jack at the front. The upper 13mm screws come out easily with this impact universal socket, especially the inner screw. Non-impact universal joint sockets work but they are always binding up during the task of removing or installing screws.
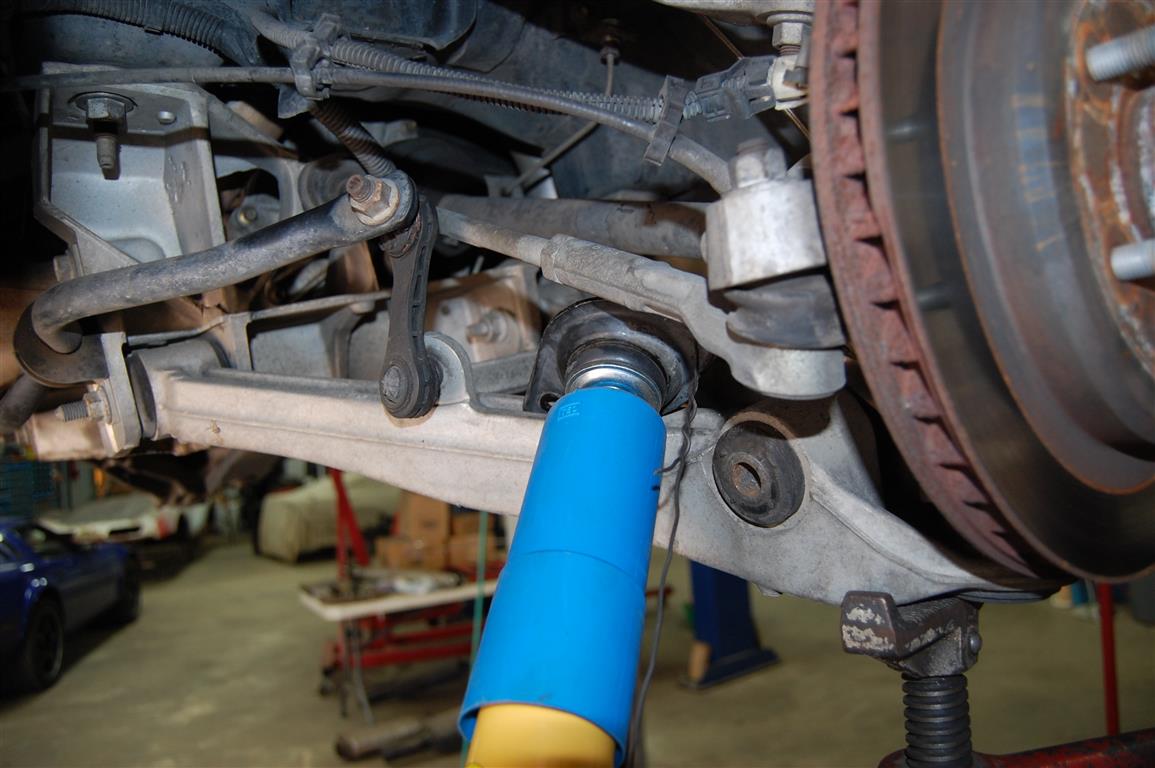
The 24mm lower shock bolt and 24mm nut is removed then the shock is lifted up with a pry bar off the lower control arm. If you placed a jack under the control arm let the pressure off before lifting the shock off the control arm.

While this may seem simple the shock is a tight fit when it is extended during removal. I usually compress the shock and move it down quickly to get it out of the upper shock connecting rod pocket area.
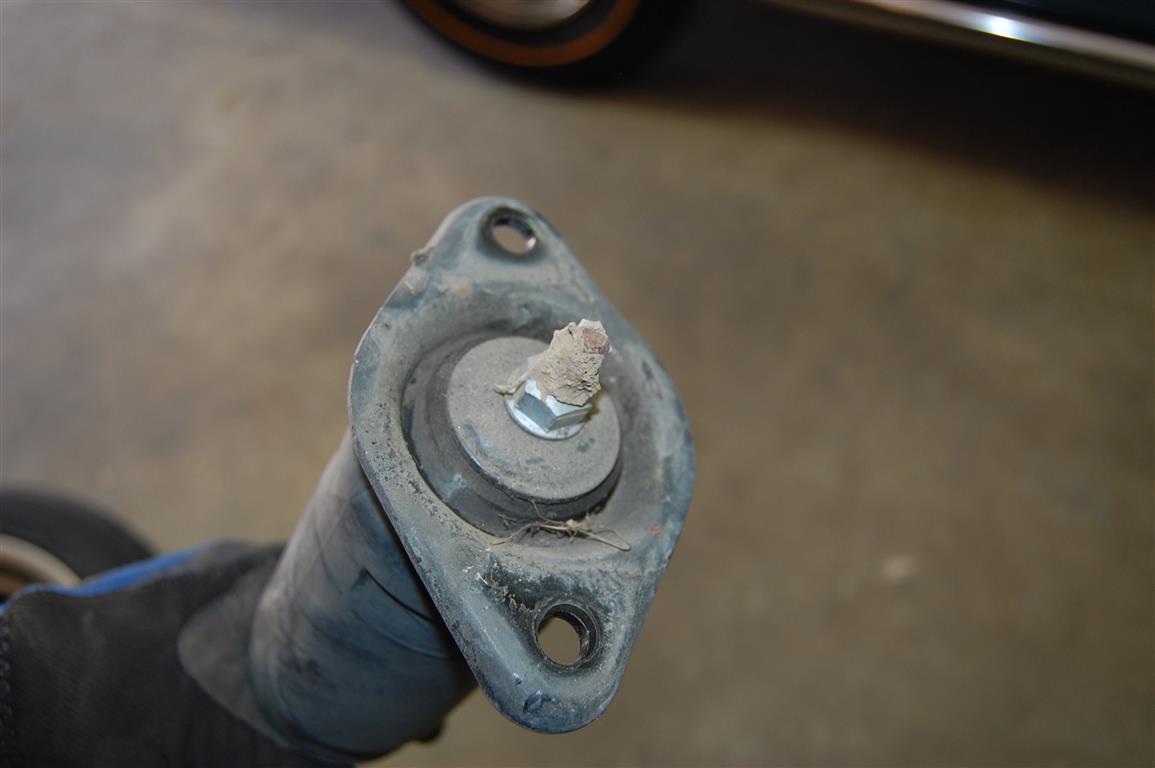
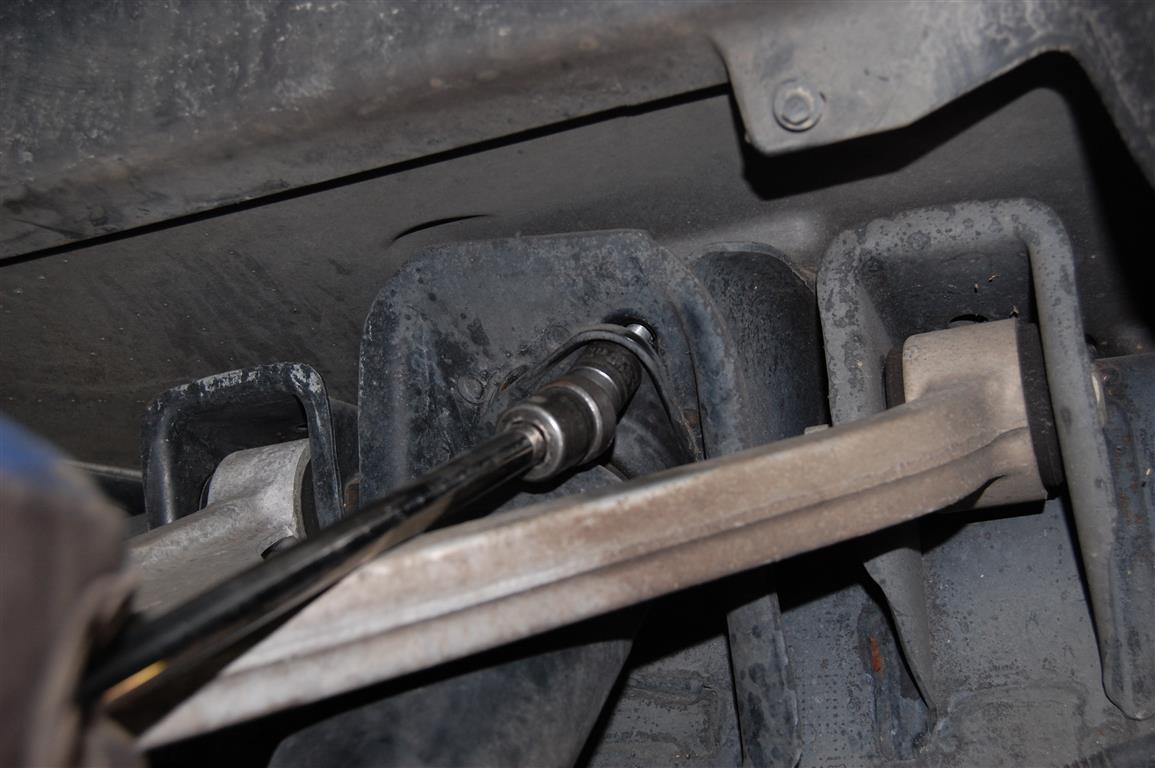
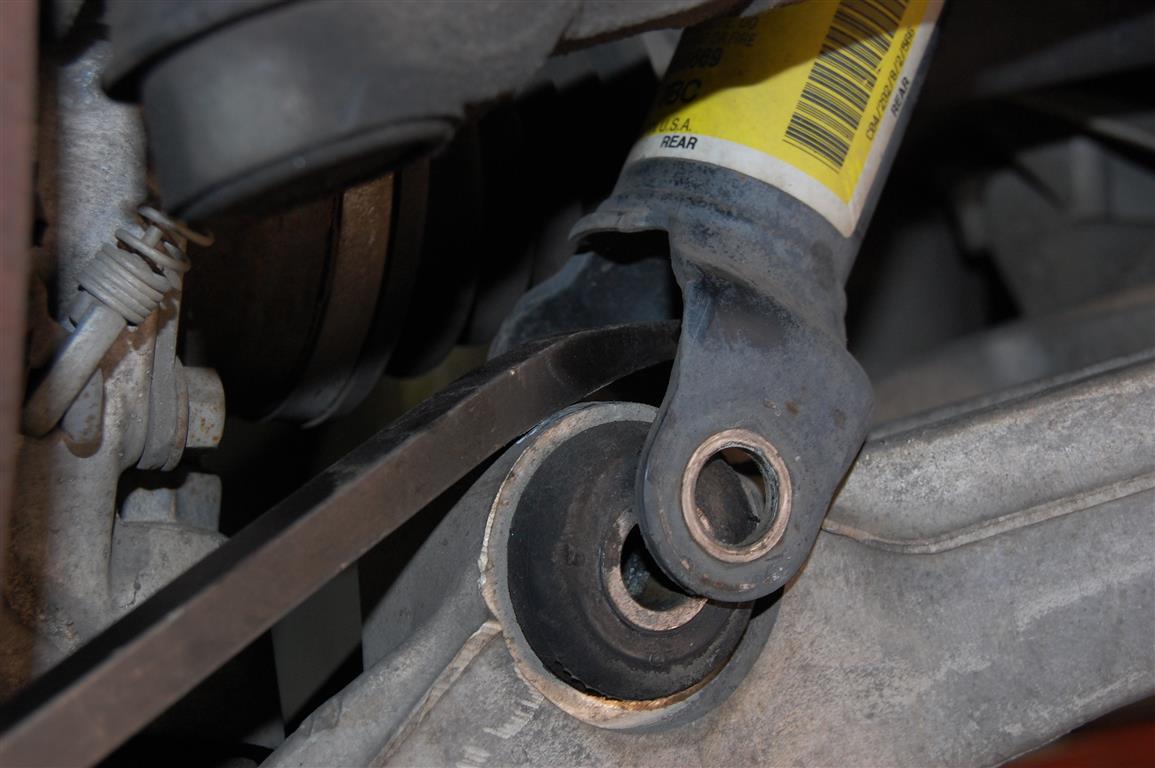
This is how you will find most shock absorber upper nut and connecting rod shaft ends full of road debris and the occasional mud wasp droppings.

You will be required to reuse the upper shock mounting plate, to make this easier I use a wire wheel to remove the debris and-or rust from the nut and shaft end threads.

This is why I want the rod end threads clean; a special socket shaped as a double “D” is required to hold the shaft rod end while the 15mm lock-nut is removed. This socket came from Snap-On tools certainly a pair of vise-grips will work if the threads are clean. Sure you can try to spin the nut off with an impact wrench but the dirt and lock-nut make it difficult. By the way, you can spin the shaft of the old shock for as long as you want during nut removal. Do not attempt to spin the replacement shocks shaft during installation, the shaft can be spun off the piston requiring another new shock.

New rod end cushions are supplied so the original cushions should be removed and any dirt cleaned off of the mounting plate.
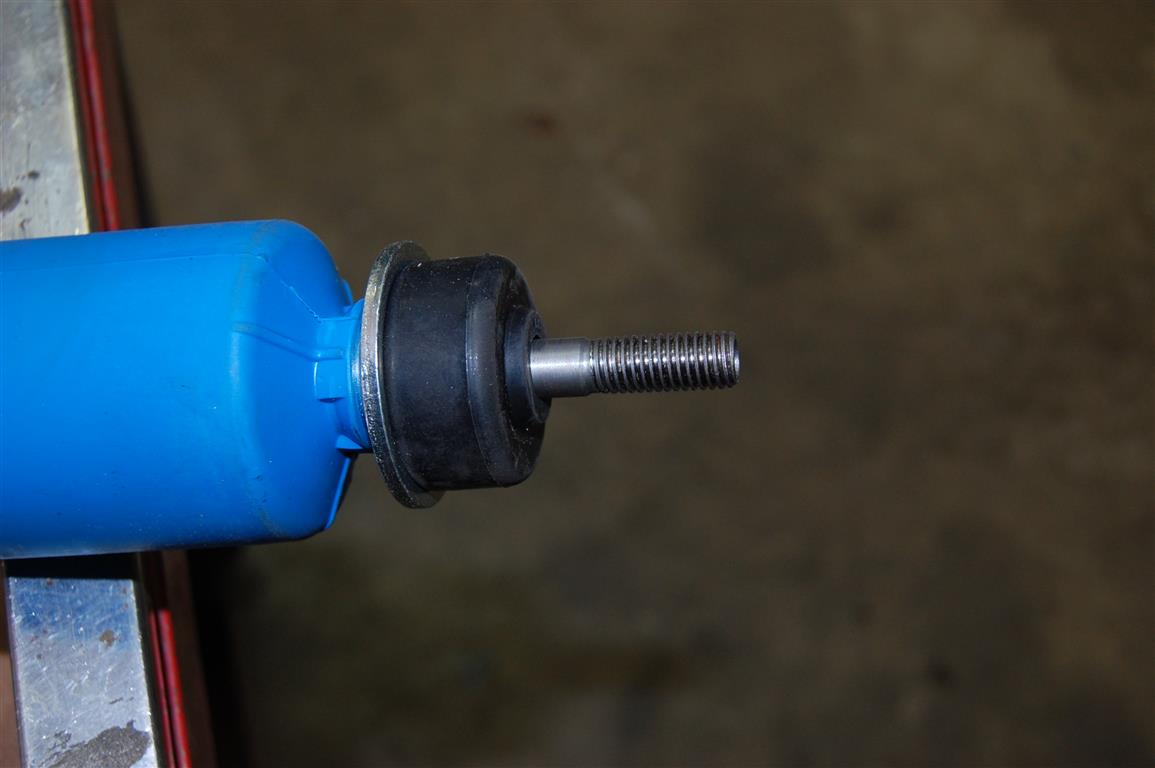
Our new Bilstein shock uses a universal style cushion, make sure the new washer is installed (cupped side up) and the cushion alignment raised area fits the mounting plate. The cushions can be turned over to utilize two different size raised areas. The raised area should fit inside the mounting plate rod end clearance hole. When the plate is installed with the upper cushion and the cupped washer (cupped side down) installed the upper nut is tightened until the rubber cushion begins to be outside the cupped washer. Too much squeeze will collapse the cushions and they will fail prematurely.
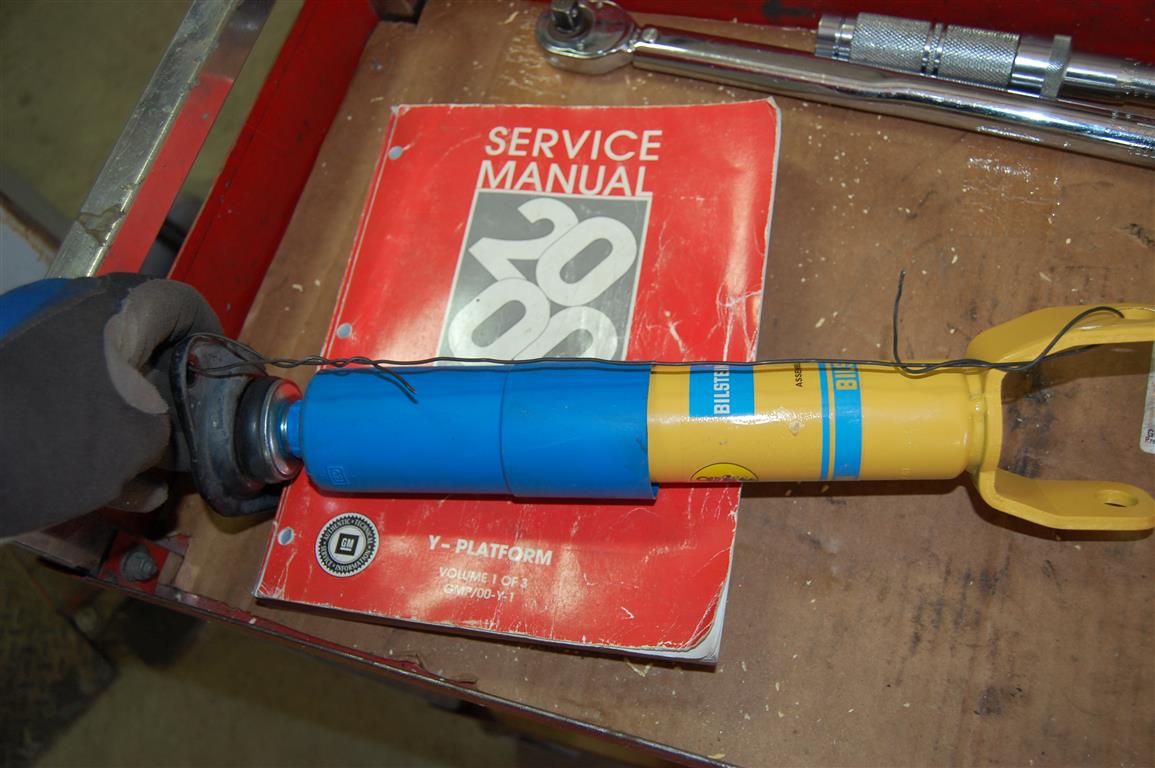
To make the rear shock installation easier I use a piece of mechanics wire to hold the shock as close together as possible.
The wire trick holding the shock together does help getting the shock into position. I also lift the rear control arm a bit to open the area between the toe-link and lower control arm.
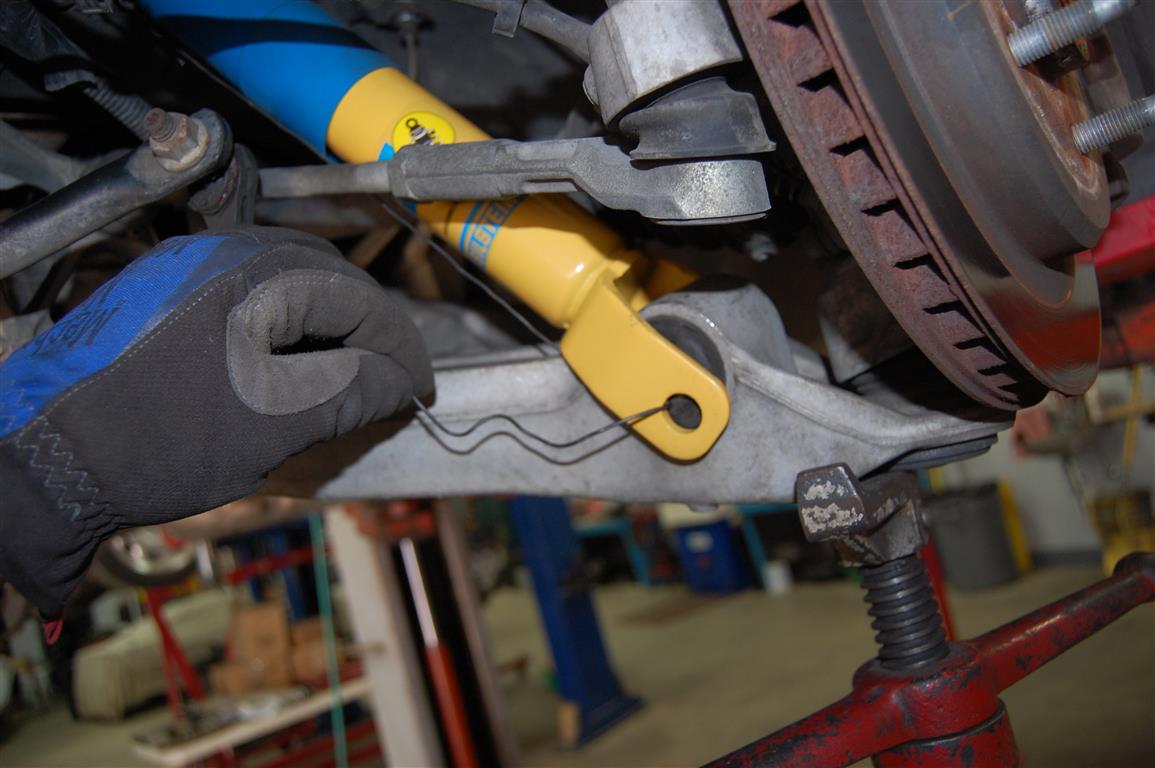
Once the shock is in place the wire is cut and pulled out.

The upper shock mounting plate is installed and the 13mm screws are torqued to 22 foot pounds or 29.5 Newton meters.

The lower shock mounting nut is torqued to 162 foot pounds or 220 Newton meters. While this may seem extreme the high torque is required to make sure the shock absorber mounting bracket has conformed to the bushing sleeve in the lower control arm. It may feel like the shock absorber bracket is tight when in reality the bracket is not tight against the bushing sleeve. If at all possible I try to torque the nut as opposed to the bolt which can have additional resistance during tightening.
Front Shock Installation
I begin the front shock absorber installation by removing the washer fluid reservoir. Three 10mm hex nuts hold the reservoir in place.
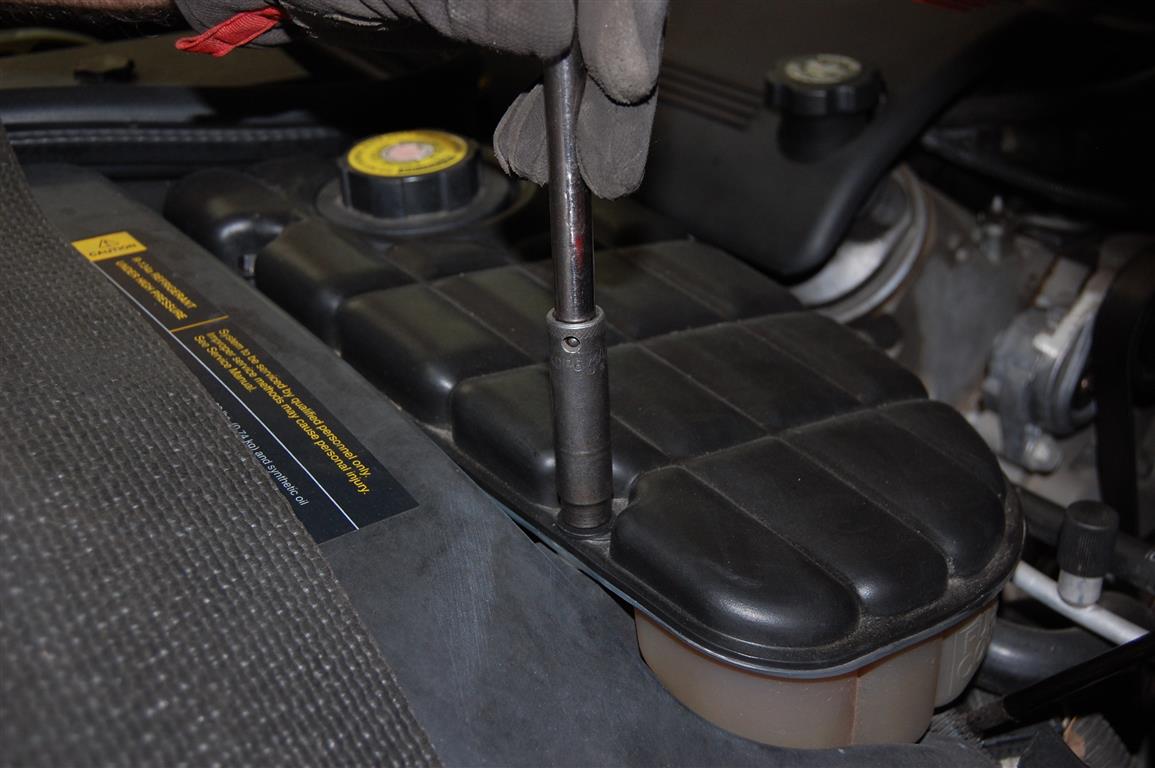
To access the passenger side upper shock mount I also remove the coolant reservoir, it is retained with 10mm hex nuts.
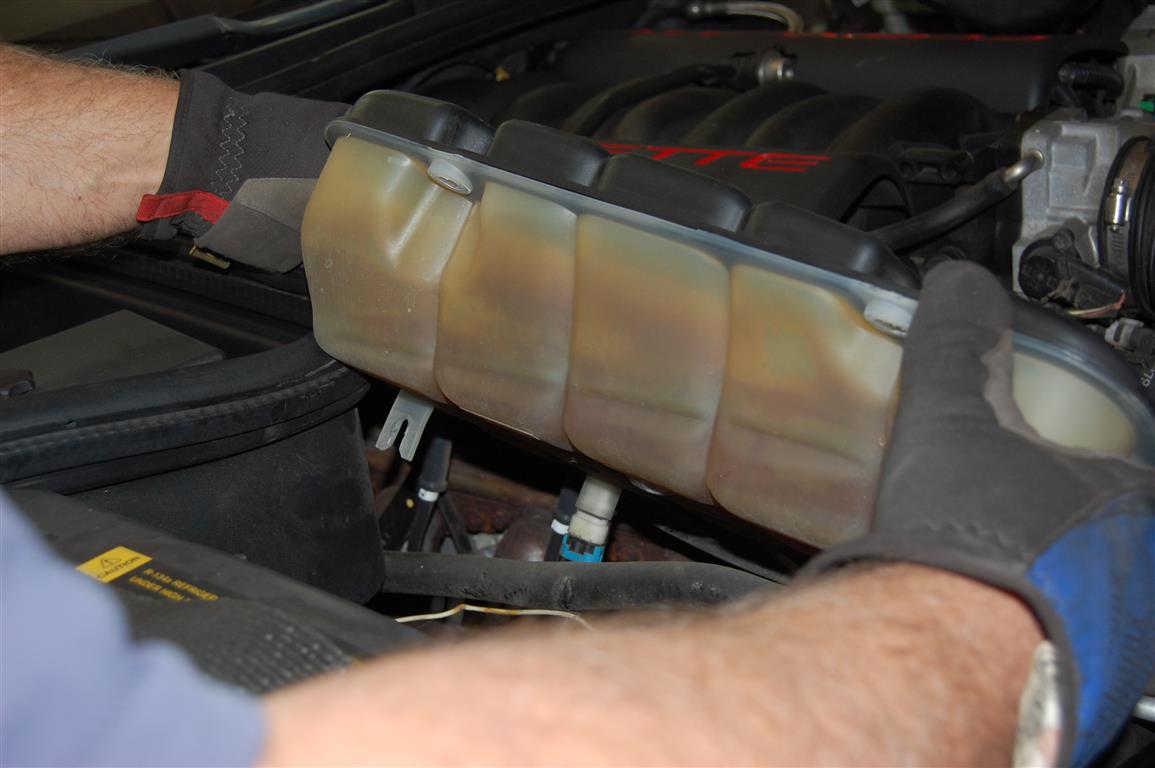
Unlike the washer reservoir the coolant reservoir has a tab that holds the tank in place. The 10mm hex nut is loosened and the coolant reservoir level switch is disconnected before setting the tank to the side. You do not have to remove the hoses from the reservoir it will lay out of the way without harming anything.

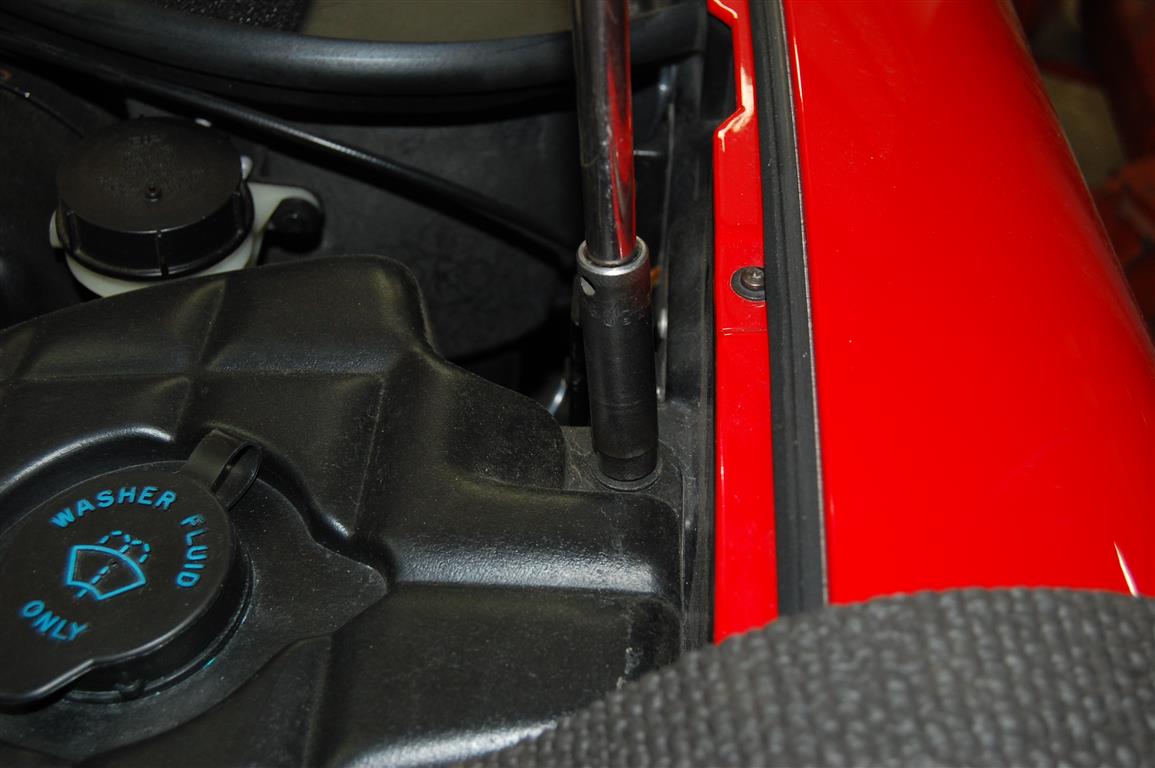
On the front upper shock mount I am using the same double D socket to rotate the shaft to loosen the nut. A 15mm wrench must be used to hold the nut from inside the fender while spinning the shaft. The shaft is rotated clockwise to loosen the nut from the shaft.
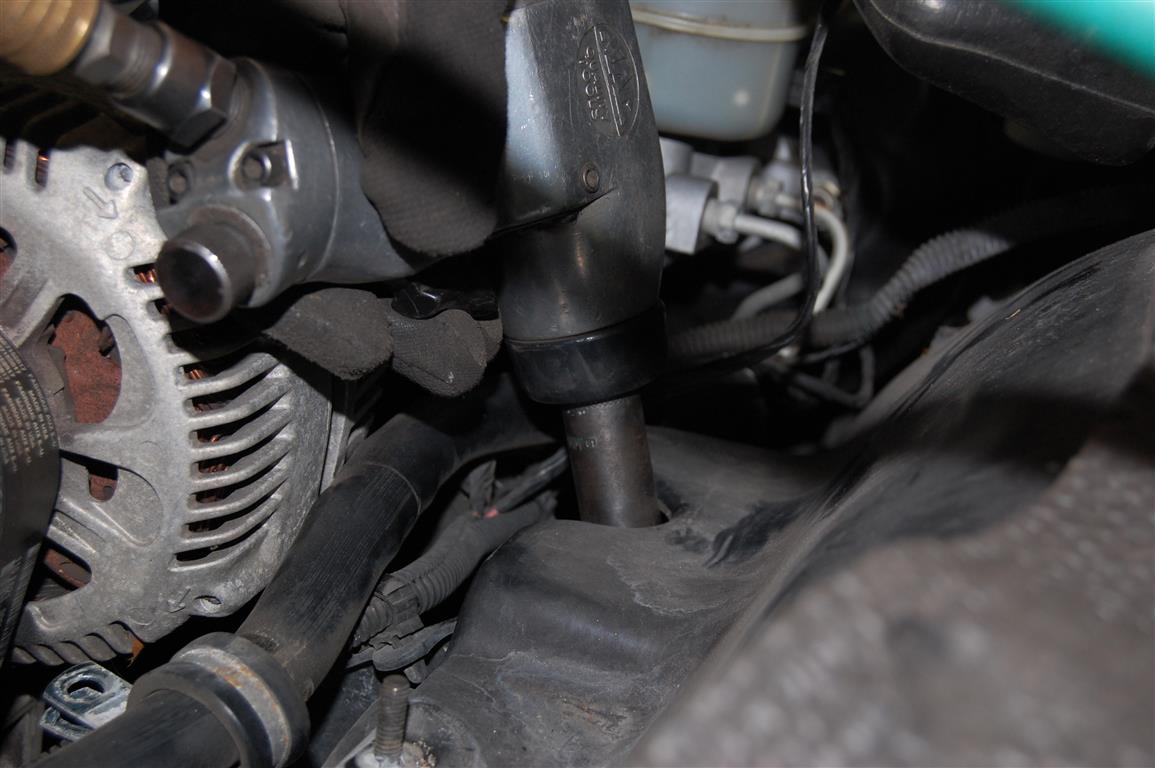
Once the nut is loose enough a 15mm socket can be used to do the final removal of the nut.

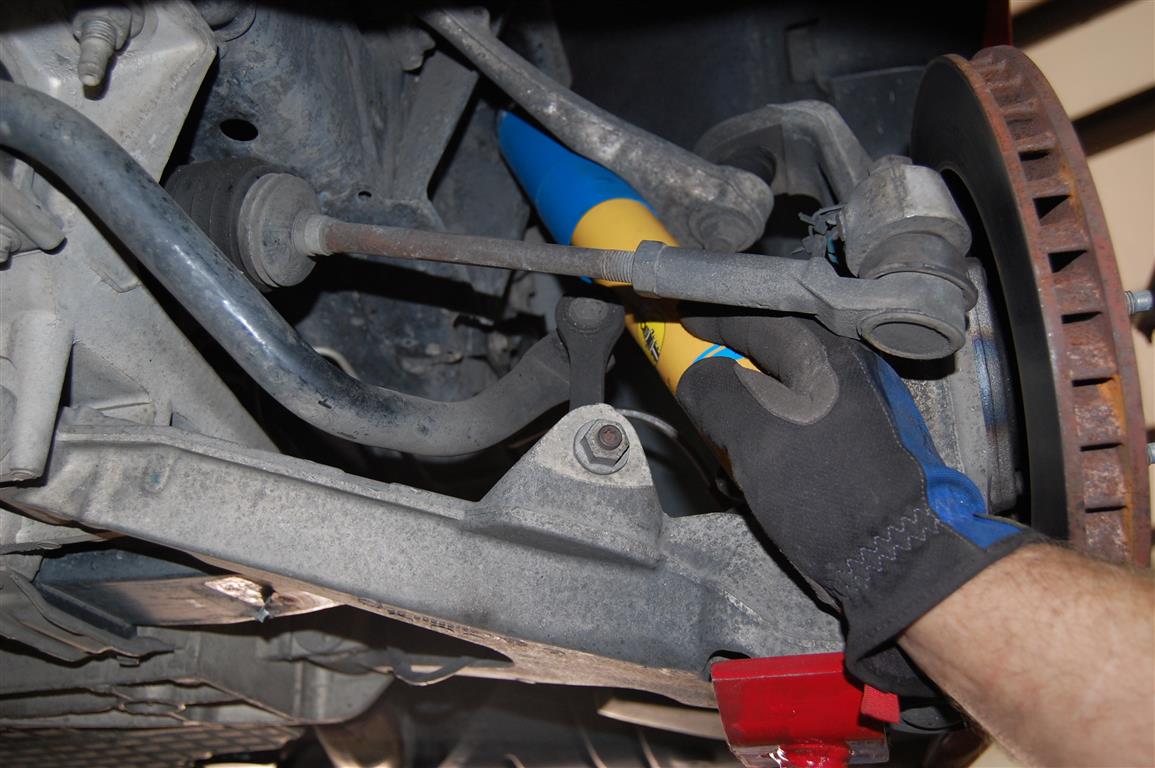
The 13mm nuts are removed from the lower shock mount and the shock is pried up and out to the side for removal.

Like the rear shocks the front shocks are difficult to get out of the confined area. I collapse the shock and then pull it out.
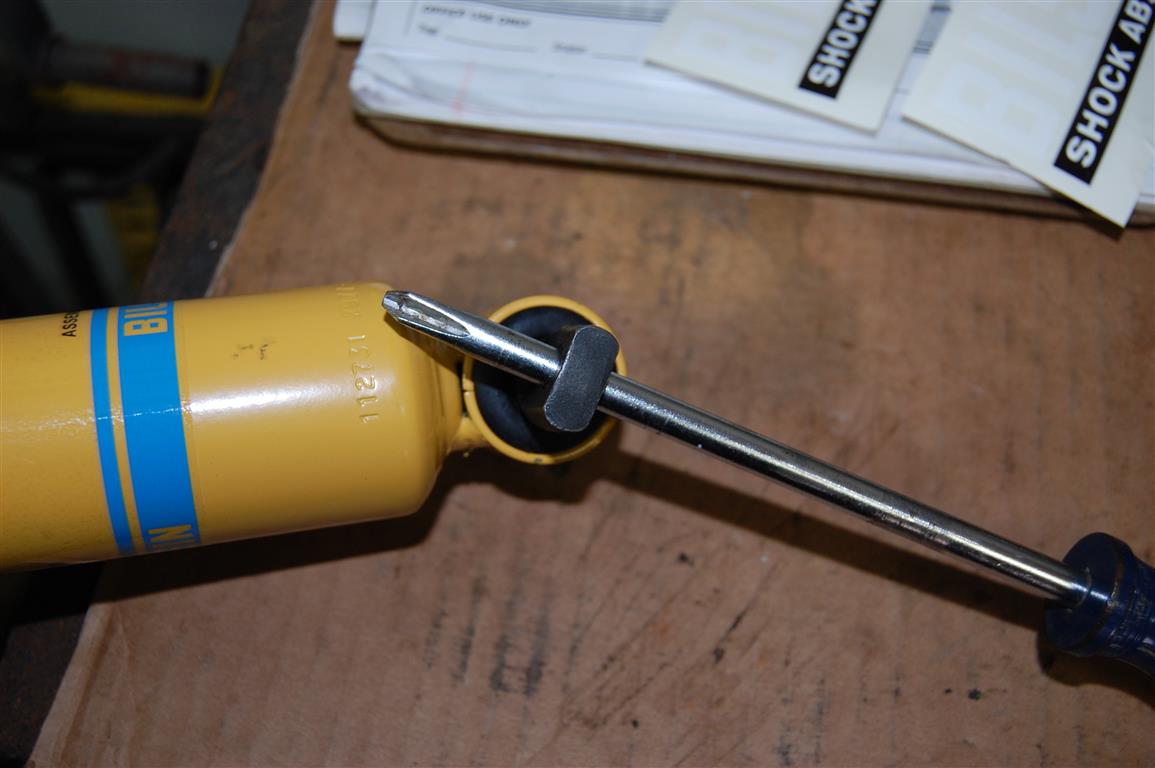
To ease installation I use this large Phillips head screwdriver to rotate the front shocks lower cross-shaft to about a 30 degree angle. This aids in bolt installation once the shock is in place.
During installation the front shocks can be pushed upward and then moved over on top of the lower control arm.
I always install the upper stud mount first centering the rubber cushion and putting enough pressure to hold the pieces in place. Once the wheels are on and the front end down on the ground I tighten the nut on the stud and install the lock-nut if provided. Like the rear shocks the rubber cushion should begin to squeeze outward beyond the washers diameter to avoid over-tightening.
The 13mm lower shock mounting nuts are torqued to 22 foot pounds or 19.5 Newton meters.
Story and photos courtesy Chris Petris
hi i dont know where to by shocks for my 1998 corvett convertable they told me at les swab that my 1998 corvett takes electrick shocks and not regular shocks so how do i find the electrick shocks
If I replace the front shocks on my 2002 c5 corvette without the sensors will my computer freak out ? What’s my options?
Need info after I disconnect wires on front shocks
where can I find a left rear shock sensor #22153637 for my 2003 corvette.
Doing a Google search of this number turns up numerous results. I see used ones on E-Bay, as well as new ones at a surplus parts dealer (SMC Auto Parts).
Buy the desired shocks and also purchase the simulator kit (about $250, but you might find it for less elsewhere). Plug in the simulator components and the suspension computer will not know you’ve changed shocks so it will not go into limp mode.
I replaced the shocks on my 98 corvette and now the max speed is 80 will your device take care of problem?
Wondering how to torque the bottom bolts on the rear shock to 167 foot pounds. I can’t find any torque wrenches that go that high. Mine goes to 150, then has a non marked notch above the 150. I did the brake caliper mounting bolts to 125 foot pounds and that was a struggle, without lifting the car way up high and using a cheater bar. Use of a cheater bar may wind up breaking the wrench or bolt. How do all the tire shops do it? I never ever see them whipping out a torque wrench. Never. Makes me wonder if they just don’t care cause it’s not their car.
The lower shock mounting nut is torqued to 162 foot pounds. Most stores that offer quality torque wrenches have 1/2″ torque wrenches capable of torquing up to 250 foot pounds.
If I replaced worn out mag shocks from a 2005 C6 with used ones from a 2012 Grand Sport C6 would they work? The part numbers are different.
Here are shocks we offer for your C6 – https://https://www.corvettecentral.com/search?CurrentSearchCategoryId=C6&q=shocks
I’m trying to buy rear shocks for my 2006 convertible. Not even the dealer can tell me what will happen with my ride control option for sport to regular if I put non oe shocks on? Will I have dash lights on? What shock do I buy to replace the rear original shocks.
Here is a link to rear shocks we offer https://https://www.corvettecentral.com/search?CurrentSearchCategoryId=C6&q=rear+shocks
I’m trying to determine if I buy 4 Bilstein shocks for my c6 that has ride control will I be stuck with an engine light on? One site mentioned if that happens the car will only go 80 km per hour. Factory shocks are insane price! I really need new shocks and work like to order soon if I can find out what I need.
My C6 gave a display reading that said “Speed Limited to 157mph” after disconnecting front shocks. The RTD simulators DID NOT cause this to go out. I bought 2 Ohm 10 Watt wire wound aluminum finned resistors and they did the trick. Or you can have a dealer program out the Z51 option (roughly $150). You can pull the connector from the front shocks and go for a ride to see what will happen. It is a squeeze and pull connector. It does not make it unsafe to drive, just annoying with the message.