
Automotive door sealing technology has improved dramatically from the early days when rain water came in from all angles. By 1969 GM changed the outer seal strip that wipes the glass clear on those damp mornings to do a good job of keeping water out of the door. In turn it kept water off of the door internals and off the backside of the fiber door panels. By 1984 the door outside seal strip was an integral part of door glass sealing. The downside was they were the most exposed seal strips to date subjecting them to the effects of UV deterioration much quicker than previous year Corvettes. You can help keep them around longer with an application of rubber protectant to replace the rubber solvent compounds removed after each wash job. Products like Adams V.R.T. Vinyl Rubber and Tire Dressing from Corvette Central P/N 106824 will keep your outside seal strips looking good for many years. This dressing brings back that new look without that greasy oily slick look, you can also touch it without fear of it coming off on your hands or clothes.
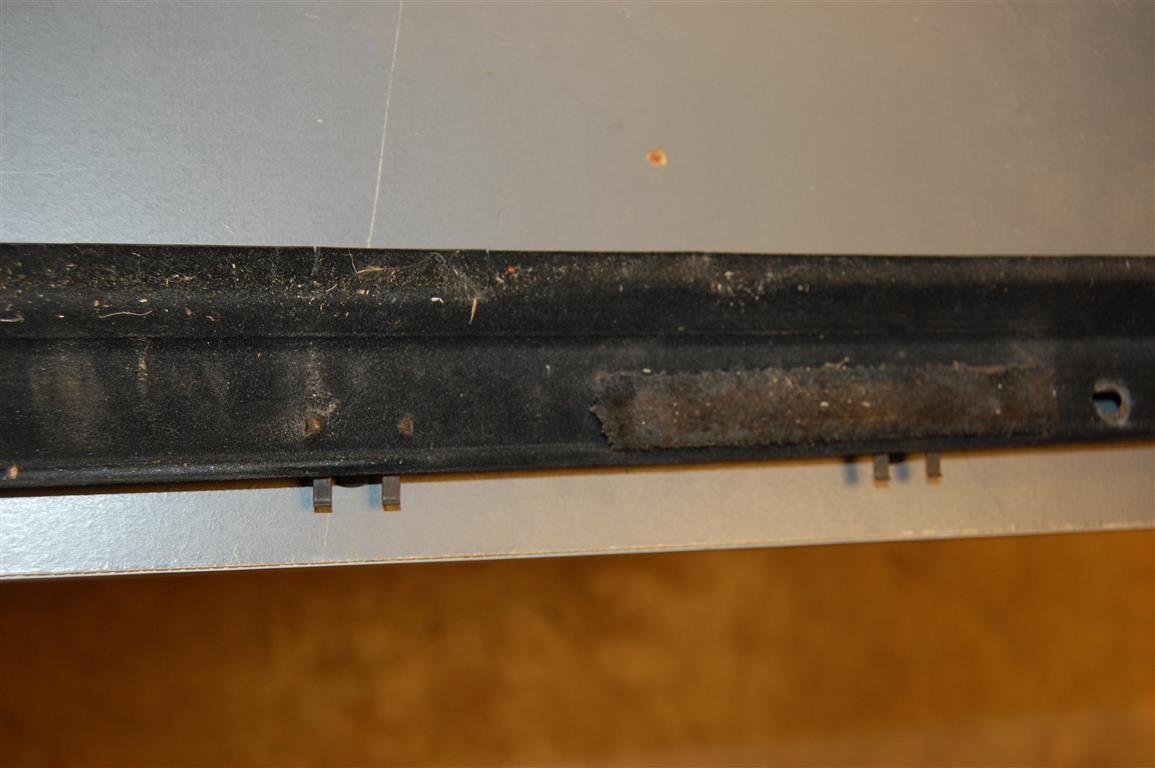
Ultimately no matter how well you maintain your 1984-1996 Corvette; the doors will end up with a rough looking outside seal strip on the top edge of the door. From an aesthetic standpoint the tattered upper edge looks pretty bad no matter how good your paint or wax job is. The rubber compound dries up and large sections of the ¾ inch wide outside seal strip break off making them look ragged. While looks may not be so important requiring an immediate fix; the dried out material that is missing allows dirt and grit to enter the area below the seal strip. The dirt and grit collects in the two auxiliary strips mounted onto the outside seal strip that quells any door glass rattling that might occur. The grit eats at your window after a while and you end up with noticeable scratches. Those noticeable scratches are almost impossible to remove without replacing the side window glass.
Another factor is water that passes into the door area on top of the window regulator and motor. While the seal strips do not completely eliminate water from entering the door on the outside upper edge it does limit water intrusion substantially. New seal strips will also eliminate annoying door glass rattles on rough roads or when closing the doors. While it is not the easiest task to accomplish, it is possible for the Saturday afternoon Do-It-Yourselfer to finish in one afternoon. Simple tools are required along with a drill, rivet tool and some patience. Corvette Central has a very nice pair of reproduction outside seal strips, part number 284067, at a very reasonable price making a definitive aesthetic improvement on your C4s exterior. The strips are correct in appearance and more importantly the retainers are in the right place for the easiest possible installation.
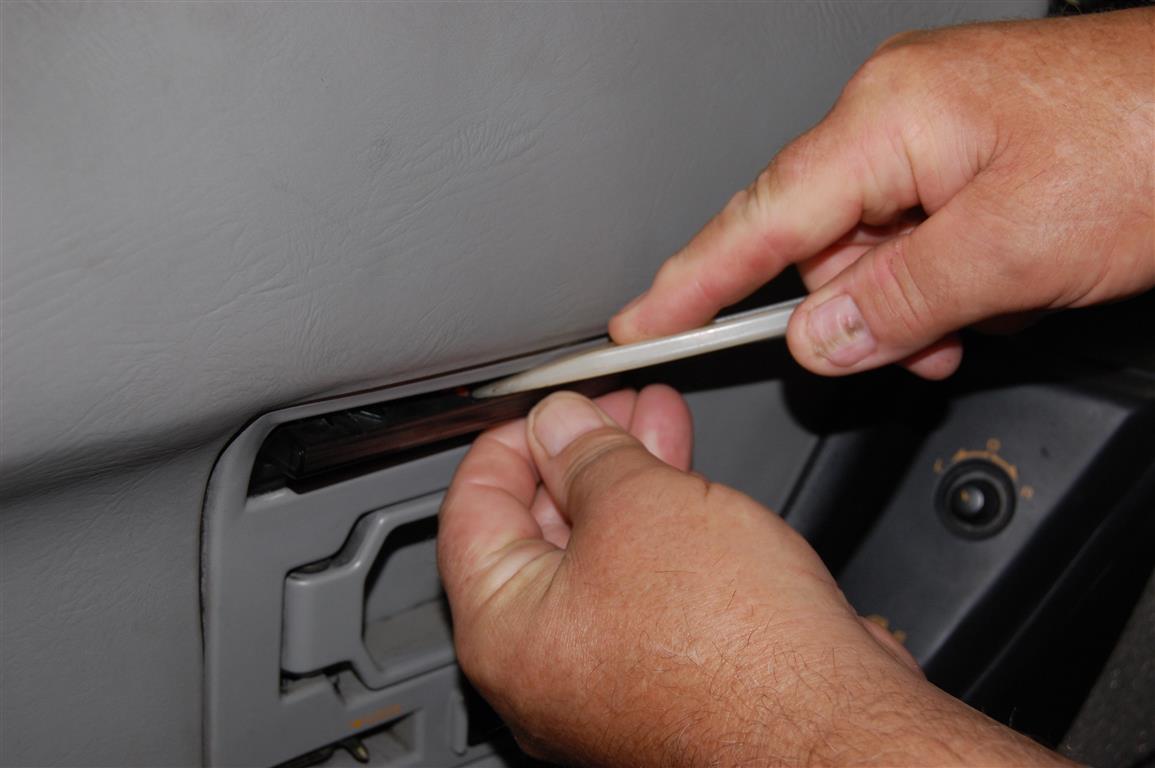
Let’s move on to the photo illustration installation of the strips. The task begins with door panel removal which varies from the 1984 to 1996 model years.
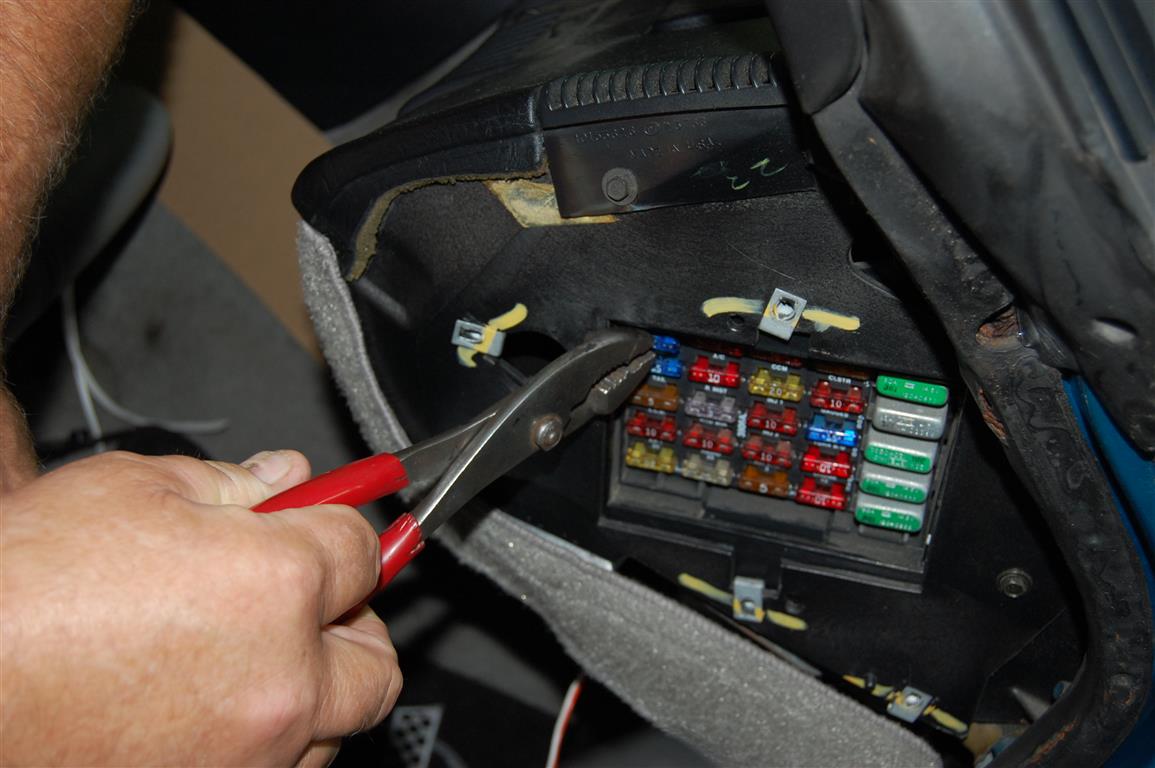
Before you begin removing door panels on the 1984-1989 Corvette it is advisable to remove the courtesy fuse or remove the negative battery cable. The CTSY fuse will disable the door courtesy lights and save your illuminated entry module. If the courtesy lights are left on for extended periods of time (longer than fifteen to twenty minutes) the delay module overheats and burns up. 1990-1996 Corvettes do not have a standalone illuminated entry module they use the Central Control Module for courtesy light control. Leaving the courtesy lights on will not damage the CCM, they will auto shut-off if enough light is present or they have been on a predetermined amount of time. You also need to be aware that the door lock switches will still have power to them when the courtesy light fuse is removed. Your call, I suggest removing the negative battery cable.
All C4 manual door lock knobs are a clip-on fit on the manual lock rod. This hooked small diameter pick works best pulling the knob off the rod.
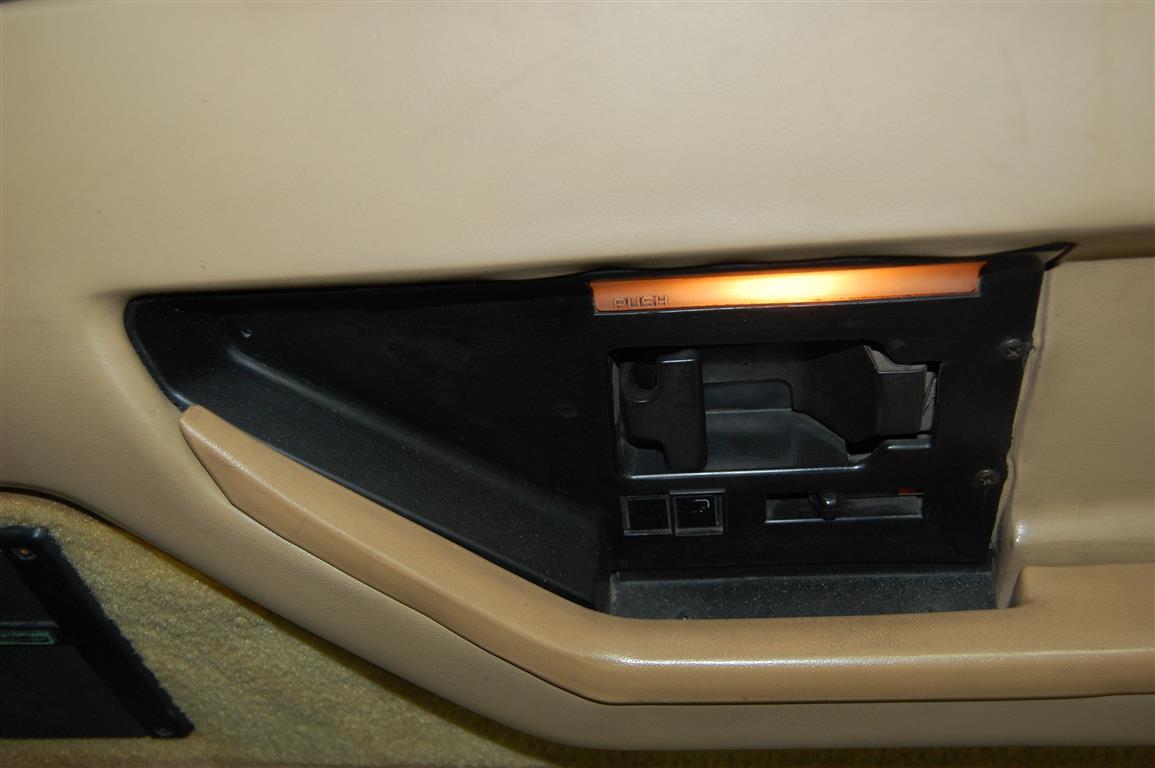
Here a plastic windshield tool is used to pop out the courtesy light lens assembly. There are two clips on the top side that hold the light assembly in place.
The light assembly can be left hanging until all the screws are out and the bezel can be removed.
There is a Phillips head screw in the door handle bezel under the courtesy light to remove in the 1990-1996 Corvettes.

1990 and up door panels should have a Phillips head screw under the manual lock rod knob. I have found many 1994-1996 Corvettes that do not have this screw from what appears to be a factory door panel installation. Always check the area for a screw before attempting to remove the door panel bezel.
All 1984-1996 C4 door panels have a screw centered in the door open handle bezel at the front that must be removed.
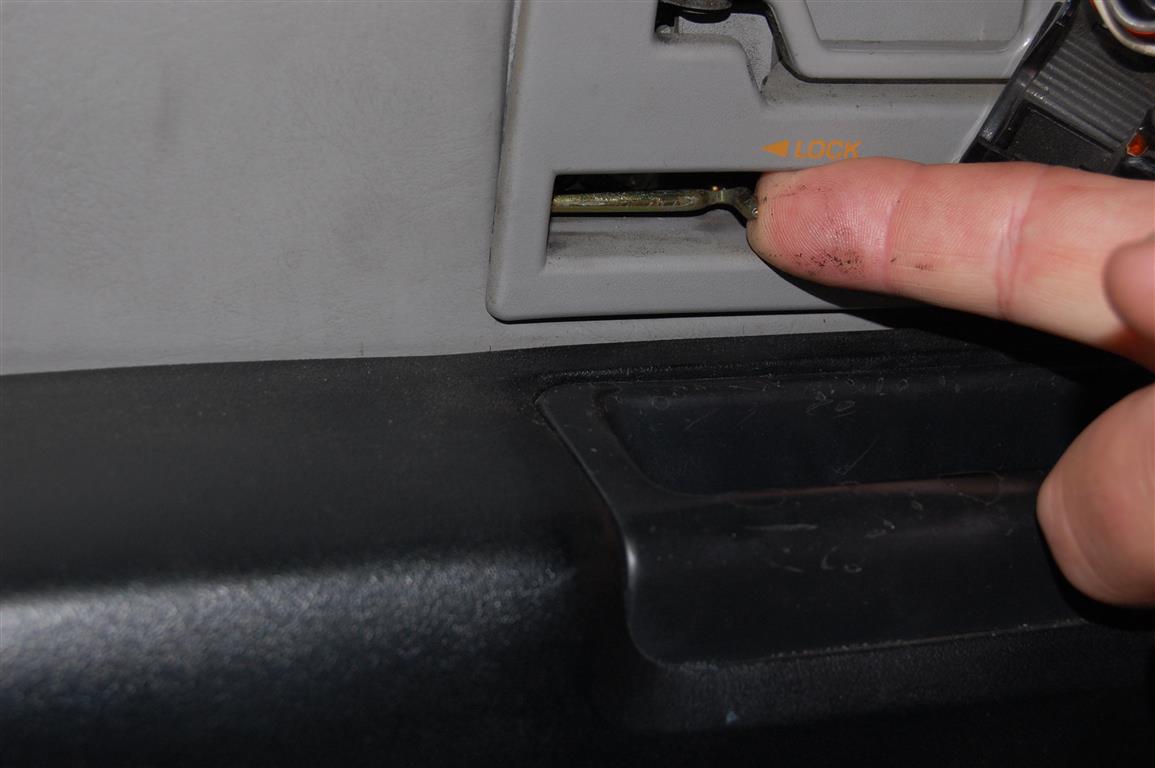
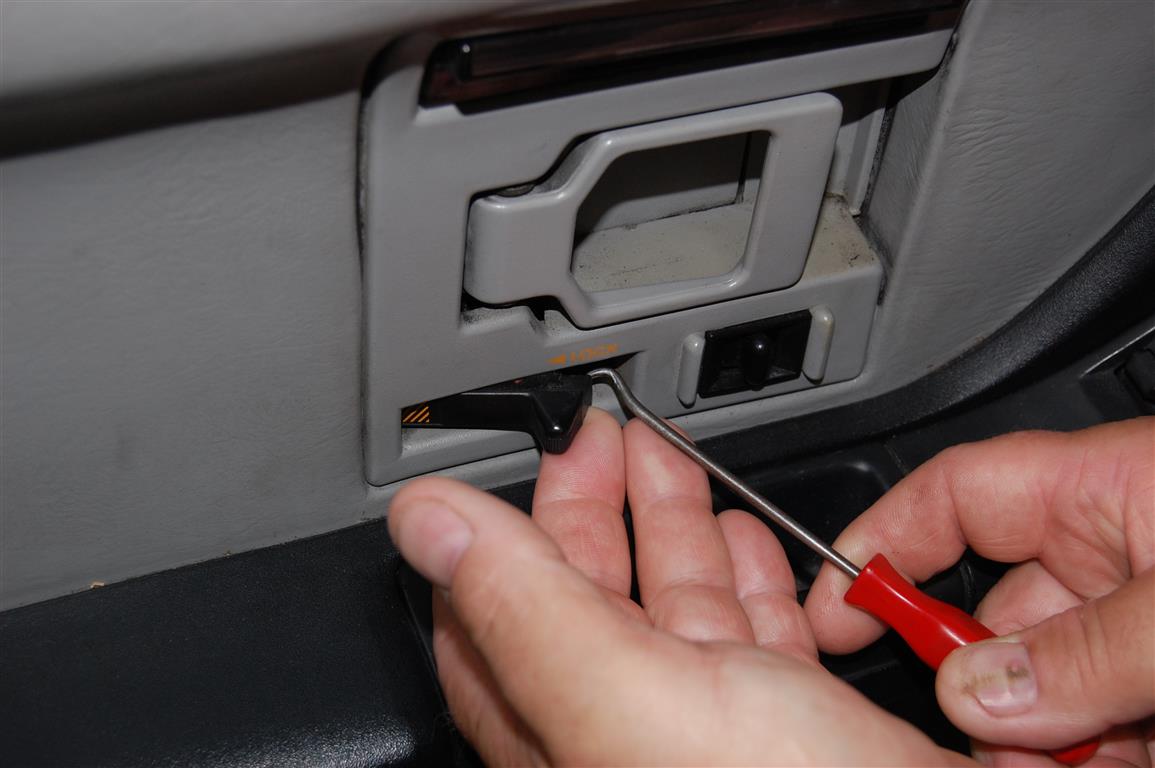
The manual door lock rod must be pushed rearward to remove the door handle bezel. Remember that the door is locked, if you put the window up and leave the keys in the ignition during your window/door project. You know how I figured that out.
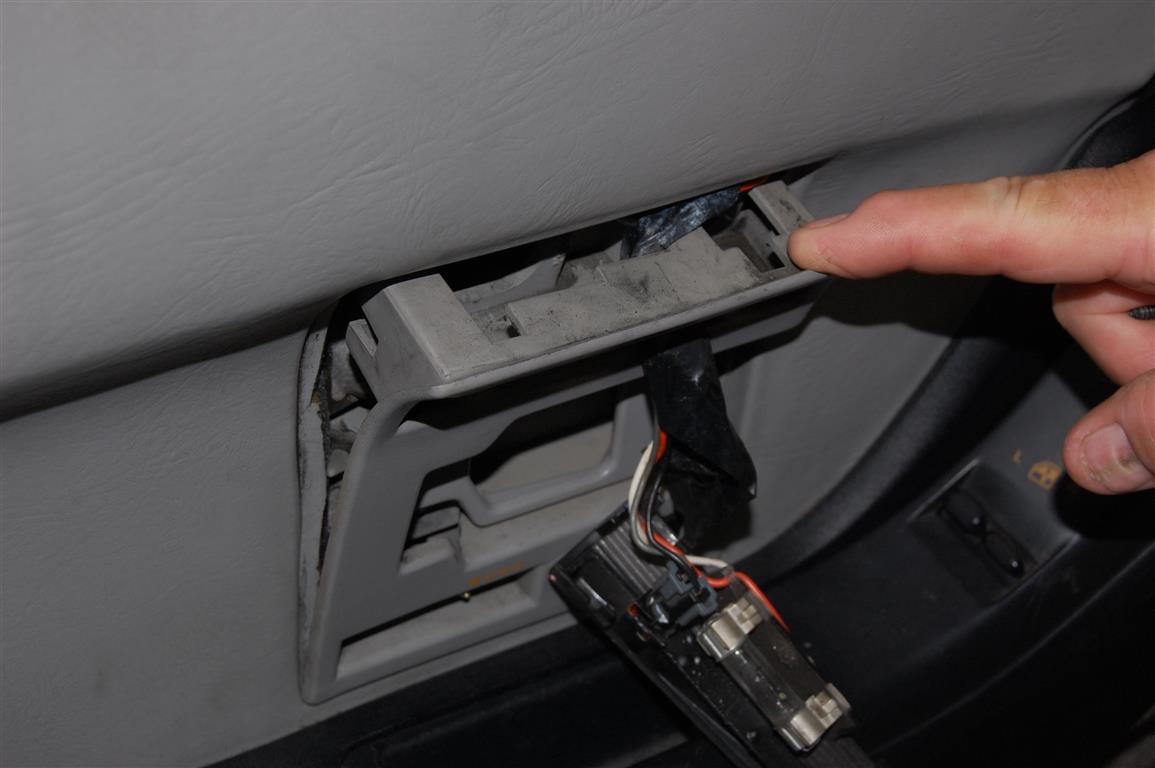
The 1990-1996 door handle bezel fits snugly in the door panel usually you can remove it with your fingers at the top first. Remember the manual door lock rod has to be pushed upward and out of the bezel as the bottom section is pulled away from the door panel.

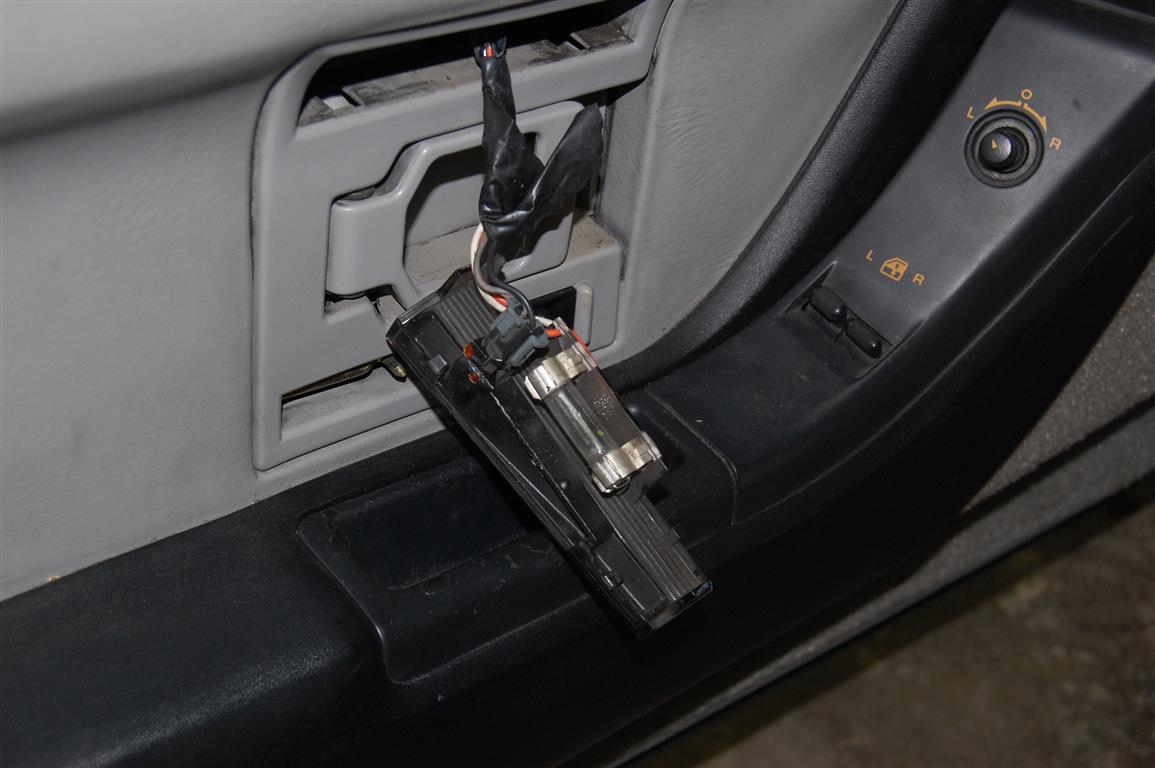
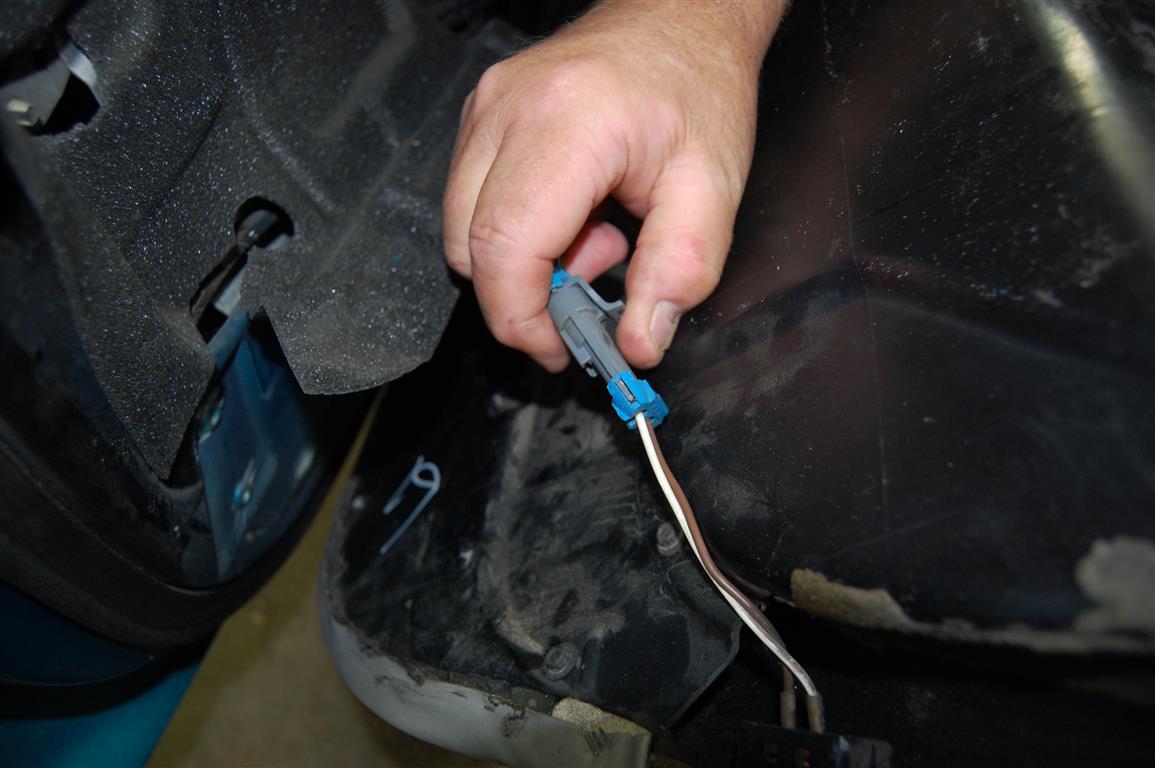
Once the door panel bezel is removed the courtesy light connector can be uncoupled. These connectors are simple to uncouple by pushing the tab upward and pulling them apart.
I use this plastic weatherstrip tool to remove the door lock switch connector especially if the battery is not disconnected. Check the wires at the switch connector they are often frayed especially early C4s. The wires are sometimes holding by just a few strands of wire. If the wires are breaking or ready to, Corvette Central has the side specific repair harness available part number 664496L for the left and 664496R for the right. These repair harnesses are for 1986-1996 Corvettes when GM used reverse polarity switches and five wires. 1984-1985 Corvettes use three wire connectors their part number is 664501R and 664501L.
I leave the 1984-1989 door handle bezel in place because they are fragile and can crack easily if they are pulled out of the panel. The only screw to remove is the center screw under the front of the door release handle. Don’t forget to push back the manual lock rod to the locked position like the 90-96. The manual lock rod is then pushed upward and out as the panel is removed. Another concern is the courtesy light connector that must be disconnected before panel removal, it is easy to yank the door panel off the door and find out you just exploded the courtesy light switch. If that happens to occur Corvette Central has a repair harness with switch part number 664492. Once the 1984-1989 door panel is removed as an assembly the door lock switch connector can be accessed and removed like the 1990-1996.

All C4 door panels have two screws in the armrest pull area that must be removed. Corvette Central has metal reinforcements to aid the OE plastic inserts for the 1984-1989 armrest pull area. The arm rest filler savers are part number 484497 and they will keep your door panel armrest in good shape for many years once installed. The 1990-1996 door panels has an integral arm rest pull that is part of the switch assembly.
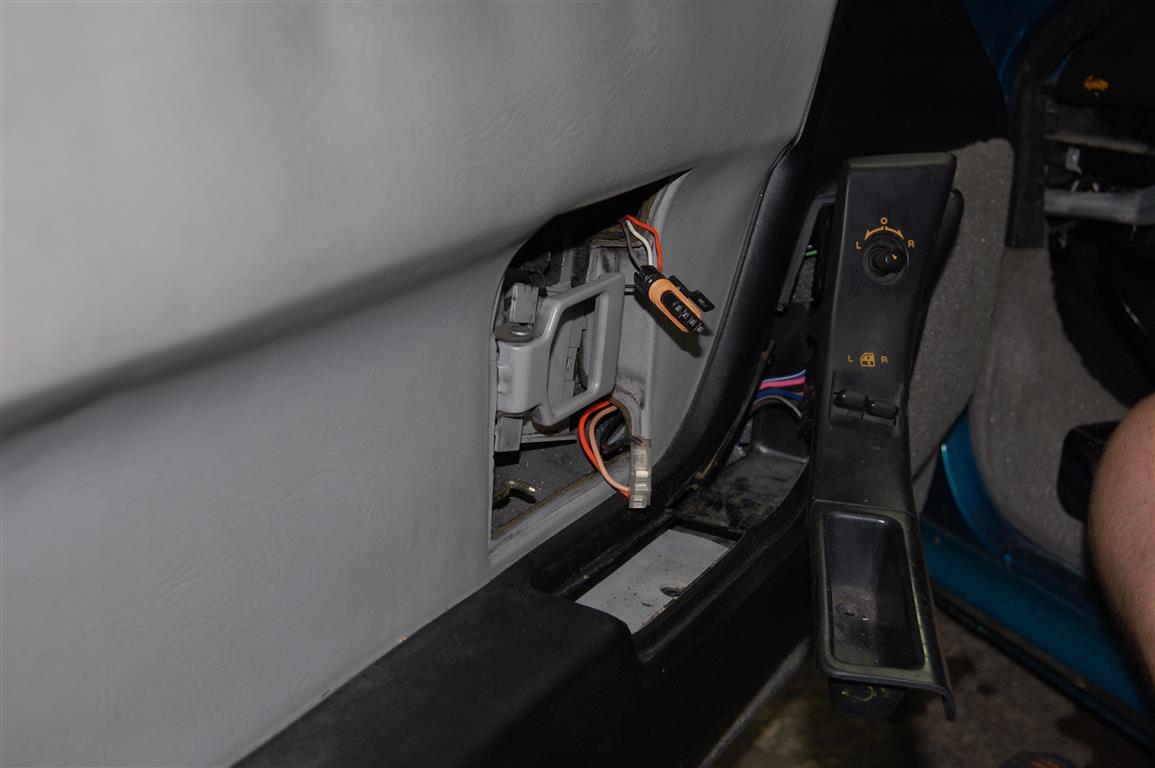
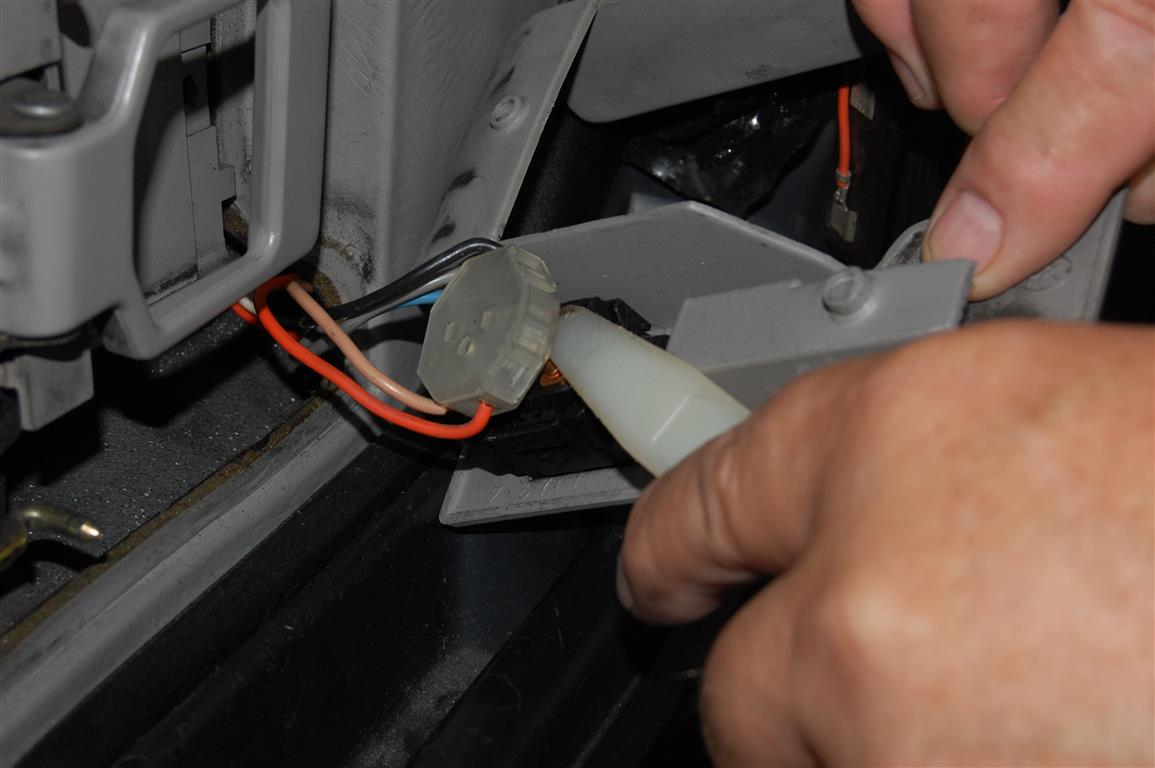
The 1990-1996 driver side armrest door pull/switch assembly has a clip at the top that slides under the door panel. Once the door armrest pull is removed pick up the armrest pull/switch assembly and let the front go downward as you pull backward. To throw a curve ball the 1990-1996 passenger side door panel has a screw under the window switch. The passenger side window switch pops into place and is easily removed with the plastic windshield tool. Once the switch is out look in the hole and you will find a 7mm screw holding a metal tab onto the door frame.

A small plastic tab has to be moved away from the mirror position switch then the connector removed.
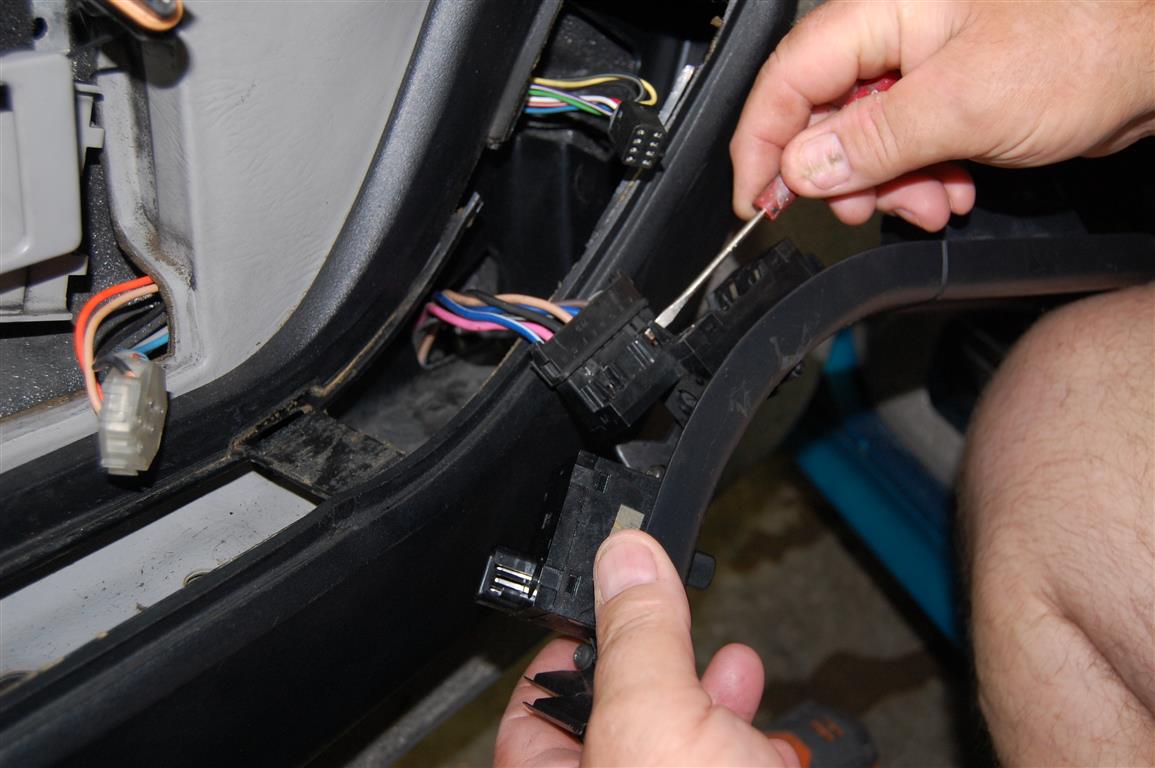
The power window switch has two tabs to move outward then the connector can be pulled off. Take it easy with this connector; work it back and forth easing it out to prevent switch damage.
1990-1993 Door panels will have a long screw in this position to remove.

1984-1989 Bose Stereo equipped Corvettes will require speaker grille removal.

1984-1993 Corvettes will have a row of screws at the bottom, these screws are often rusty might be a good idea to have a fresh set of Corvette Central P/N 344142 handy.
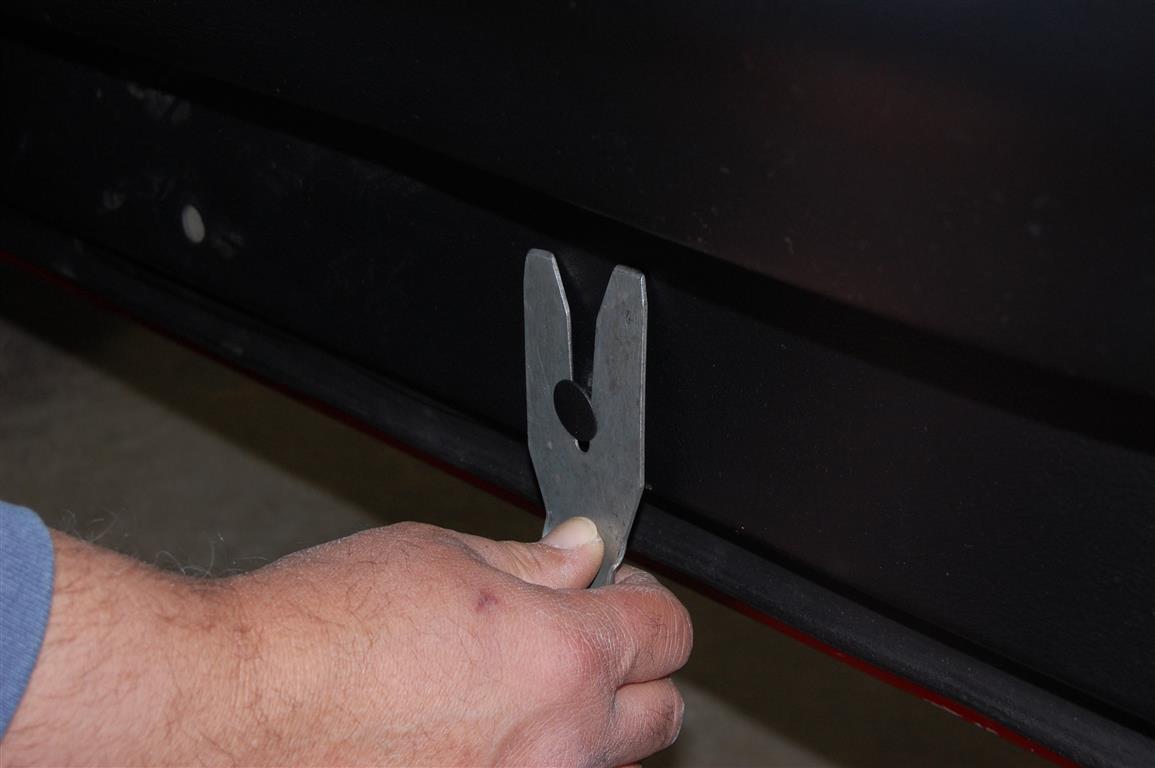
There is a right and wrong way to remove the 1994-1996 lower door panel retainers. This interior trim tool works very well for removal of the plastic push-in fasteners. Unfortunately placing the metal tool on the plastic panel can scratch the door panel plastic surface.

I prefer to place the tool under the door panel to pry the retainers out avoiding any plastic scratches. The tool is inserted until the inner V is seated against the plastic retainer and the handle is pulled outward releasing the retainer.

All C4 doors have this screw at the rear of the door near the rear hatch release switch.
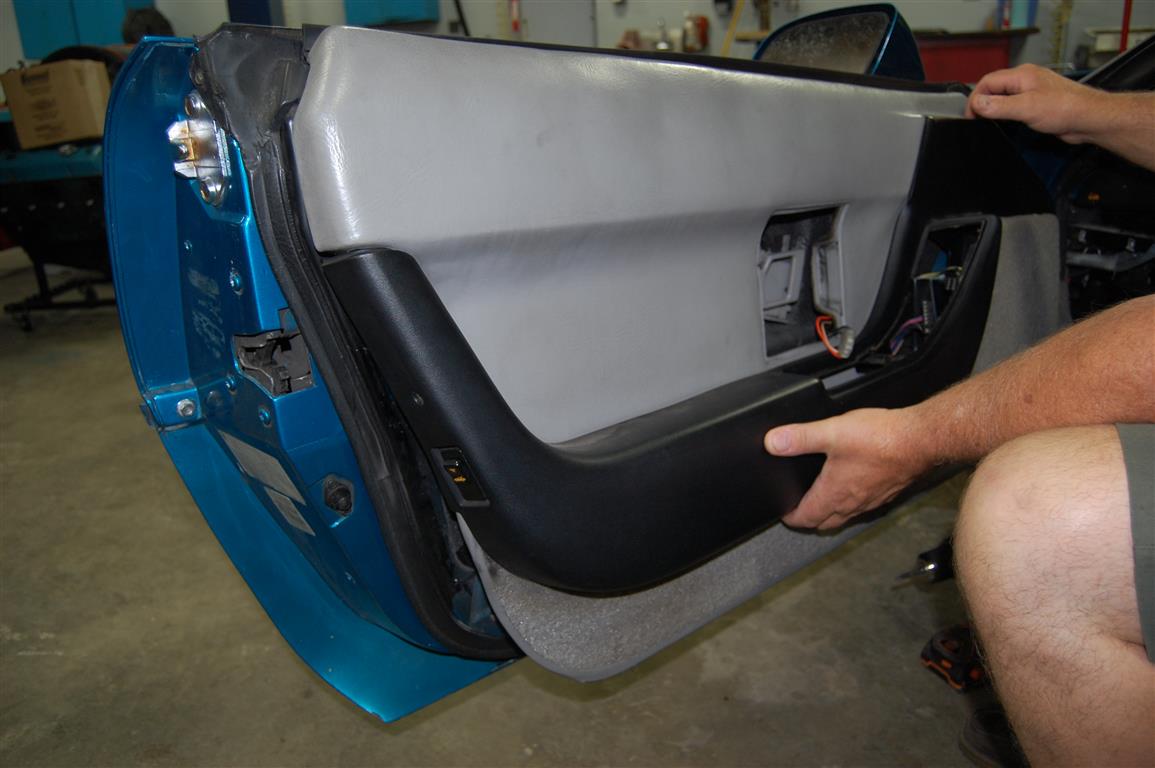
The door panel is pulled upward off of the top side of the door frame. Make sure the wires and connectors are not caught as you remove the panel away from the door. You have one more connector to disconnect before taking the panel completely off. Remember the 1984-1989 door panel will have the courtesy light and door lock switch connections to disconnect before the panel is too far away from the door.
All C4s will require the removal of the rear hatch or convertible tonneau cover switch harness connector. The tab is move upward and the connector pulled apart. Now the door panel can be pulled completely off the door.

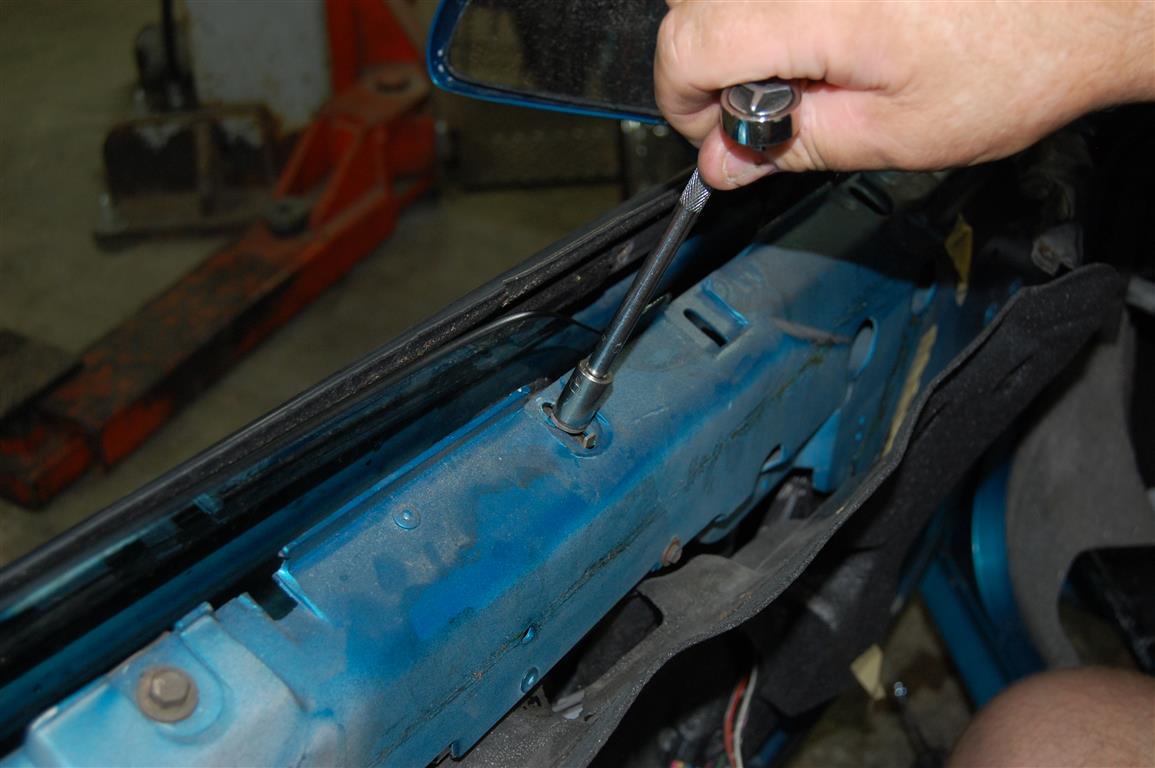
The rear upper weatherstrip 7mm hex head retaining screw is removed.
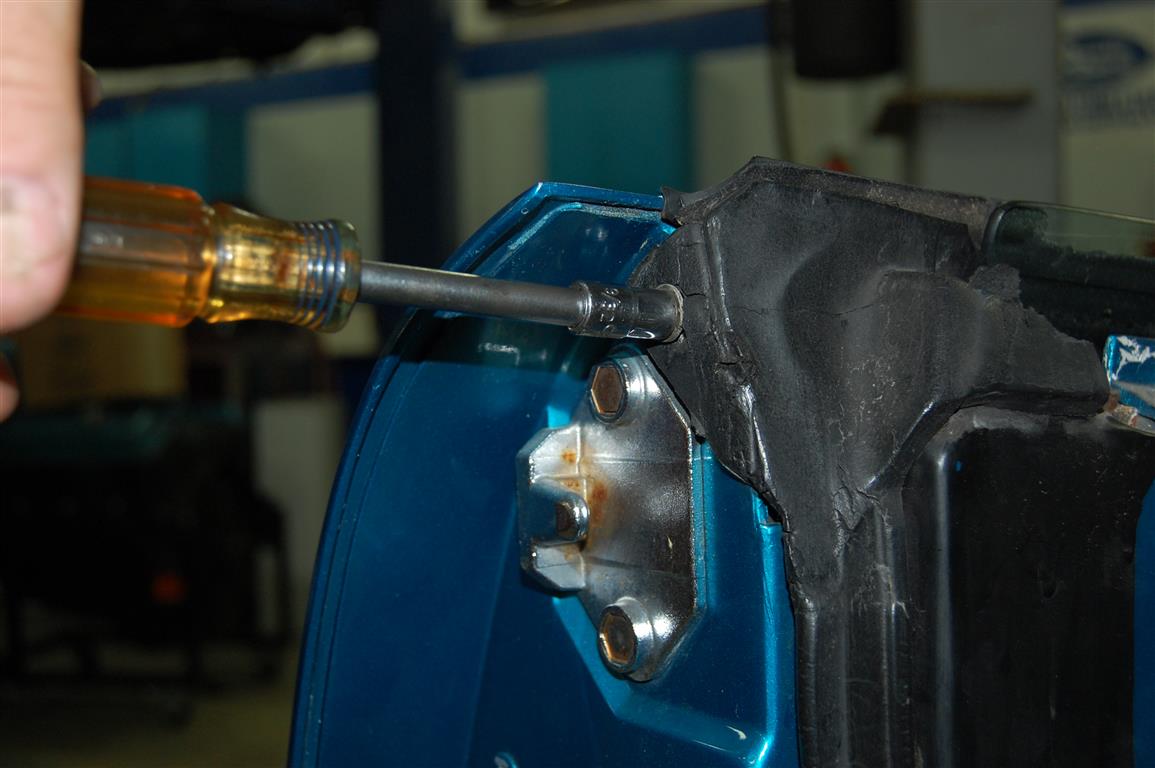
The rear outer weatherstrip 7mm hex head screw is removed next.
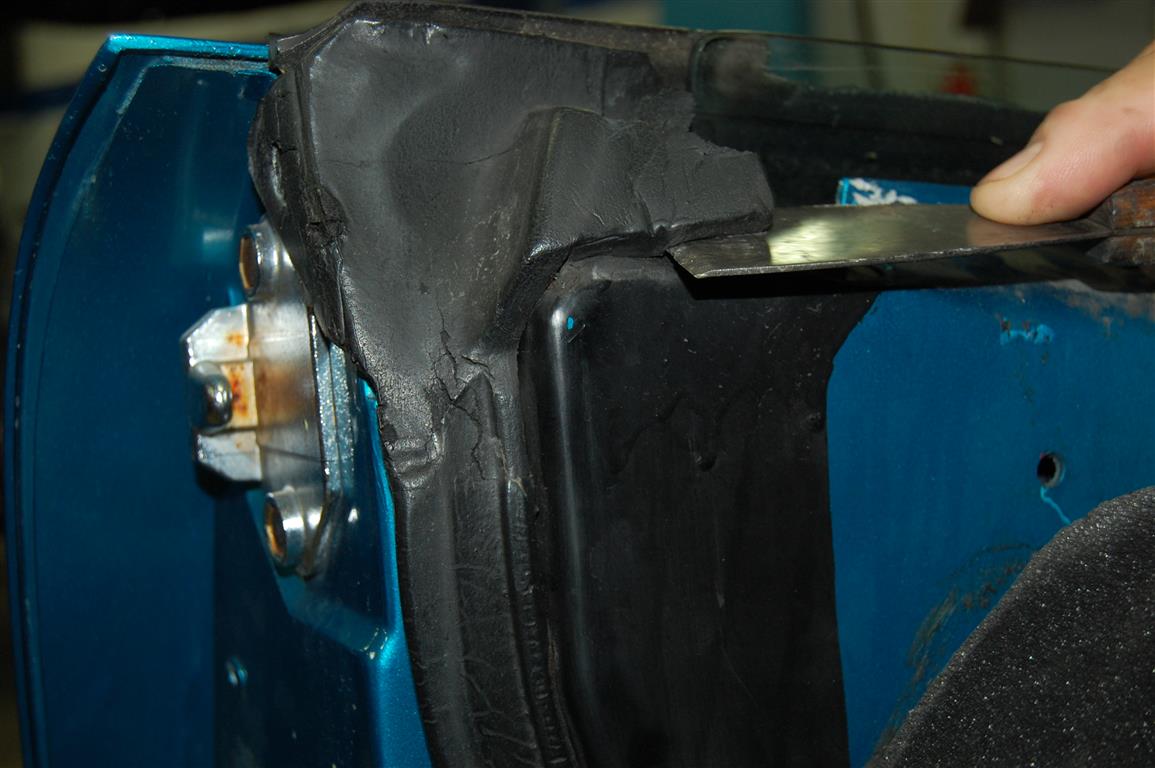
You need to pull the weatherstrip back enough to access the rivets, try to avoid rough handling of the fragile weatherstrip, especially if it is original. A wide blade scraper with a sharpened edge works well cutting the weatherstrip off the door. GM applied adhesive to the weatherstrip so it takes some effort to get it loose.
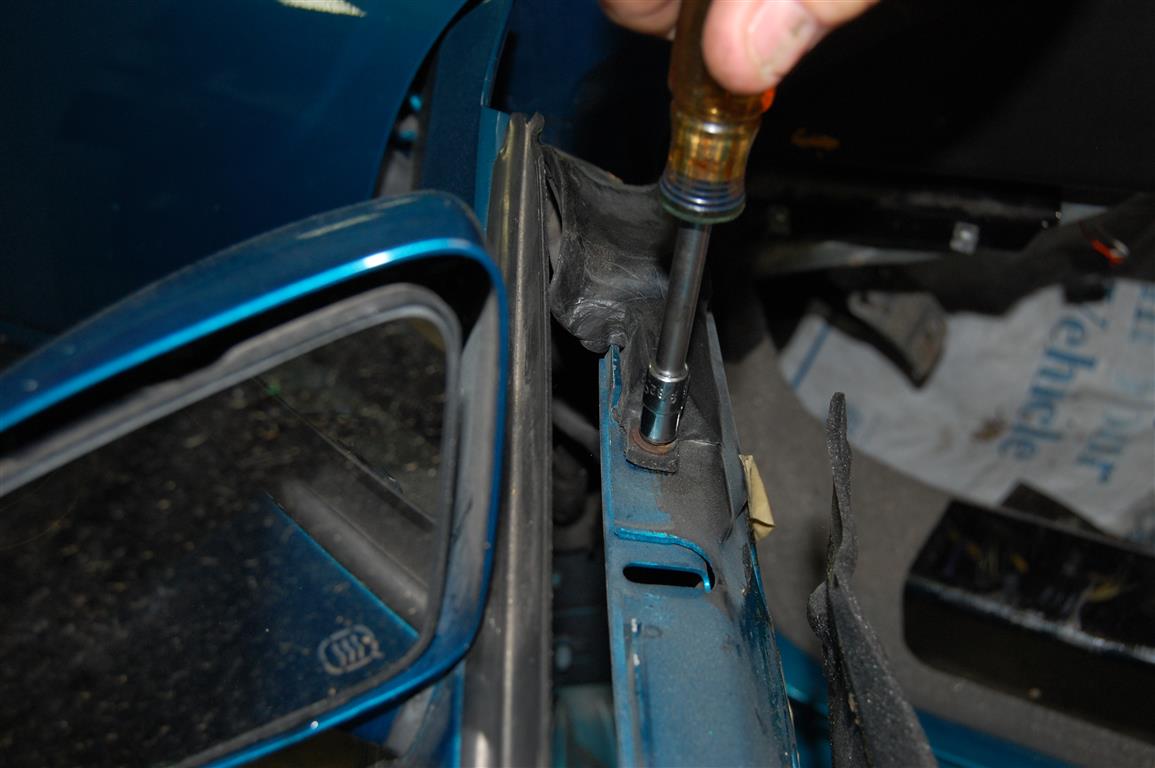
The front upper portion of the weatherstrip must also be removed. There are two 7mm screws holding the weatherstrip at the outer edges.
Like the rear of the door the weatherstrip is carefully pulled off the door.
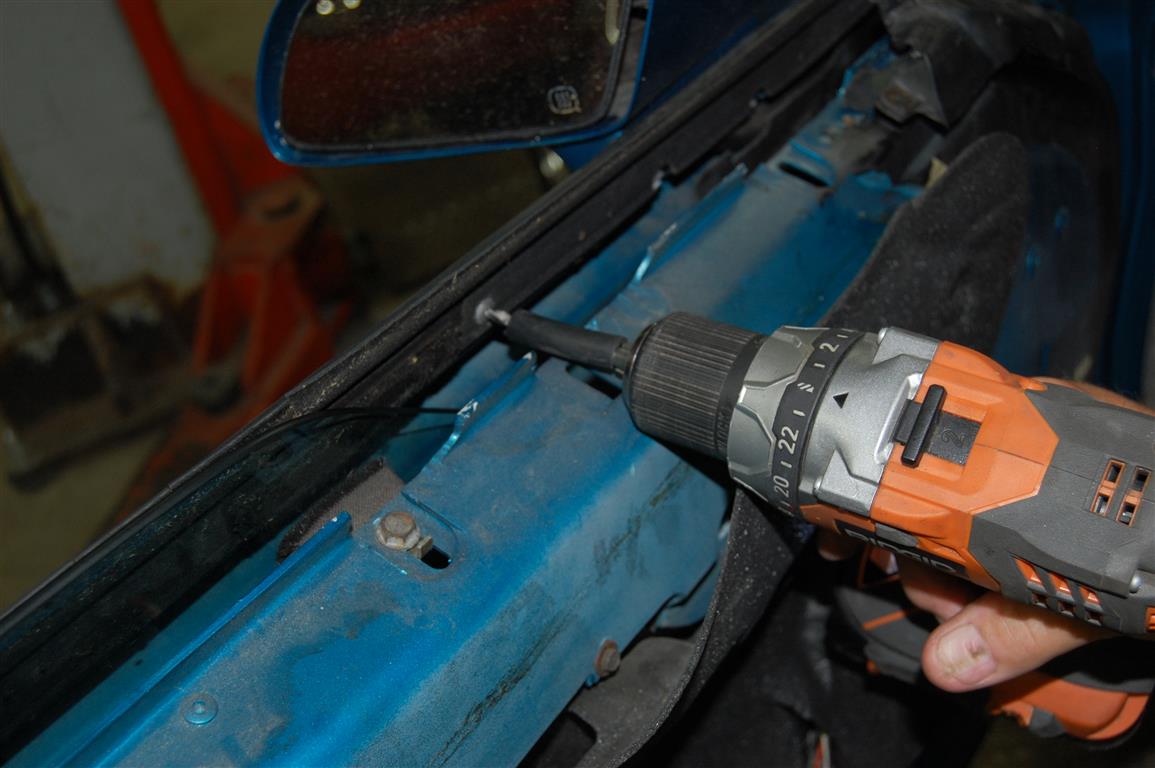
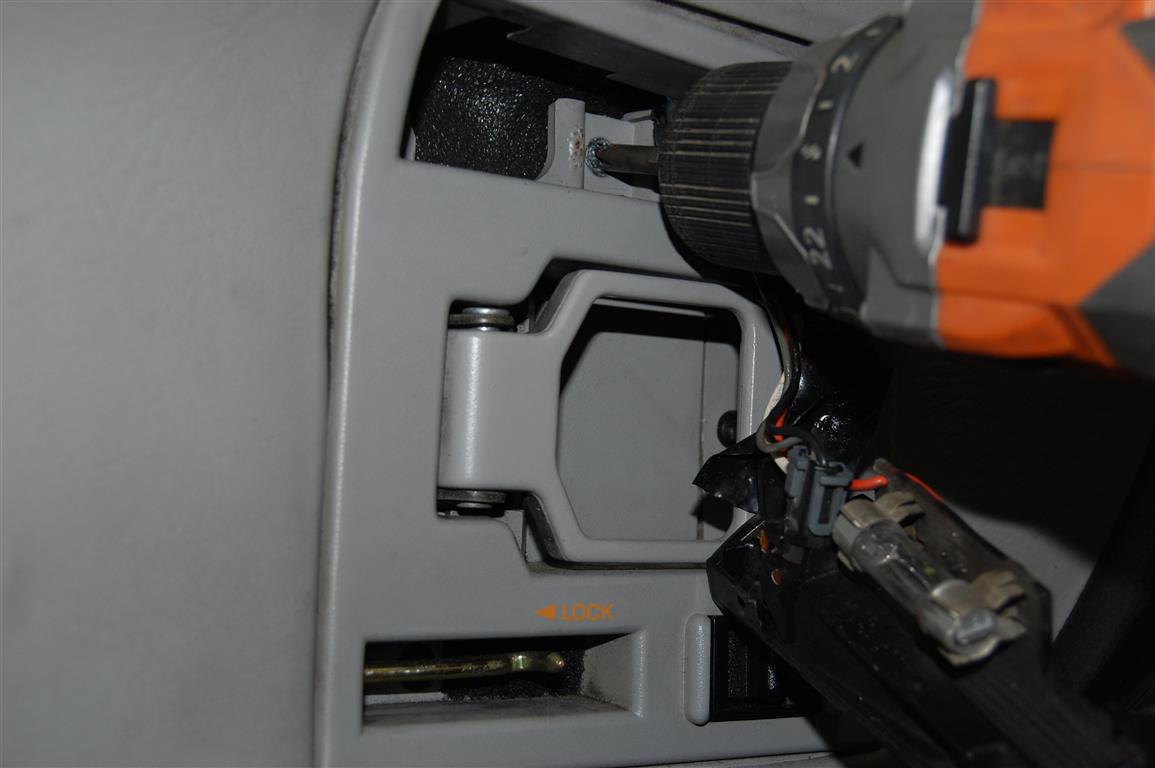
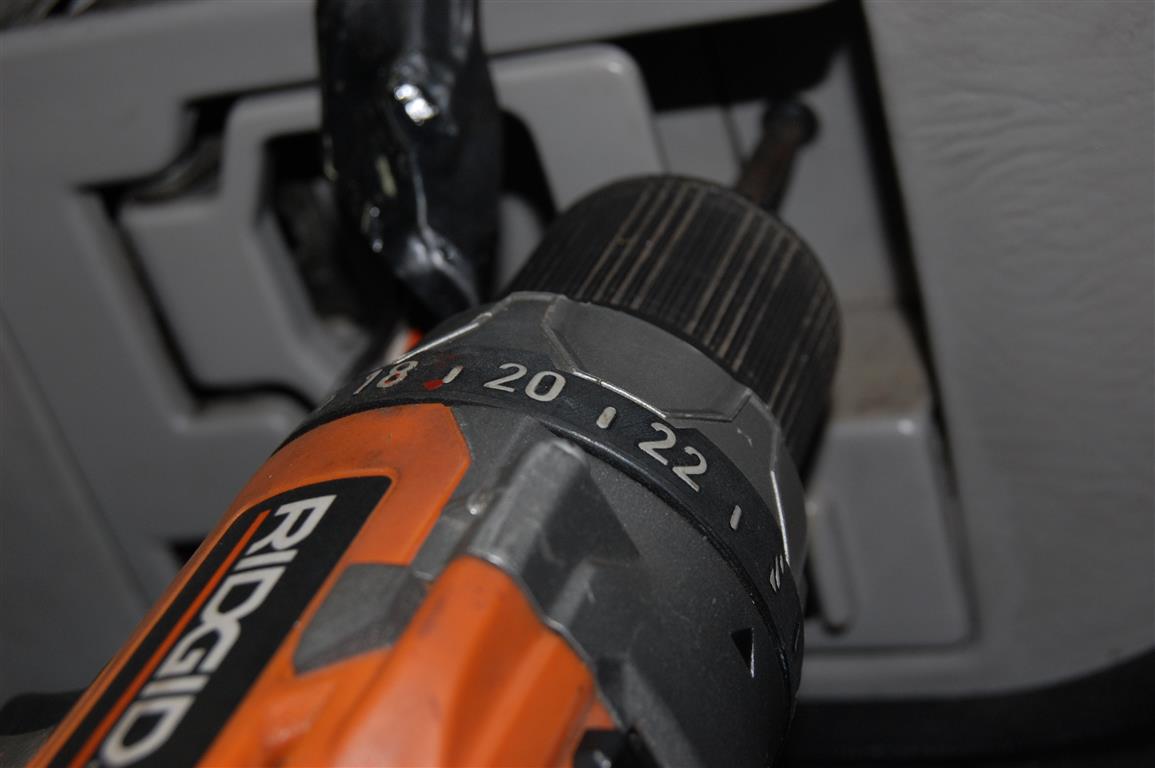
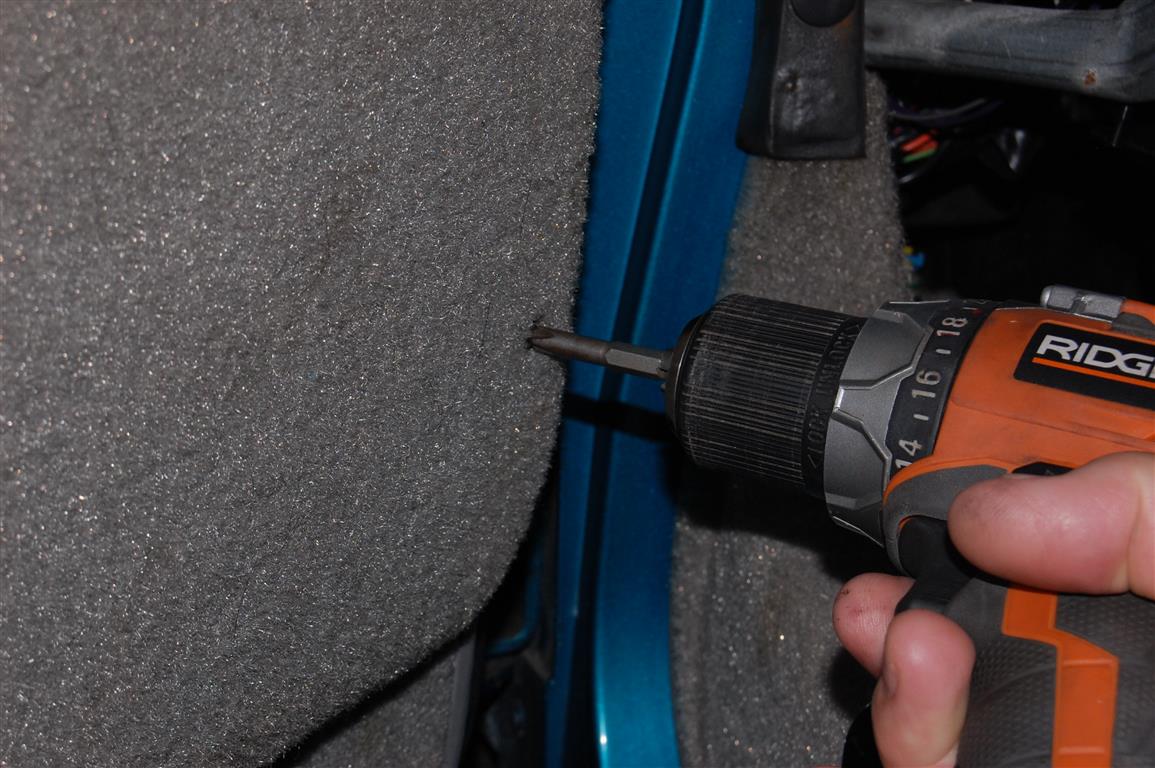
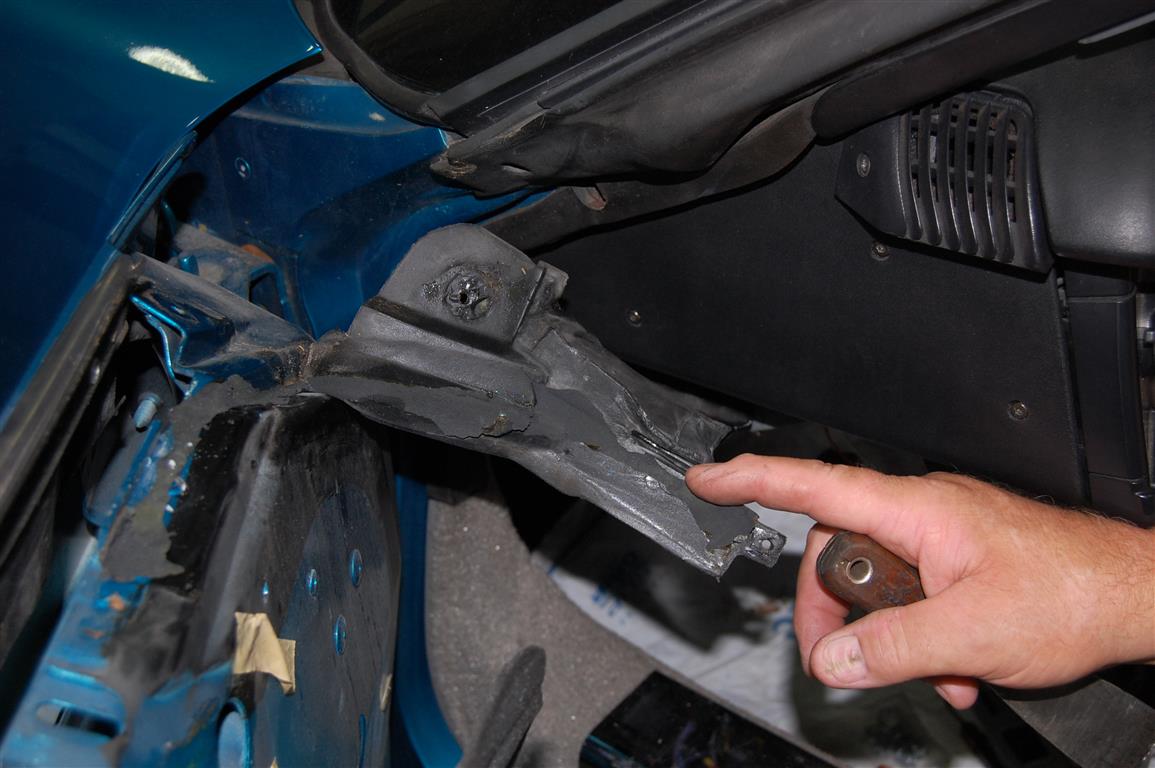
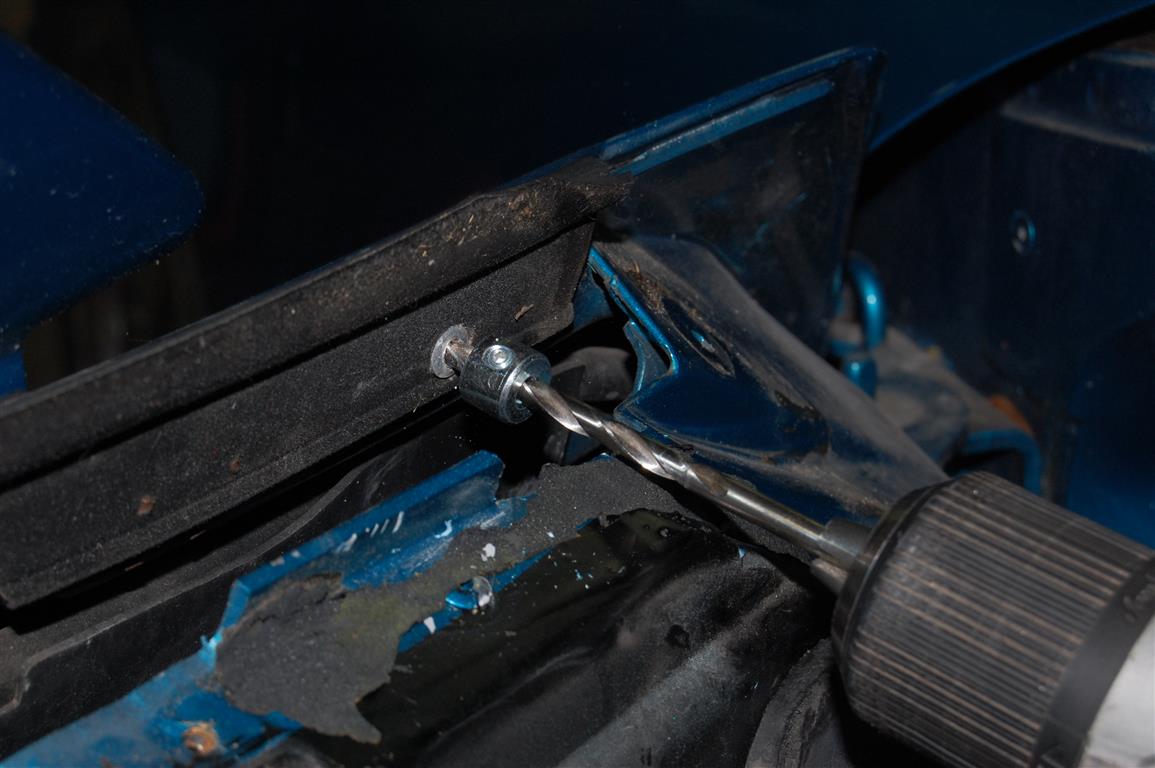
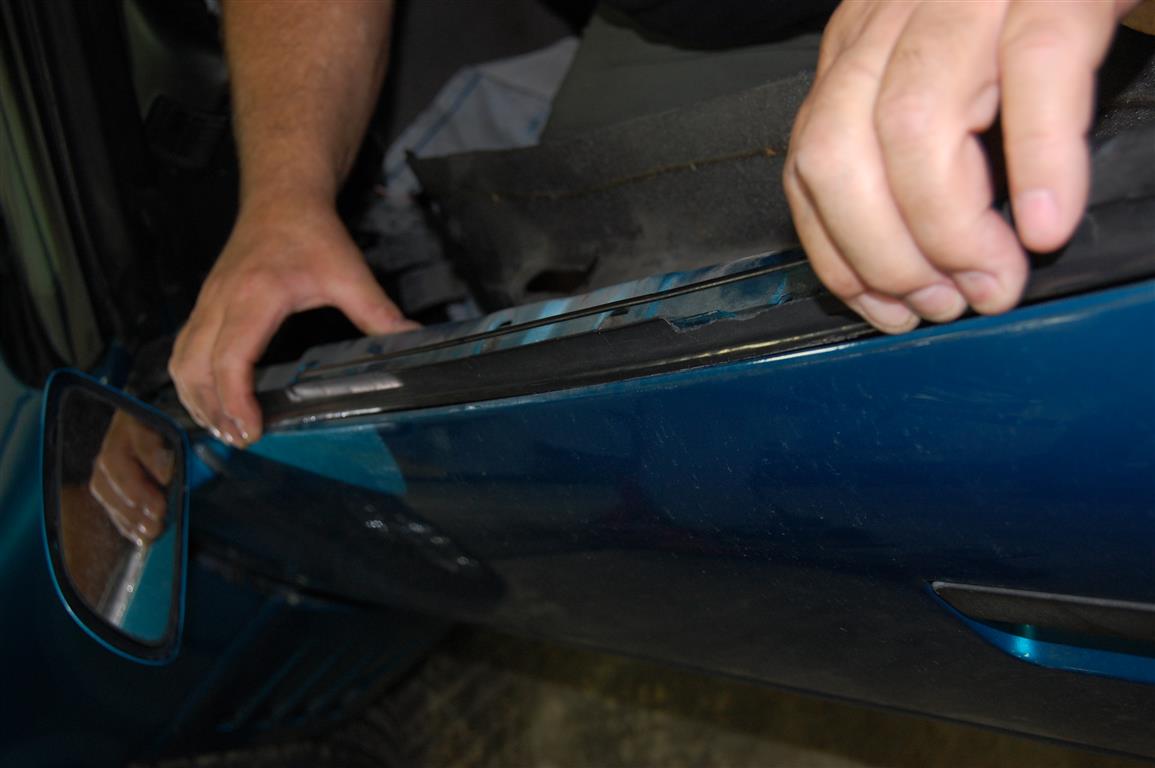
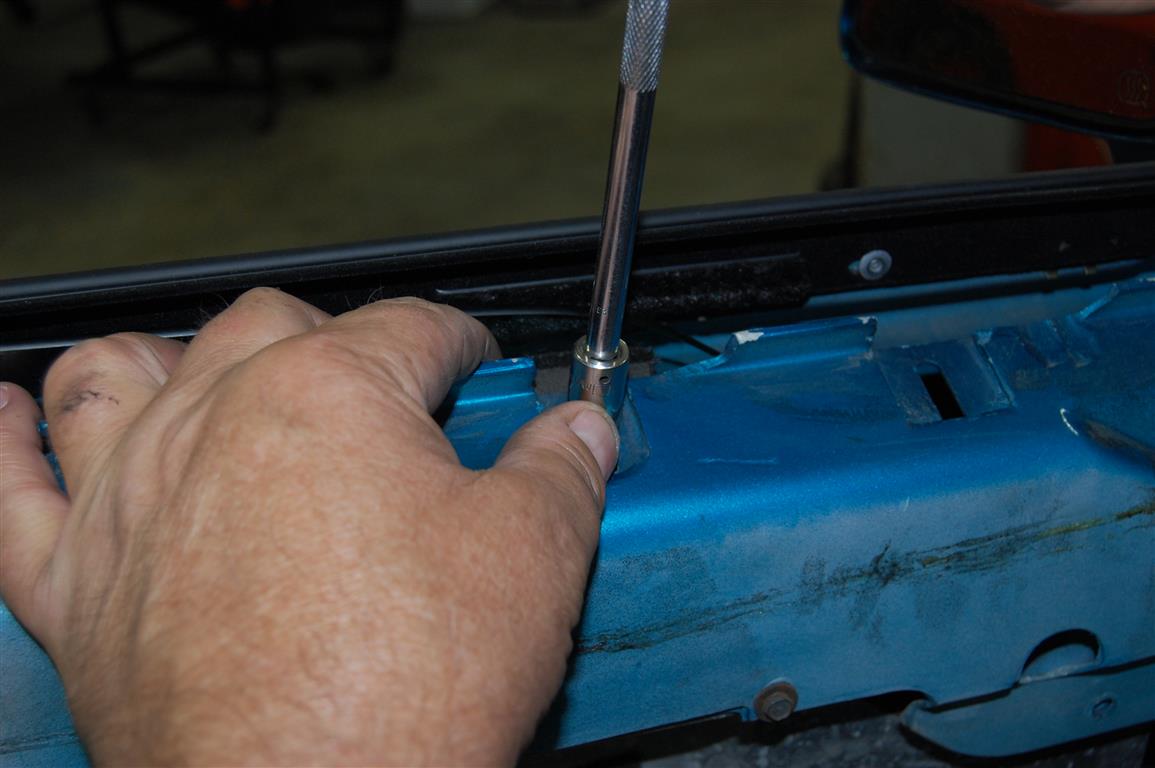
Finally at the door outer seal strip rivets for removal. There are three rivets that must be drilled out with a 3/16-inch drill bit. One rivet is placed at the front and rear of the seal strip along with one close to the backside of the mirror. The piece of rubber vacuum tubing is an inexpensive drill stop to avoid going into or through the outer door skin. That outer door skin can be closer than you think.
This is an official drill stop and they are available at most hardware stores. The stop is held in place with a set screw and can be set at any depth.
The next step is to loosen the door glass anti-rattle bumper at the front with a 10mm hex head socket. Try to avoid turning the screw out too much, losing the bumper, it can be found if the screw is removed completely, it will require some extra work fishing for it inside the door with a magnet.

The rear door glass anti-rattle bumper is also loosened so the door glass can be pulled as close as possible to the inner side of the door frame. Be aware that tinting film applied to door glass can be damaged when the door glass anti-rattle bumpers are loose. The window regulator upper mount has some sharp edges that will dig into the tint film. If you have tint you may want to put some duct tape on the top side of the regulator mount area. The window regulator mounts in the center of the door with two 10mm screws.
Once the rivets are removed the seal strip should be pulled towards the inside of the door from front to rear. The idea is to release the retaining clips by pulling the strip towards you, once the clips are loosened up the strip is pulled upward.

The seal strip sometimes requires a bit of a wrestling match to coax it out of the clips. The seal strip comes out easier as one single back and upward motion, as opposed to trying to get one end up, it binds the other clips if you go that direction. To avoid paint damage placing a screwdriver on the outside edge of the door and prying upward is not recommended.
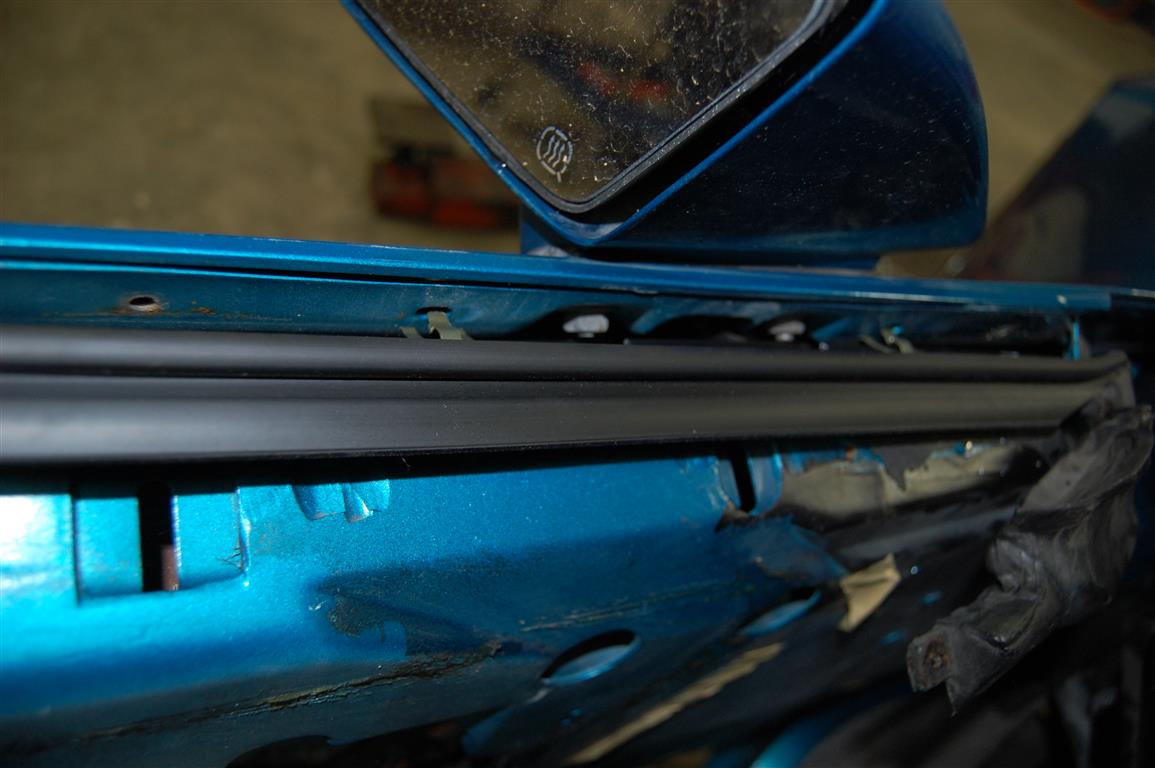
This gives you an idea of the objective each metal retainer clip must go into the oval slot in the door frame. Do not try to push the seal strip down into the oval slots until all the retaining clips are started into each oval slot. The new strips are a thing of beauty once installed properly, trying to push some of the retainers in while other are not in place will distort the metal substrate. Once the seal strip is distorted it is very difficult to make it look correct.
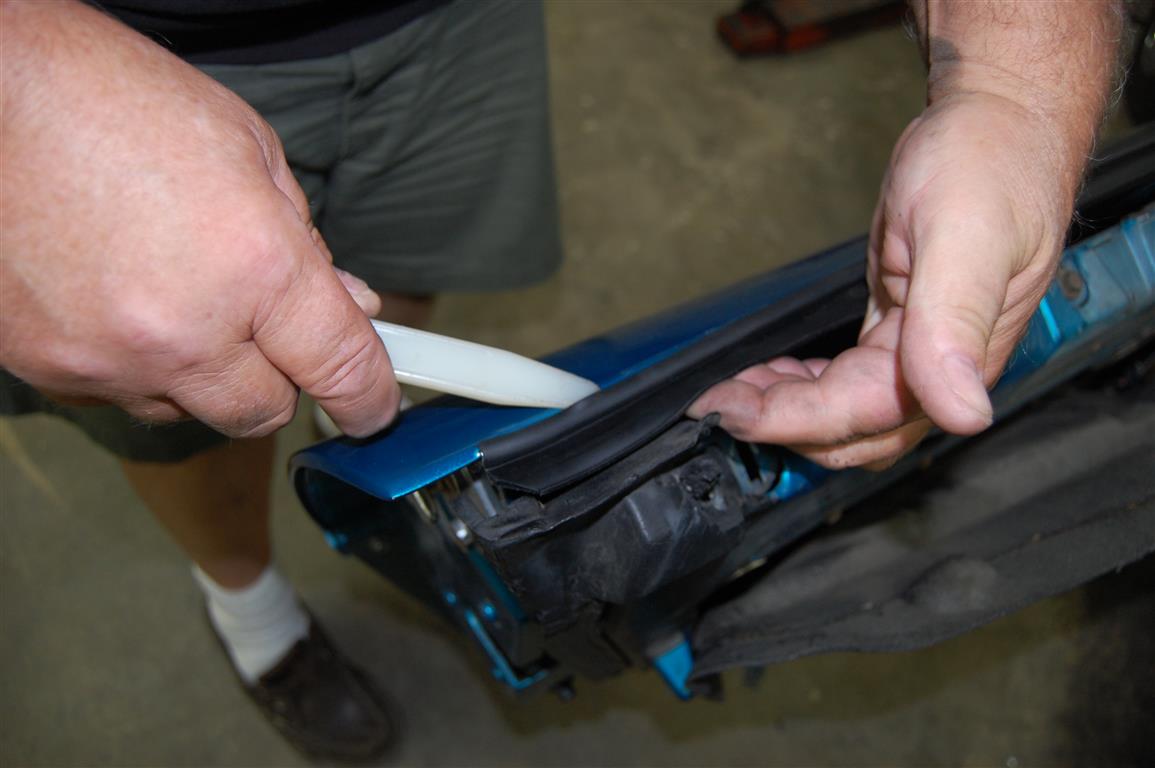
With the seal strip in place it is time to make sure the outer lip goes over the door edge properly. At the back end it is easy to use this plastic windshield installation tool to coax the rubber on top of the edge before the rivet is installed. Many times the same thing happens at the front end of the seal strip between the mirror and the front edge of the door, I have found that I need to pick up slightly on the seal strip before trying to get the install tool under the rubber strip. The idea is to pick it up enough to allow correct placement of the strip without pulling it out of the retainers. Forcing the tool into the rubber can cut it, using a screwdriver can hurt the paint.

Now the supplied 3/16-inch rivets are installed at the front, center and rear. Sometimes I may need to run a 3/16 inch drill bit (with the depth stop installed) into the seal strip and door frame rivet-hole if the rivet does not want to go in easily.
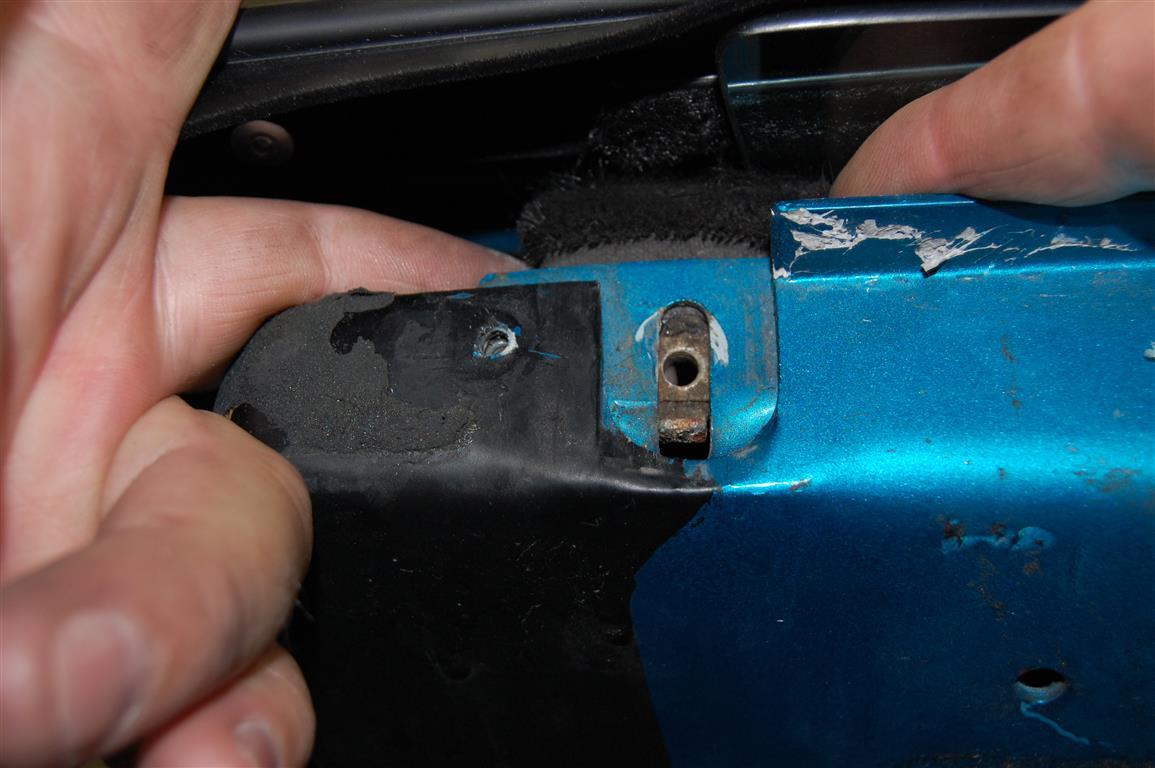
It is easy to loosen the anti-rattle bumpers too far and they drop into the door as I did this time. It takes a bit of dexterity to place the anti-rattle bumper into place for the 10mm hex head screw installation. You can see where the exterior paint was removed from the 10mm hex head screw we call this the witness marks. Try to place the screw back in the same position or witness mark.
The front anti-rattle bumper usually requires a finger or two in between the door frame pushing the glass away from the inside of the door, while the bumper is also pushed back into the same position it was. Same as the rear anti-rattle bumper stop place the screw in the “witness marks”.

Once the rivets and anti-rattle bumpers are back in place the weatherstrips are glued back on the front and rear upper corners. You will be able to see where the factory placed the adhesive, follow those guidelines.
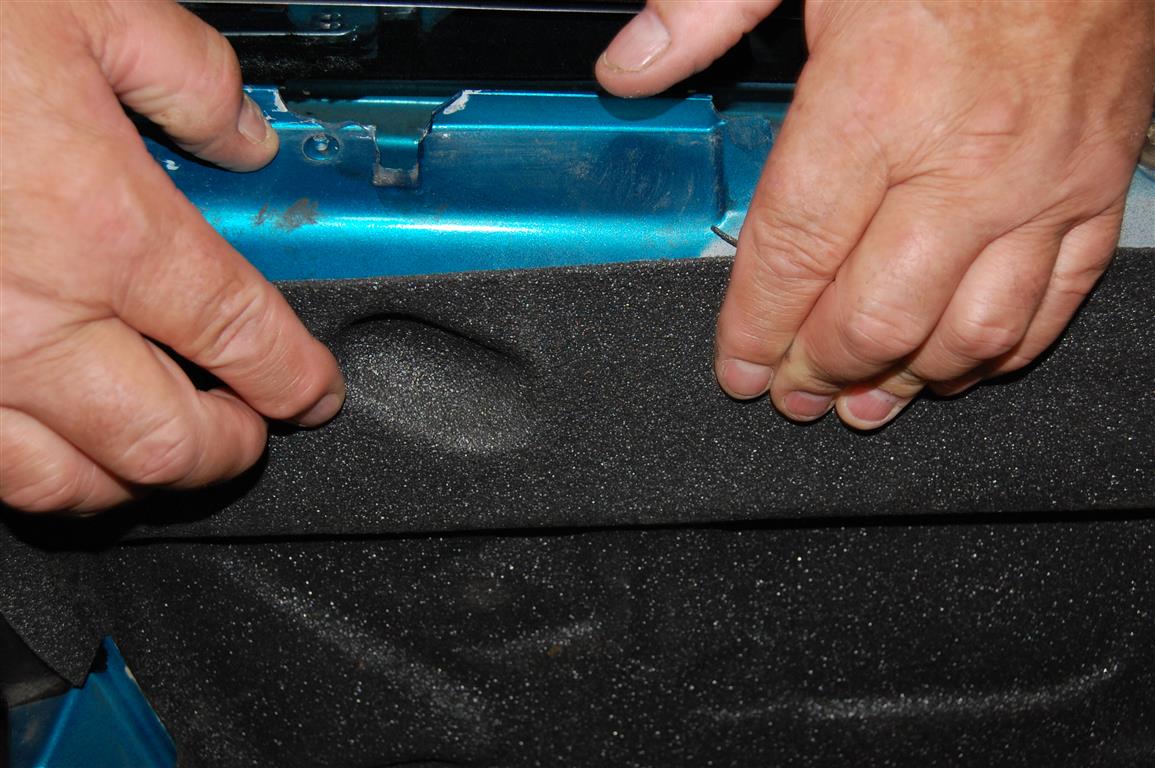
This is the typical 1990-1996 under door panel foam weather shield. Corvette Central has the correct fitting insulator/barrier panels to replace the often torn originals. The replacement insulator/barriers can be fitted to the 1984-1996 (some cars used a thin plastic barrier) Use part number 284084L for the left side and 284084R for the right side on all C4s. The installation of the foam barriers will help quieten the interior.
Story and photos courtesy Chris Petris
Very helpfull details. It will be something I need to do when I find out how to adjust the IN and OUT tilt of the door windows. They tilt in so bad I’m afraid they will brake. Any ideas on the tilt problem will be appreciated.
I was looking for suggestion to repair a battery drain caused by the courtesy lights. I removed the – cable from the battery and attached a volt meter from the battery to the cable and it registered over 14 volts. I removed the csty fuse and it dropped to 0. prior to that I had removed the lcd fuse. After removing the csty fuse and I put the lcd fuse. back in and it registered 12 volts. With the lcd fuse in, it takes about 2 days for the battery to drain to 50%. Any suggestions? My doors need seal strips and rest filler savers. I’m going to repair these after I solve the battery drain problem. I am glad I Found your website. I’m creating a shortcut to my desk top.
I use a 1/2 inch round pad with adhesive on one side on the door frame where the door light switch hits. It solved my battery drain. The problem was my door light switch.