Mechanical projects can be fickle. You start simple and before long it is an all-out assault. Our initial intent was to simply replace the leaking brake calipers and possibly the rotors on our 1969 427 convertible but we found ourselves heavy into the wheel bearing grease.
After being in the business for a while, some processes become second nature. Before you pull a wheel, you grab it and see what kind of movement you find. That’s when things changed dramatically. The simple brake job became complicated. The wheels flopped around, especially the rear wheels. Sure, the car is rough but the mileage is low and quite a bit of service had been done previously, so we were surprised to find sloppy bearings. After checking the owner’s records, we found the wheel bearings had been serviced less than 10,000 miles ago!
Avoiding service of loose bearings will reduce the “good feel” of the brake pedal. As the rotor rotates, oscillating the caliper pistons in and out, air is sucked into the hydraulic system. This is the cause of the most common complaint with the 1965-1982 brake system: low brake pedal after driving a short while. You bleed the brakes and within a few weeks the pedal is low again. What do you do?
This is a tough situation for most service centers unless they are versed in 1963-1982 rear spindle bearing service. The most important thing every Corvette owner needs to know is to take care of your rear wheel bearings so you have some control of the repair situation. There are qualified Corvette techs in the field that have the special tools to do the rear spindle bearings correctly. Unfortunately, they usually aren’t where you break down. Most independent repair shops don’t want to invest in the special tools and will eventually get the job done, but at what cost?
Most dealerships have probably gotten rid of those old special tools (or loaned them out) to make way for the latest C5–C7 tools. Plus, the techs are young and only familiar with the new sealed units and want to replace the whole assembly. In other words, if you break down on the highway…good luck.
Rear wheel bearings get tougher to press apart as they get older. The heat cycling seems to make the bearings adhere to the spindles. When you hear the bearings start to growl, you’ll be 1,000 miles from home with no garage in sight. As the growling increases, the chance of spindle damage is imminent. Spindle breakage is a nasty sight because you almost always need fiberglass repairs.
Once our wheels were off, we examined the situation carefully. We had loose wheel bearings on both sides. The rear rotors were removed previously for emergency brake servicing; we pulled the rear rotors to take a peek. The emergency brake shoes were full of grease so, in addition to loose wheel bearings, the grease seals were leaking. We know the lawn tractor type emergency brakes don’t work well anyway, but smearing them with grease makes them useless. The wheel bearings can have .001-.008 deflection for tolerance. We had .024 wheel deflection so decided to pull the spindles apart and check the previous bearing service.
The actual bearing service is all mechanical and simple to do with proper tools. I just hate wheel bearing grease! Wheel bearing grease seems to get on everything no matter how careful you are. We use Valvoline synthetic chassis and wheel bearing grease because we want the best lubricant protection available. We found that synthetic lubes are better at staying blended and lube even when overheated.
Before you start you should consider the tools required. Is it smart to buy the tools that will gather dust for many years between bearing service? There are other ways to remove the spindles, like the spindle knocker tool (CC# 582415) which you thread onto the spindle then pound with a big hammer. My problem with the knocker tool is the confined area where you are trying to swing a hammer, plus the trailing arm is supported by a rubber bushing which takes some of the shock of your hits. Once the initial bearing movement takes place, the spindle is on the move. That initial movement can ruin an afternoon. Also, how much pressure do you want to put on the trailing arm bushing?
The outer bearing can be pulled off the spindle at your local machine shop to save the cost of tools. There is a rear spindle set-up tool (CC# 582418) that allows the bearing shim to be determined without assembling the bearings. Installing the spindle with the installation tool saves bearing and grease seal damage.
It’s time to get out the wheel bearing grease and get started!
Sometimes more work creates less work in the long run. We remove or unbolt the axle shaft so the bearing play can be accurately checked. The axle loads the bearing and makes rotating the spindle difficult. After a day of fighting with the axle, removal is well worth the effort.
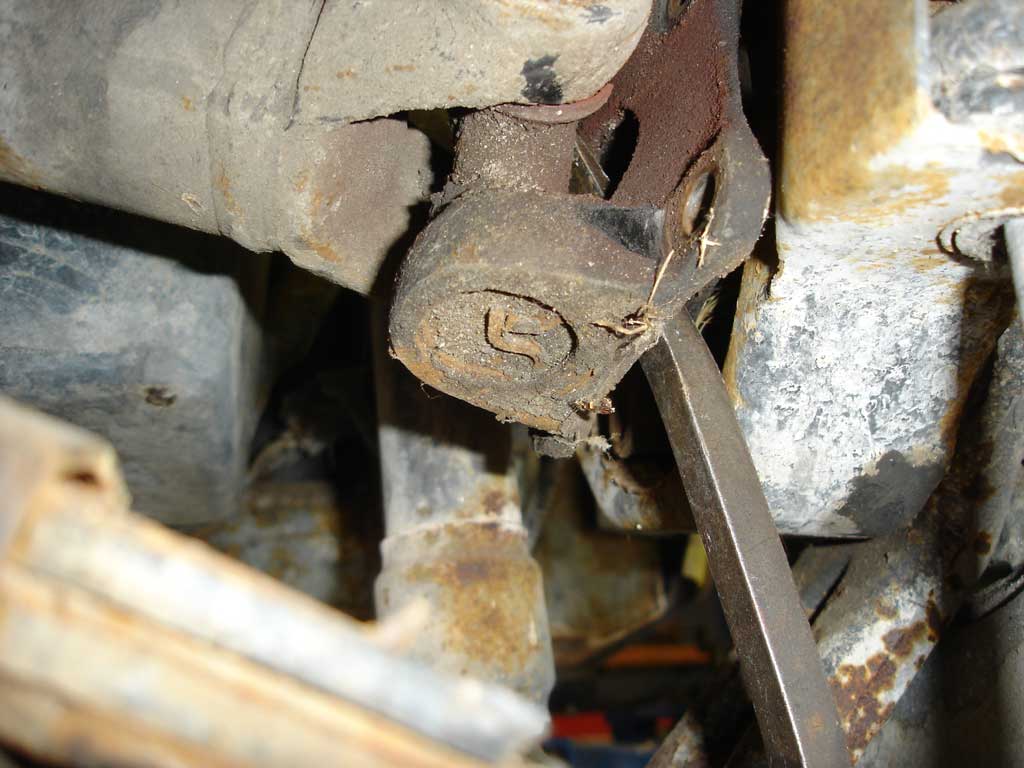
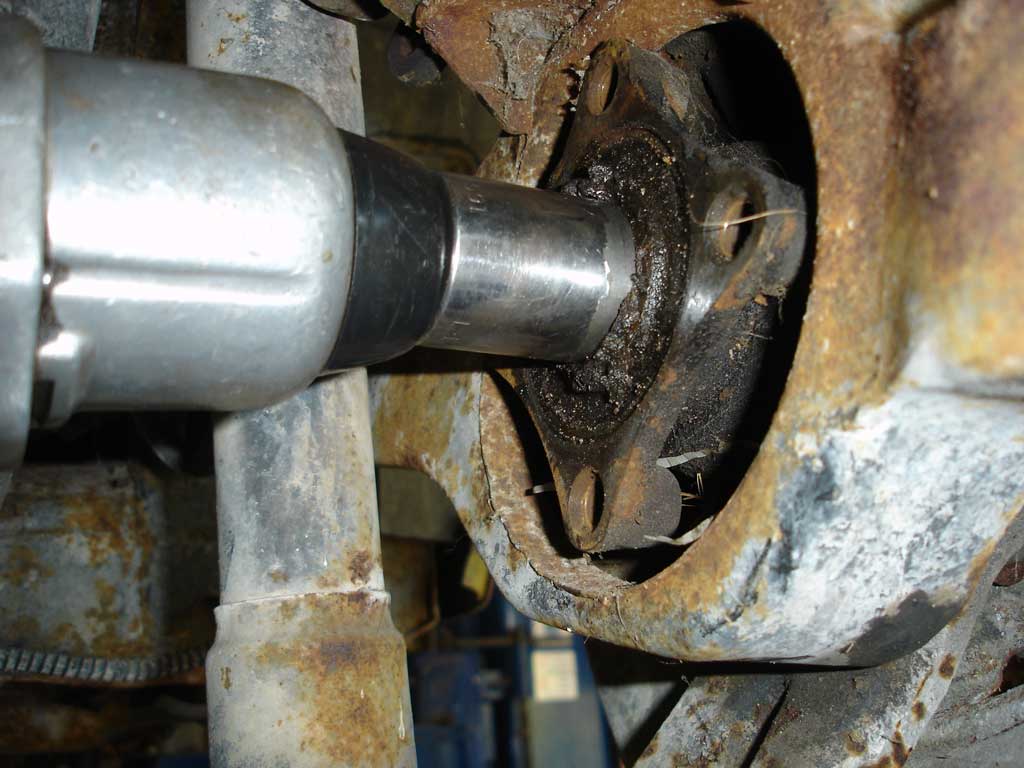
We use a pry bar to force the axle off the spindle flange. Guess what? Now we find a rusty u-joint cup which means only one thing: the needle bearings are turning to metallic dust. Now we get to go a little deeper. Where does it end? We’ll proceed with the wheel bearing check then go back to the u-joints. After all, how much bad news can a person take in one day?
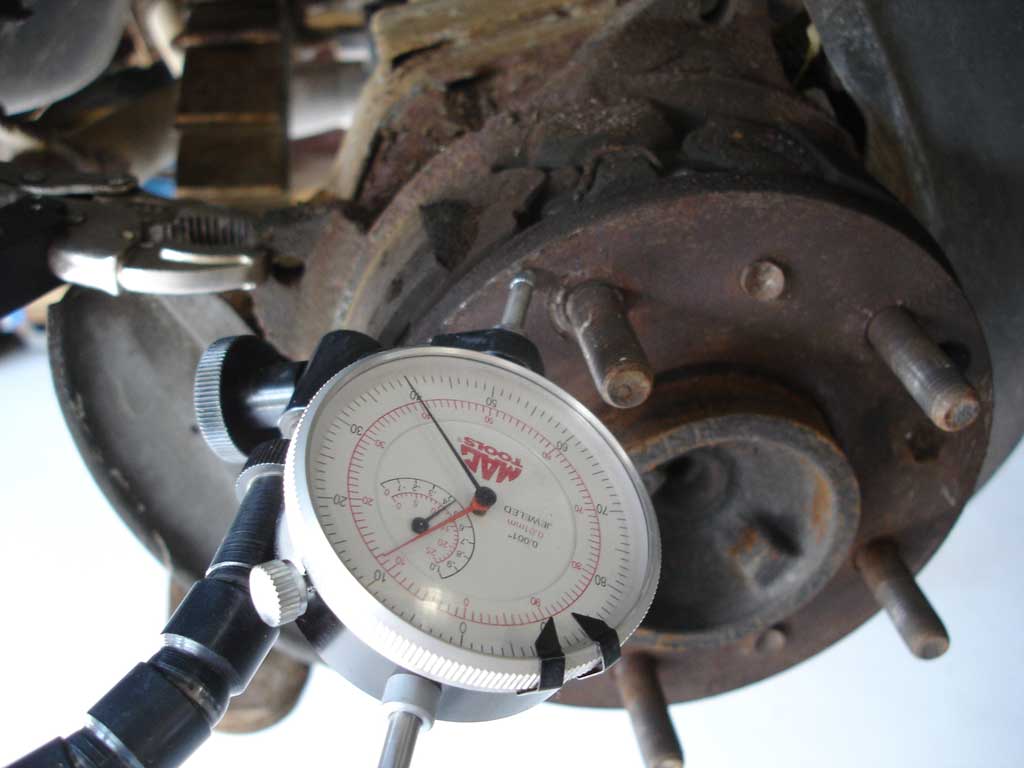
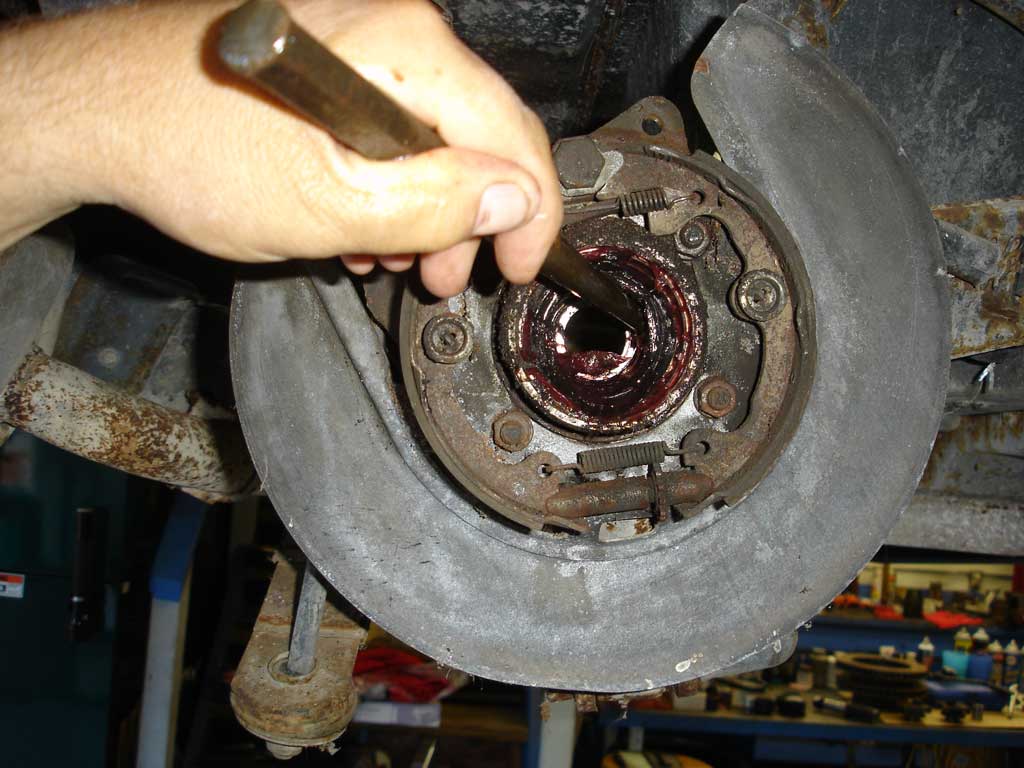
We set up our dial indicator to check actual rear wheel bearing play on the really loose side, although on this side you could use a tape measure to check the bearing play. We found .205 when .008 is the maximum allowable wheel bearing play. Notice the rivets that someone left behind? We’ve found the rivets pushed back just enough to hit the emergency brake shoes and springs. Ever wonder “what’s that ticking sound when I drive alongside a wall?” This will do it.
Remove the cotter pin and 1-1/16 inch castellated nut for spindle removal. We’re using the impact for removal only. The spindle nut torque is 100 ft lbs, then turn the nut to the next opening to allow for cotter pin installation. The nut should not be backed off to install the cotter pin because the flange can work back and forth on the spindle splines, causing a loose fit eventually.
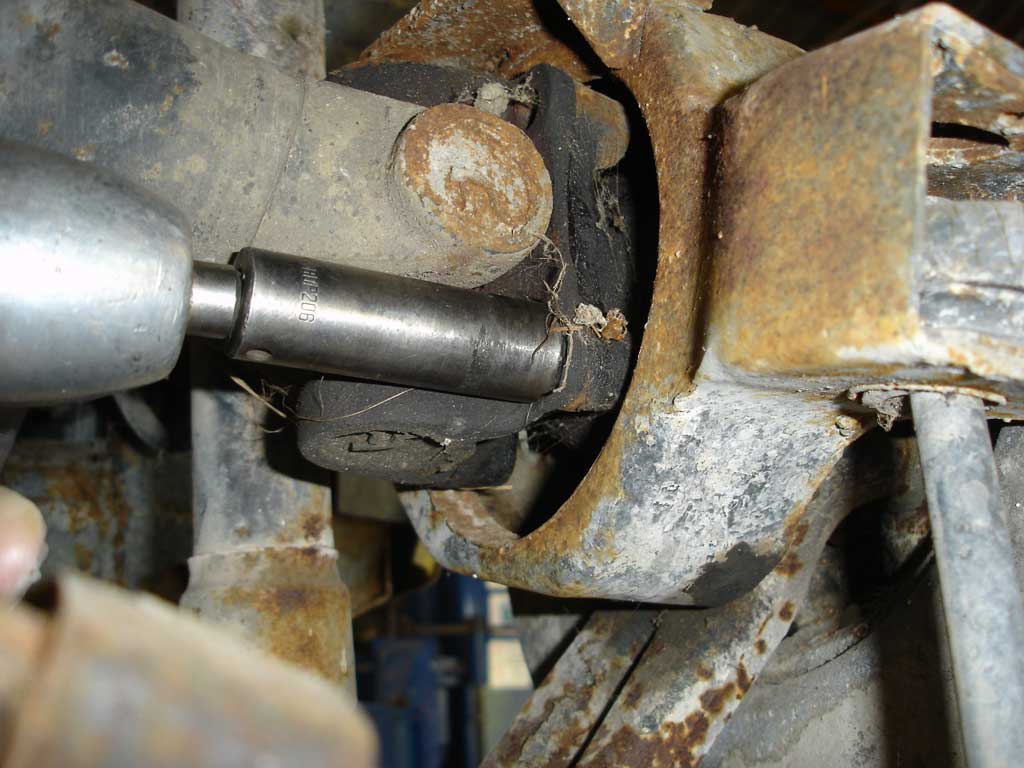
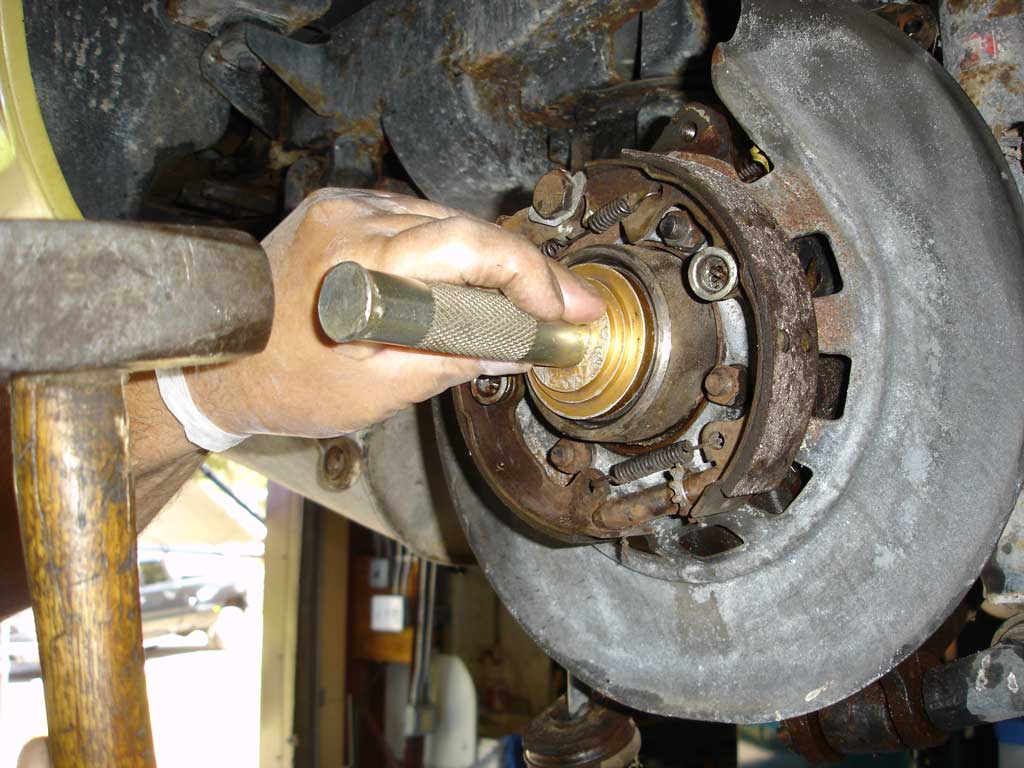
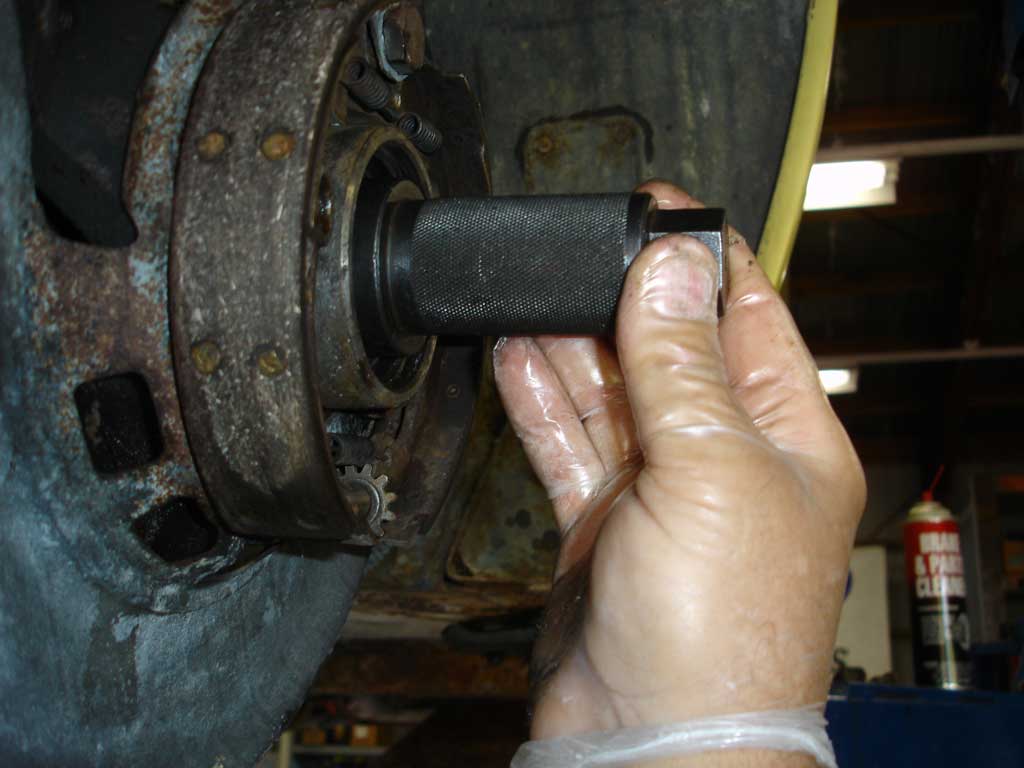
This is the spindle thread protector that we wish that Mr. Goodpliers would have used previously. The spindle threads were damaged from a hammer and who knows what kind of treatment. If you are using a spindle knocker tool it would be installed now. Be sure to tighten well so it doesn’t come loose during the thrashing it will receive.

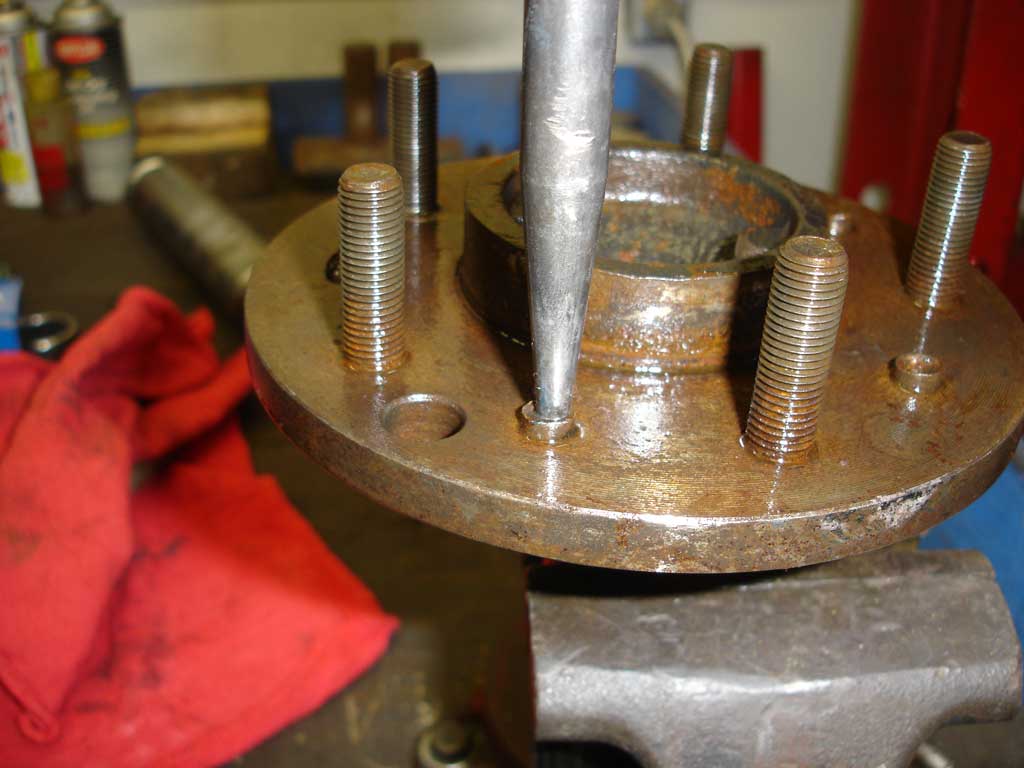
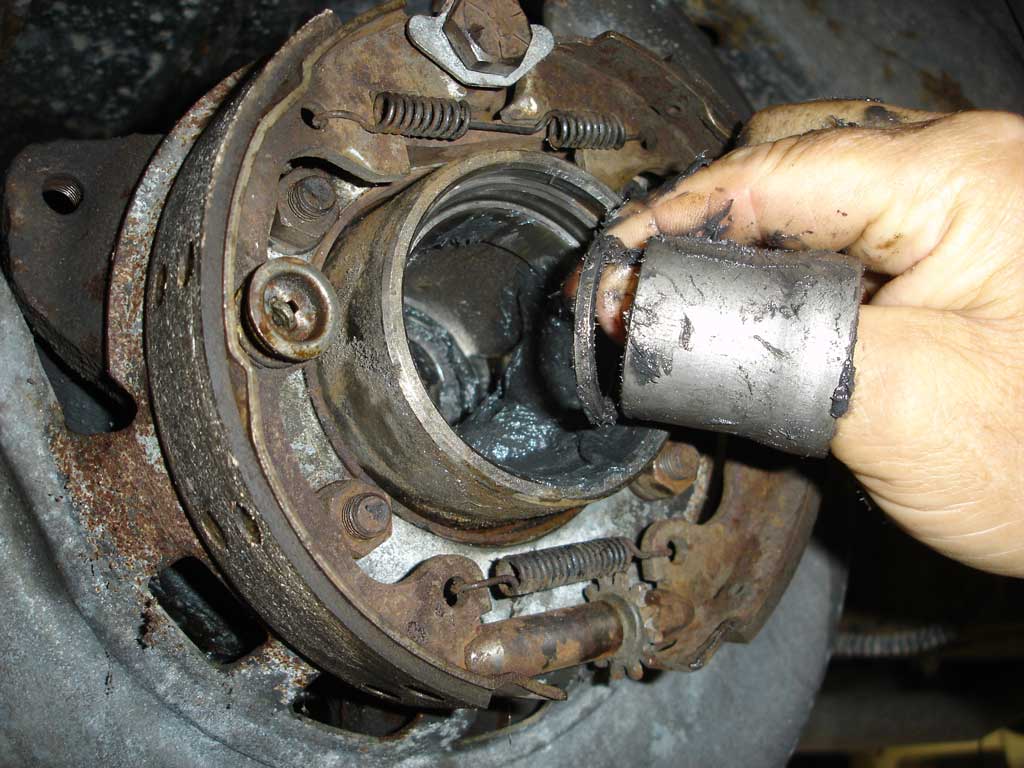
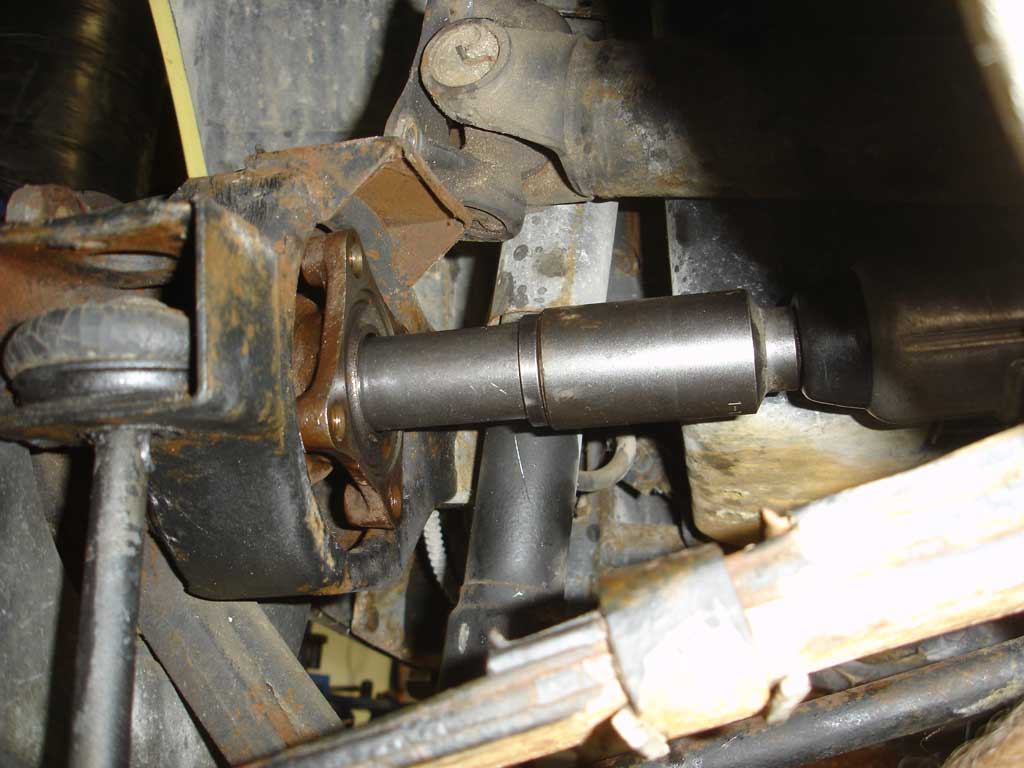
With the spindle press (CC# 582427) installed we can push out the spindle with relative ease. If you find heavy resistance there are a few things to check. Emergency brake shoes can bind on the rotor if it’s still in place. Back the emergency brake shoe adjustment all the way off and try again. If heavy resistance is still felt with no spindle movement you’ve got one of those bearings that grew on the spindle. A big hammer can be used to whack the bearing. Press on the forcing screw while tension is applied. This usually gets things moving and then the forcing screw will finish the spindle push out.

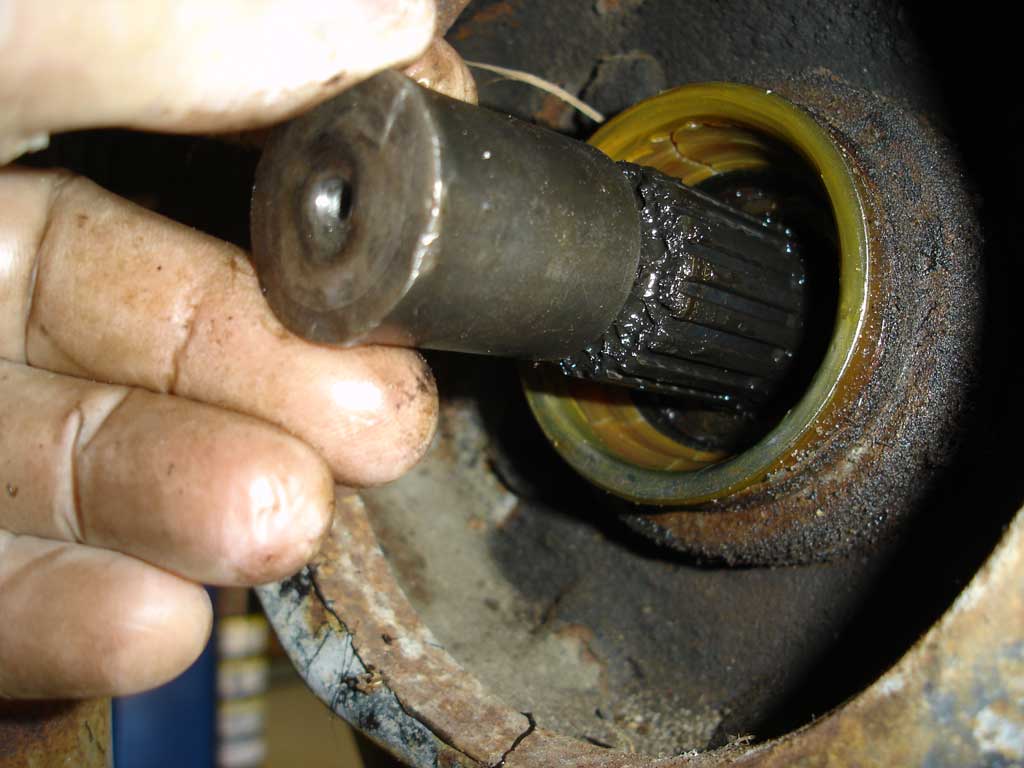
As the spindle was coming out we noticed the outer seal damage that would explain the emergency brake shoe greasing incident. One useful trick is install the outer bearing and grease seal on the spindle, then insert the assembly in the spindle housing. The inner bearing is then started in place before the spindle is tightly assembled and the outer seal is pressed in place with screwdrivers. This is tough to do and many times the seal is damaged because you are working against the bearing that wants to pull out.
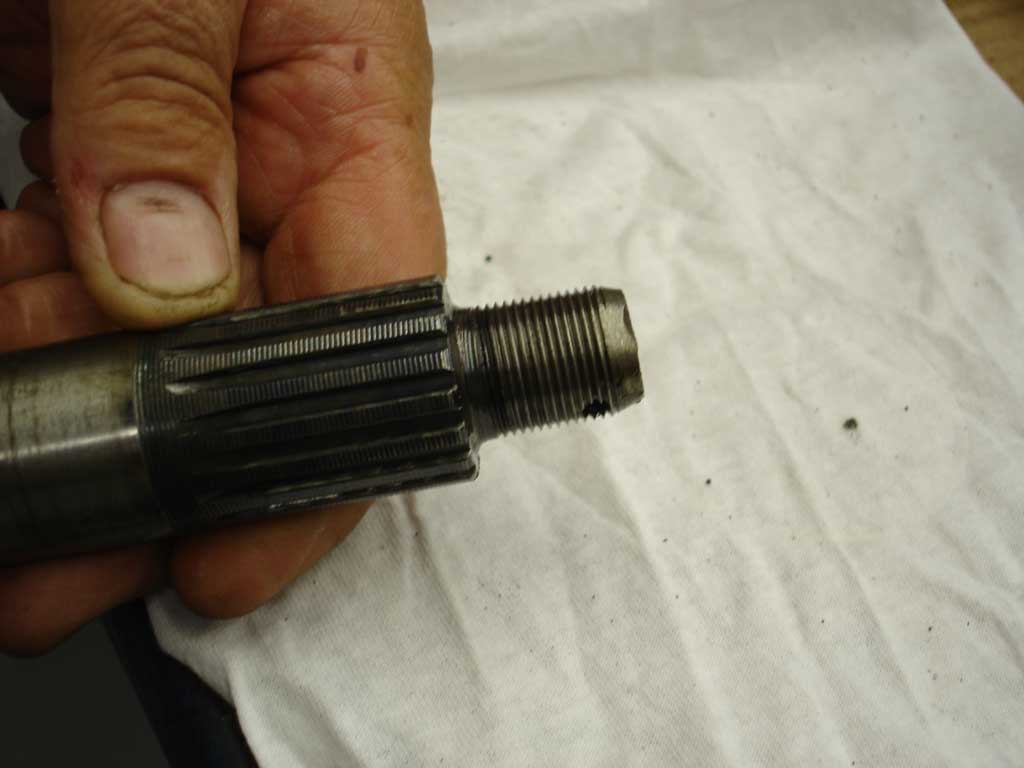
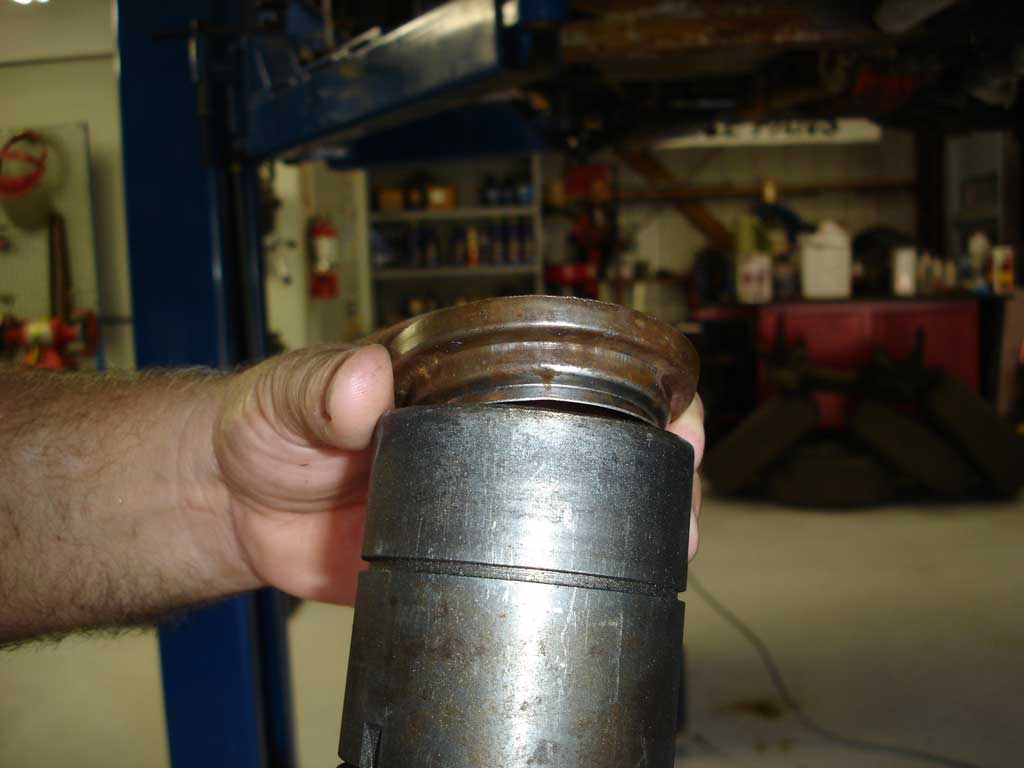
Once we had the spindle out, we could see the damage that occurred from the whacking incident. We had to grind the bevel on the outside edge of the threads to allow us the ability to install the nut and torque it properly. This is not a major issue since the nut doesn’t end up loaded here. When the threads have been hammered, the end of the spindle gets shorter and fatter, preventing nut installation. This is not something fun to find after the spindle has been set up for installation.
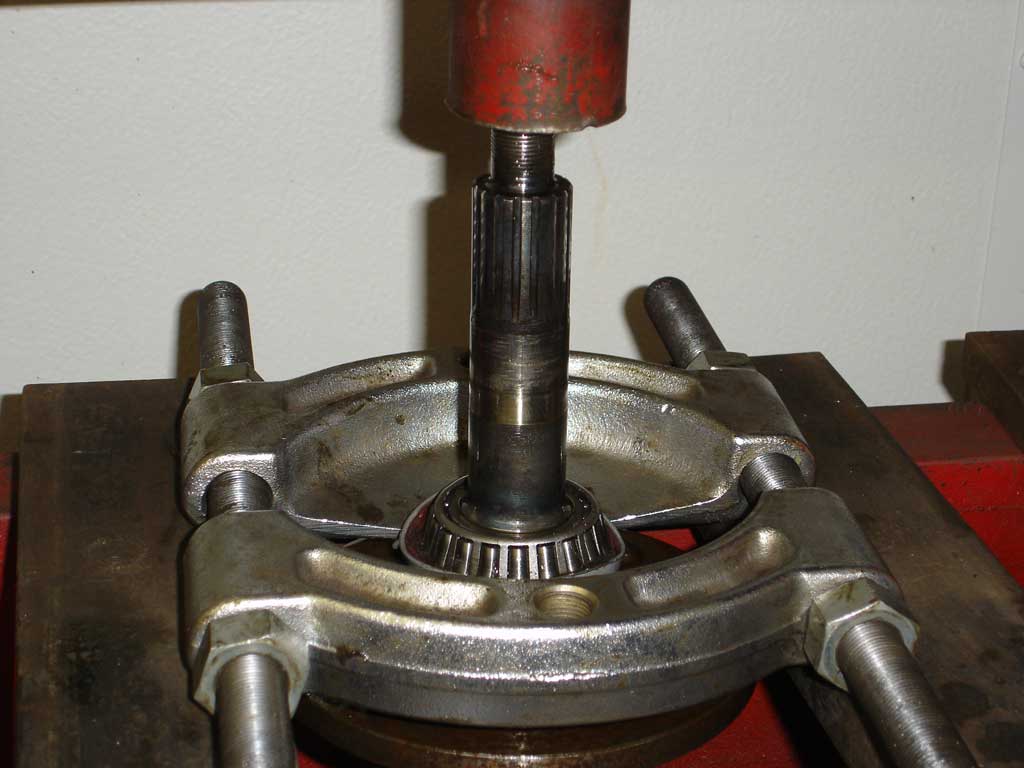
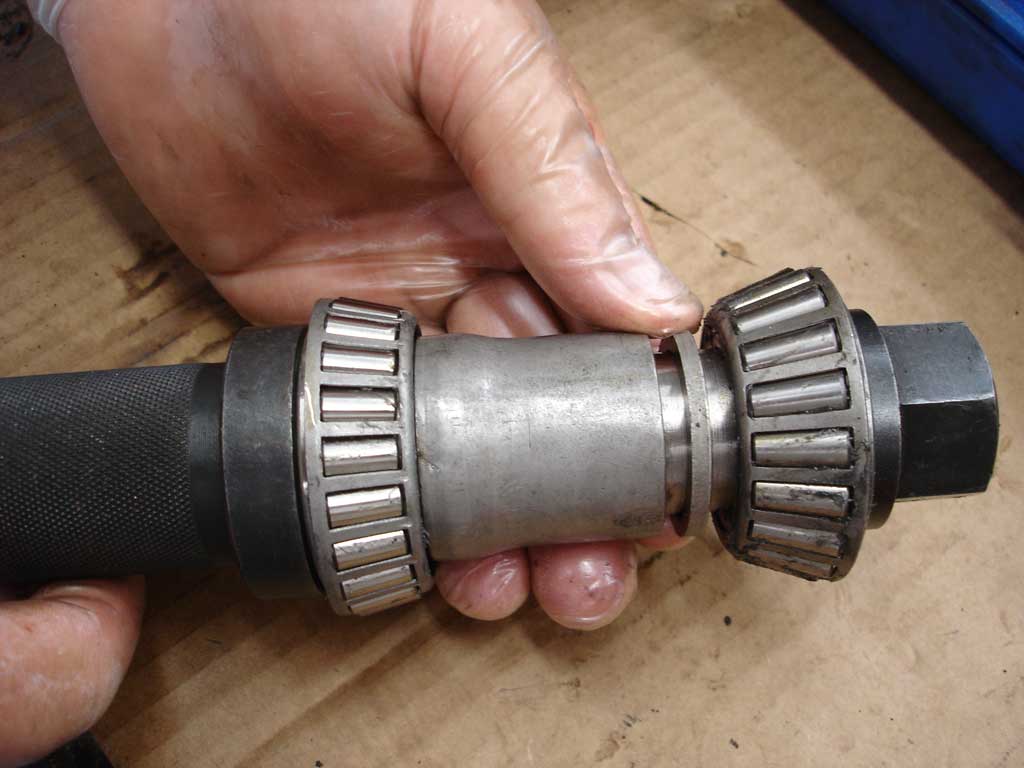
We use a bearing collar to press off the inner bearing from the spindle in the hydraulic press. It’s rare that the bearing can be saved, and why go through all the trouble to grease the bearings and not replace them? The bearing cage and rollers can be removed, then the inner race cut off or hit with a hammer to shatter it. The shatter part is definitely not recommended because the hardened bearing pieces are hard to remove from flesh and quite painful. Our bearings showed signs of high speed cutter removal from the cut marks in the spindle. It’s worth a few bucks to have the bearings pressed off.
While the spindle is out we pushed the rivets out to allow the rotor to sit flat and avoid emergency brake shoe damage. As the punch pushes the rivet out, be careful. Don’t let the punch get stuck in the hole because the flange can be distorted. The punch will raise up the immediate area, preventing the rotor from sitting flat. This is also a good time to replace wheel studs if necessary.
Now the inner bearing and race can be knocked out. There are two areas that allow the punch to sit on the race. During removal, alternate positions to prevent housing damage. Our 1969 had a spindle bearing housing replaced probably due to bearing failure that damaged the housing from spun bearing races. The bearing races must fit tight in the housing to operate properly and keep clearances correct.
We’re using a bearing installer to install the bearing races. This avoids race damage and possible flesh wounds. The 1969 had two different spindle bearing housings, an early housing with a recess in the center and a late housing which is flat across the bearing surface.
This is a great tool. The outer bearing and sleeve are stacked on the tool with a shim then inserted in the bearing housing. The inner bearing is installed and then we check bearing play. This means that we can check for proper clearance then assemble with confidence knowing that the final bearing clearance will be correct.
The spindle bearing tool is inserted for a final bearing clearance check. We cheated here. After checking many of these setups we are able to feel the correct clearance. This is not always the case because sometimes the shims are too large, causing clearances above .002. It’s difficult to feel when .008 is the max allowed, so we use the dial indicator for proper setup if there is any perceptible movement.
We are using an inexpensive bearing packer to pack the bearings. The grease must be forced out between the cage and bearing rollers for proper packing. The bearing packer works decent in the summer but when it cools off the hydraulic press is required to force the grease through the bearings. Do not grease the bearings before checking endplay because erroneous readings will result.
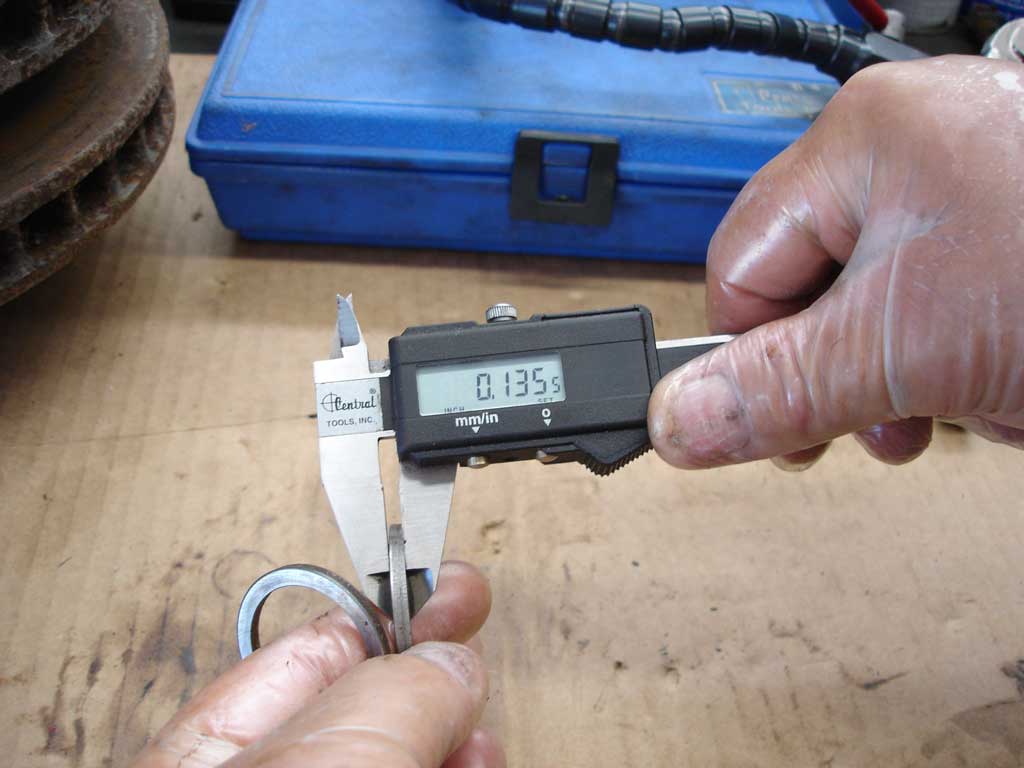
We previously installed the inner bearing and now we insert the sleeve and proper shim into the housing. Remember, the large side of the sleeve goes towards the outer bearing with the shim on the inside. We put a large spoonful of grease in between the bearings for additional lubricant.

Once the outer bearing is in place we can install the outer seal using a hammer around the circumference. Be careful not to distort the seal during installation. The hammer is used only on the outer edge to prevent dings in the seal retainer ring. By the way, now is the time to do any emergency brake repairs if necessary. At the very least make sure the brake shoe adjuster is free and that the upper lever moves.
The inner bearing and seal have a dust shield that gets installed last. We found a sleeve that the dust shield fits into to install the shield properly. Hammering on the top of the dust shield distorts it and in most situations the shield comes off and rattles around the flange. It takes quite a bit of effort to seat the dust shield properly and you can feel the outside edge to make sure it is sitting flat when it is on the bearing housing.
First we install the flange then the spindle installer is threaded onto the spindle to allow us to pull the spindle into place. The steady, even pull keeps the bearing rollers from getting hammered into the races. If the correct shim was used the task is coming to a close.

This is a common occurrence lately. The washers shown go under the spindle nut and after extreme over-torquing they crack due to fatigue. The washers should be checked closely for cracking. It’s usually obvious because the washers become coned from the stress. If they are coned replace them even if they are not cracked.
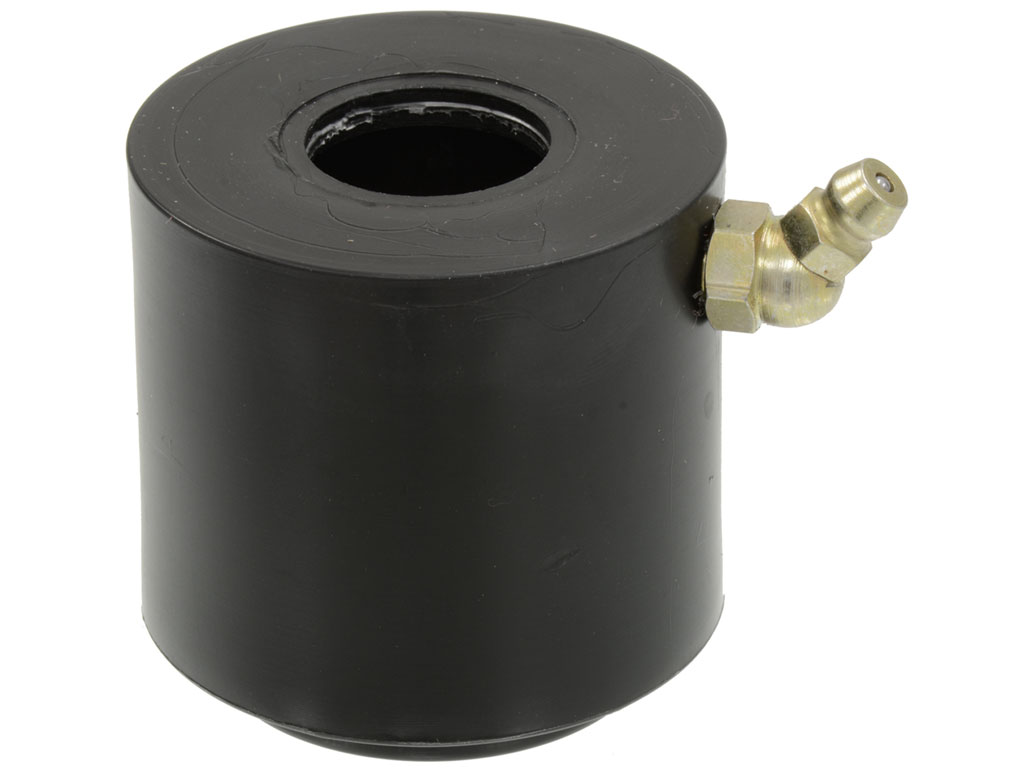
Rear Spindle Bearing Greaser #582416
Q: Should I use a rear spindle bearing greaser or completely disassemble and service the spindle bearings?
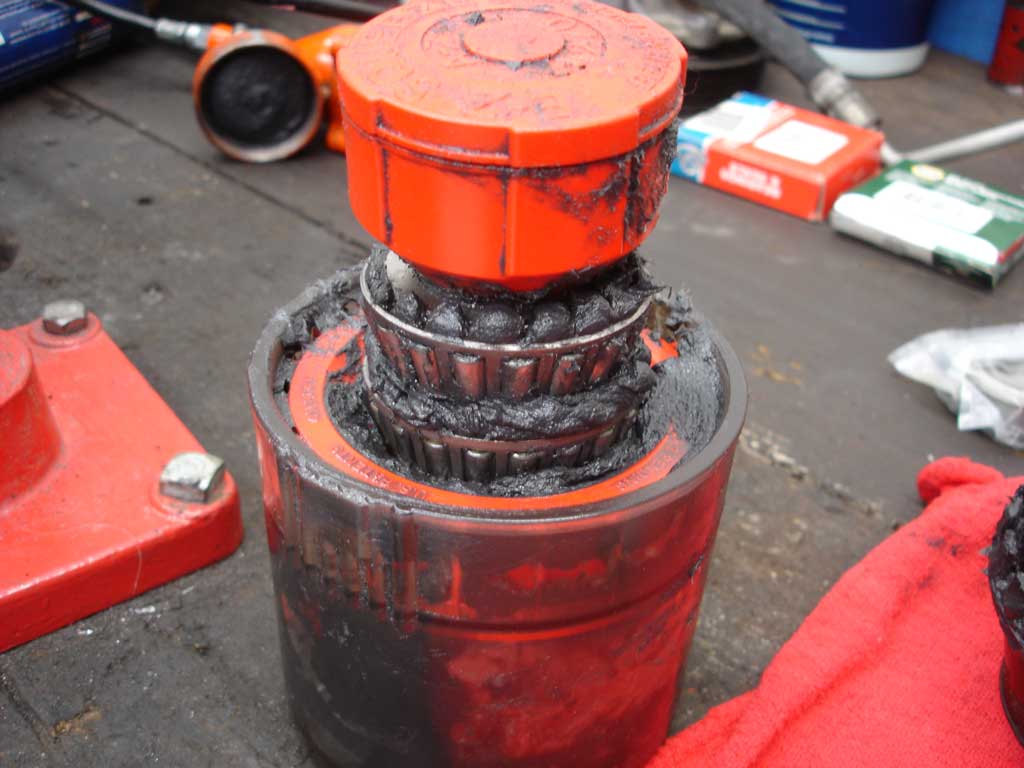
After a long highway run, grease will become liquefied enough that seals need to be tight in their bore when installing to prevent leakage. Today’s lubricants are much better; they handle heat well and lubricate better. If you have an unrestored early 1963-1982 Corvette, the rear spindle bearing grease is not up to today’s lubricant standards. Earlier Corvettes (1963-1973) had thick fibrous grease that took the heat well but had a tendency to burn off lubricant, leaving the wax based binder behind.
There are two areas of concern with the bearing greaser— overfilling the housing and giving a false sense of security. There is no way to know how much grease is in the spindle, so how do you know when enough is enough? If the greaser is used until lubricant comes out of the wheel seals, the seals certainly won’t handle pressure when the grease heats up and expands. Instead, grease will leak onto the parking brake shoes and create a mess.
Rear spindle bearing failure begins with a slight rumble and an accompanying roughness you can feel in the seat. At that point, greasing the bearings will slow down the degradation but not stop it. The roughness will become more pronounced until you hear popping and cracking, with smoke coming from the wheel area. If you are driving at low speed the bearings can “weld” themselves, stopping you in your tracks. At highway speed the bearings will not typically lock up; they break apart and the wheel loosens, with brake calipers the only thing keeping the wheel in control…hence the smoke.
As mentioned earlier, replacing and setting up the spindle bearings requires special tools that can be costly for a one-time job. Removing a failed bearing can be quite a chore and then the spindle’s integrity is in question. You will also spend considerably more to replace the damaged components. If you just purchased a 1963-1982 with no history of repairs and drive long distances, I recommend replacing the spindle bearings.
If you find wheel bearing grease slinging out of the spindle inner flange, the bearing greaser may be a trip saver. A failed seal will deplete grease and, on a long trip, bearing damage will result. You can replace the seal and put 3-4 pumps of grease into the bearing greaser to get you home without worry of a catastrophic failure.
If you just bought an unrestored early Corvette and planned on driving it home a long distance (50 miles or more), have someone pack the spindle wheel bearings full with the greaser beforehand. Once you get home, the spindle wheel bearings can be serviced properly.
My suggestion is to disassemble the rear spindles and replace the bearings and seals. Use Corvette Central’s #101524 high quality bearing grease for the new bearings and forget about it for many years.
Story and photos courtesy Chris Petris
I am in the process of putting new trailing arms on my 65. The right hand side does not spin the same as the left. The left rotates freely (no describable play), the right however is a bit hard to turn by hand. I was assured by the vendor that this was “normal”. Seems to me that if a bearing doesn’t rotate freely, while not being loose, there will be excess heat and rapid failure. When you try to spin the right side by hand, it is hard to turn and the force necessary to rotate the spindle isn’t constant through the entire rotation.
About how many shop hours should this take? Have a shop quoting 22 hours and that seems excessive. Thanks.
Your play is in the rear itself. The rear via the axle shafts and u joints are what hold the wheel assembly and swing arm in place. To correct this to spec (which I think is as high as .050″ which relates to a lot of movement at the top of the tire), you have to remove and disassemble the rear and put in what thickness shims are needed to tighten it up. Check the carrier bearings for wear as this may affect the movement, However the shims themselves do wear as there is constant pressure on them and the yoke is turning on that shim.
Good luck!
Sorry, I know this is an ancient article, but I have a related problem. I have play in the rear wheels that will result in variable camber. I thought initially that the bearings were bad, but the play is only on one axis (horizontal, not vertical). Now I can’t figure out what is wrong. Looking at the design of the c2 rear suspension, I can’t figure out what positively locates the spindle. Does the axle shaft serve as the upper control arm to the strut rod lower? Is play in this axis normal?
Did you check the strut rod bushings? If you have OEM type rubber bushings, these age and end up with almost no rubber left in the strut rod bushings. Need to check the bushings on both ends of the strut rod (these can be seen from under the car). Also, worn u-joints can on the half shafts will also cause sloppy rear suspension conditions (also need to view from under the car). Could even be a worn/aged out trailing arm bushing in the frame at the front of the trailing arm, this would be harder to see/ascertain condition.
Hello, why not loosen the rocket by the 4 screws on the side of the brake shoes? This will free the complete wheel hub, right? and it can be removed and put back to the press, it’s easier. I have to do it on mine and that’s how I think I do. It ‘s a c3 80.
Sometimes the spindle will not come out no matter what you do with the knocker or even the screw press. In these cases you will have to remove the trailing arm and use a press to get it apart. Recently I did both sides and one came out and the other would not. After pressing it out I check the spindle size with a micrometer. The difficult one was .0005 larger in diameter. I put it in a lathe and reduced the clearance to exactly what what the other side was. Still had the press fit but the next time it will likely come apart with the factory axle press or the thread knocker. I believe the spindle was just out of tolerance and that was the explanation for the difficulty in removing the spindle. The trick is to stop right before you mess it up. Never pound on the spindle even with a factory installed castle nut on the threads. You will mess up the threads.
What is the “forcing screw” you are talking about?
The forcing screw is in the spindle removal press kit (SKU 582427) we offer.
Spindle will not come off.
If you find heavy resistance there are a few things to check. Emergency brake shoes can bind on the rotor if it’s still in place. Back the emergency brake shoe adjustment all the way off and try again. If heavy resistance is still felt with no spindle movement, you’ve got one of those bearings that grew on the spindle. A big hammer can be used to whack the bearing. Press on the forcing screw while tension is applied. This usually gets things moving and then the forcing screw will finish the spindle push out.