A frame off restoration is not for everyone; it’s an involved process that invariably takes much more time and money than you plan. It is, however, the only way to address some problems, and even if you don’t already have a frame issue, it’s the only way to make sure everything underneath the car is as solid as what you’re doing to the rest of it.
The good news is, while all the later work may take a lot of time, actually lifting the body isn’t too time consuming. If you start in the morning and have all your tools ready, it’s possible to have it done by lunch. We’ll cover the high spots in the accompanying photos and captions, but first a few general observations.
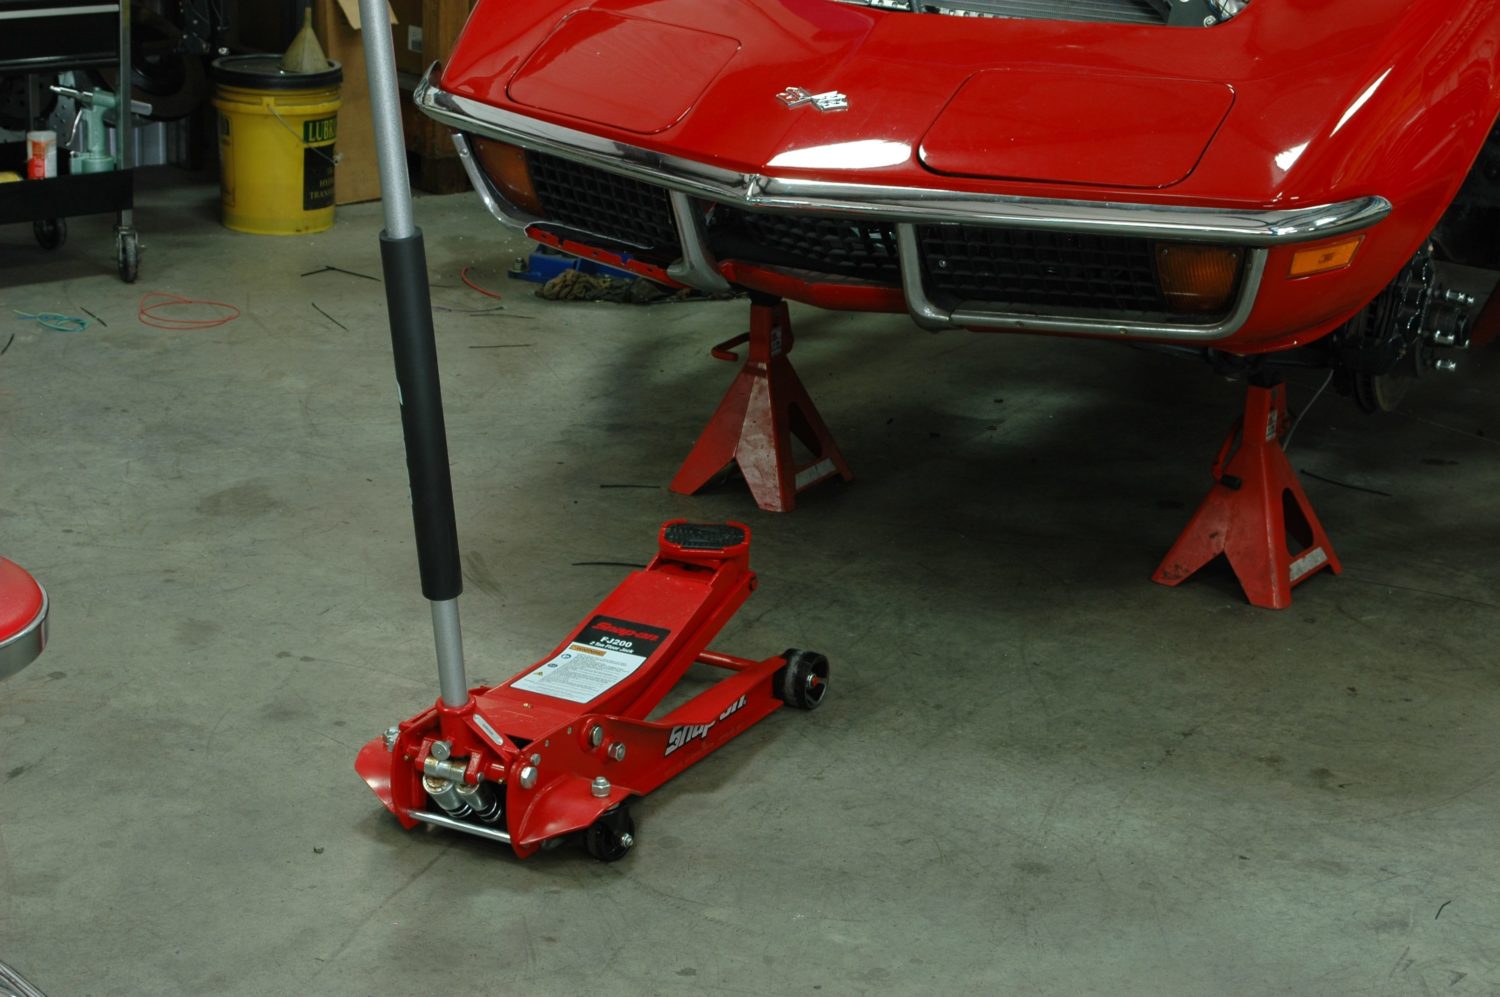
Much of what needs to be disconnected is under the car, so you’ll either need a lift or jackstands to get the car up high enough to work under it safely. I tend to be very conservative about lying down under a ton-and-a-half car, and you should be too. Make sure the car is safe and stable before you get under it.
However you choose to lift the body, make sure you have enough vertical travel to get the body to clear the frame. Any strap lift is going to put some pressure against the fiberglass on the side of the car, and the shorter the straps the more they will press against the car. Be aware the straps are fairly long and plan accordingly.
While we selected a logical order of disassembly, as long as it’s all done by the time that body comes up, there’s no set order in which these steps have to be done (with the obvious exception of safety hazards, like electricity).
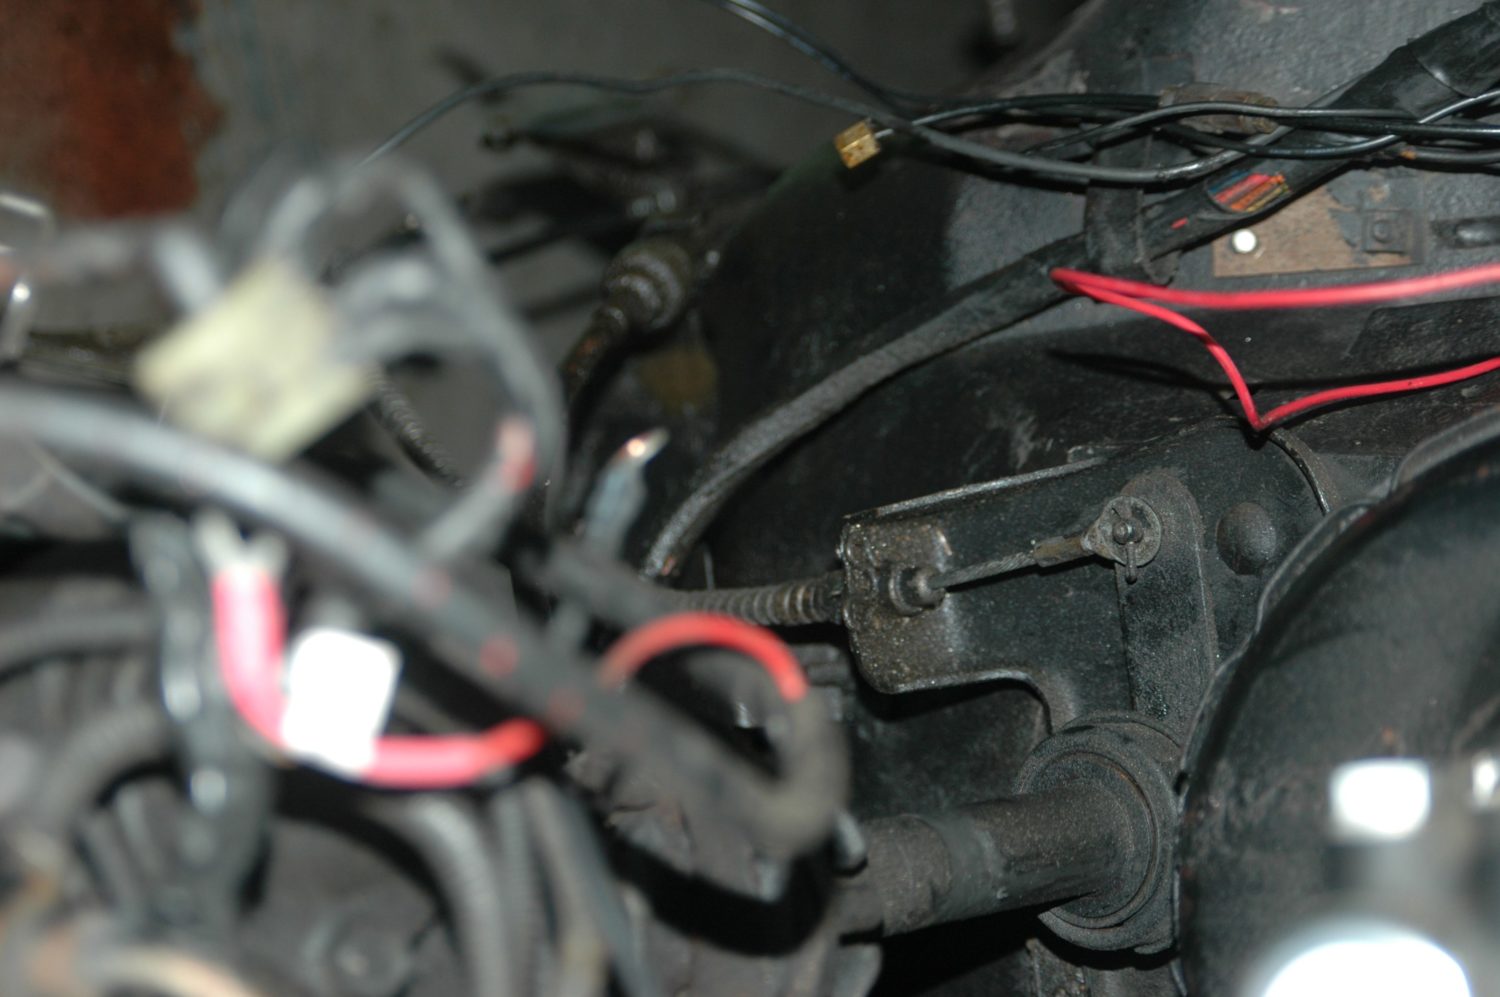
Disconnect all the wiring from the engine, including high-amperage alternator and starter wires, which carry as much power as the battery can produce. The smart mechanic will disconnect the battery long before unbolting the heavy ground wire coming from the starter, which is connected to the body in the transmission tunnel.
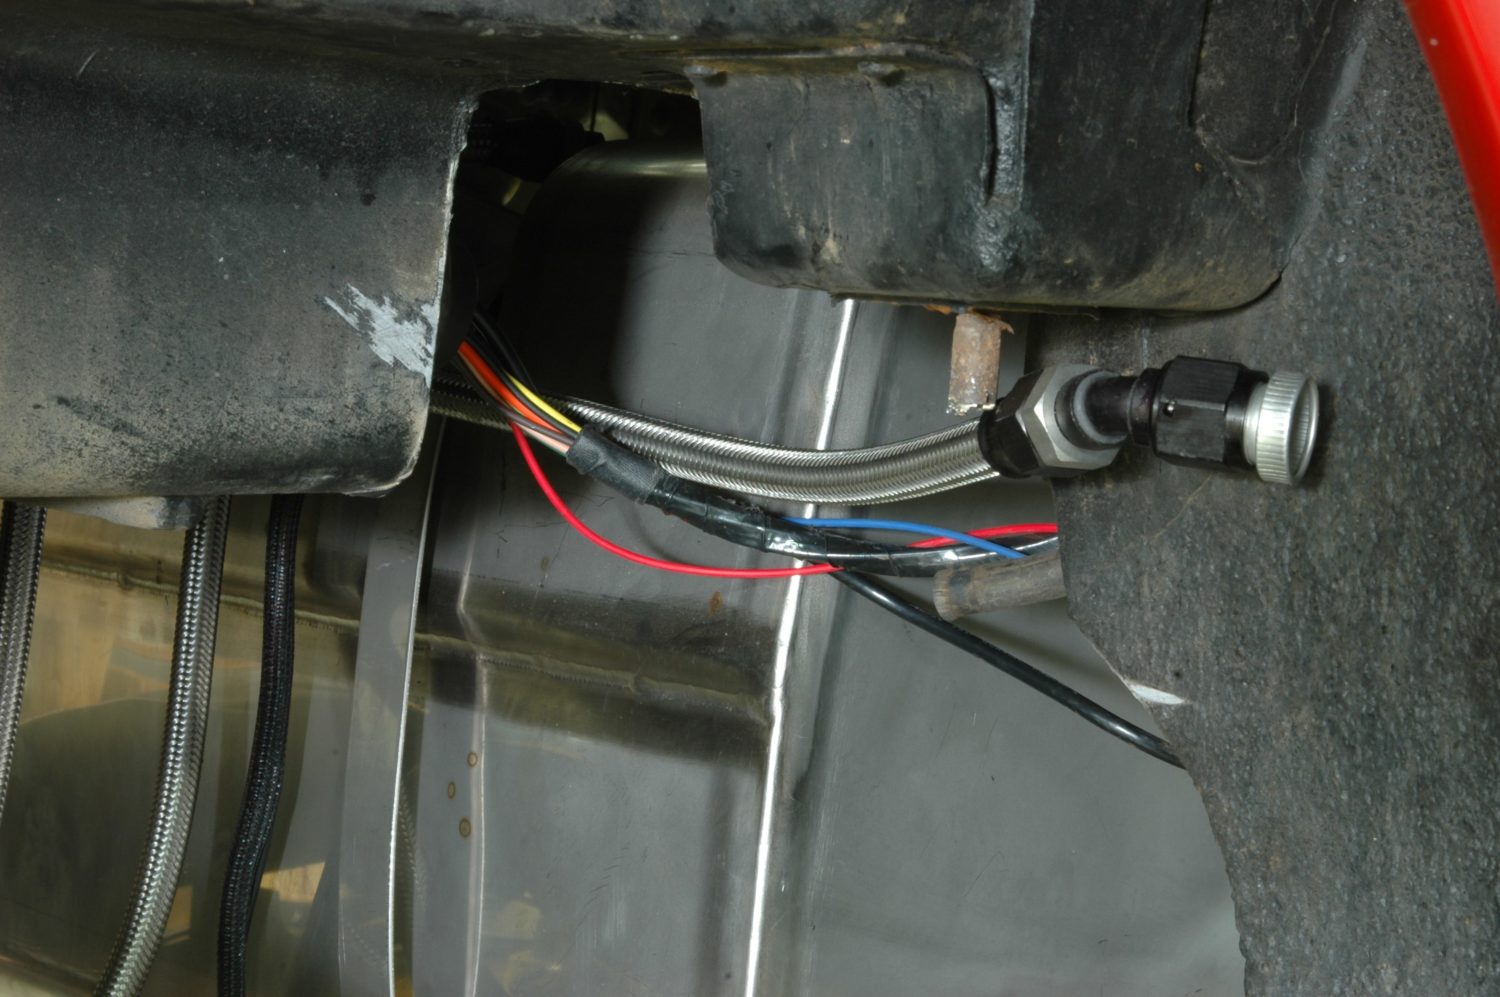
You may not have to disconnect the fuel system to pull the body. The factory fuel line is hard steel attached to the frame that runs to the mechanical pump on the front passenger’s side of the block via rubber hose. The pump then feeds the carb via another rubber hose, often through a filter. If your fuel system is original, no need to disconnect anything. However, if you have an aftermarket with something like a regulator attached to the firewall, you’ll be draining the system. One of the cars we used has an LS engine set up for flex fuel, so we had to remove all of that prior to the body pull. Use plenty of ventilation, avoid sparks or similar sources of ignition, and keep an appropriately-rated extinguisher handy.
Go. Slow. Once you start lifting the body, move very little at a time and check frequently. This is a two-man job: one to lift, one to constantly make sure nothing is interfering. Little mistakes here can cost a lot of money to fix later. So check twice, lift slowly, and stop often to make sure all is well. Then get ready for the fun of building your car the way you want it, with the confidence there’s nothing unknown lurking under the surface.

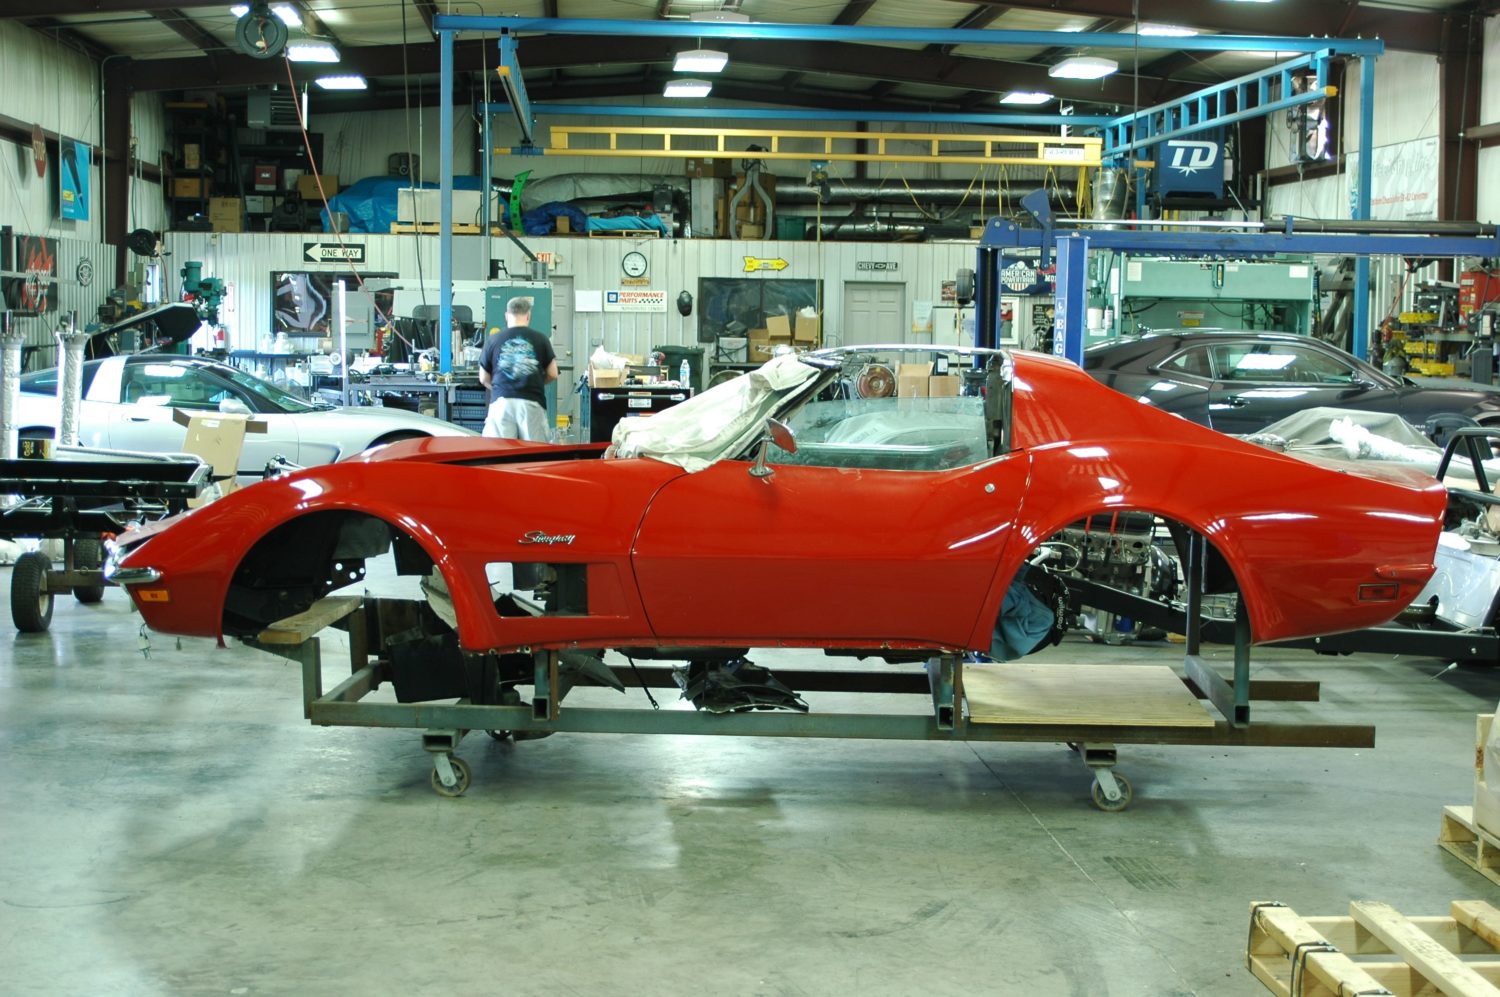
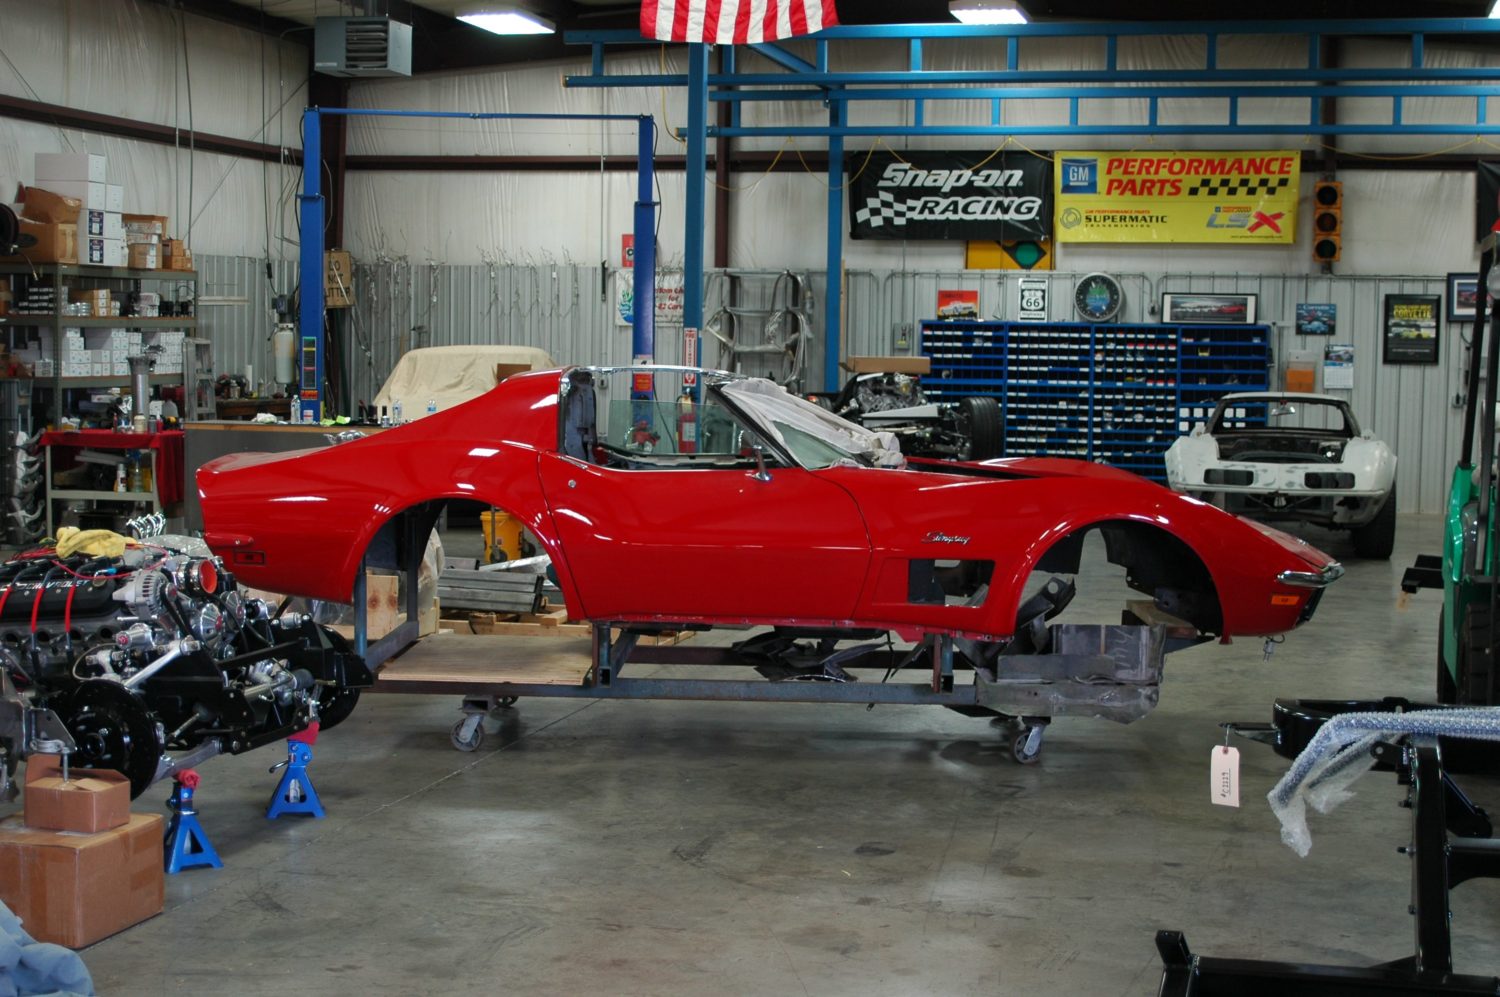
We used two different cars for this tech piece: the first is a ’72 coupe with an LS engine and a fairly recent paint job. The ’72 has Hooker/OK Kustom style sidepipes that will have to come off before we can lift the body. You will also need to remove the hood and disconnect the battery so the car is without electricity.
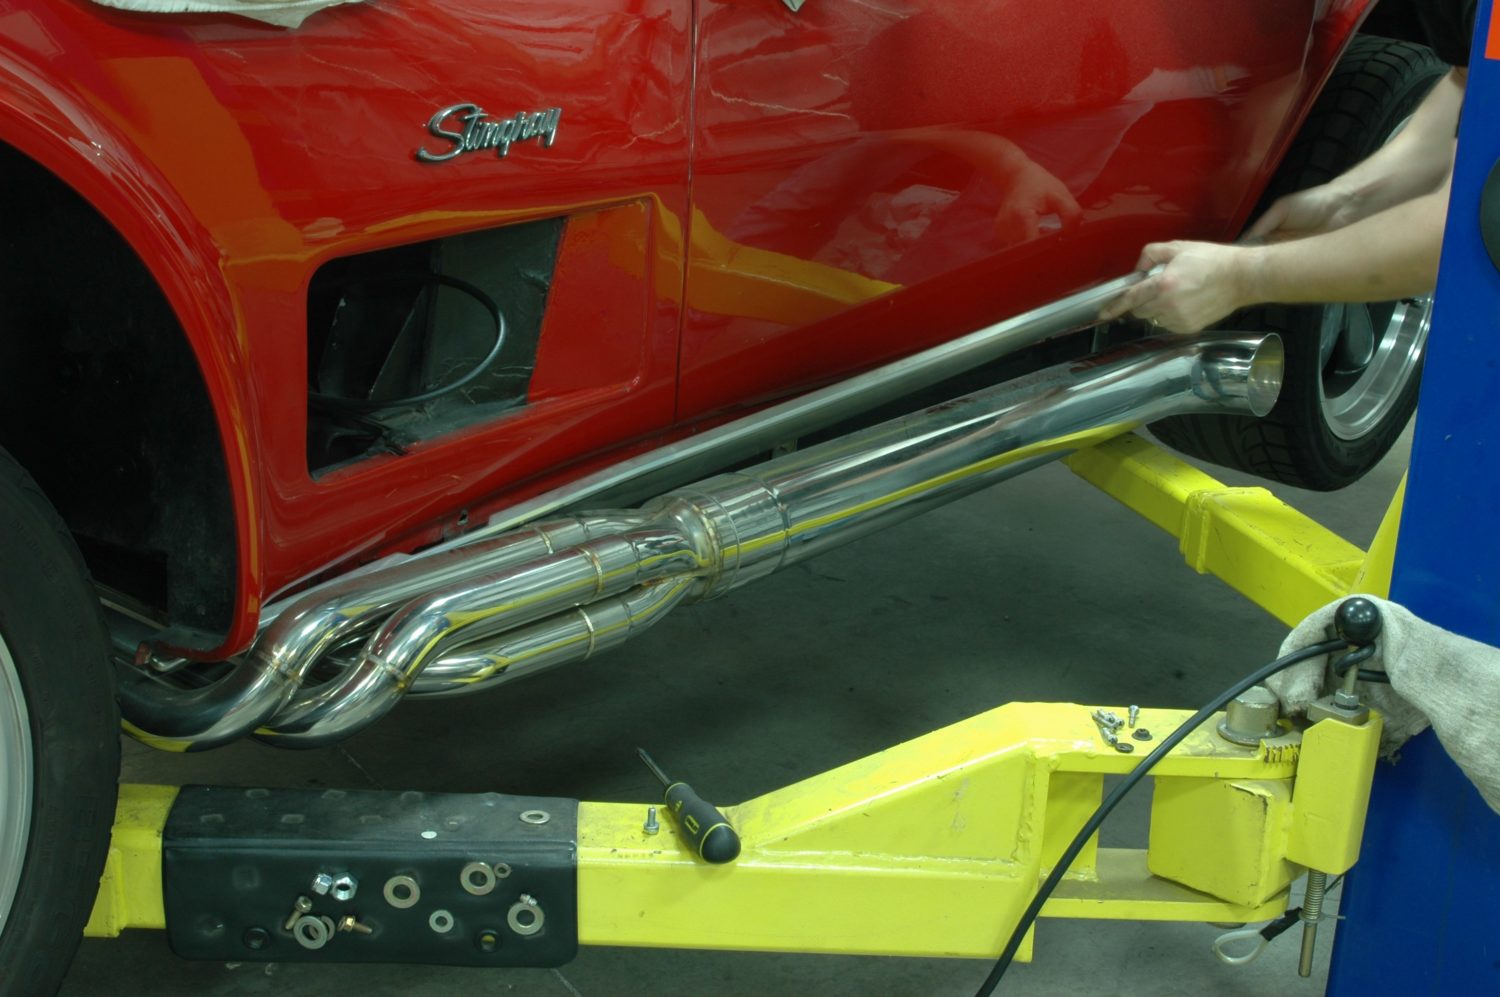
To get to the mounts that hold the pipes to the frame, the rocker moulding has to come off, which is pretty ticklish with good paint. Remove the screws then take your sweet time getting it out from behind the pipe. Even with traditional undercar exhaust, you’ll want the rocker moulding off so you can locate the lift straps.
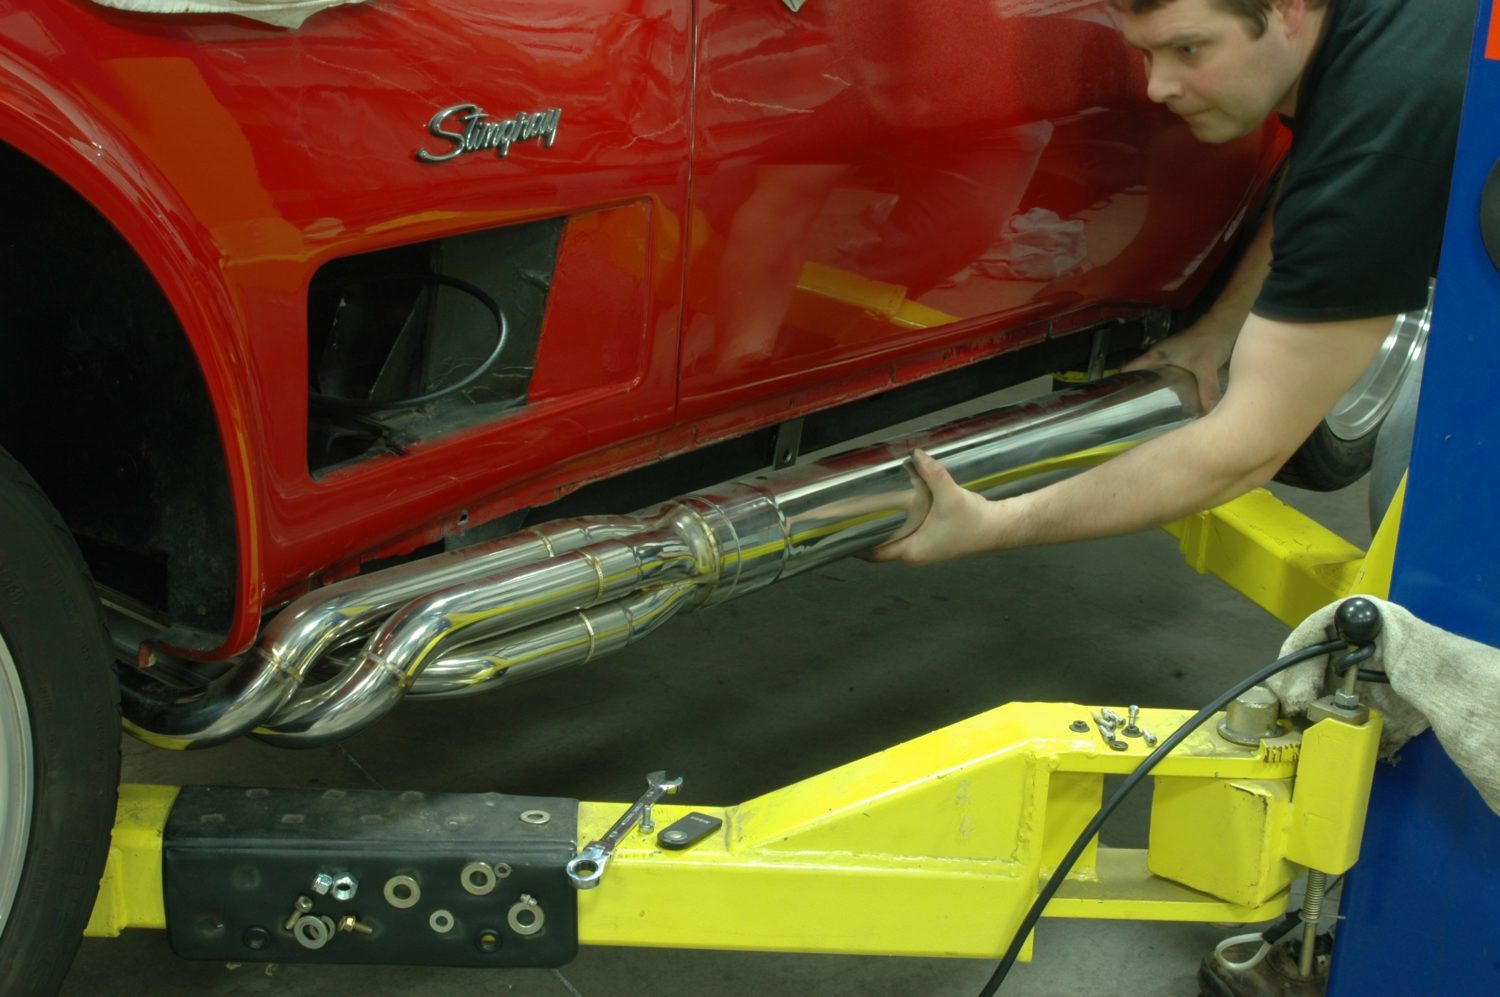
Once the sidepipe brackets have been unbolted from the frame, the pipes can be pulled off from the rear. You may have to tap the pipe with a mallet to get them off. The headers can either be removed from underneath or left in place; we chose to remove them from the rear.

Now for the slow work of disconnecting everything, including the unpleasant task of loosening the radiator hose, which is often frozen to the pipe and generally results in an antifreeze bath. Choose your workplace carefully, and get a bucket ready.

Remove the speedometer cable by unscrewing it from the transmission. If you have an automatic transmission, you’ve got some other cables to disconnect as well.
The shifter linkage on the side of the transmission has to come off: start by removing the cotter pin holding it in place on the linkage. Note the collected grime and filth—nobody said this was a clean job.
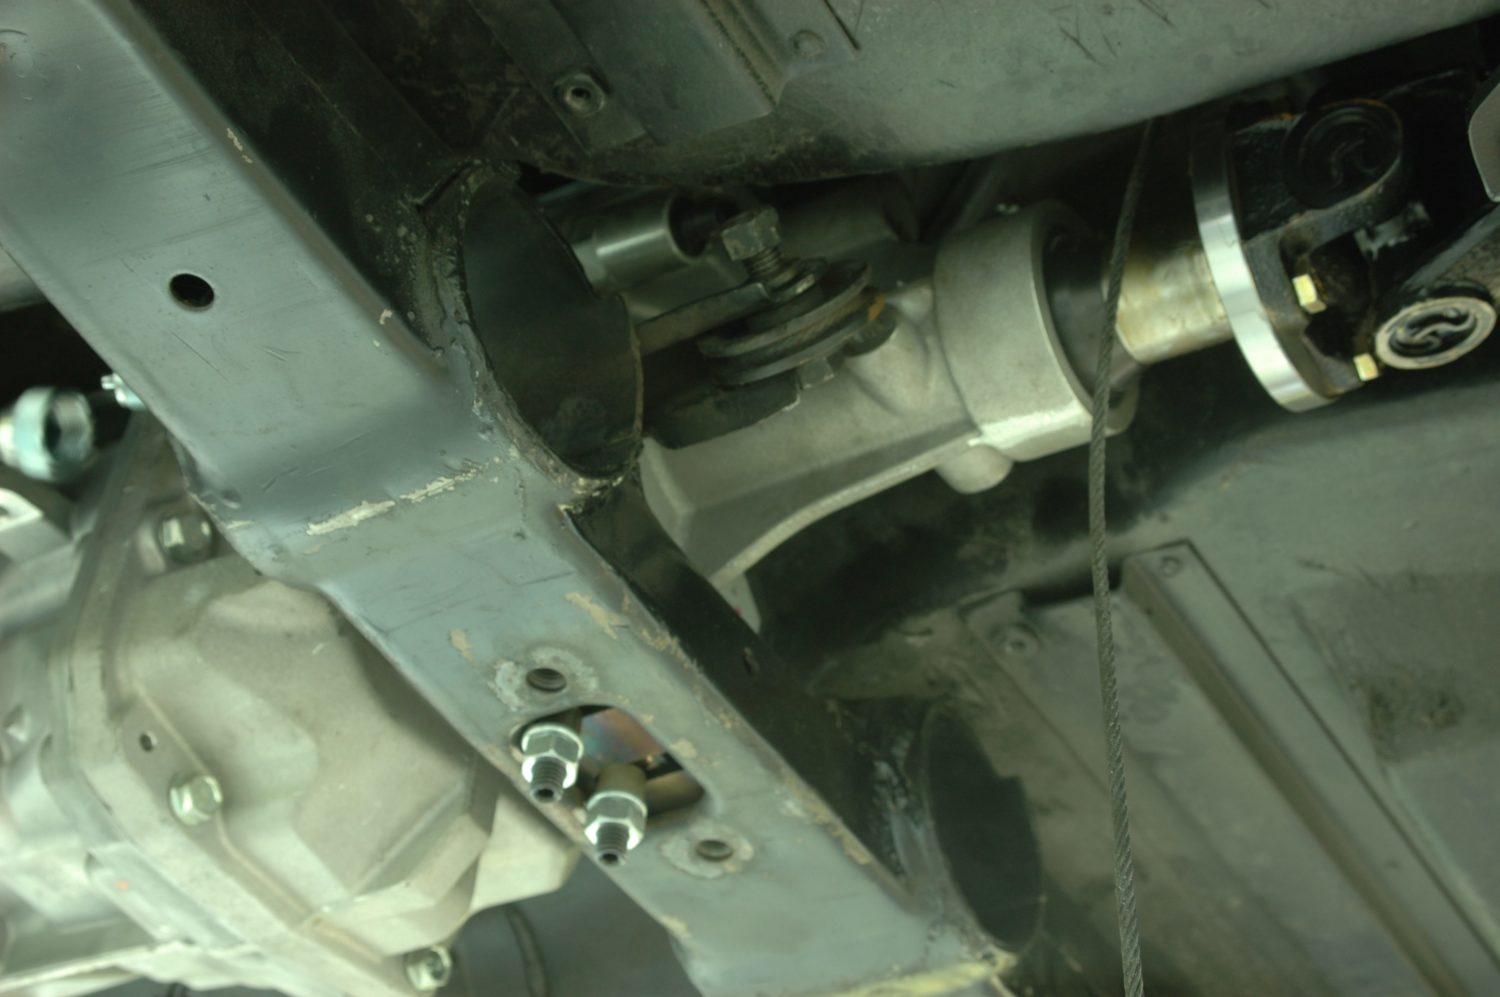
In addition to the shifter linkage and speedometer, you’ll need to remove the steering column lock, as well as disconnecting the column from the rag joint that connects it to the steering box. Note the cotter pin as well as the “Mickey Mouse” clip holding the cable in place.
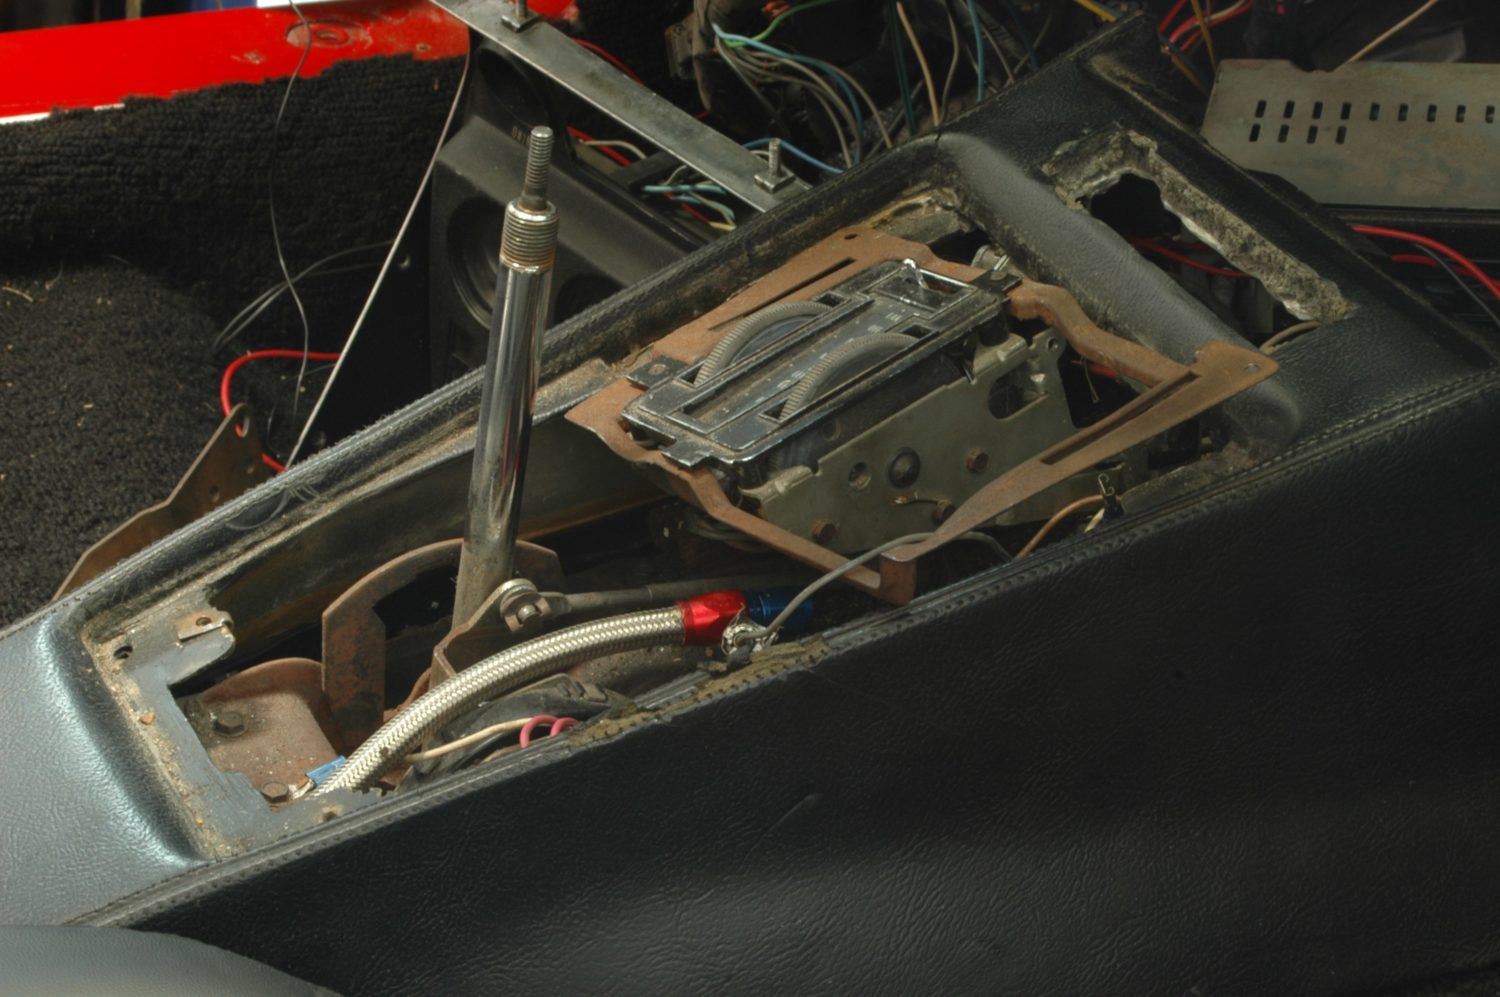
At some point, you’ll remove the shifter. If you’ve got an automatic transmission, this is what it’ll look like once you take the console plate off. Once you’re inside, it’s pretty obvious how to get it all apart.
This is where the shifter cable passes from the shifter itself to the automatic transmission; removing the shifter now once the cable is free means one less dangling thing to snag as the body comes up.

While the shifter for the automatic trans connects via cable, the manual shifter bolts directly to the top of the transmission, and you’ll need to clear its downward path by removing the shift knob (if not the rubber shift boot as well). This is an aftermarket boot on a T56 6-speed transmission.
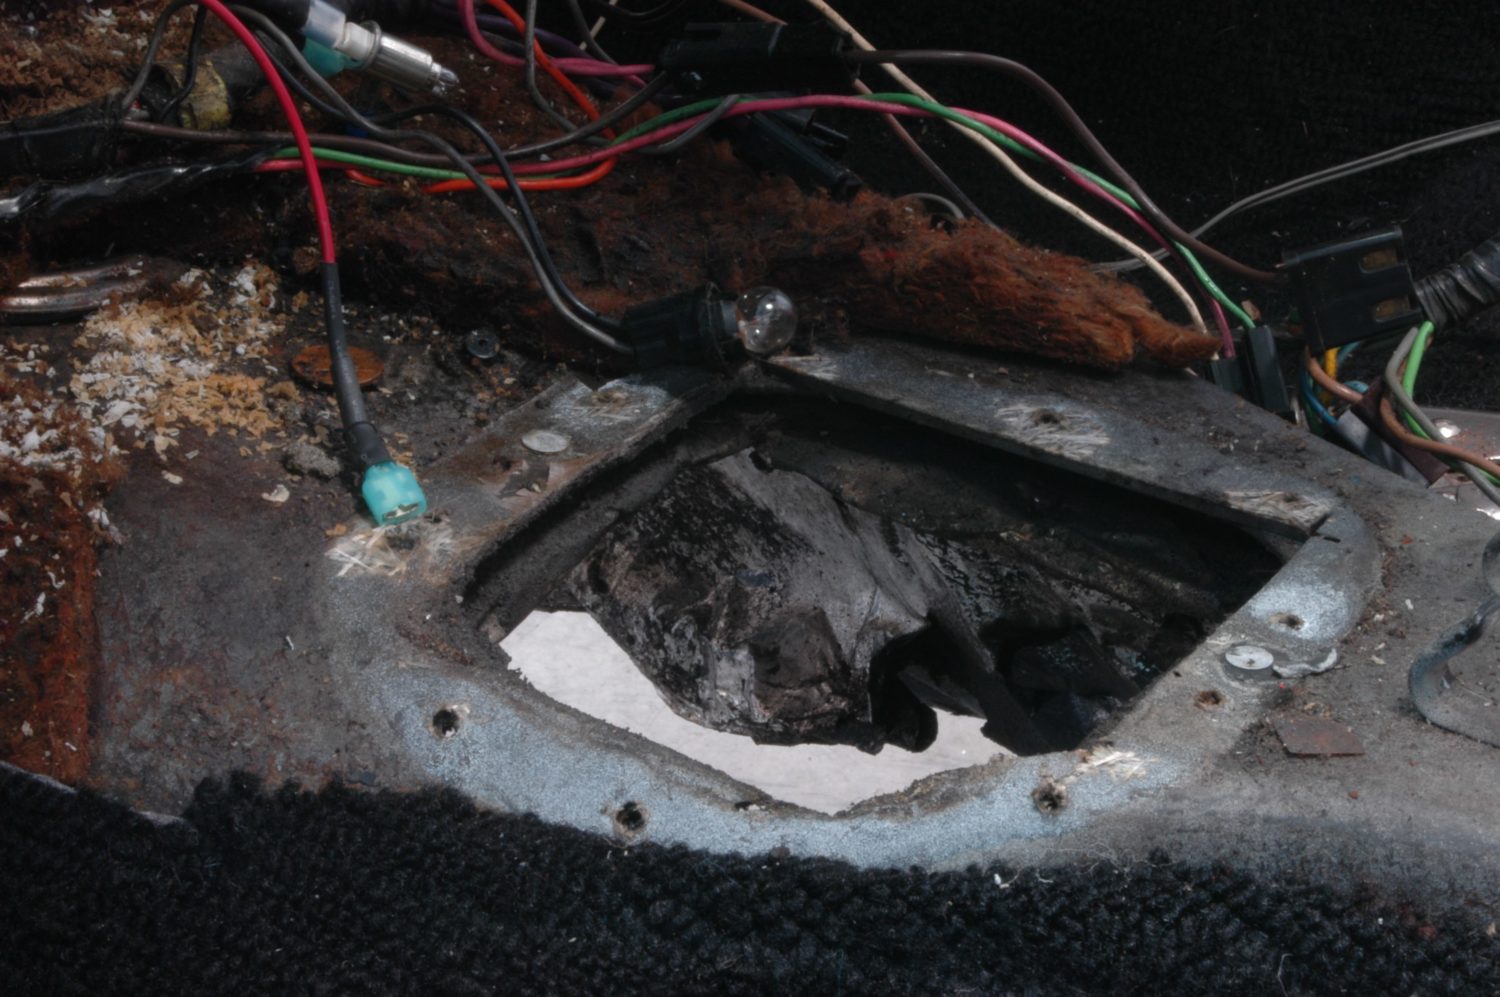
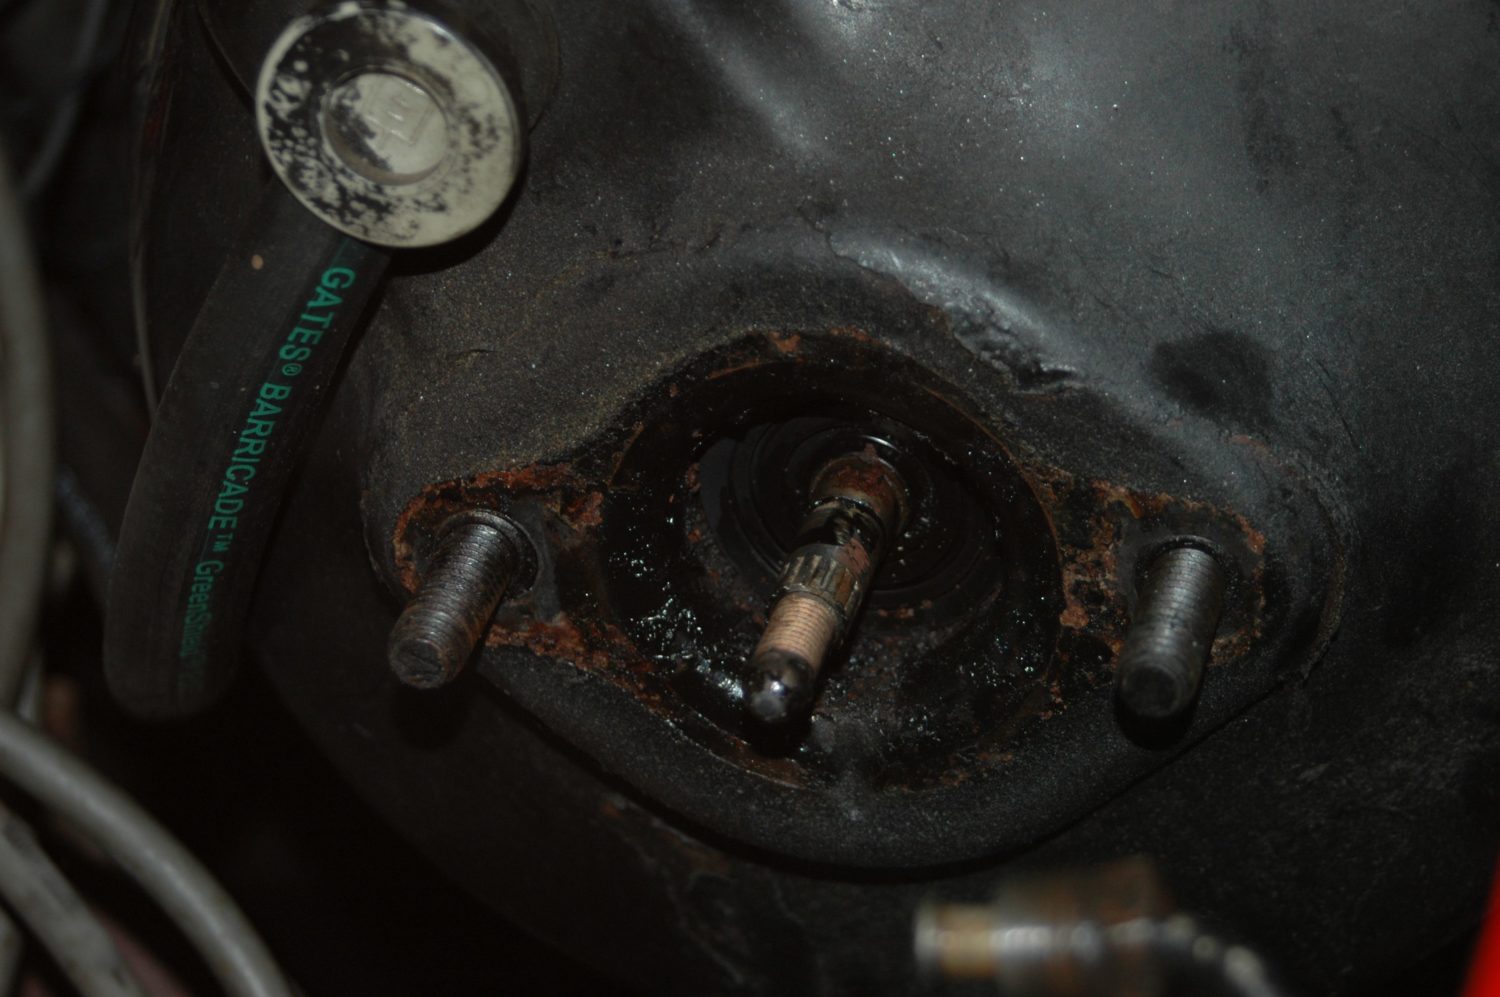
The hole that’s left once the shifter assembly has vacated it. Plenty of room for clearance here.
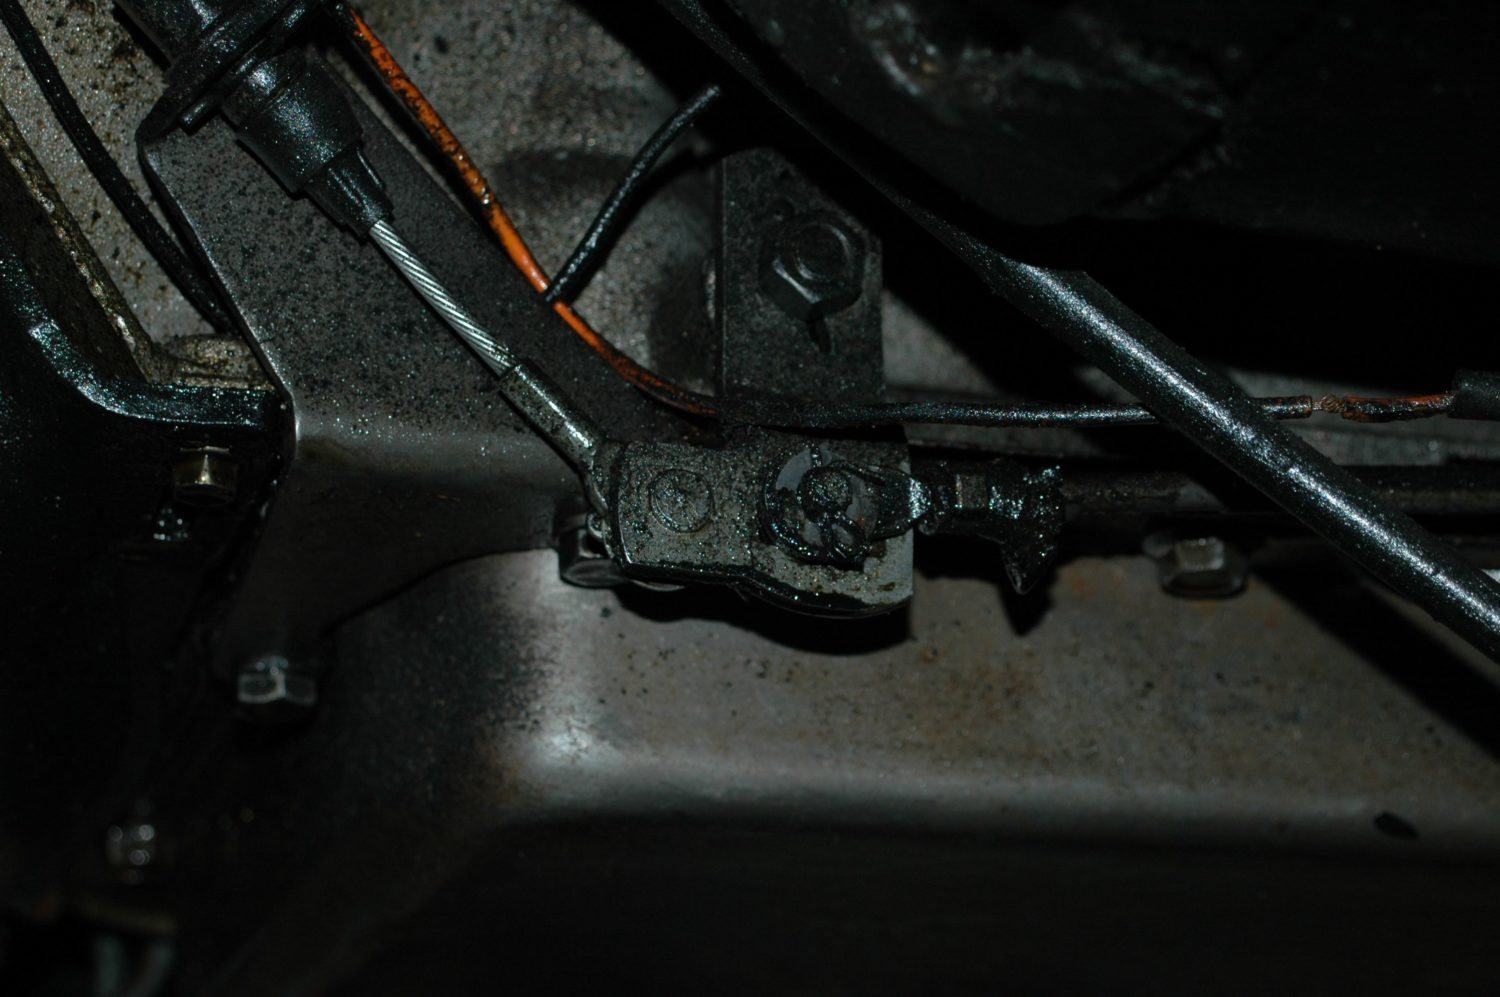
The parking brake cable will also need to be loosened from its yoke-like connection under the car.
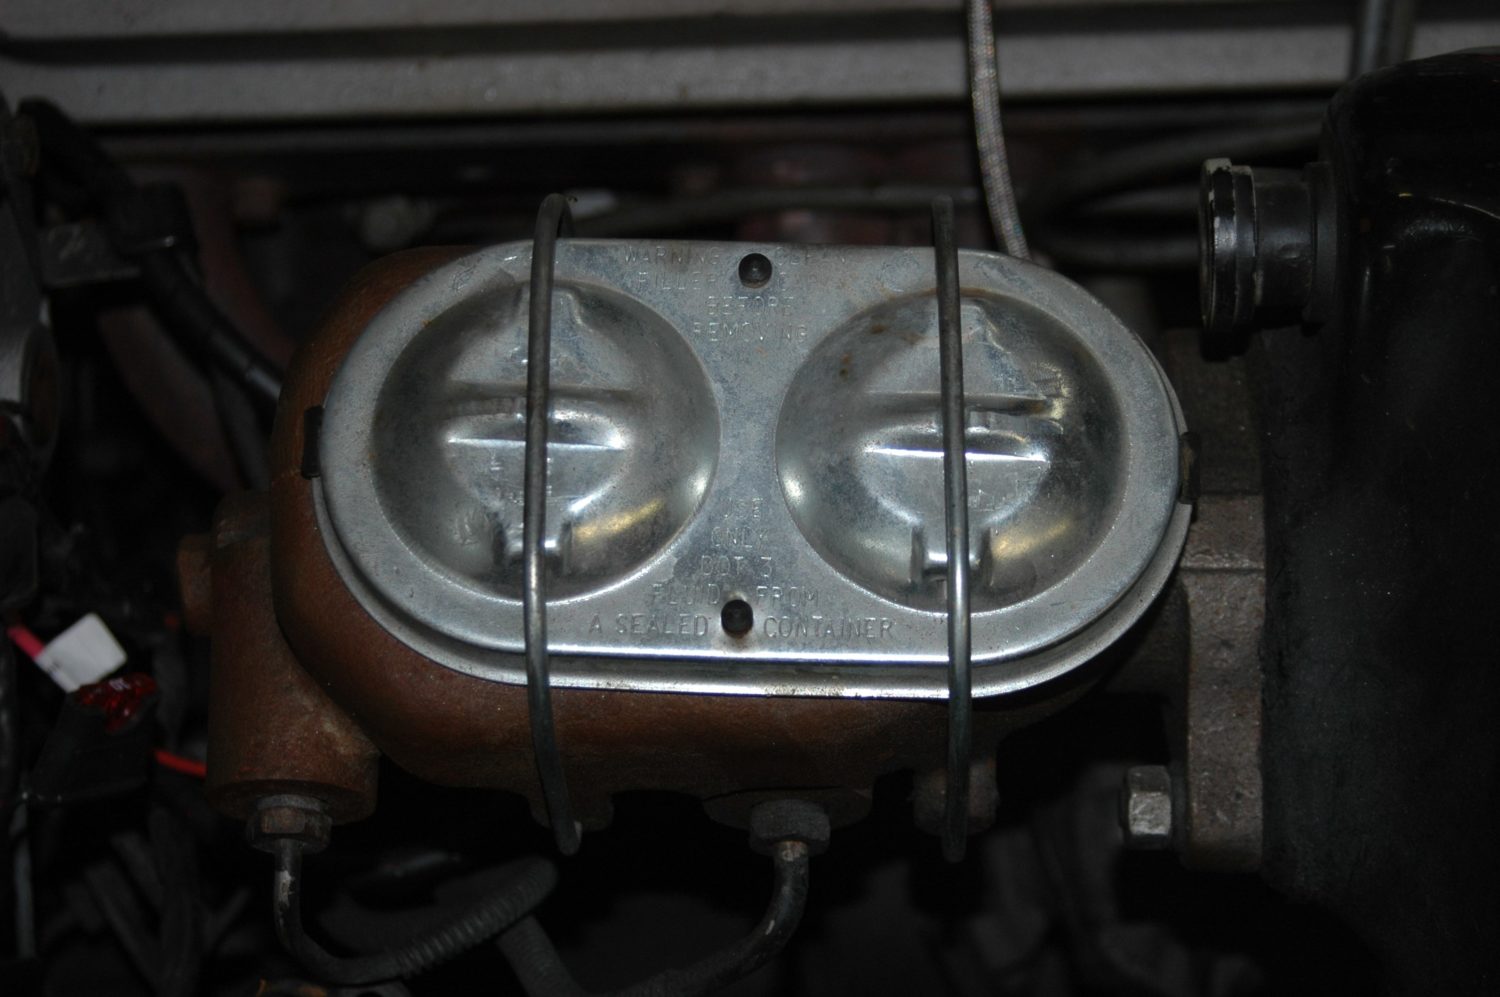
The master cylinder will need to be removed from the brake booster; it’s held to the booster with two bolts at the rear. You can disconnect it from the frame lines if you want to, but it’s much less messy to leave the hydraulic part connected.
The two mounting bolts for the master cylinder, with the operating rod in the middle position.
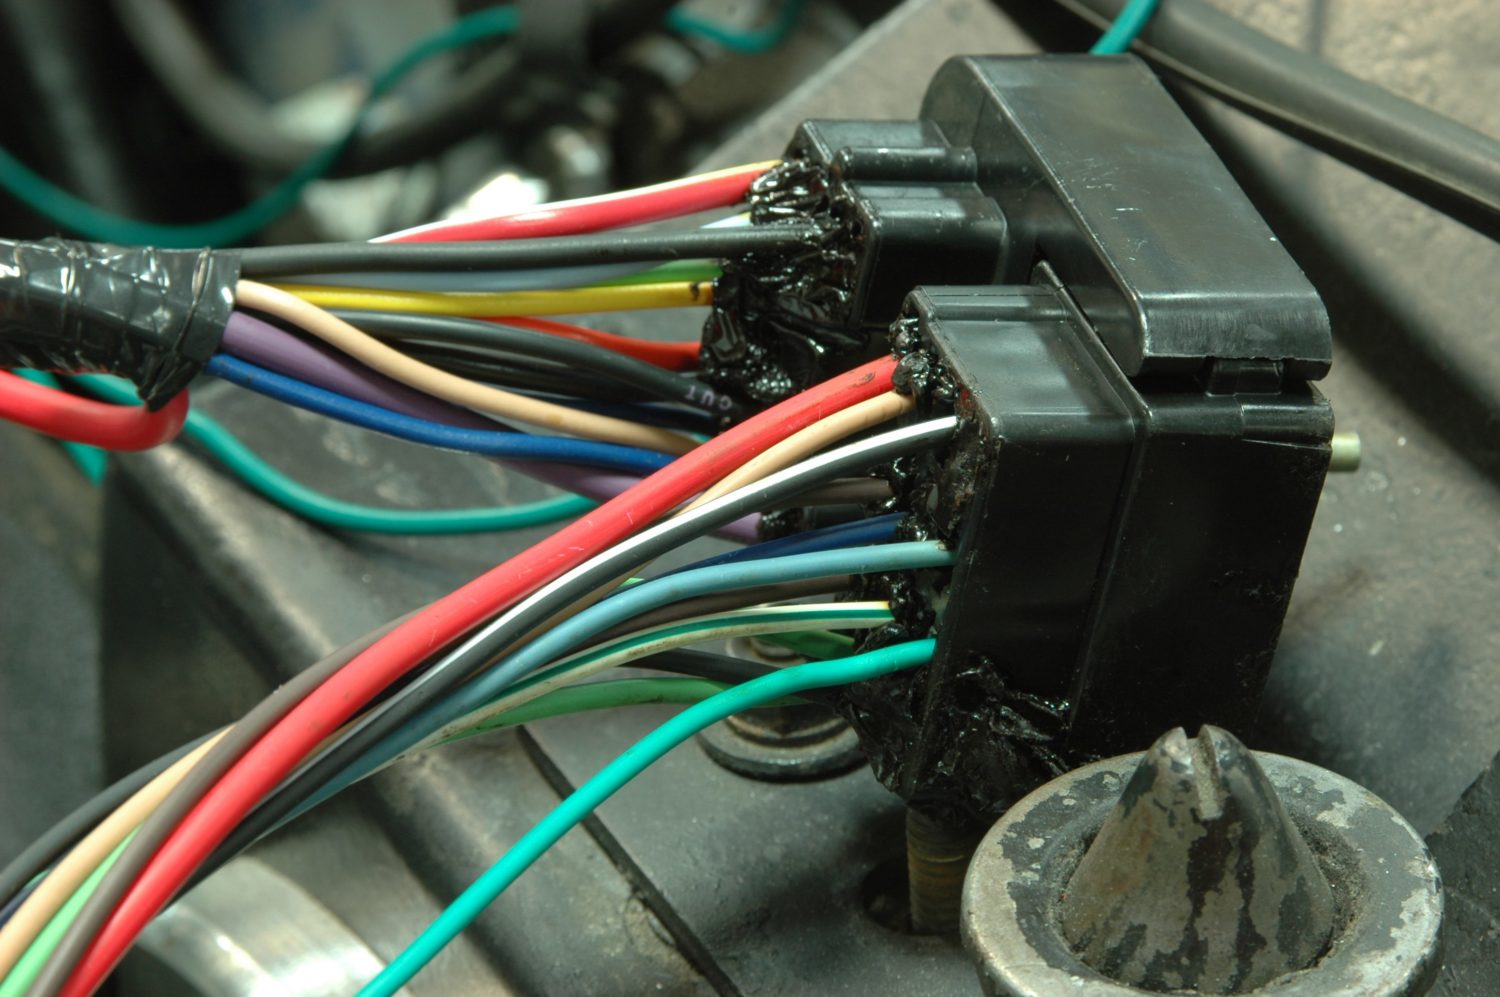
The bulkhead connector for the two engine compartment wiring harnesses. The nearest one is the front lighting harness, which will need to be disconnected from the alternator and brake combination (proportioning) valve. The further one contains most of the engine wiring, all of which will need to be disconnected.
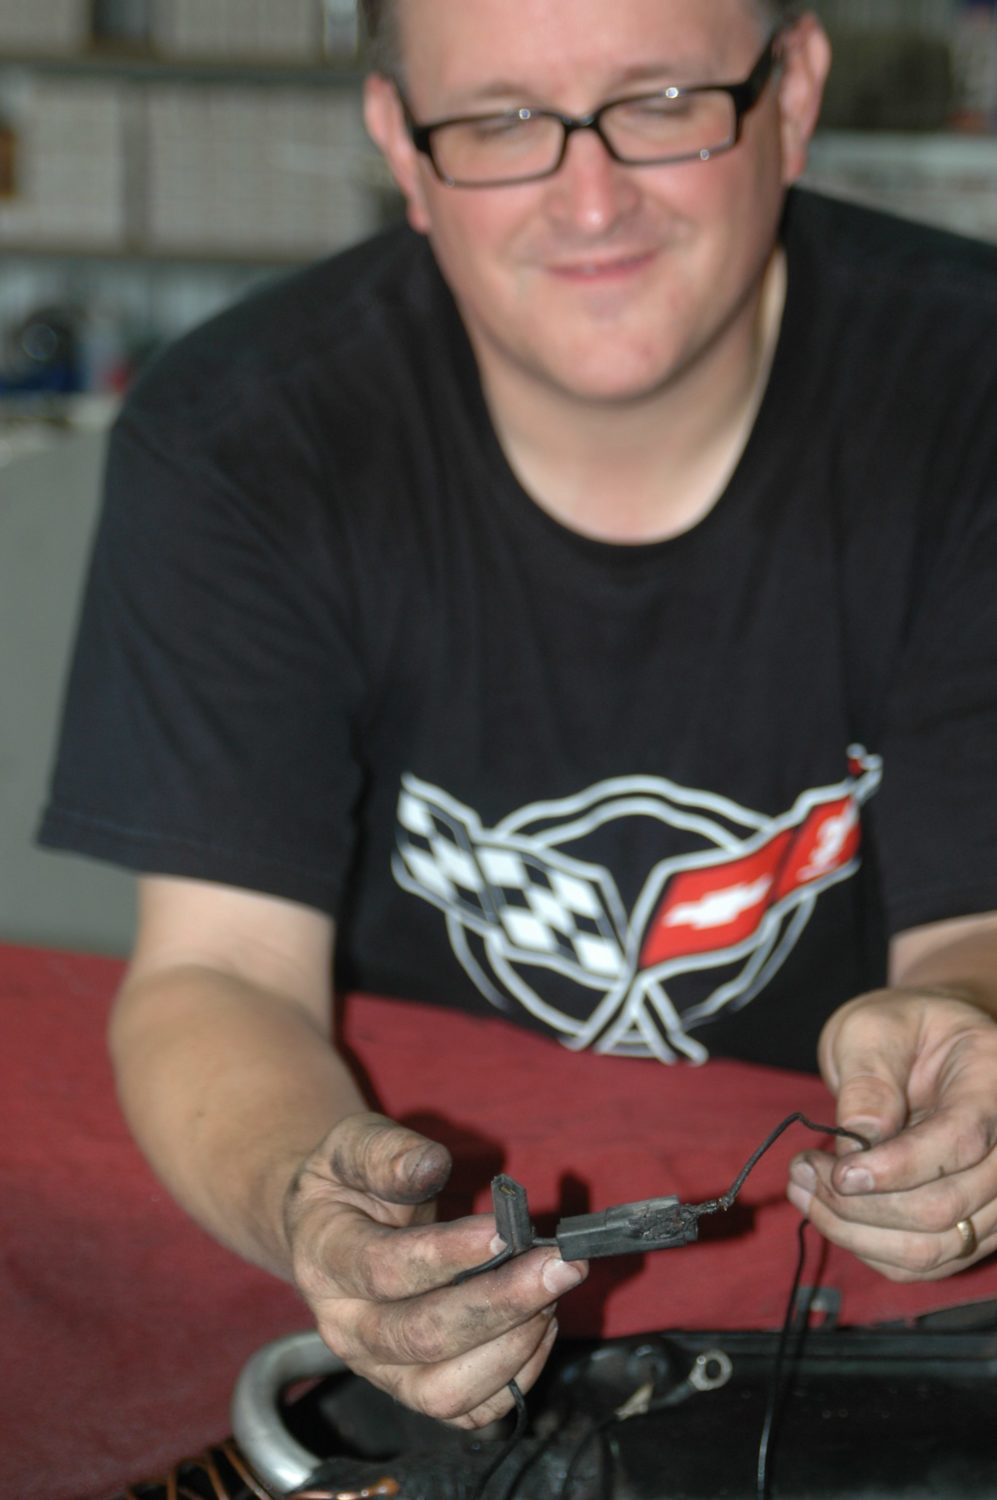
Once you get inside, expect to find melted wires like this, as well as the assorted duct tape and twist nuts we found. Now is an exceptionally good time to replace all the wiring harnesses with new ones. It’s cheap insurance against burning the car down later.
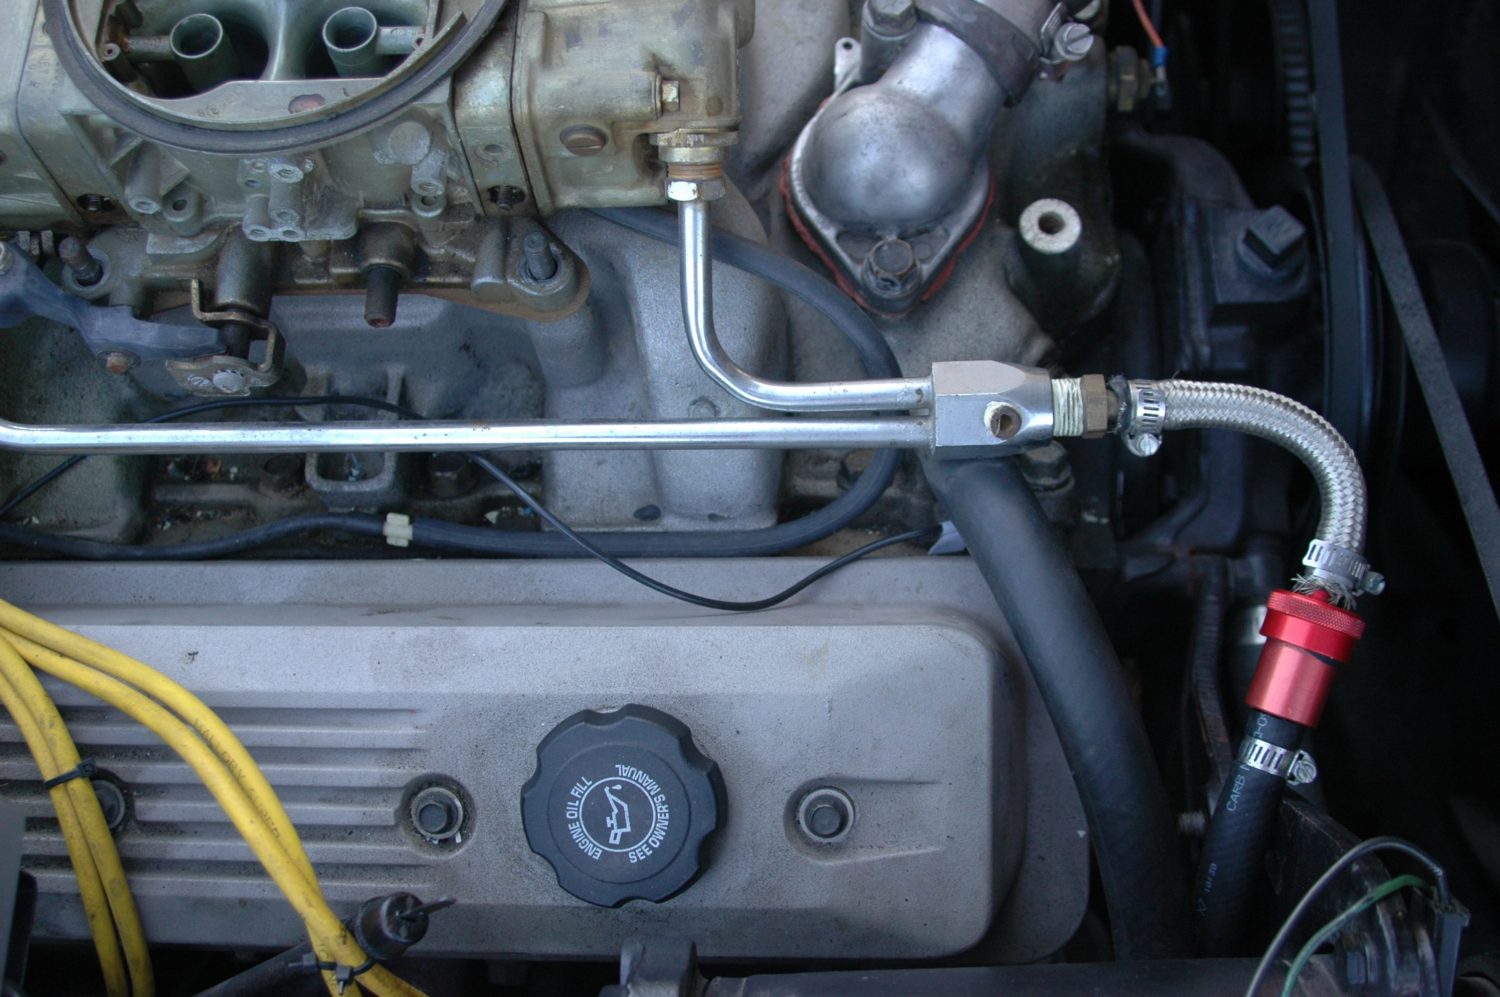
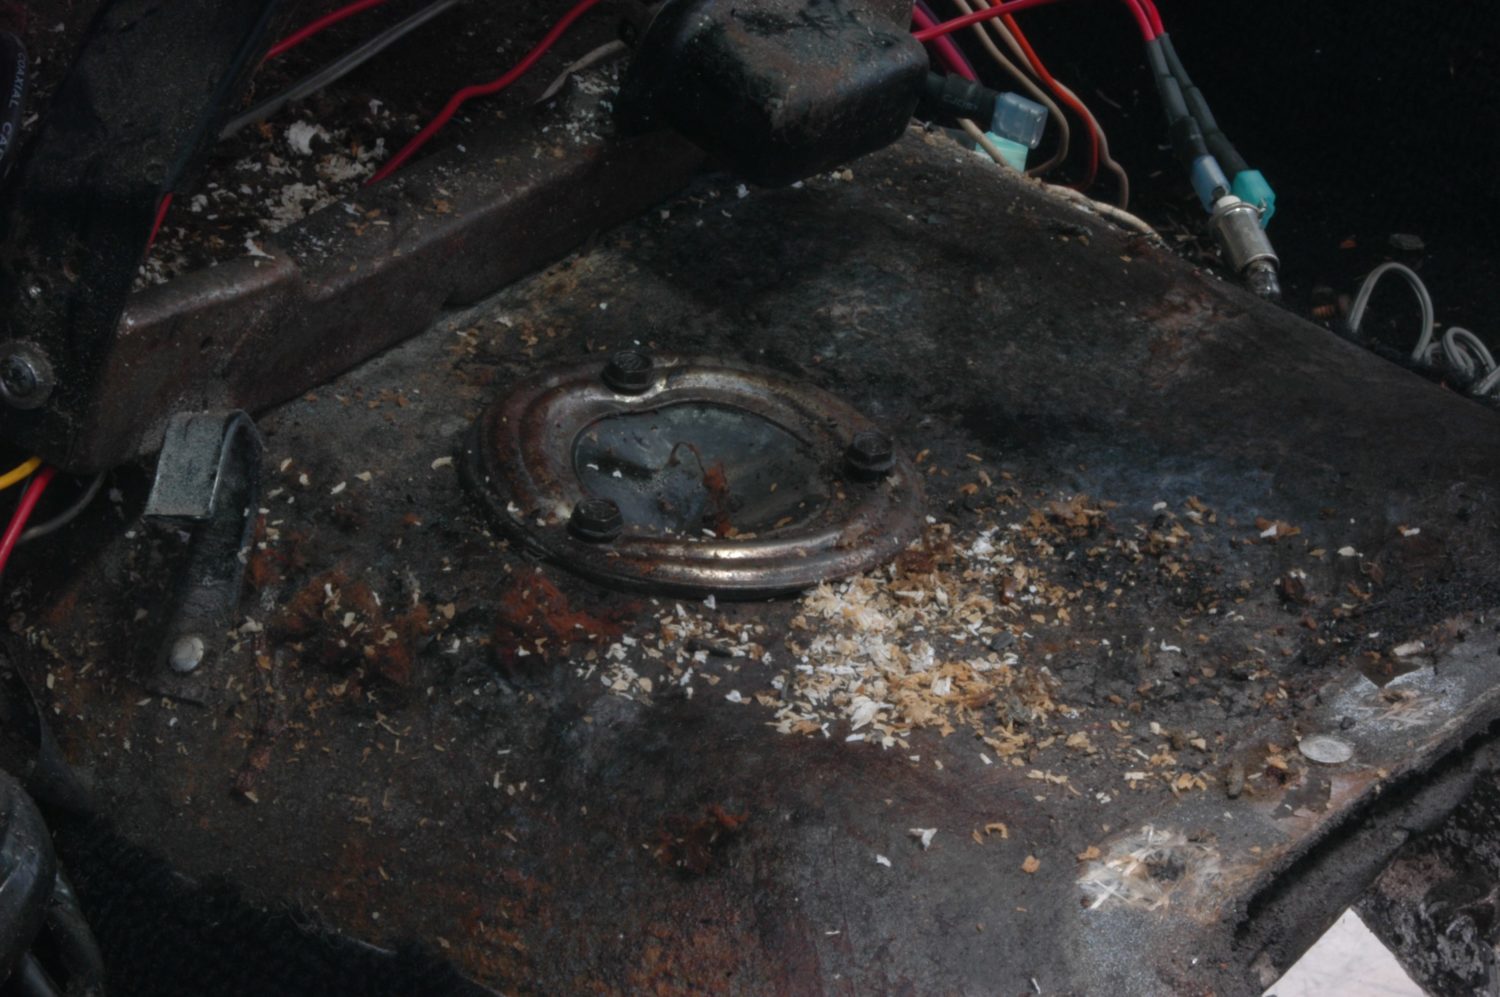
A fairly typically fuel feed arrangement. If your fuel system is in the original configuration, there’s no need to remove it prior to pulling the body, as the motor, pump, and lines will all stay with the frame.
The front bumper doesn’t have to come off, but the rear bumperettes do. They bolt to internal brackets on the inside of the body, and they’ll have to come off too. Take good notes and lots of pictures to make sure the correct brackets go back in the right places.
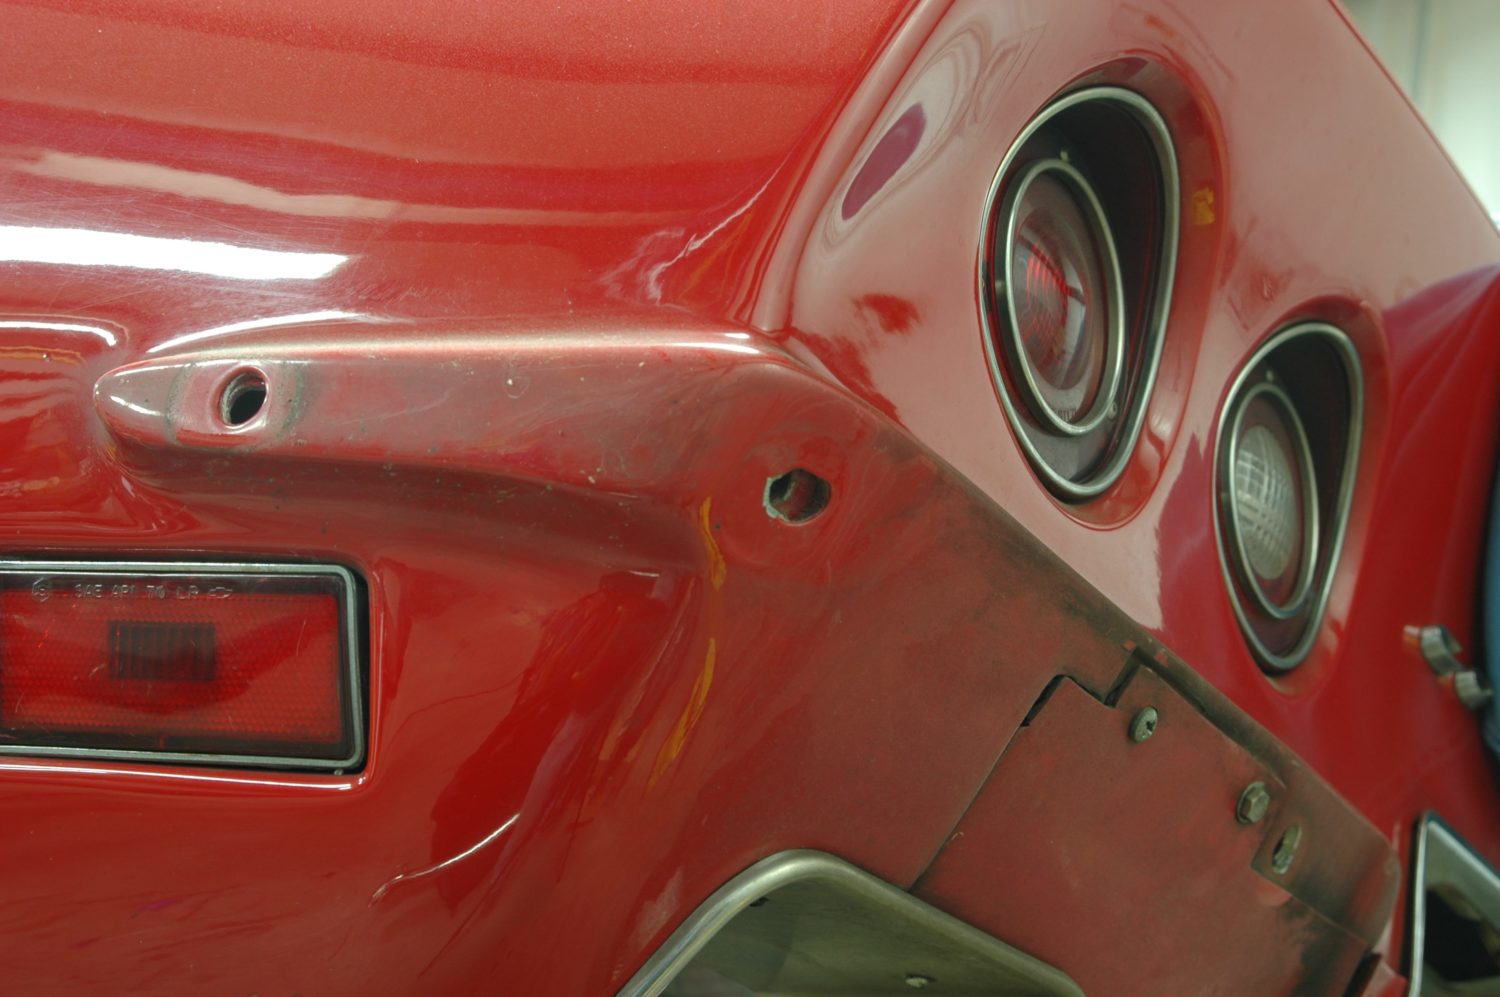
The rear with the bumperettes removed. Next up are the exhaust bezels; the driver’s side one is visible in the bottom of the photo.
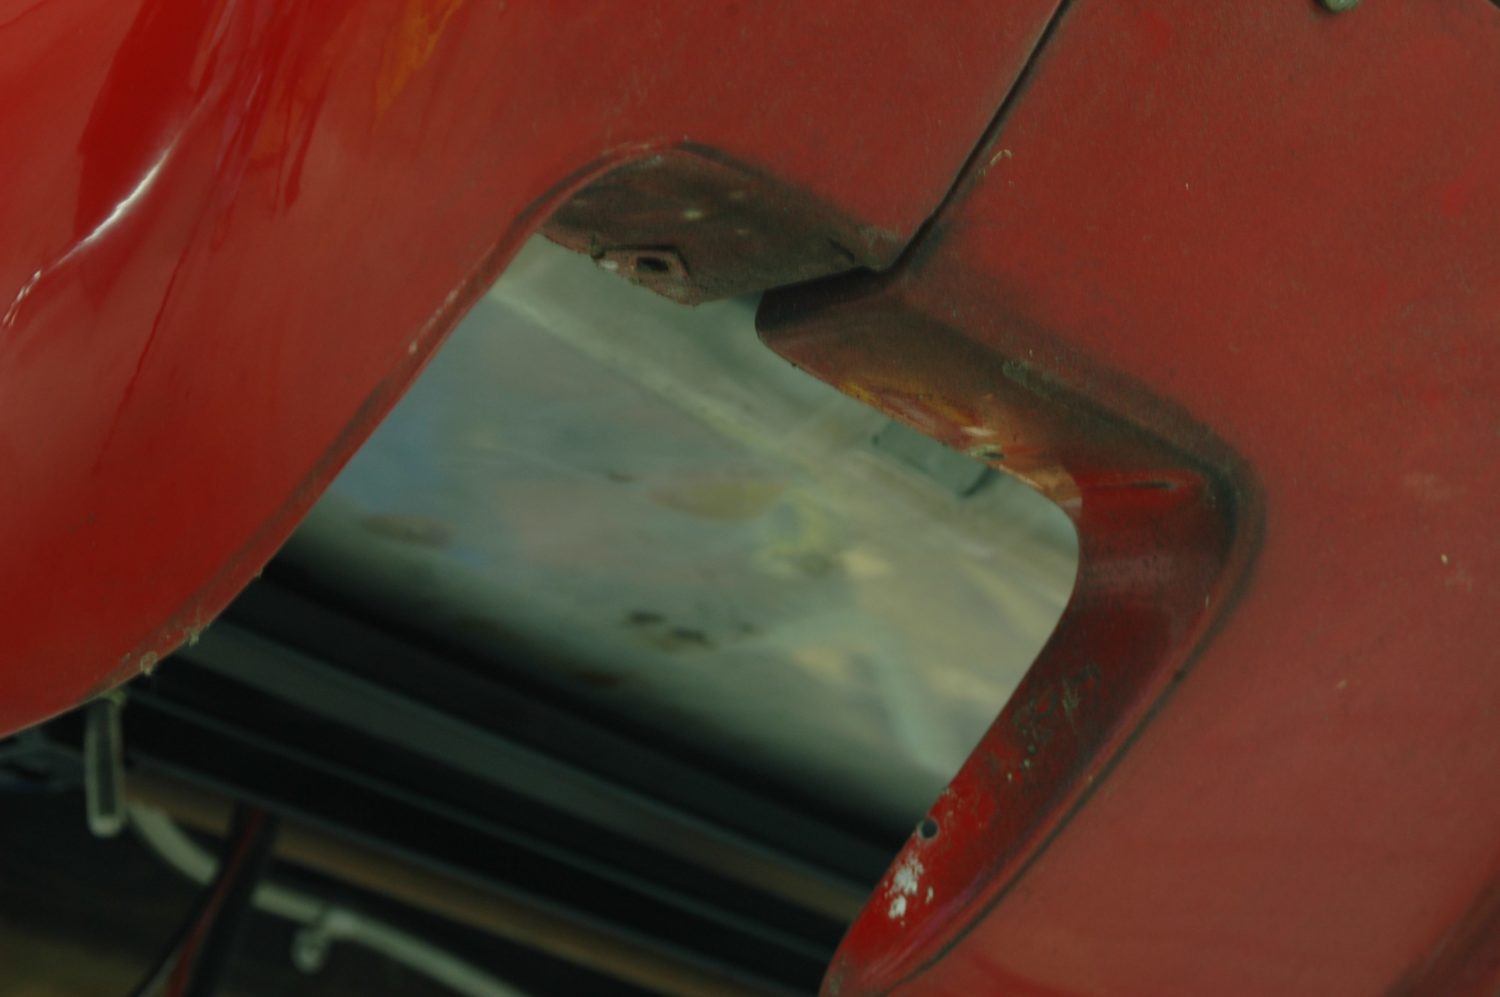
The exhaust bezel screws in place, and is easily removed. Once it’s out, the rear valance panel (to which the bezel is screwed) comes next.
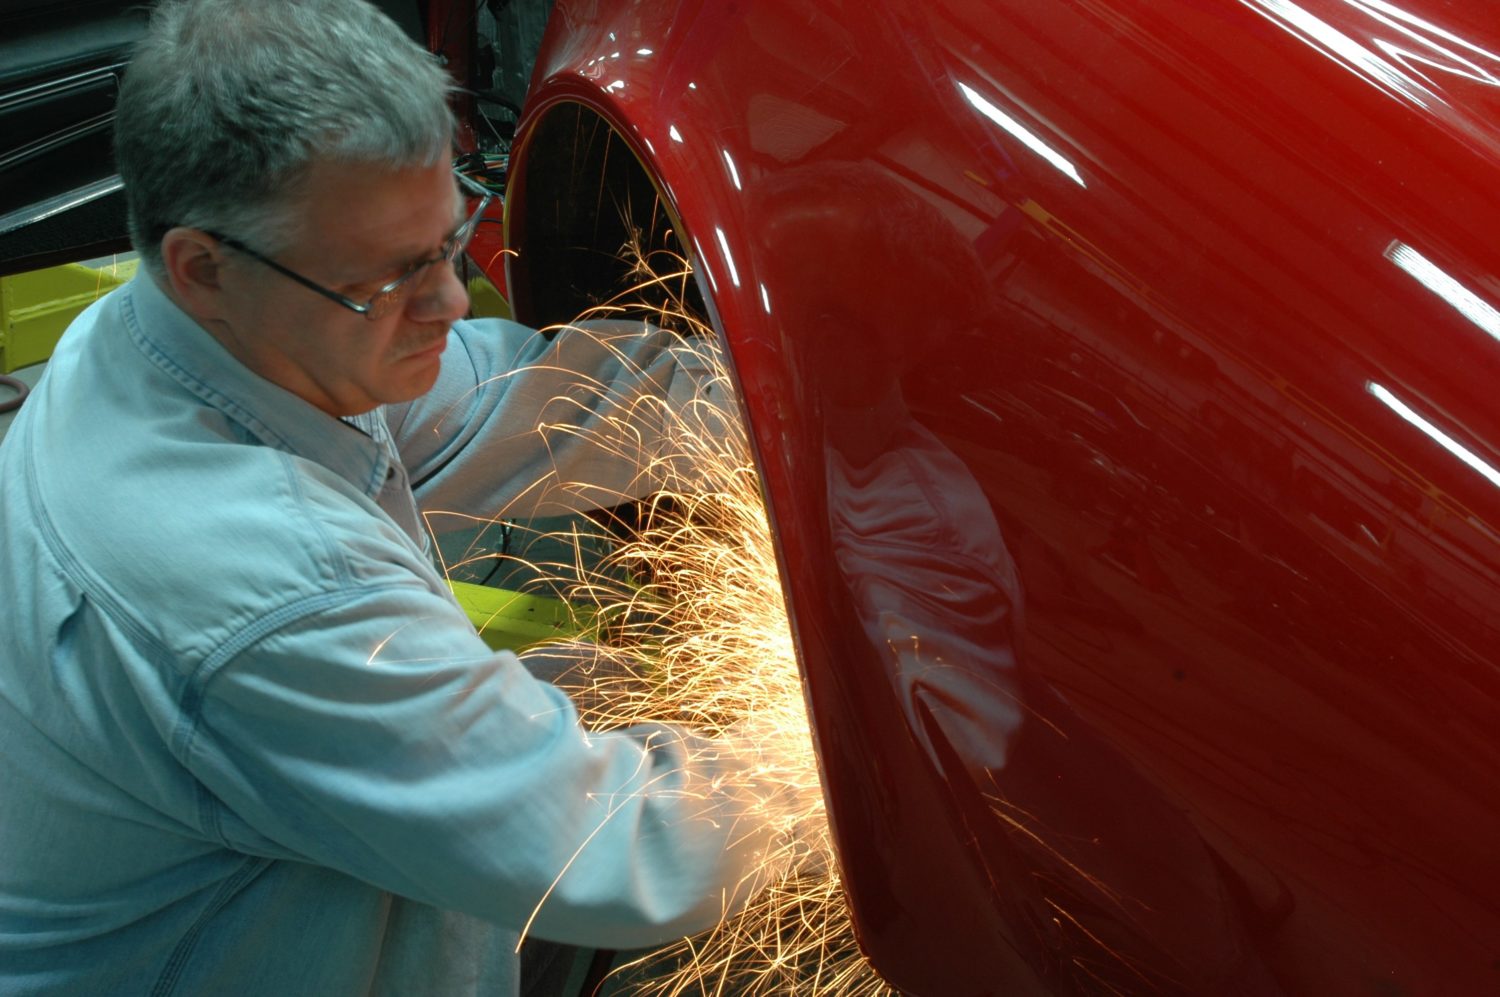
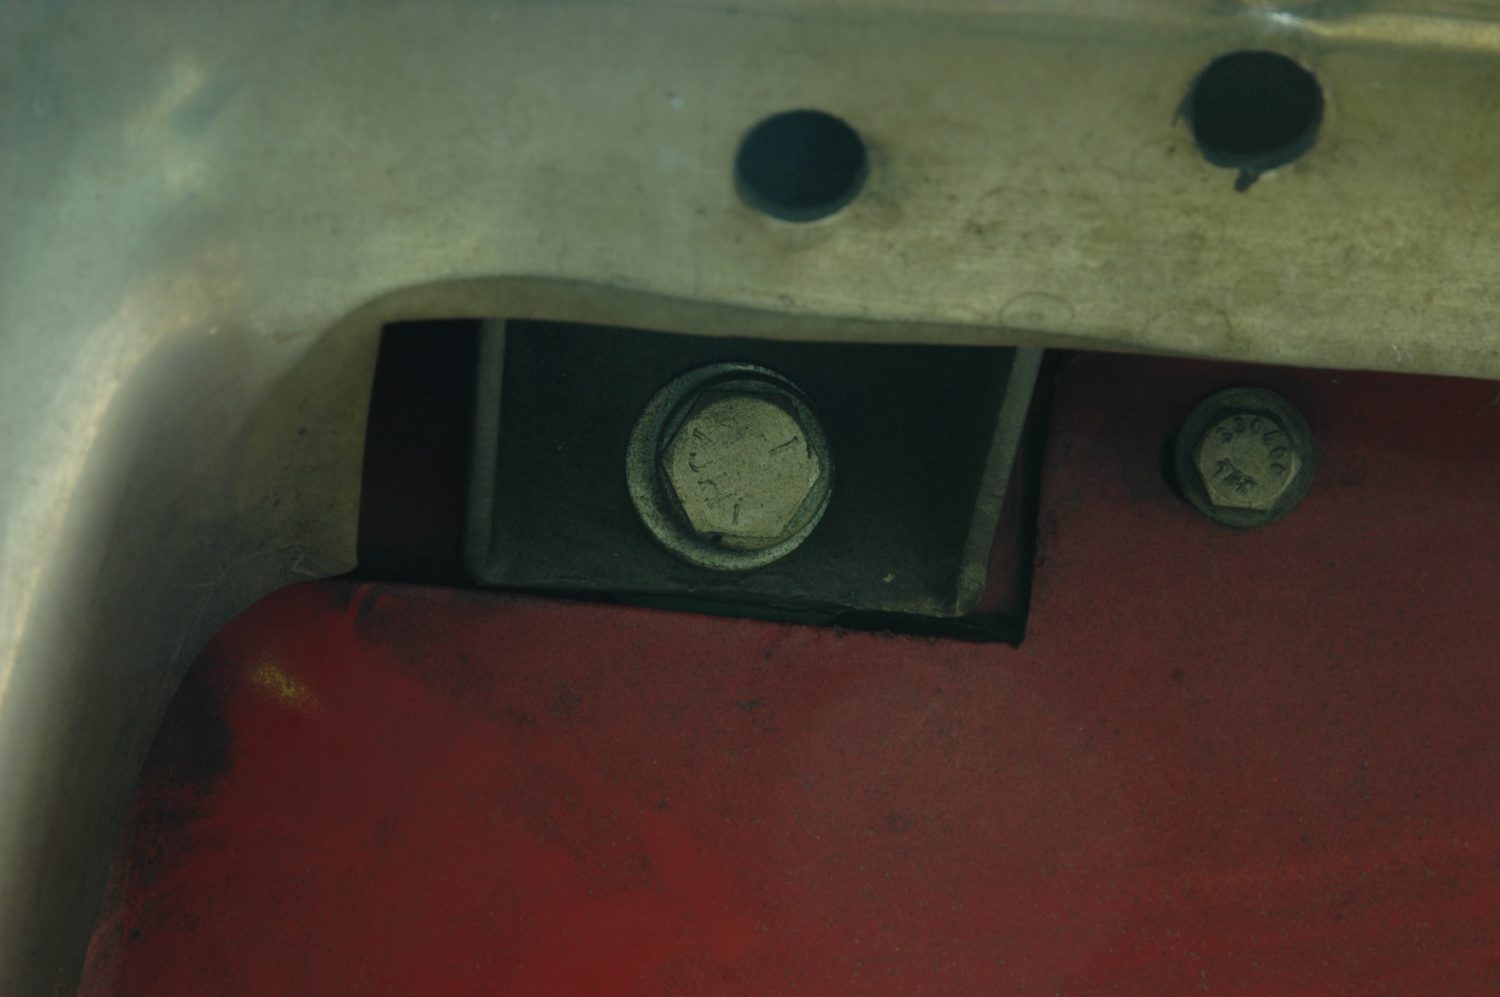
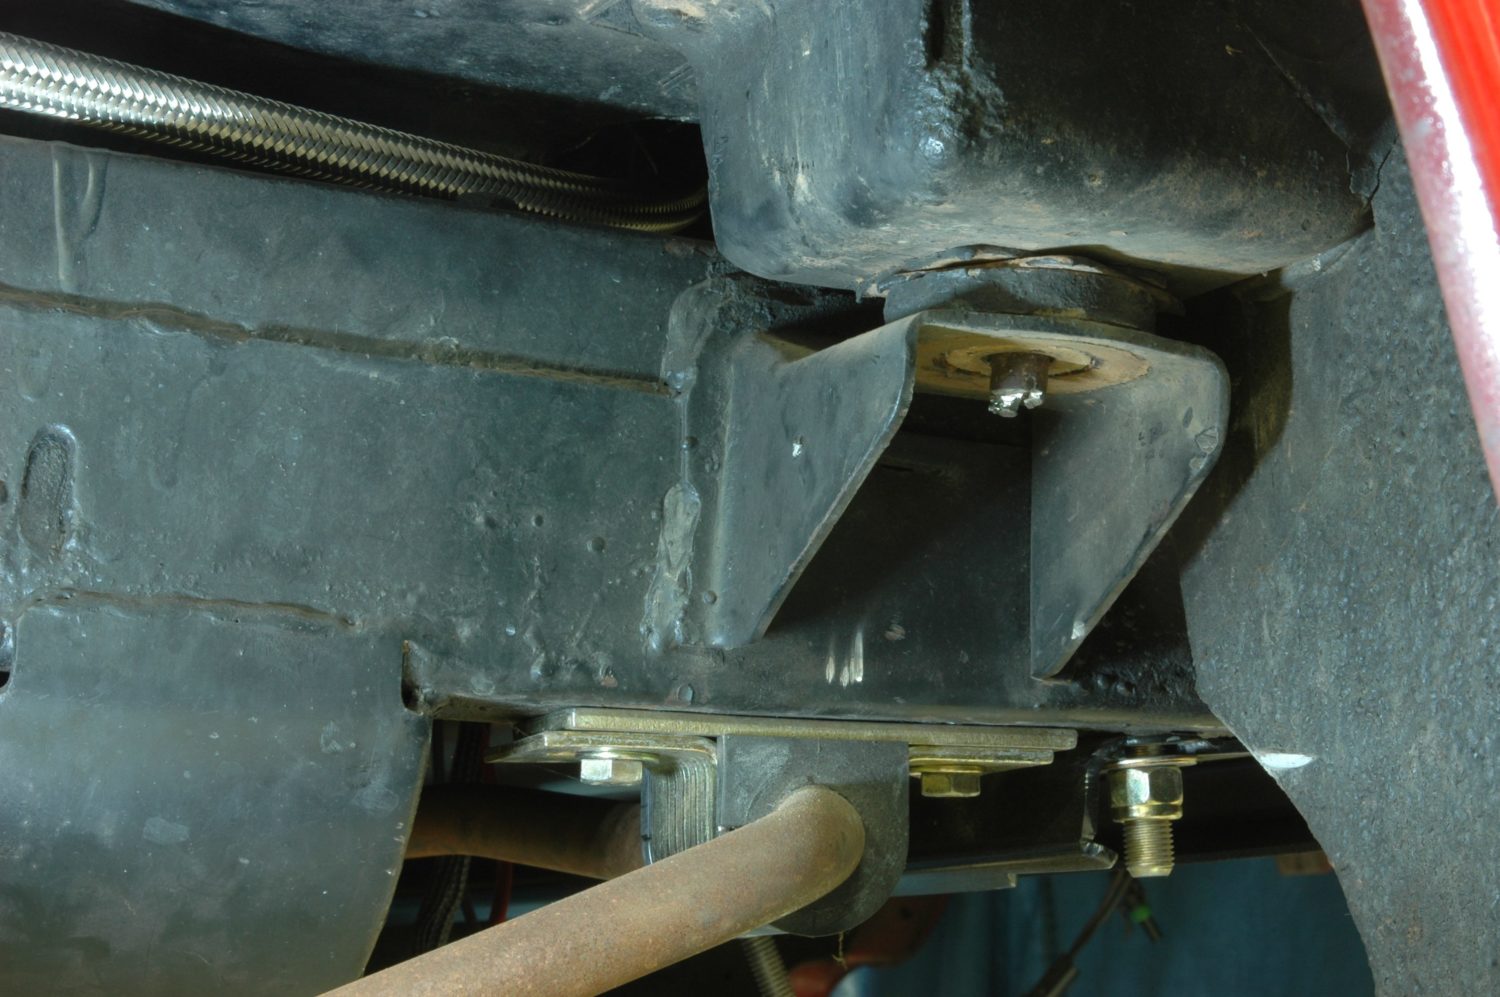
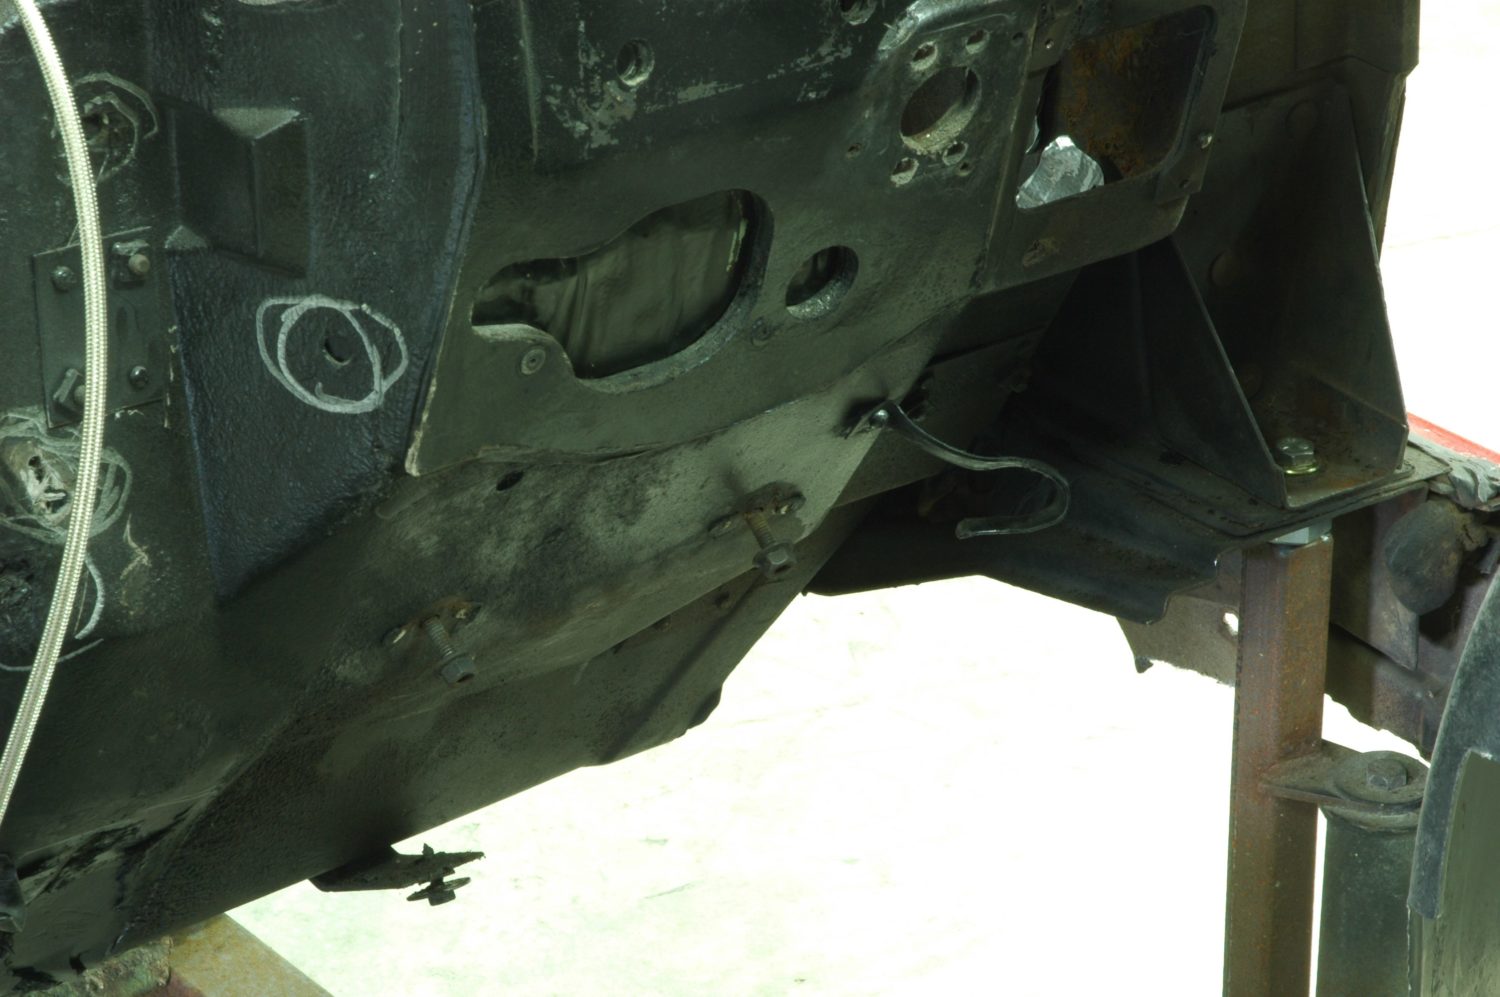
There should be four body mount bolts to remove per side, plus the bolts on the front frame horns that connect to the body near the core support. On the Number Four mount at the rear of the car, the nut is captured in a steel cage connected to the body: the side of the cage gave way, allowing the nut to spin. Here, Tray Walden cuts the bolt with a wheelie cutter.
The bolt with the head cut off. We’ll have to replace both the bolt and the cage/nut assembly that rivets in place in the body.
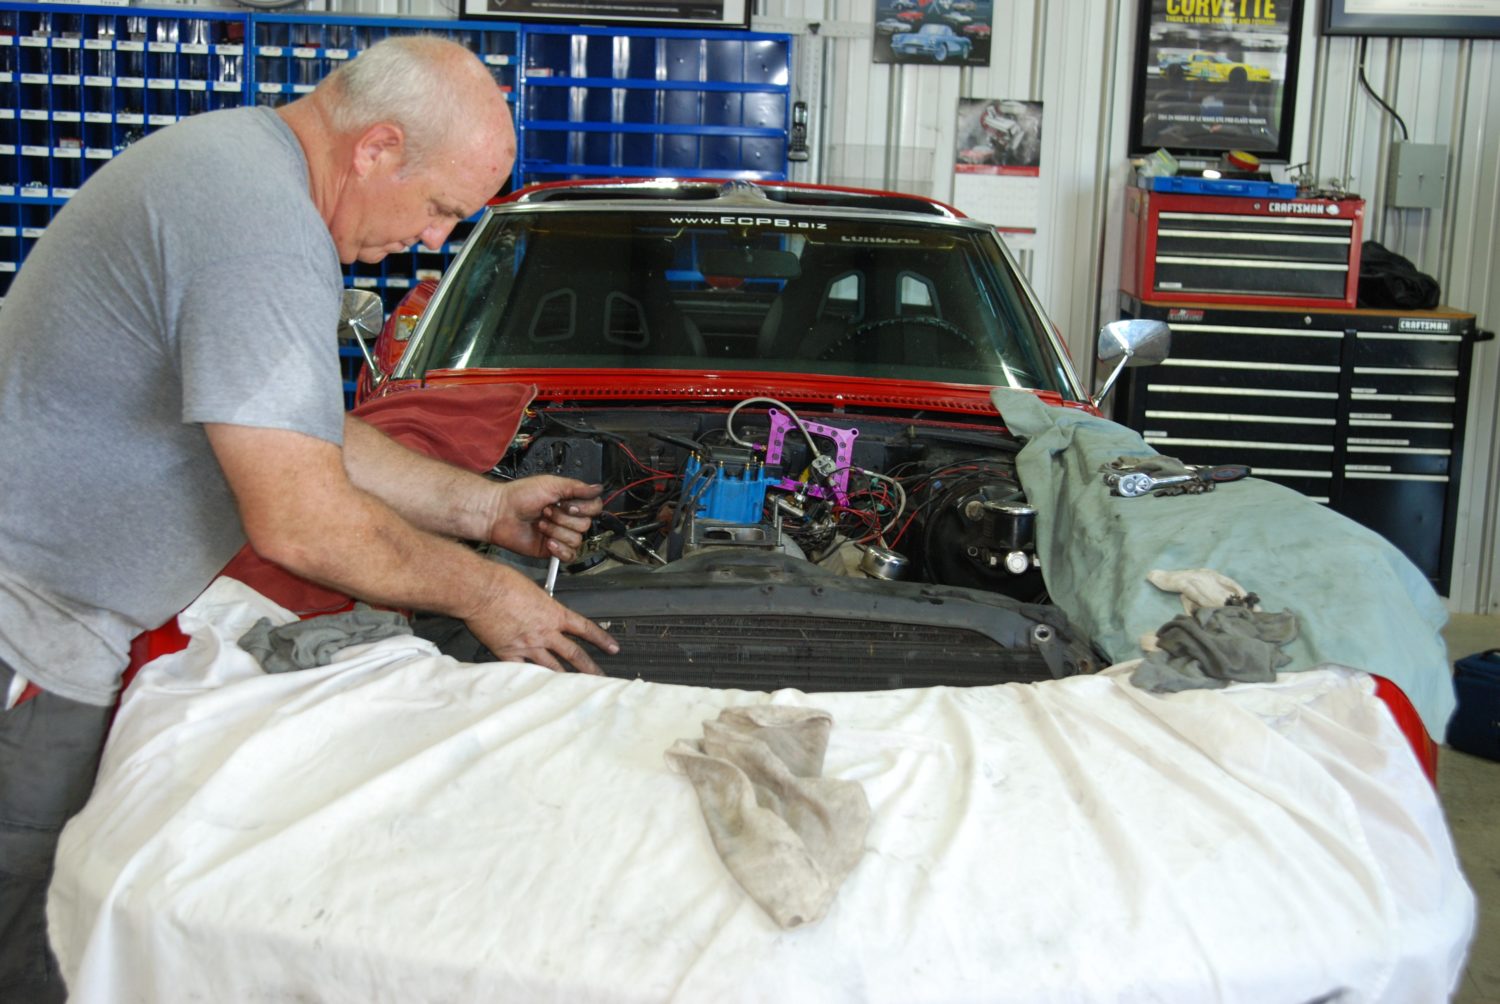
Ted Whitney working on the radiator side of things. Although not mandatory—the radiator attaches to the core support which mounts to the body—it’s a really good idea to go ahead and pull the radiator and assorted parts prior to the body lift.
Even with the radiator out, it’s a very good idea to support the heavy front nose to keep from damaging the fiberglass. Watching it bounce as the frame comes up is generally enough persuasion to keep you from wanting to see it again.
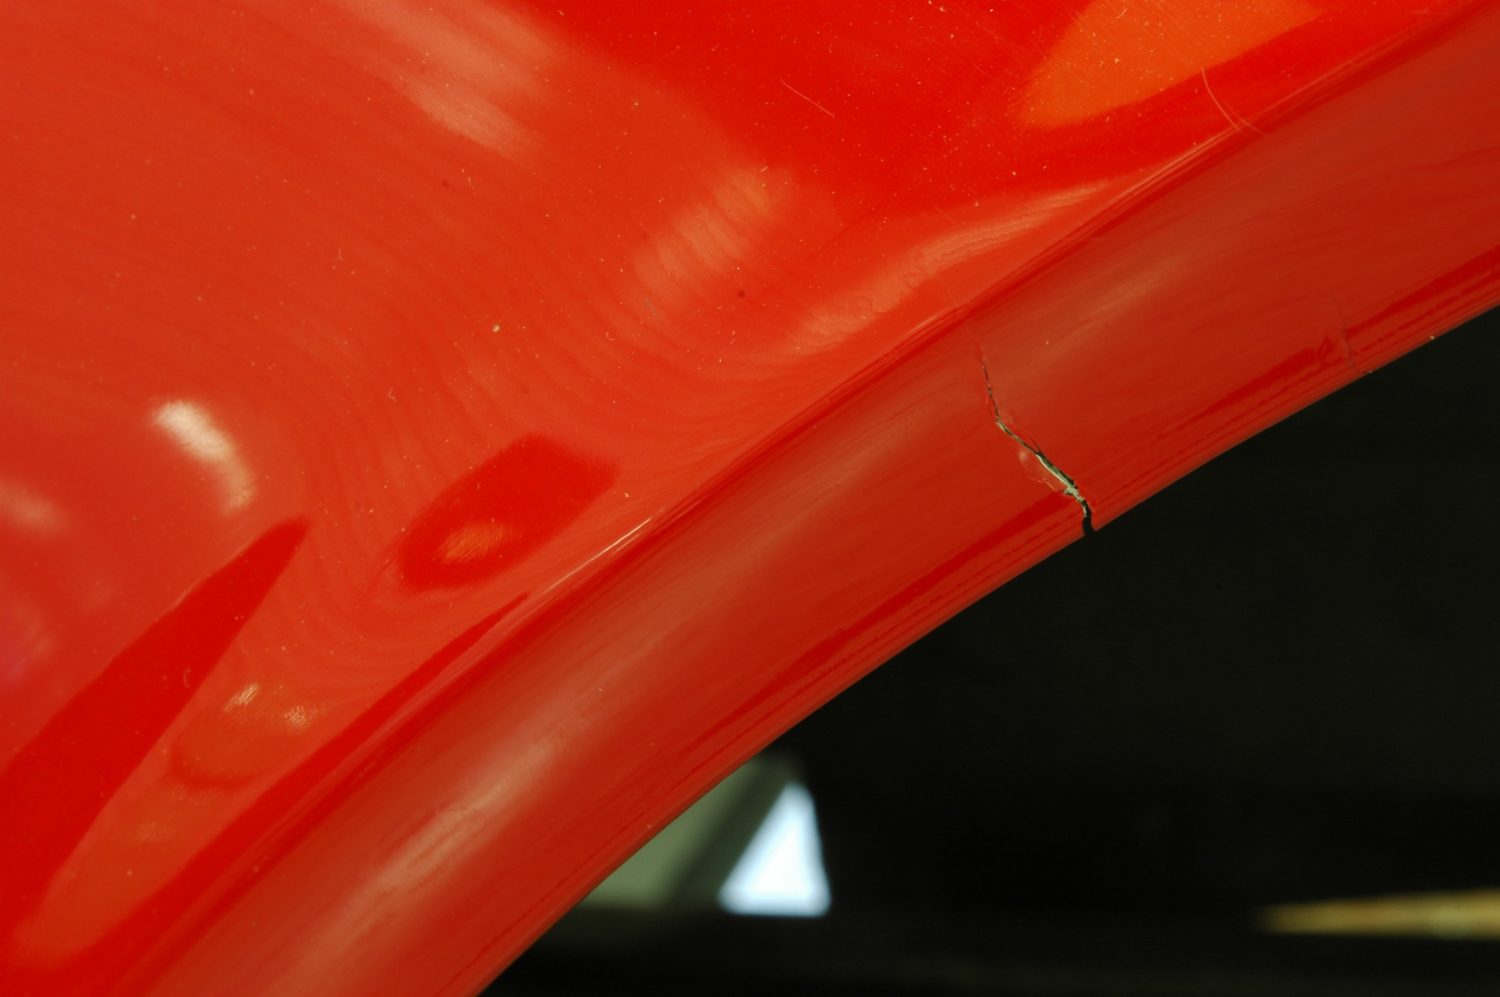
What happens when you fail to support the nose—you get cracks like this through the fender lip, which ruined the otherwise excellent paintjob. It will require significant remedial work to fix and blend in.
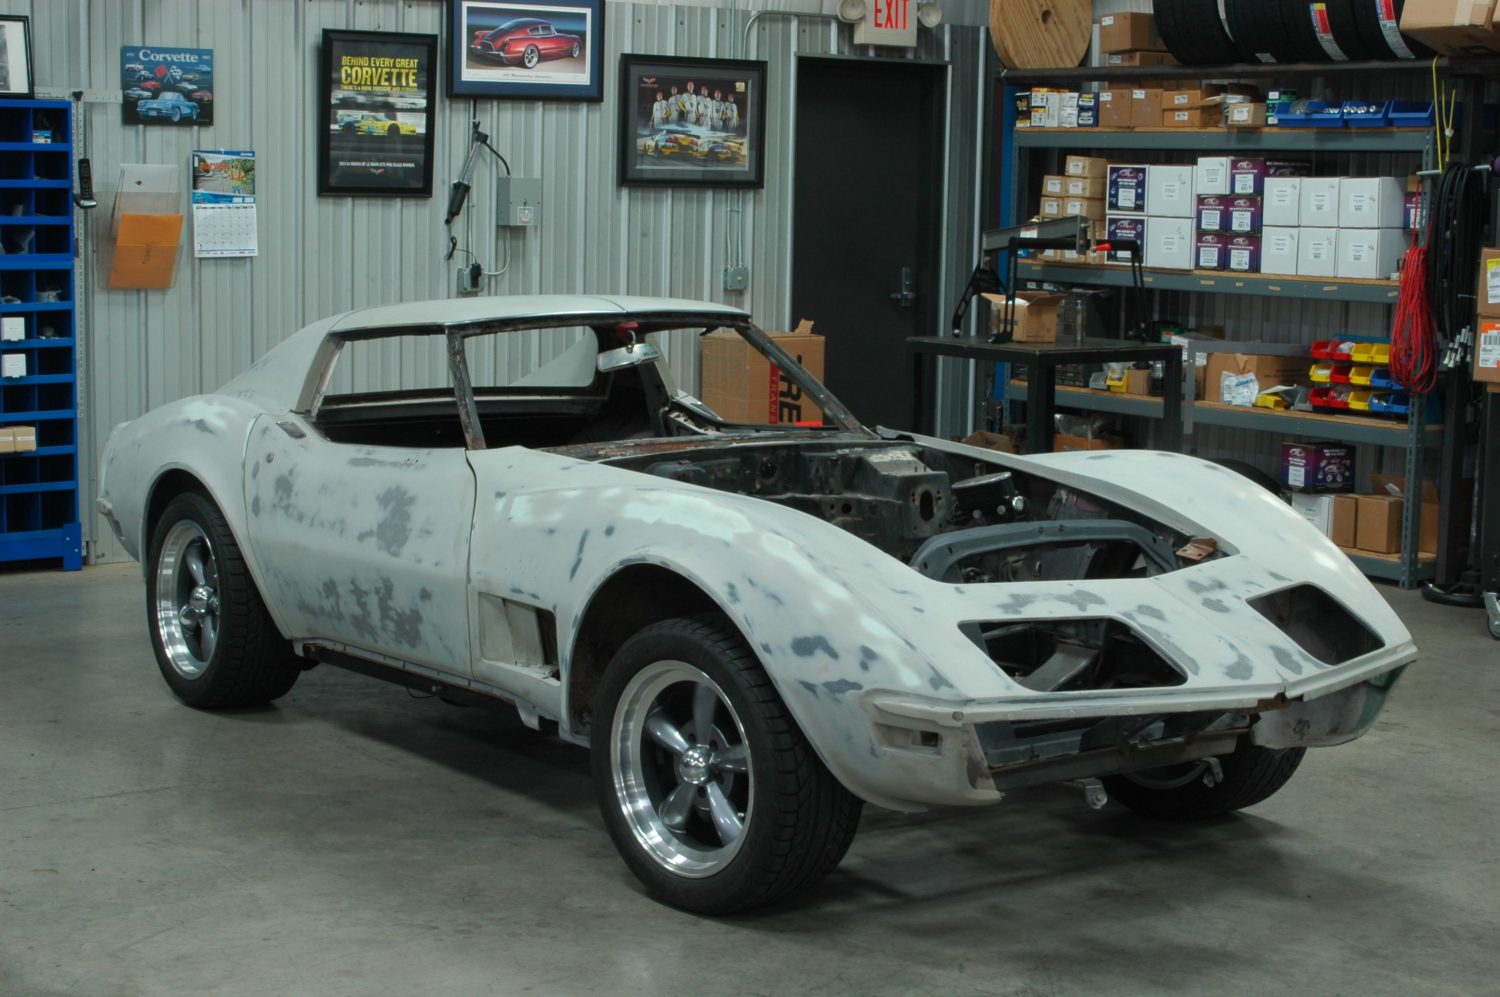
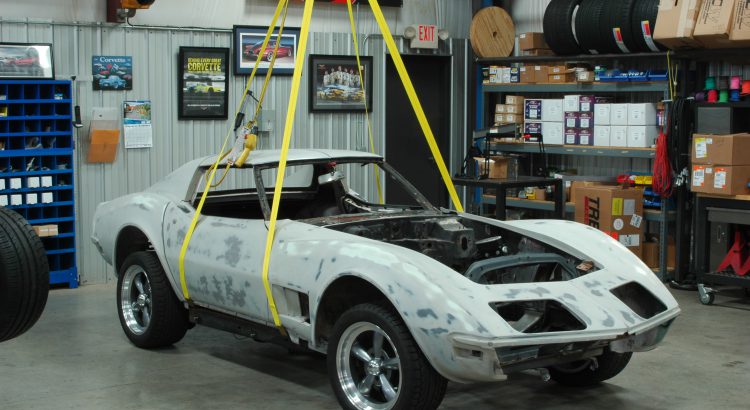
The second car we used for this project, a stripped ’71 coupe. Note from how high the front sits that the engine and trans have already been removed.

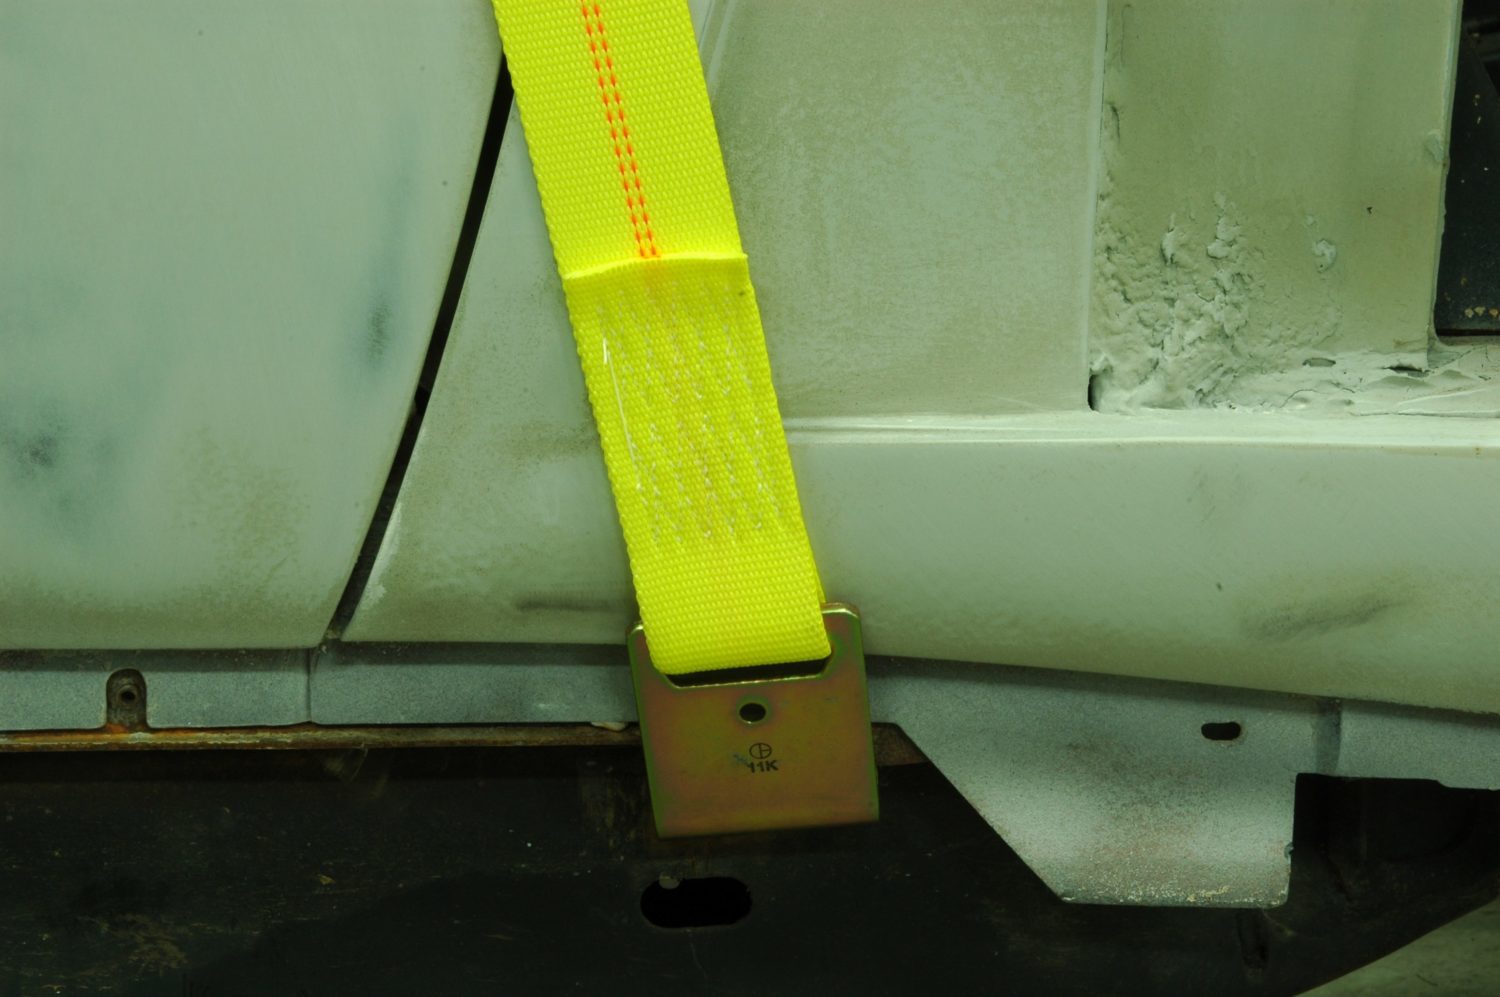
Each of the four straps is stitched into place on the heavy-duty lift ring.

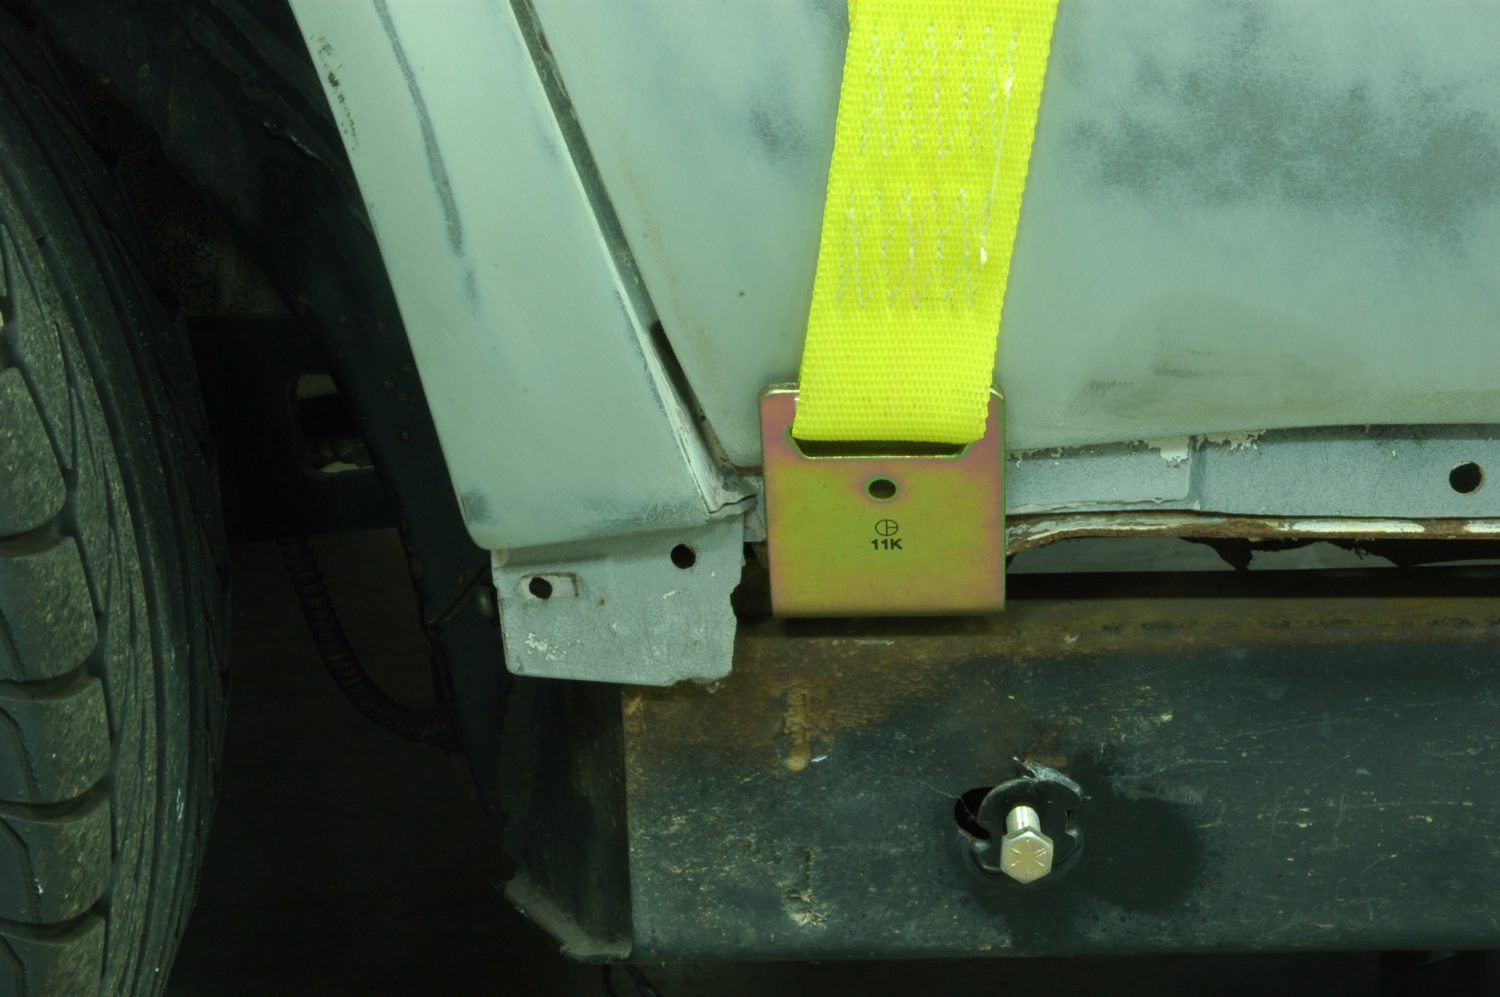
The other end of each strap has a hook that slips into place on the bottom of the body so it can be lifted from the frame.
You want the front hook as far forward on the birdcage as possible; it should be obvious now why we removed the headers from the sidepipe car prior to doing the body lift.
As with the front hook, you want the rear hook placed as far backwards as possible so the frame is as stable as it can be when it’s lifted.
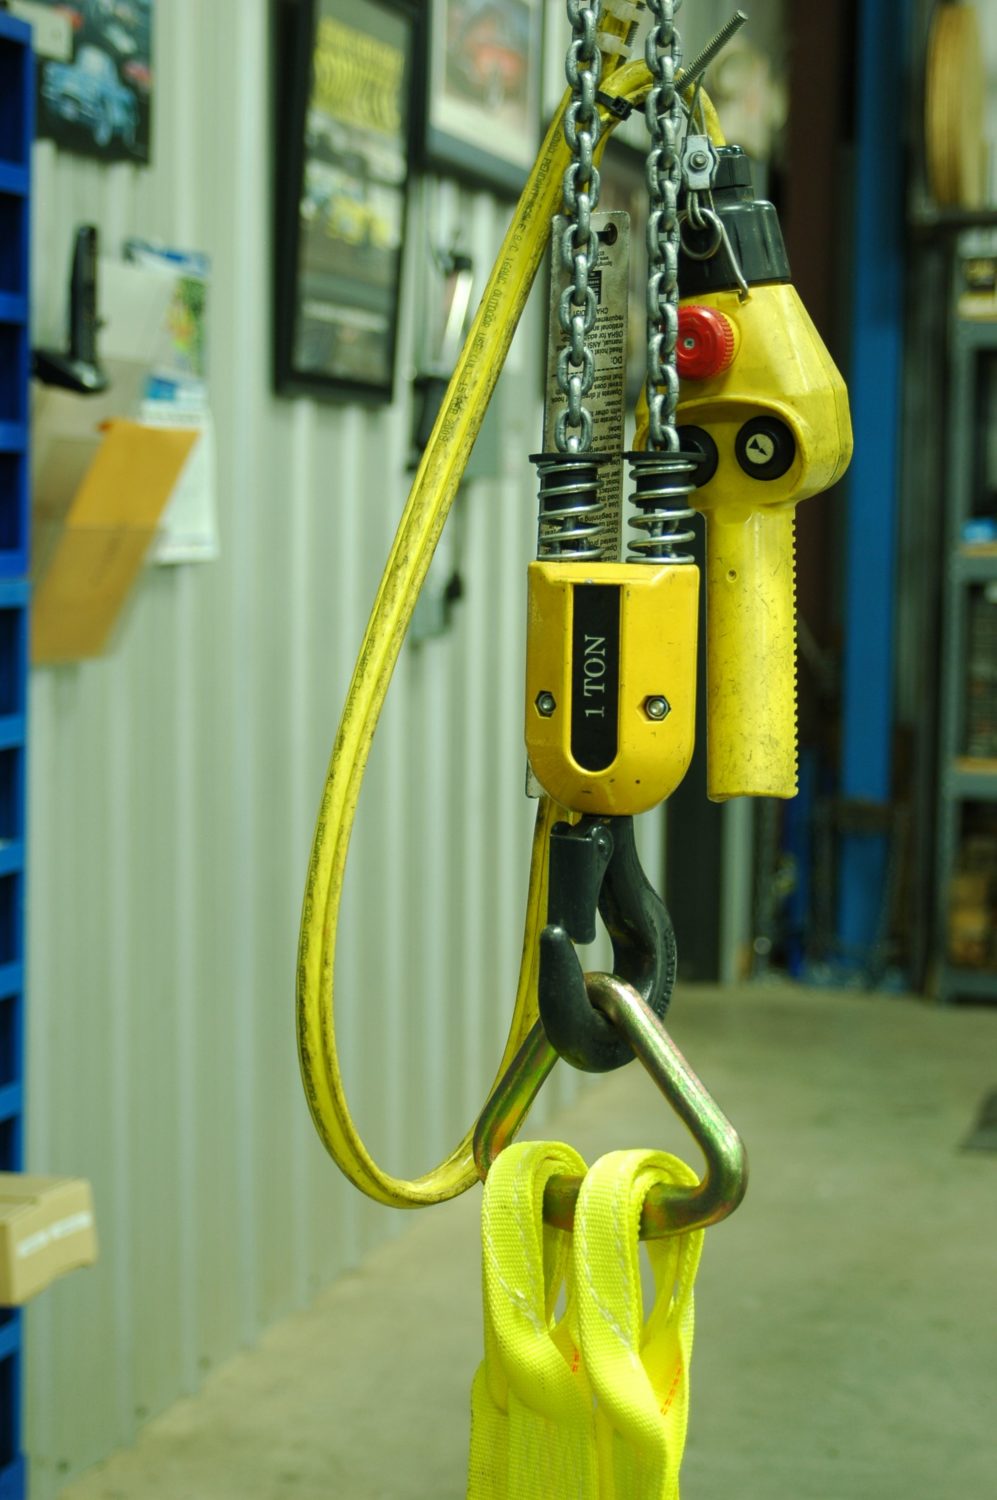
There is more than one way to lift the sling, but we used the easy way—by attaching it to an overhead crane system. A come-along will work just as well, but you’ll want to make sure you can get it high enough: our crane was not tall enough to get the body high enough to clear the frame.
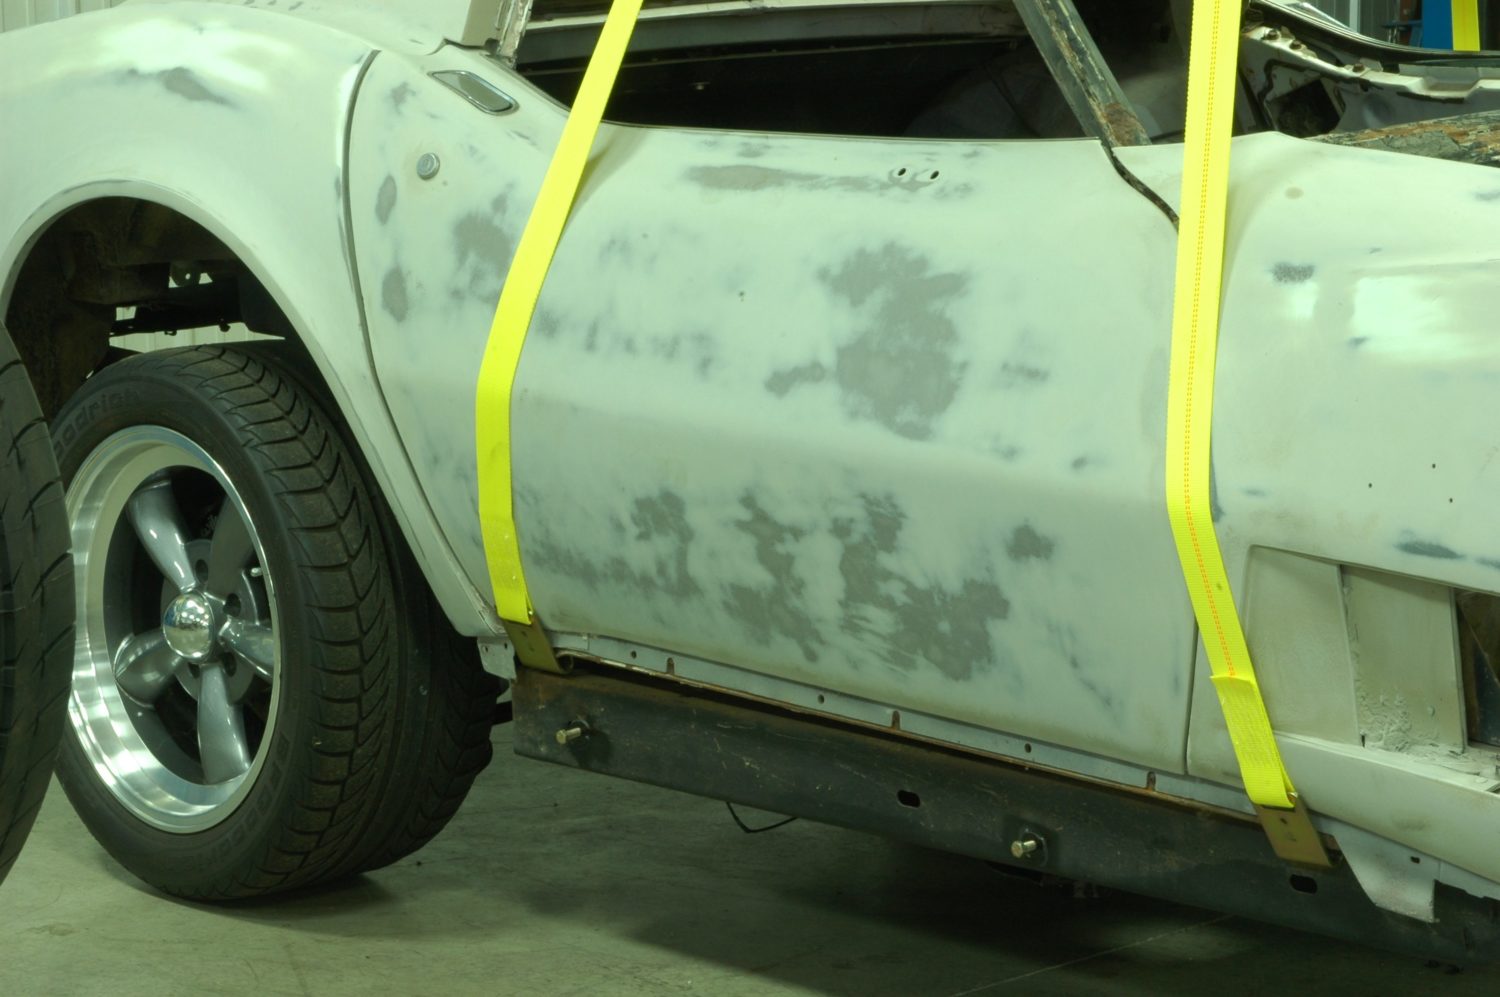
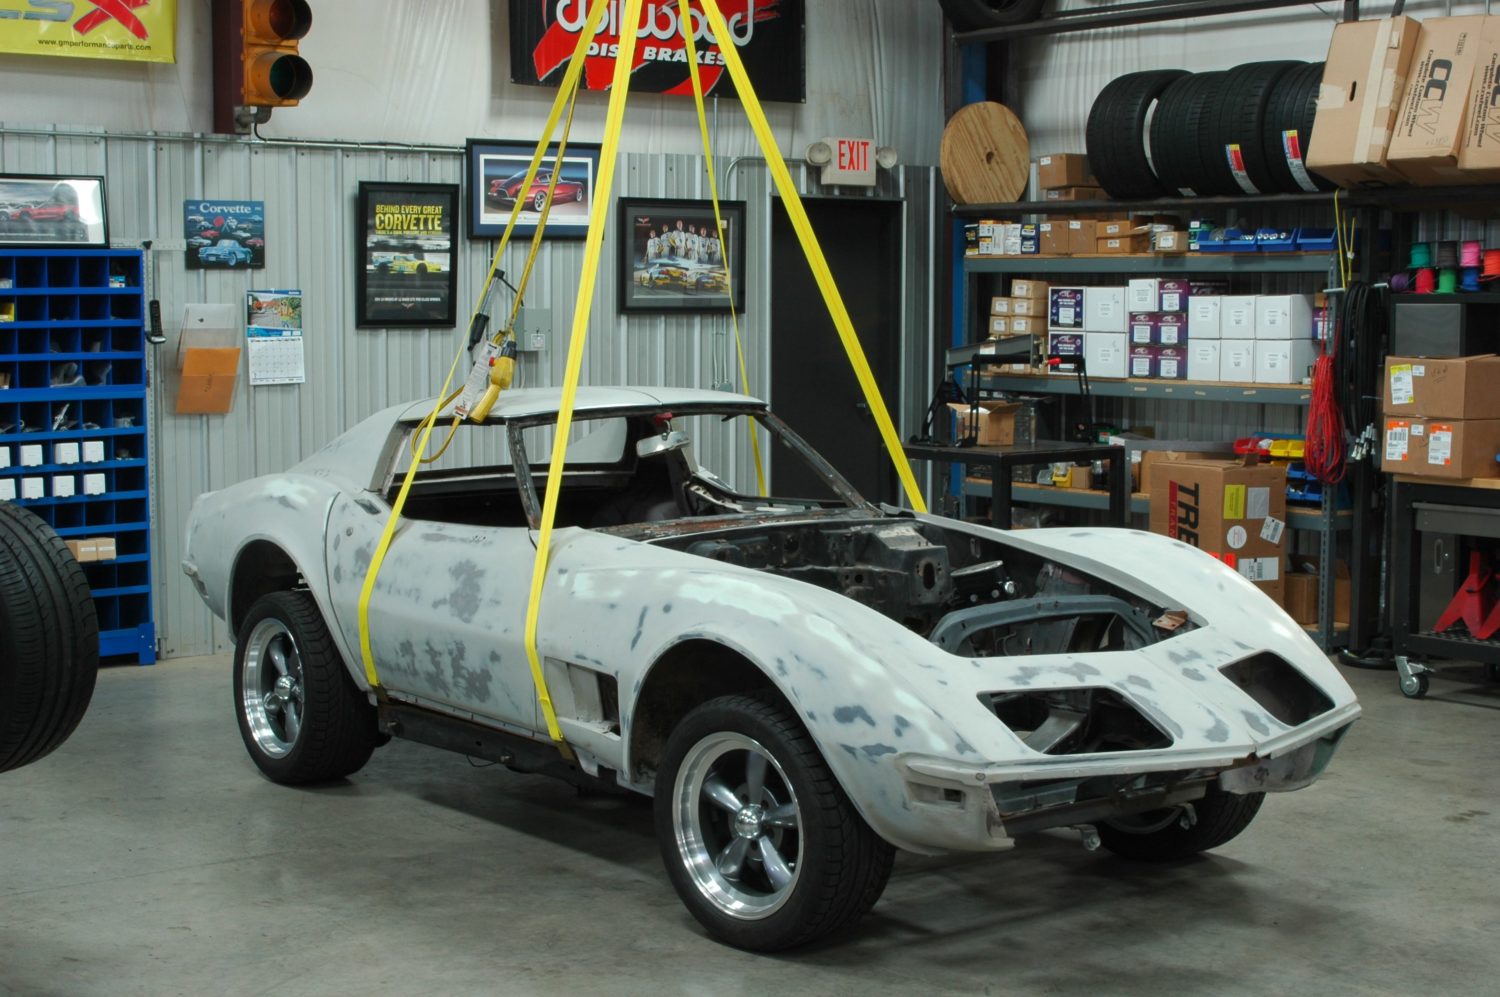
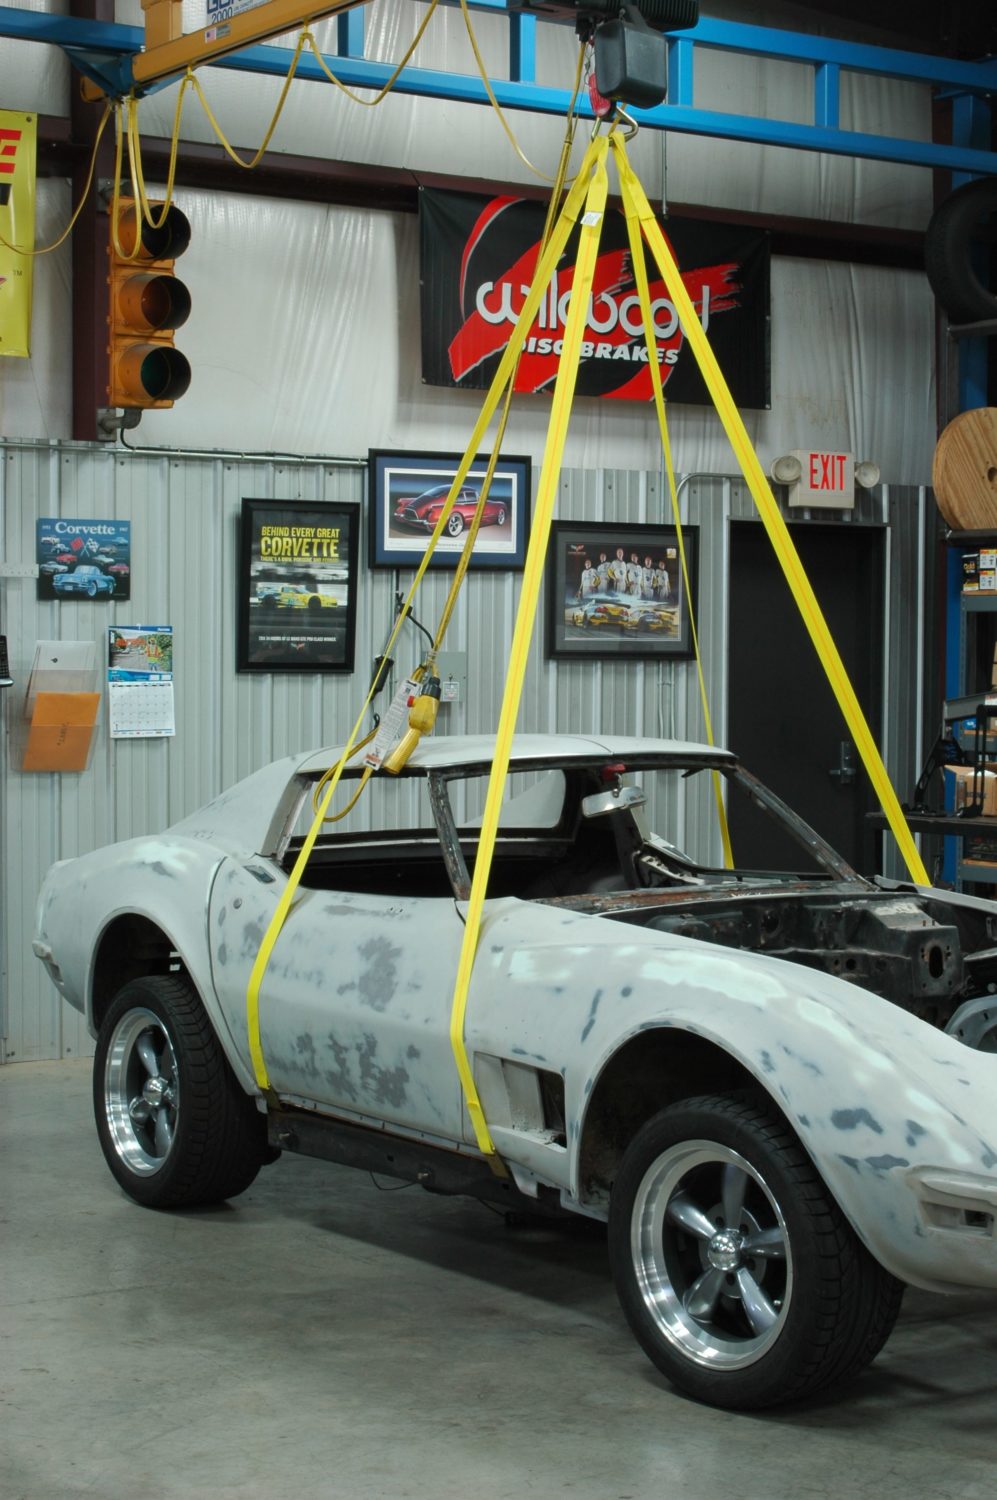
The body slung and on the way up. On a car that’s not in primer, you would obviously want to take steps to protect the paint. Expect the body to tilt as it comes up; you’ll want to have someone ready to stabilize it.
Lift slowly and check often. No matter how careful you are, the odds are you’ll find something still connected—in this case, we had failed to disconnect the fuel line from the tank, and the rear body wiring harness had been routed underneath it.
It’s very easy to miss the wiring, especially this tan wire that connects to the proportioning valve and is the signal wire for the brake warning light.
Once the body has been safely lifted and the frame rolled out from underneath, we placed a dolly beneath and bolted the body into place. That’s the Number One driver’s side body mount on the right side of the photo.
The body secured on a dolly and ready for whatever work needs to be done—even if that’s only being tucked safely away so frame can be restored.
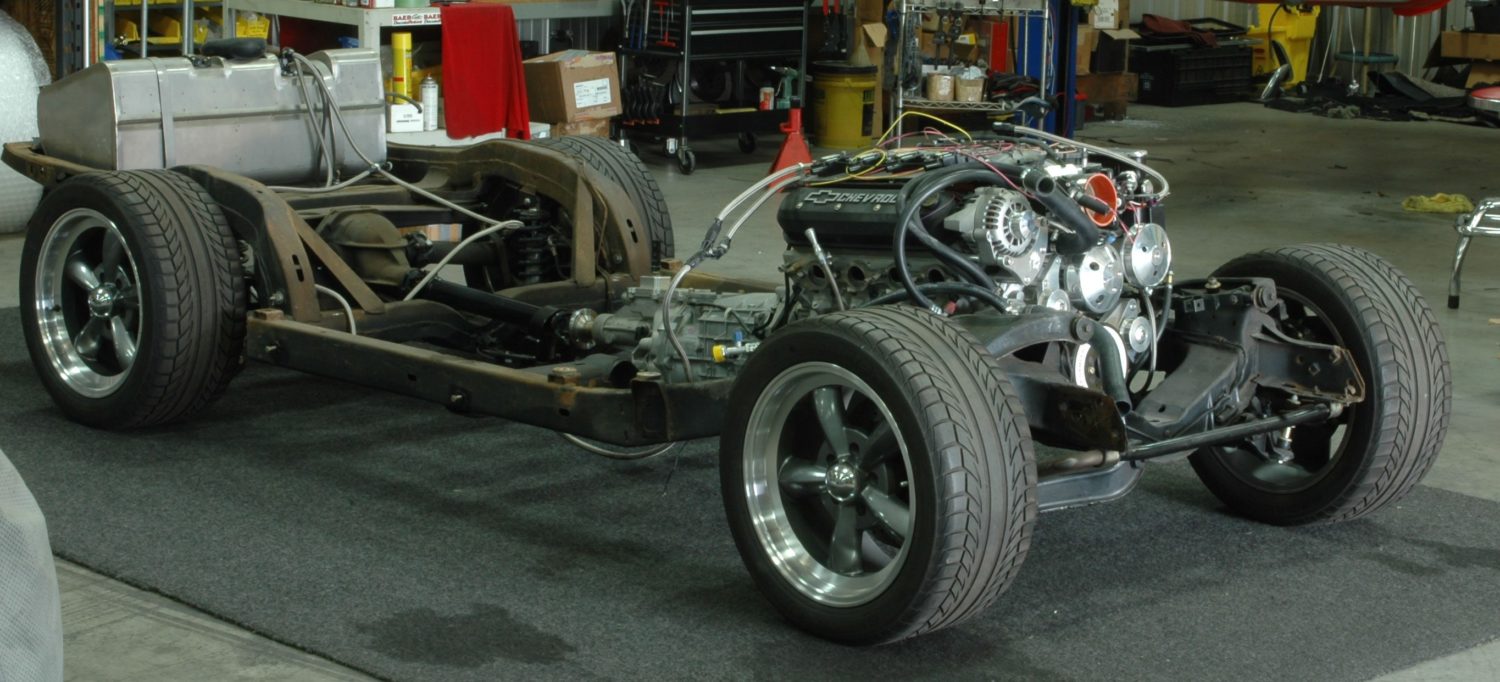
The frame ready for whatever is next.
Story and photos courtesy Jeremy D. Clough
If the Corvette Central strap kit is used, how high does the top triangular metal loop of the strap kit need to be above the ground? This includes the height to lift the body to clear the fuel tank. How much body lift is required to lift the body to clear the fuel tank?
What is the minimum height should the crane bar be in order for the body to clear the frame?
Sir, I, too, would like to know the minimum height for the bar crane to be. Thank you.
What plans did you use for the Body Dolly? Are they available?
No I did not
Ken S.
Can I leave the car hang on those straps for enough time to paint the frame thanks
If you are going to immediately paint the frame, it will still take at least a few days. I would not recommend leaving the body hanging on the straps for this amount of time. It needs to be properly supported by a wood buck, or at minimum a few strong sawhorses in addition to the straps.
Are there any extra precautions or steps that must be taken for convertibles.
Did you every receive or find an answer to the question you posted about “extra precautions or steps for convertibles?”
No never,
Ken S.
What is the approx. weight of the body (CV) with doors/glass intact?
Nice article