Written by Jay Heath. Reprinted with permission from Source Interlink, publisher of Vette Magazine.
Original article link: https://www.vetteweb.com/tech/vemp_1303_corvette_central_deluxe_gas_tank_kit/
Time may heal all wounds, but it’s hellishly hard on automobiles. These depredations tend to fall into two categories: those arising from the inevitable effects of the aging process, and those inflicted—whether intentionally or not—by one or more of the vehicle’s owners over the course of its life. While the Corvette’s fiberglass skin confers some measure of immunity to the former, the vintage-Vette market is rife with cars still suffering the effects of poorly executed body modifications and other “custom” work performed throughout the years.
All of which brings us, in admittedly roundabout fashion, to the ’58 model depicted in the accompanying photos. Though outwardly appealing, with a recently re-sprayed Signet Red paintjob and a mostly intact interior, the car bore the unmistakable signs of what might be charitably be described as a “colorful” past. Most notable was the rear suspension, most of whose factory parts had been jettisoned at some point in favor of a kludged-together ladder-bar setup and a nine-inch Detroit Locker rear that shuddered in tight turns like a Kardashian at a geography bee.
While the original powertrain was also MIA, the news here was less grim. In the place of the stock 283 was a 406-cube small-block equipped with a Holley carb, AFR heads, and a raunchy hydraulic roller cam. The T-10 aluminum four-speed, meanwhile, had been supplanted by a heavier-duty iron Muncie (most likely an M-20). Given the ’58 model’s sub-3,000-pound curb weight, the package should have yielded rousing performance, at least in a straight line.
And it did…when it wasn’t coughing, sputtering, and shutting off mid-charge. In fact, it was an inability to consistently perform up to its potential that ultimately forced the car’s previous owner to wash his hands of the project. No matter what corrective action he took—from changing out the fuel filter and lines to having the tank professionally cleaned—the SBC stroker still evinced all the signs of an inadequate or contaminated fuel supply. At some point it all proved too much, and the Vette went up for sale.
When the new owner also proved unable to chase down the source of the problem, he took the car to AntiVenom, a Seffner, Florida–based performance tuner specializing in Corvettes of all vintages. After a careful process of elimination left the 54-year-old factory fuel tank as the only possible culprit, AV’s Greg Lovell decided that the wisest (and most economically palatable) course of action was to order up a fresh replacement unit from Corvette Central.
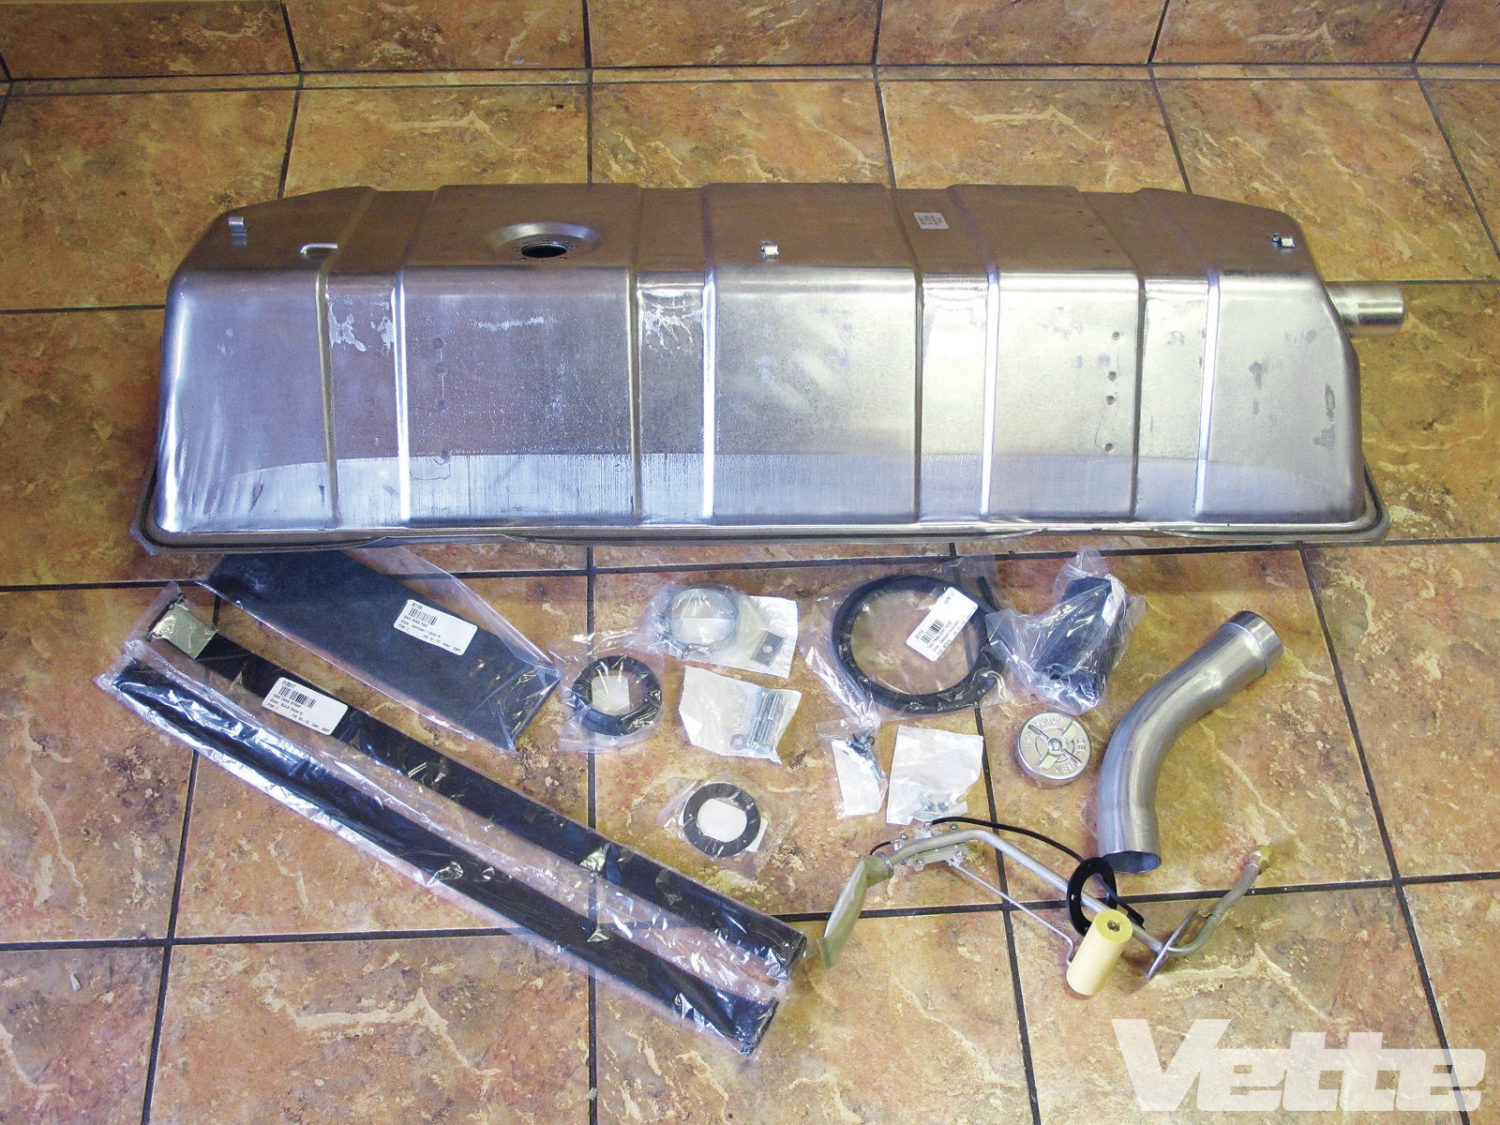
Corvette Central’s Deluxe Gas Tank Kit (PN 361021) comes complete with a new cap, fill neck, gaskets, vent hoses, hold-down straps, and supporting hardware. Assuming originality isn’t paramount, it’s a smart alternative to simply cleaning and reinstalling the OEM unit, a process that, as we’ll see momentarily, does not guarantee results.
Follow along now as we start to get this long-suffering C1 back on the road to fuel- system salubrity.
1. Having problems with your fuel supply? Check the filter. The aftermarket unit in our C1 was completely clogged with rust, indicating a badly deteriorated tank.

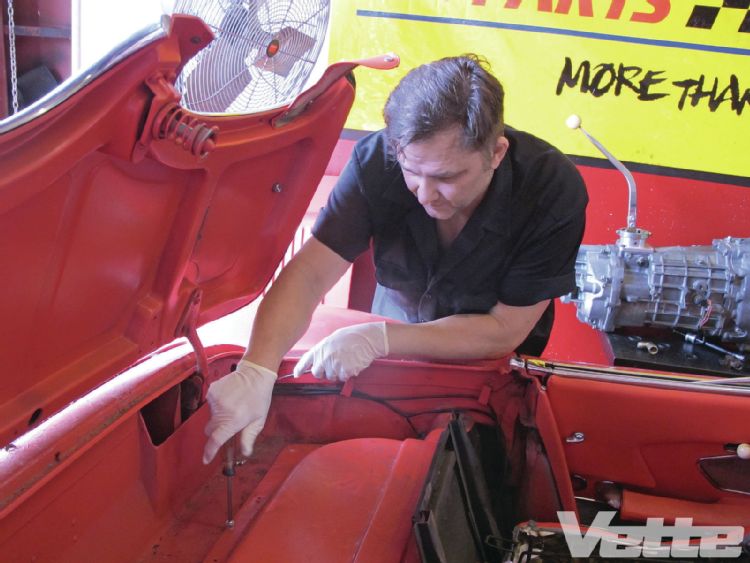
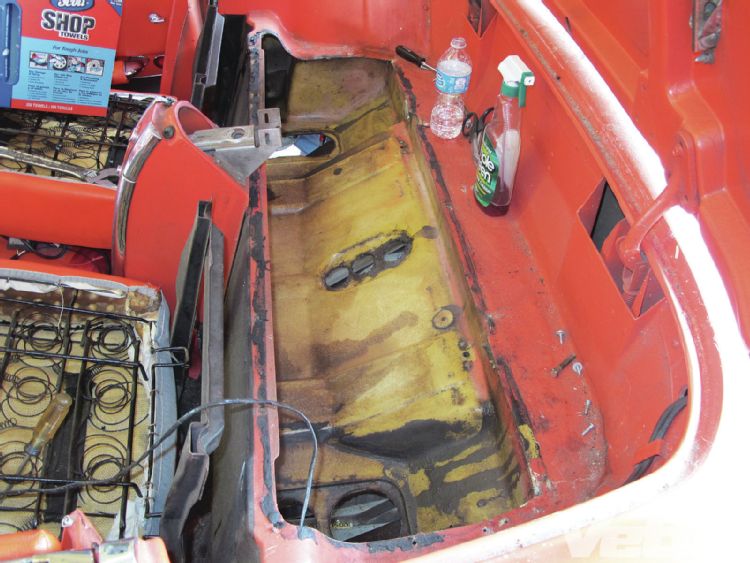
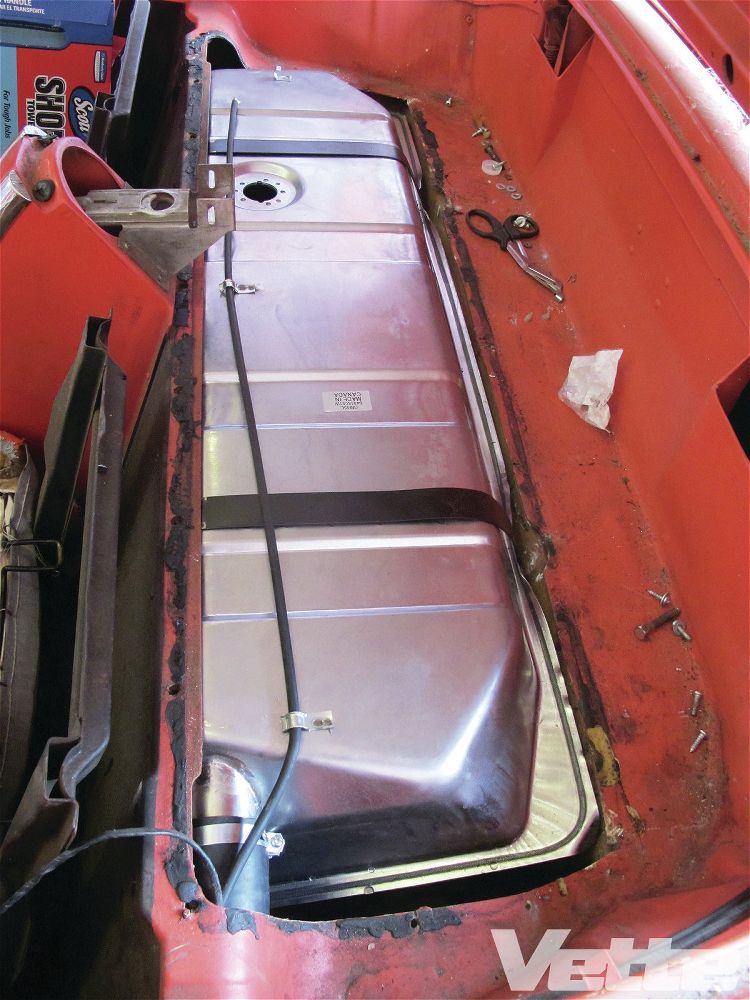
2. After removing the convertible hard top, Lovell begins the job by removing the screws securing the fuel-tank cover. Note that the number of screws can vary from car to car, as many Corvettes of this vintage will have had the cover removed and replaced numerous times over the years. Our subject C1 had 18 stock screws, along with a few non-factory extras.
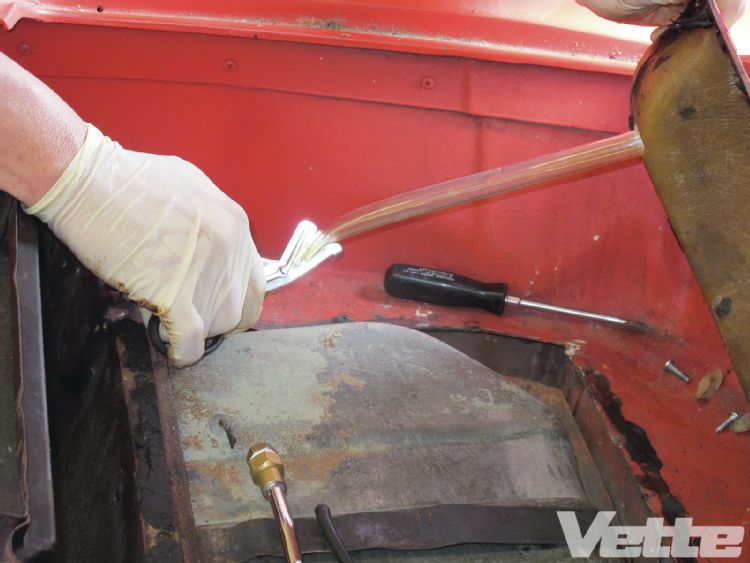
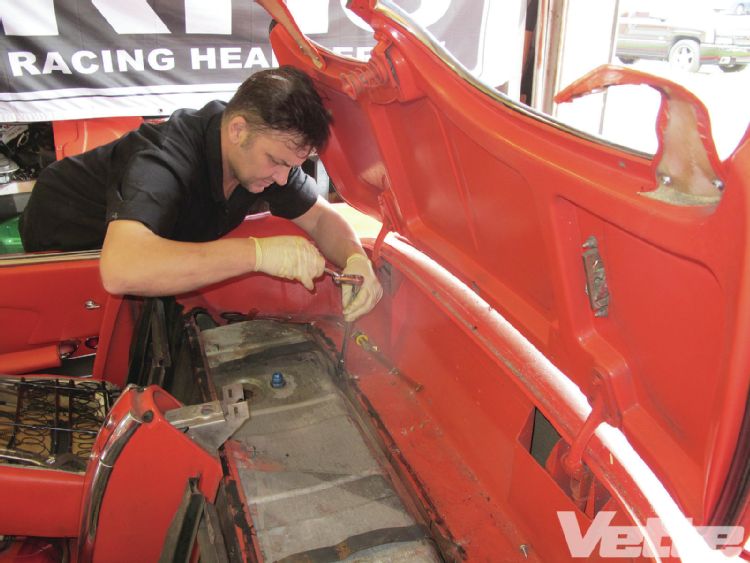
3. With the tank exposed, Lovell cuts and removes the return line feeding the (owner-installed) aftermarket fuel system. It will not be reused with the CC unit.
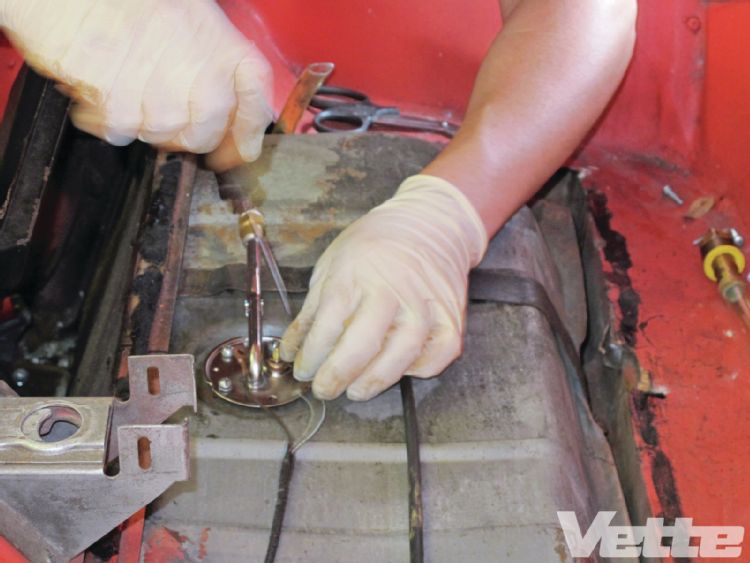
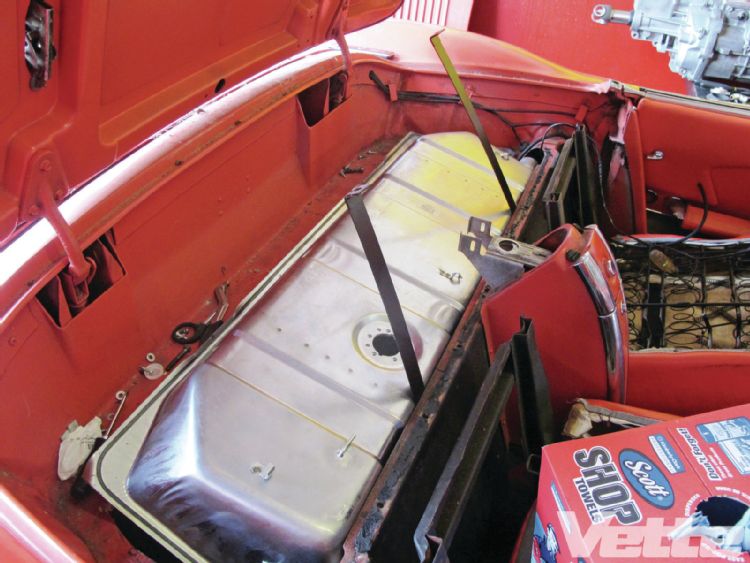
4. Next to go are the fill tube and vent hose, followed by the fuel pickup/sending unit (shown). The wiring for the sending unit may be disconnected and set aside for now.
5. All that’s holding the tank in at this point are a pair of metal retaining straps. They’re secured by one bolt (at the rear) and one captured nut (at the front) each, so they’re relatively easy to remove.
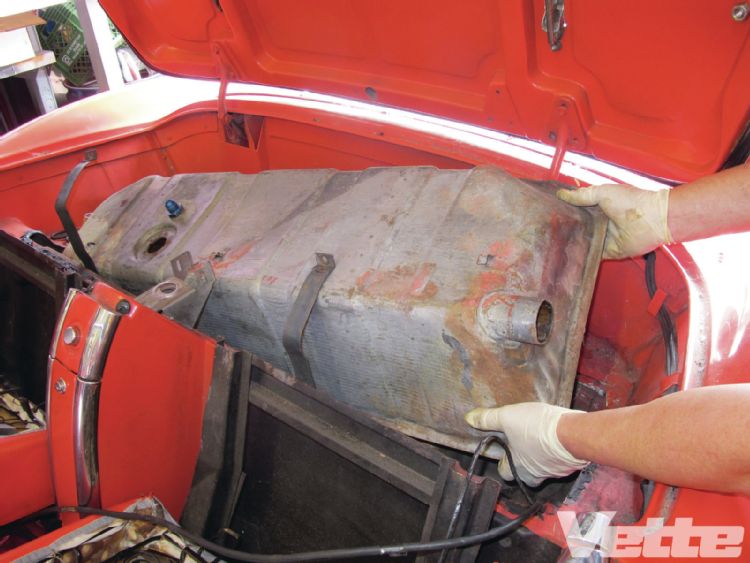
6. With the straps out, Lovell wrests the tank free and sets it aside.
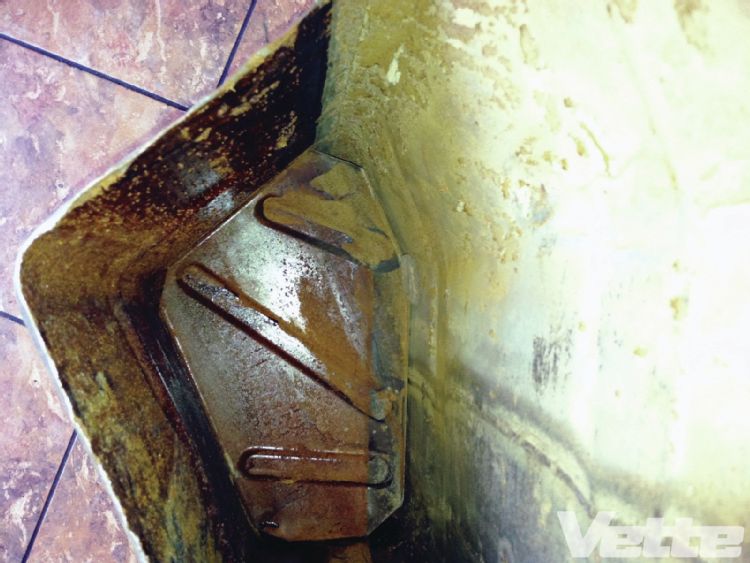
7. A few days after our install project, Lovell cut open the old tank to take a look inside. As you can see, even after being professionally cleaned, the interior walls were coated with rust. It’s for this reason that we recommend using an aftermarket replacement whenever practicable.
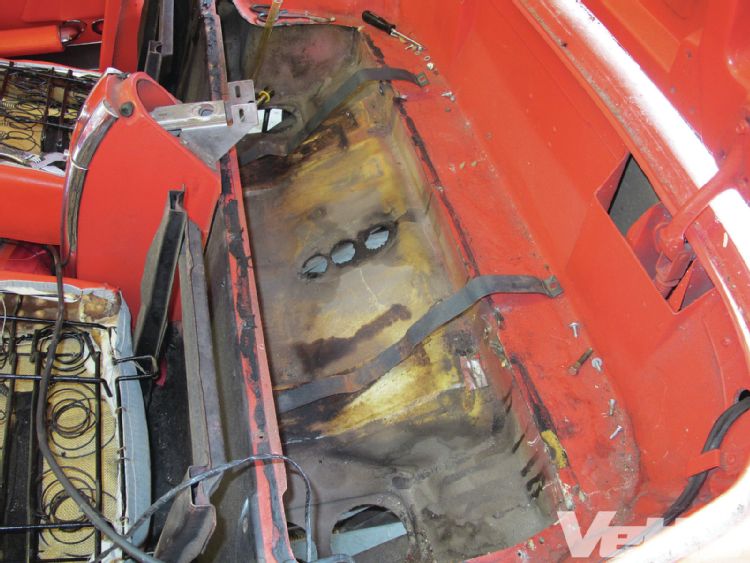
8. As is often the case on street-driven C1s, the recessed area beneath the tank wore an encrustation of road grime.
9. Since preserving the finish wasn’t an issue in this particular area, Lovell deployed a can of lacquer thinner and a shop rag to tidy things up a bit.
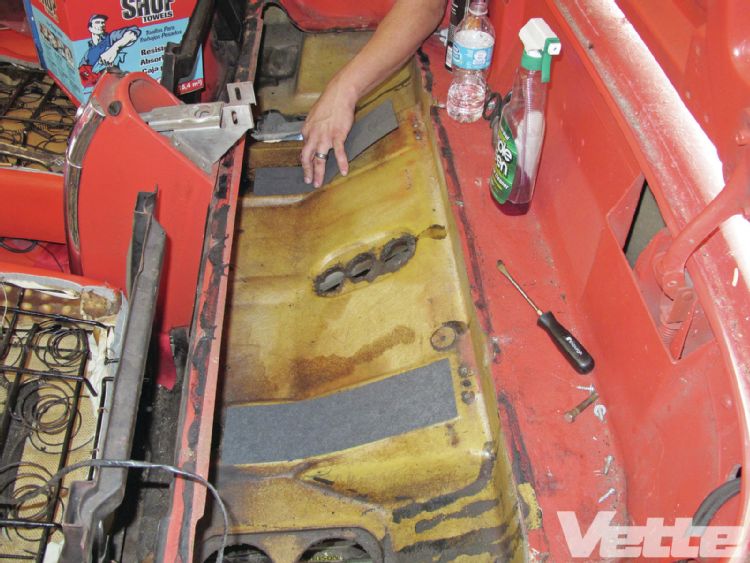
10. The CC kit comes with a pair of soft rectangular pads that cushion the tank to reduce vibration and noise. While the weight of the tank should hold the pads in place, you can use weatherstripping adhesive to secure them if you’re so inclined.
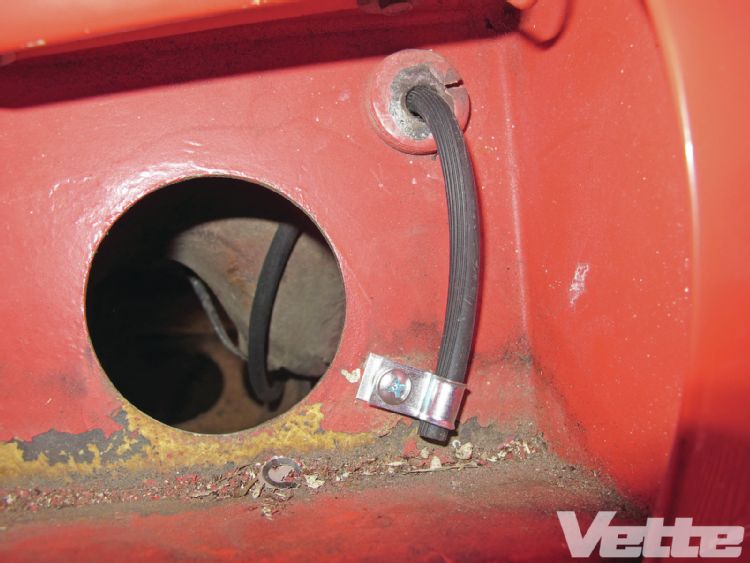
11. The next step is to secure the fresh rubber vent line in this eyelet behind the fuel-fill door. Run the line through the hole in the body (top right) and let it hang for now; we’ll finish installing it once the tank is in.
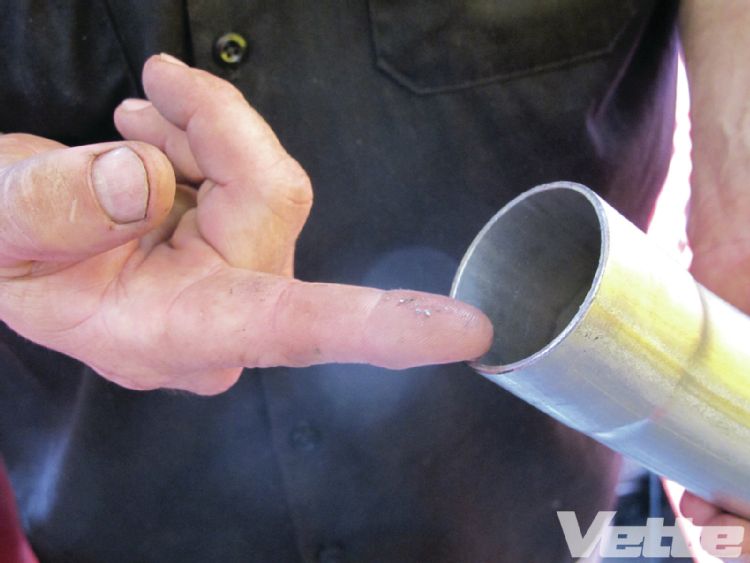
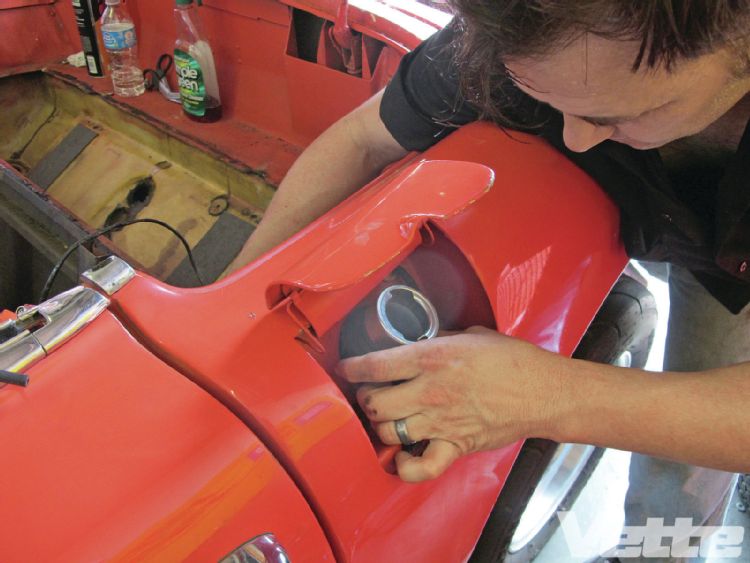
12. Now it’s time to add the fill tube. Be sure to clean the tube thoroughly before installing it: The inside of ours was covered in a light dusting of metal shavings, presumably left over from the manufacturing process.
13. Lovell feeds the freshly cleaned fill tube through the corresponding opening in the body and pushes it into place on the provided rubber grommet.
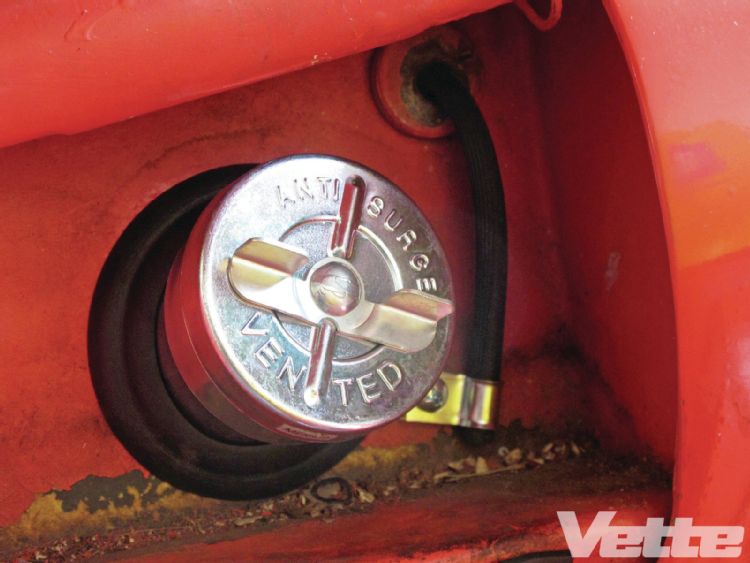
14. Topped off with a new fuel cap (also included in the CC package), the end product should look something like this.
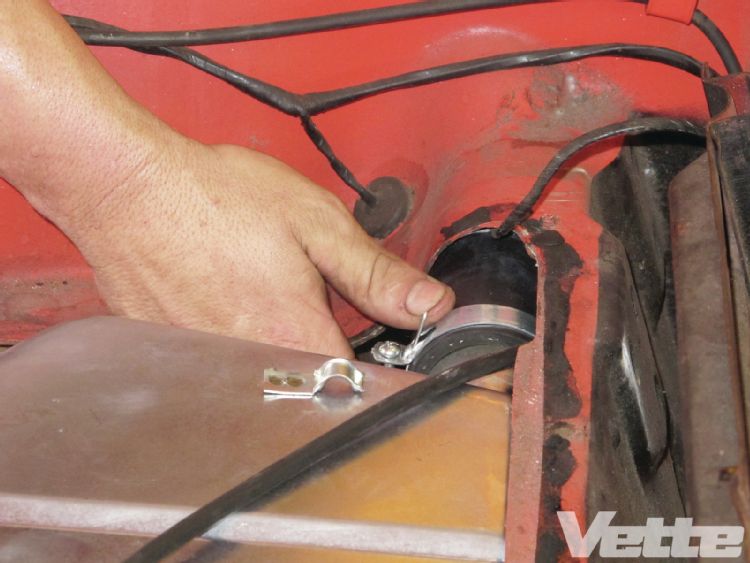
15. After a little experimentation, Lovell decided it would be easier to install the new hold-down straps in their front mounting tabs before lowering the tank into place.
16. With the tank in the car, Lovell bolts down the retaining straps. Note that he had to pry back the tank lip a bit to access the bolt heads.

17. The fill neck can then be connected to the tank using a short section of rubber hose that comes with the kit.
18. The next step is to run the rubber vent line through the two eyelets on top of the tank and into the vent tube on the far right side.
19. Here, Lovell installs the rubber gasket on the mounting surface of the new sending unit. Note that there’s only one way to orient the gasket so that the bolt holes line up correctly.
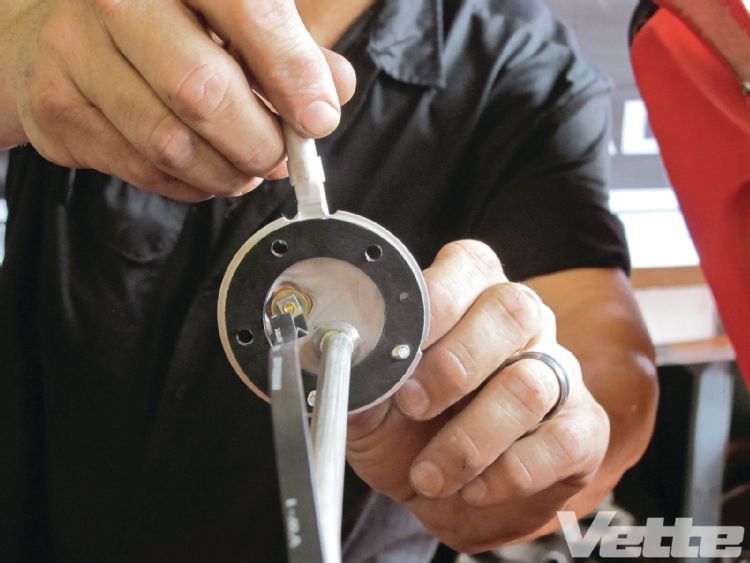
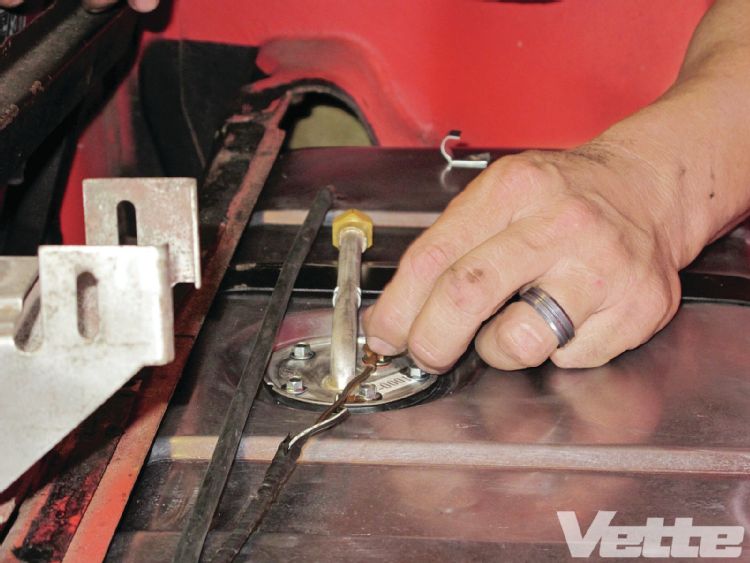
20. He then lowers the sending unit into the tank, bolts it in place, and reconnects the wiring (shown).
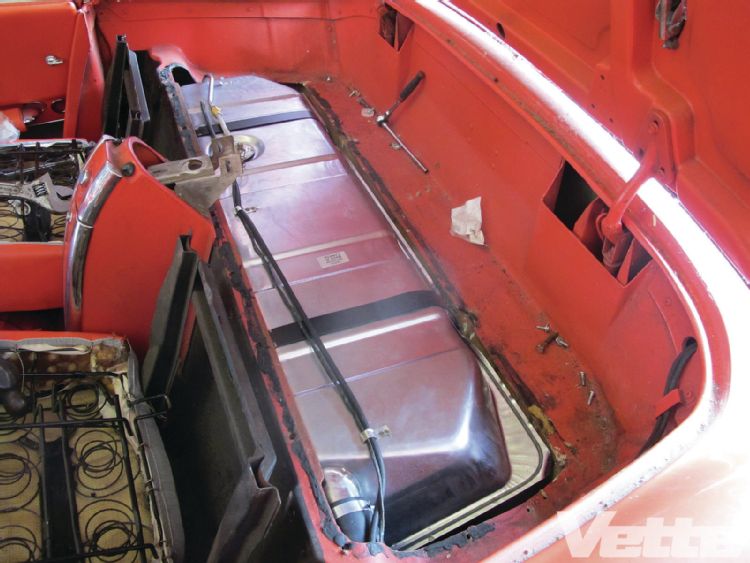
21. Here’s a look at the completed installation. Assuming the rest of your fuel system is in good shape (remember to change that filter!), all that’s left to do is reinstall the cover over the tank and head out for a test drive. We, on the other hand, have a few other issues to sort out, from the lines themselves all the way forward to the engine bay.
Replaced a 1962 tank:
1) upper tank straps held with rivets; drilled out, replaced w local hrdw store nuts & bolts – bought new rivets from C1 supplier, but no instructions or tool access possible
2) used old tank pads – surprise – new were too thick to allow tank straps to reach (new pads are not very thick)
3) difficult to orient tank back in compartment – mark everything
4) fuel gauge sending units do not last (ethanol fuel? – using additives) on 3rd unit; lotsa needle bounce and lack accuracy
Thanks for the C1 tech articles.
I read through the comments and someone asked how to drain the fuel with the tank still in place. I would like to know the best answer to this question without removing the tank. I need to drain old gas but I do not need to replace the gas tank. Thank you.
There is a drain plug on the bottom of the tank, towards the front, though I’m not sure how accessible it is with the tank still being in the car.
There is an access hole in the floor to the drain plug under the car. The drain is on the front right (passenger) side of the tank. And about mid-way of the right rear tire and to the rear of the axle.
Please help;
I have a 1961 convertible.
For some years now i have had to keep the tank below 1/2 otherwise when I turn to the right I get a hard smell of gas from the back ( eg. leaking ) . I removed the tank entirely , flushed it out ( all ok ) and replaced the goose neck and rubber flanges as well( purchased at corvette central ) . Still the same .Gas filler cap is original. I cannot find where the smell/ leak is coming from.
A very common complaint.
When turning to the right fuel can possibly surge up the fill pipe.
I suggest you get a not vented fuel cap.
There is a vent hose attached to the top of the tank, so really no need to also vent the cap.
361045 non-vented cap, $39.95
Thank you,
Corvette Central
Product Assistance
Can you tell me what the large holes under the gas tank in the body are for. Should they be covered? I am replacing my tank and am confused about the function of these holes,
Those holes are for ventilation.
The factory left them open.
Regards,
Gus
Corvette Central Product Assistance
Just like the tank described above in the pictures is there a grommet that goes on them straps where those holes are you can see where they’re clearly there’s a hole there and that’s pretty much where that strap bolts to isn’t there grommet to keep the water and debris and stuff from entering the compartment where the fuel tank is
I seem to get vapor lock often in my 1960 (350 crate) with stock WCFB Carter carburator. I like to install an electric fuel pump system while replacing my original tank. Do you have any best practices, instructional diagrams and/or recommended products I should consider?
I liked your photos and descriptions, but am wondering how you drained the gas from the tank prior to removal? I have a 1960 Corvette that has been parked for the last 8 years, and now is not getting fuel to carburetor. I’m going to start with replacing fuel lines and fuel pump, but expect that fuel tank cleaning or replacement will be needed too.
You’ll have a lot easier time draining the gas if you wait until after removal.
A small battery powered fluid pump available at many on line outlets will make the job a piece of cake and you can use it later the fill up your lawn mower.
The replacement shown above looks to be for a nonconvertible car. Is it the same tank for a convertible car? If not do you make or have one for a 58 convertible?
This link has everything you need to put a new gas tank in your 57-60, It’s the same tank. https://https://www.corvettecentral.com/c1-53-62/fuel/gas-tank/
All Vettes until 1963 were convertible.
Not quite so. A number of units were shipped each of 1957, 58, 59 and 62 model years with the soft top delete option. These cars had the removable hard top only and can be quickly distinguished by the absence of the soft top latches on the rear deck. RPO 419 with soft top delete or RPO 1625 (24 gallon fuel tank) which required RPO 419. There were 931 cars equipped this way in the 1957 model year.
I am putting a replacement tank in my 62 that I bought from Corvette Central and I have it fit in the cavity, but I have a question about the rear retention strap carriage bolts. Do the carriage bolts tighten into threading in the cross member support or is there to be a receiver nut on the back side of that cross member? When I removed the carriage bolts from the old tank, both bolts broke off one or two threads from the carriage body of the bolt. I don’t know whether I can use a ram to drive the rest of the bolt through, but if there is threading in the cross member I would damage that. Or do I need to try to drill it and use an easy out? Any help would be appreciated. Thanks.
I have a 62 corvette and I get a gas odor after filling the tank. A small amount of gas seems to get into the material lining the convertible top cavity near the filler tube. Also the gas gauge gives inconsistent reading and it seems I can only partly fill the tank.
Do you hav a deluxe kit for my 54?
At the moment this is the only Gas Tank setup we have for the 1954.
Do seat backs need to be removed for the tank installation described above?
That shouldn’t be necessary but having them out of the way might make the job a little easier.
I’m having difficulty with steps 15-16 in getting the tank to fit into the compartment with the heavy SS straps installed. Do the straps need to be formed to wrap around the tank before being installed or do I try to form them after the tank is put into compartment? Is there a reason these straps are so much thicker/stronger than the C2s?
Please note, the tank lip had to be pried back a bit to access the bolt heads. In photo step #18 it shows how far the tank lip is pried to fit the straps.
I had the same issue. I formed the straps to fit tight against the panel in front of the tank with a tight 90 degree bent at the top so it was like a tight tailored fit. That helped a bunch.
I’m trying to find an after market tank for my C1 1958 with in tank fuel pump. Any suggestions would be greatly appreciated.
Yes, we offer both for your 1958!
EFI Fuel Tank # 361031- https://https://www.corvettecentral.com/search?CurrentSearchCategoryId=&q=361031
In-tank fuel pump module # 351152- https://https://www.corvettecentral.com/search?CurrentSearchCategoryId=&q=351152
Let us know if you have any other questions!