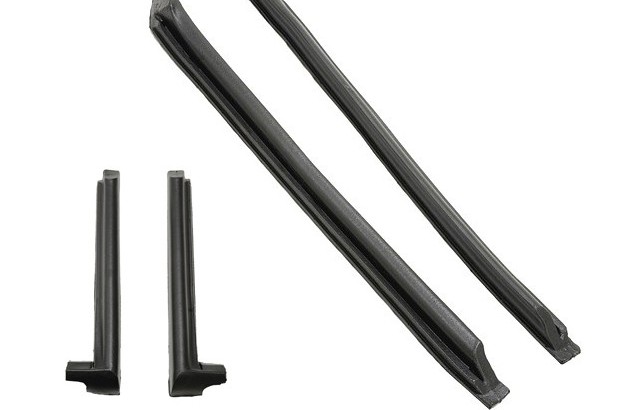
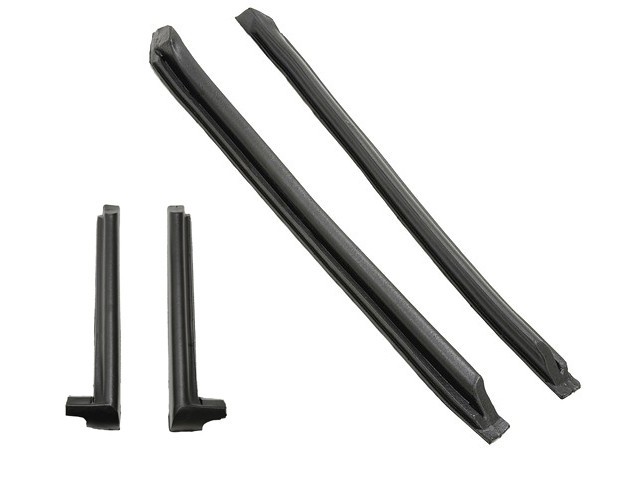
Using aftermarket weatherstrip pieces in the past, we had to choose either adjusting the windows to seal, or adjusting the windows to roll up and down without the door open. There was no way to do both. ’77 and earlier models used a different style rear vertical weatherstrip that wasn’t solid so it made window adjusting only somewhat problematic. Front vertical weatherstrips are a problem on all years. The dense rubber just wouldn’t seal properly to let the window roll freely. Thankfully, newer offerings are as supple as the factory original pieces.
A light coating of silicone grease regularly applied to the weatherstrips helps avoid weatherstrip sticking to glass. This method also helps seal where weatherstrips come together. We always apply it to T-top weatherstrips.
With that in mind, we are ready to start our corvette weatherstrip installation. Follow along and we’ll show you how you can seal up your Shark…for good!
Replacing the rear vertical weatherstrips requires removal of the inner roof panel to drill out rivets. We remove panel screws and lay it aside. The seatbelt doesn’t require removal to access rivets. ’68-’77 Corvettes use a retainer, allowing replacement without panel removal, plus the weatherstrips are designed differently. Most aftermarket weatherstrips work well for these years.
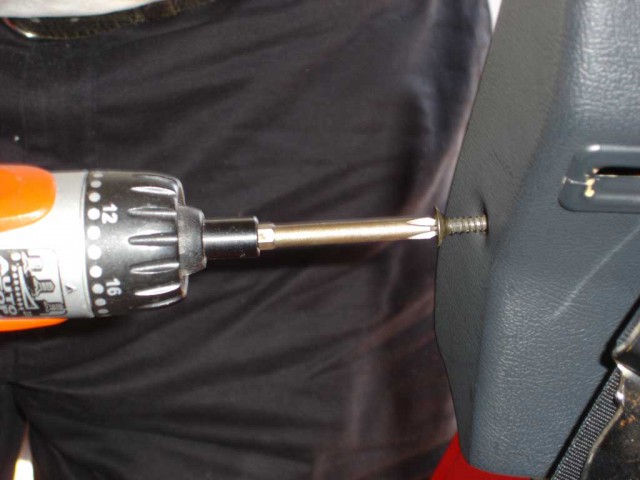
We are using a 3/16” drill bit to remove rivets, carefully only cutting the rivet head off. If the rivet has a piece of clinching stud protruding from the center of the rivet, use a punch. The drill bit has a tendency to walk off center if the stud is in the way, causing fiberglass damage.
With the rear vertical weatherstrip removed, note the lower rivet length: 3/4” long to clinch properly without protruding too deep into the weatherstrip. The lower rivet has two possible positions. We note that the lower hole was used for installation later. This will position the rear vertical in the proper position.

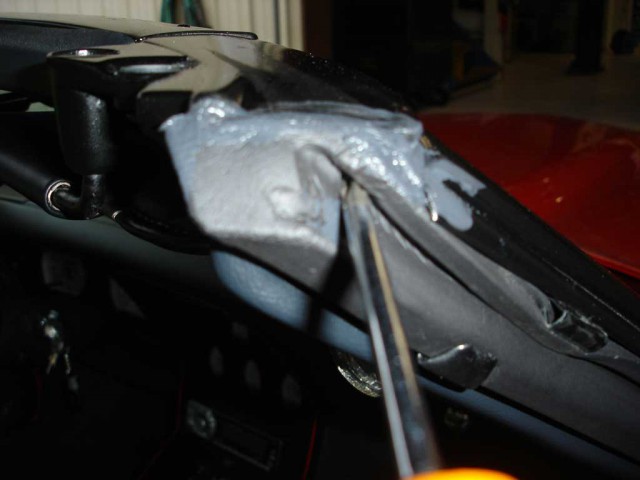
A flat, semi-sharp scraper blade works well to remove old gunk, and a wet rag with Xylene or Acetone will remove any remaining adhesives. Remember to wear gloves when using solvents.
DAP acrylic water-based caulking can be used to seal the rear vertical to the body and to fill any imperfections; the caulk stays flexible for many years to come. If you ever need to remove the rear vertical, the caulk will release. Adhesive would destroy the weatherstrip.
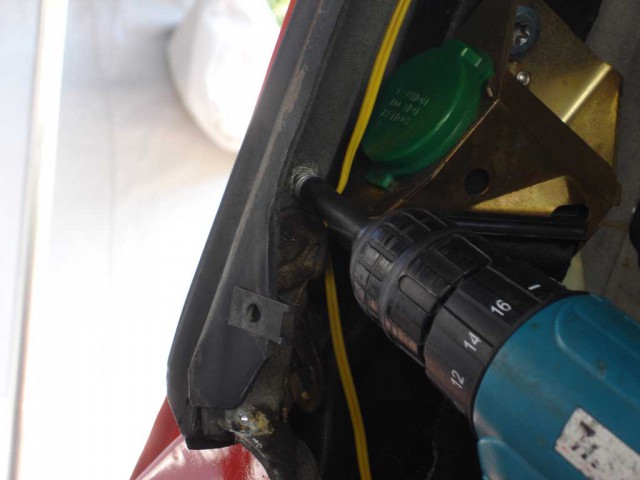
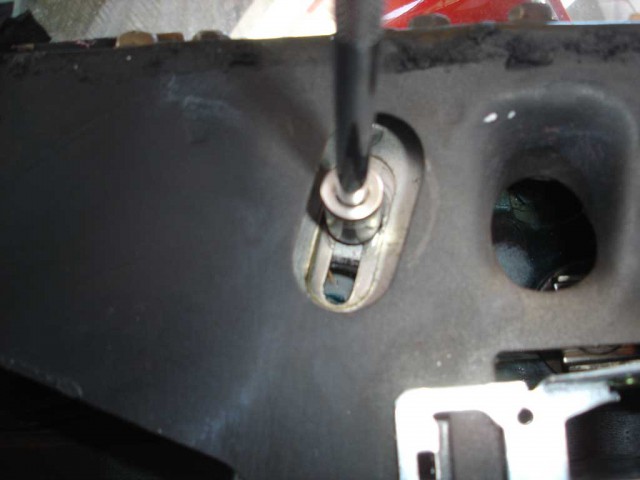
You can see the center and upper rivet clinching studs protruding from the inner panel as we’re locating the lower rivet hole. We lightly set the 3/8” upper rivets just enough to hold the strip in place. Watch the upper and center rivet length; longer than 3/8” can puncture the outer skin of the weatherstrip.
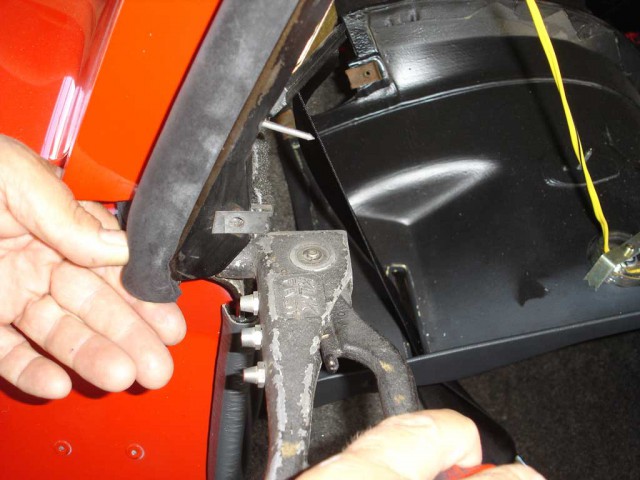
Now install the lower 3/4” long rivet, clinching it while holding the weatherstrip in place. Then the upper rivets can be clinched tightly. The acrylic caulk dries slow enough to allow us to move the weatherstrip around during installation without losing the necessary seal. Be sure of placement before setting rivets!
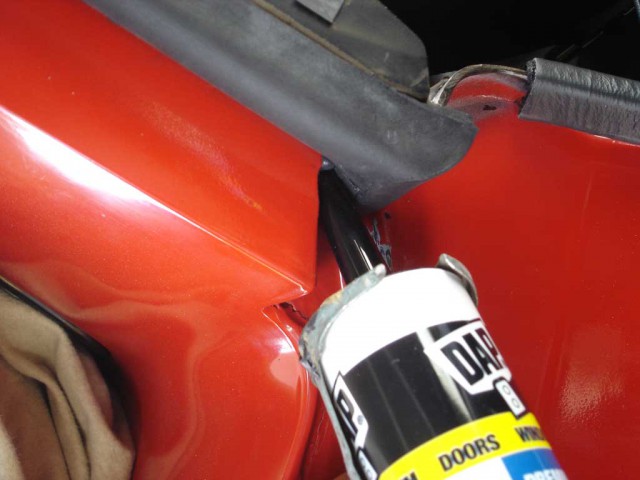
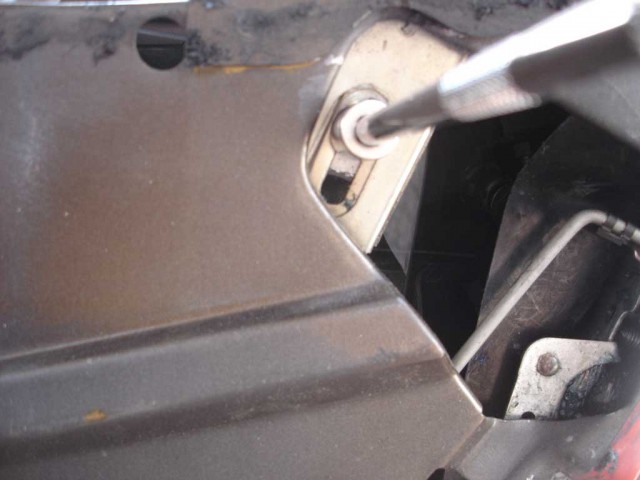
Use the same acrylic caulk to seal the lower portion of weatherstrip to the body. Caulk is easy to clean up when it’s still wet. When it dries, mineral spirits is the only way to remove any residue. The best policy is to keep up with it. When you apply sealer, clean any excess immediately. Once the rear vertical is in place, roll the window up and see how the glass fits. Our window hit the outer blow-out clip as the door was closed and opened. This prompts us to move the weatherstrip retainer closer to the edge of the windshield trim.
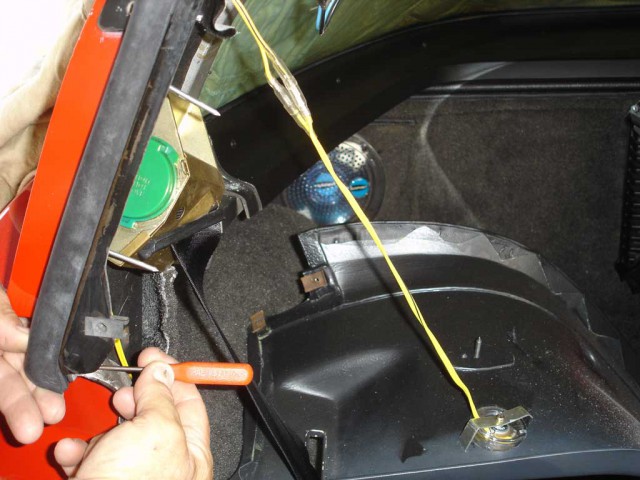
We add a new 1/8” hole to allow more weatherstrip retainer outward movement. This has always caused us concern. Why would the retainer need to be placed in a different area? There appears to be minor body work near the door hinge that might explain the necessary movement of the retainer.

Install the front vertical without any sealers or adhesives to check for fit. The plastic installation tool we’re using is available from most auto body shop supply stores. It has a blunt end to safely install the weatherstrip; installing the inner edge into the retainer then stuffing in the outer edge with the tool works best.
Look for pinching of the weatherstrip at the lower corner. This might cause it to roll about three inches of weatherstrip. Although this might not affect sealing, it will eventually tear the outer skin. We move the weatherstrip retainer out slightly at the bottom to avoid a pinch.

Install the T-top to check weatherstrip fit after moving the retainer and carefully closing the door. What a difference already, the door closes easier. The window is too close at the rear so we have to remove the door panel for window adjustment. This isn’t unexpected, since window placement may shift as the hardware wears.
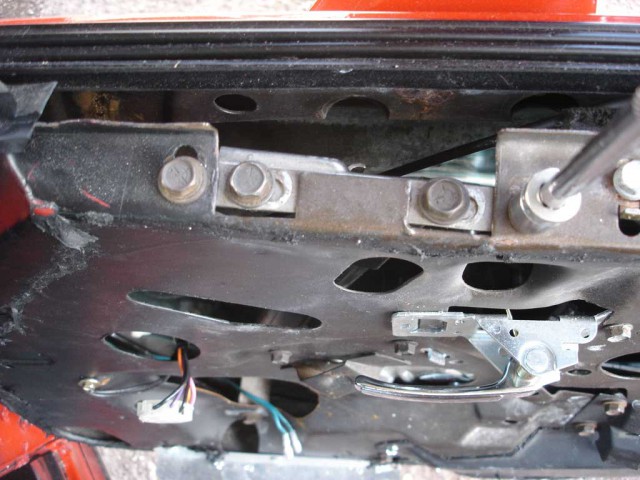
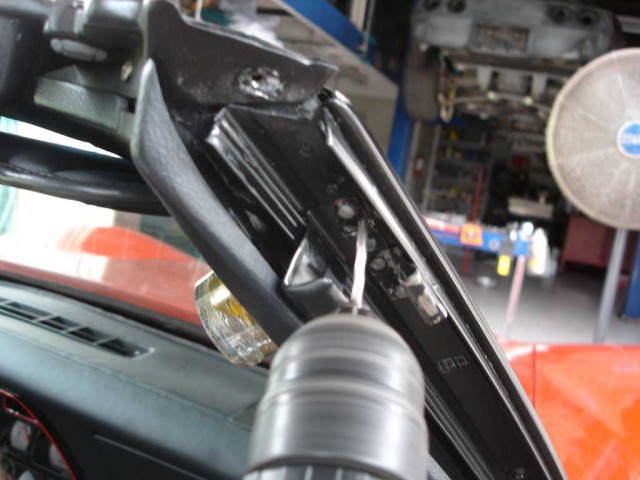
The socket is on top of the window in/out adjustment at the front of the door. Moving the bolts closest to you (while sitting in the seat) shifts the window outward at the top, while moving the furthest bolts shifts the window inward. The bolts in the center are window fore and aft, working in direct correlation.
The rear of the window has the same adjustment capabilities, but will bind if the adjustments aren’t similar. Minor changes are recommended to help the fit.

Moving the balance track on the slotted mounting holes moves the front or rear, as the door glass goes up and down. This track rarely requires adjustment. Once upper stops are adjusted, move the balance track so the window rollers hit the stops at the same time.
If the roller isn’t hitting the stop when the window is rolled all the way up, the balance track is out of adjustment. The window height at front or rear also affects how close the window is to the pillars at front or rear.
Rear upper limit stops work like the front; the roller should seat fully against the stop or the balance track is out of adjustment. These adjustments are critical for window height and minor increments make big changes, possibly causing the window to crash into the rear pillar when closing the door.
Finally, the anti-rattle bumpers at the top of the door should stop the window from rattling around, from the midpoint to the lowest point of travel, without binding the window. If the bumpers are adjusted too tight, in/out adjustment can be affected when the window is all the way up.
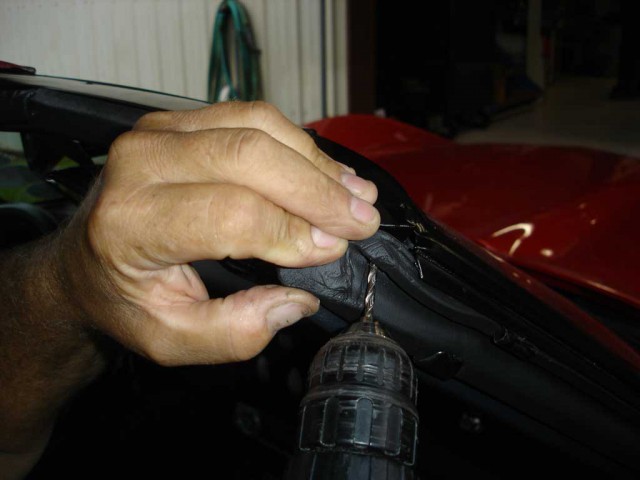
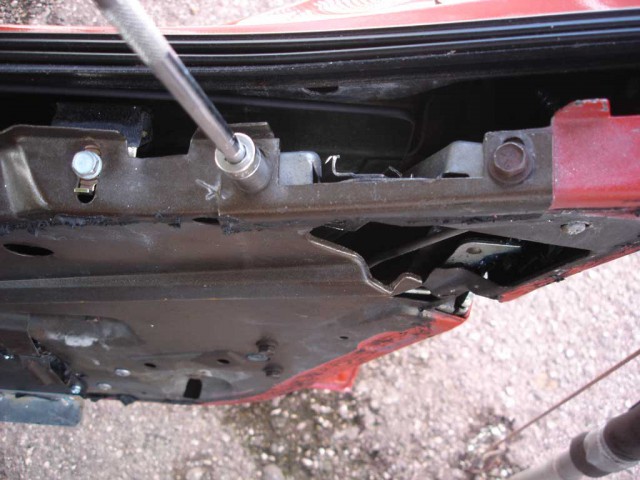
We find we need another hole for the weatherstrip, due to the retainer being moved earlier. We wait until the window fits well into the weatherstrip and rolls up and down properly before making the change. Watch the drill as you pierce the windshield frame; the glass is quite a distance away but you never know what may happen!
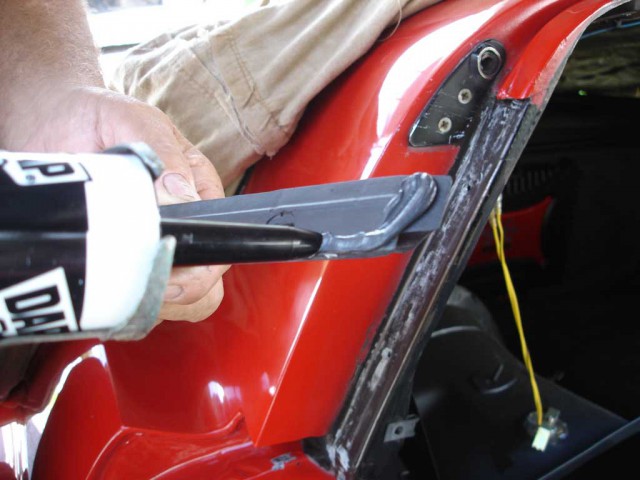
We apply DAP caulk under the entire weatherstrip area then screw it in place. Then we carefully install the weatherstrip under the blow-out clip. We spray black Plasti-cote on the blow-out clip to avoid replacement.

Our final step is to glue the weatherstrip at the bottom of the retainer. Beforehand, make sure it fits together with the door weatherstrip. It’s common for them to bind as the door is closed. We apply the adhesive to the weatherstrip then pulled it away to let the adhesive air-dry for final installation.
Proper installation and adjustment sounds difficult at best for an average person, mechanically inclined. Best to get someone who has done this several times. For an average person doing this, what would you rank the installation from a 1 to 10 with 10 being the most difficult?
Doors are one of the toughest parts of a Corvette to work on, but this article is a helpful guide. This would probably be a 7 out of ten for someone with no experience with weatherstripping or windows.
Thank you. I certainly agree with your 7 rating.
You can find all our C3 weatherstrip replacement parts at https://https://www.corvettecentral.com/c3-68-82/weatherstrip/
The pictures about window weatherstrip are too close. It’s hard to tell where the guy is working. How much are the new weatherstrip replacements for both doors?